Configuring the SF 7.4.1 Oracle RAC cluster随笔
Posted
tags:
篇首语:本文由小常识网(cha138.com)小编为大家整理,主要介绍了Configuring the SF 7.4.1 Oracle RAC cluster随笔相关的知识,希望对你有一定的参考价值。
本文旨在记录过程,不做过多描述。具体参数信息请参考官方文档。
1、环境信息
主机配置信息如下图:
共享磁盘信息如下图: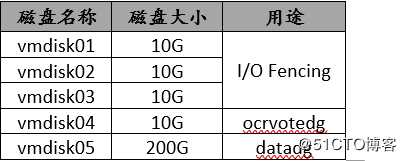
2、安装Veritas InfoScale Enterprise
以root身份登录任意一节点,执行installer程序,然后输入I,如下图:
[root@odb01 ~]# /mnt/rhel7_x86_64/installer
选择Veritas InfoScale Enterprise,安装完成后不立即进行配置。然后输入要安装的主机名,以空格隔开。
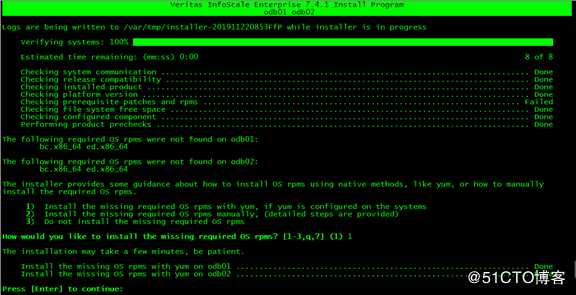
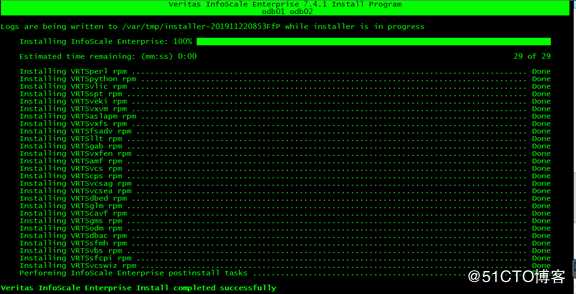
如果有正式的license输入即可;如果没有就使用keyless licensing选项。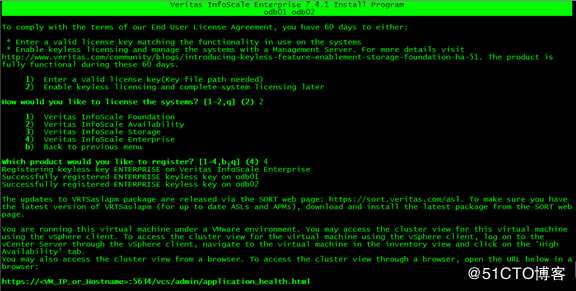
3、配置Veritas集群服务
[root@odb01 ~]# /opt/VRTS/install/installer -configure选择SF Oracle RAC选项,输入集群几点的主机名,下一步。

接着配置集群名称以及心跳:


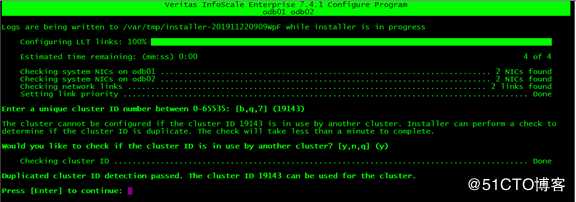


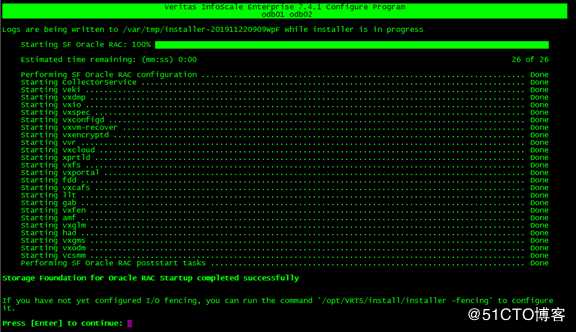
4、配置I/O fencing服务
[root@odb01 ~]# /opt/VRTS/install/installer -fencing
这里选择Configure disk based fencing选项。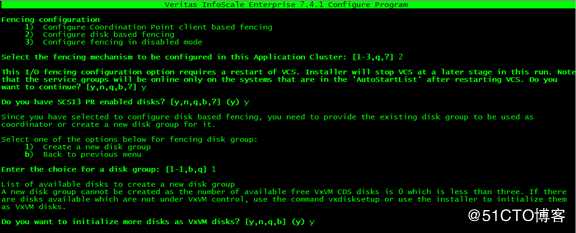
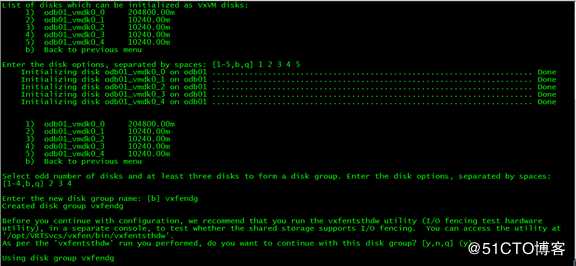

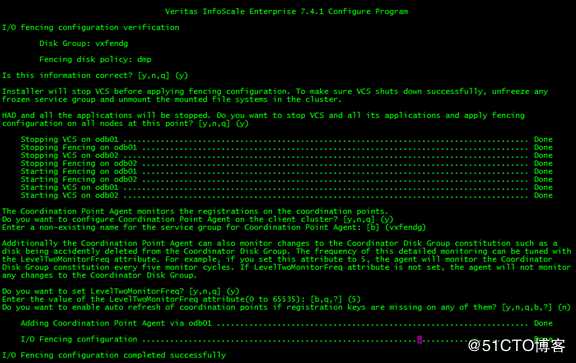
可以使用下面命令进行验证: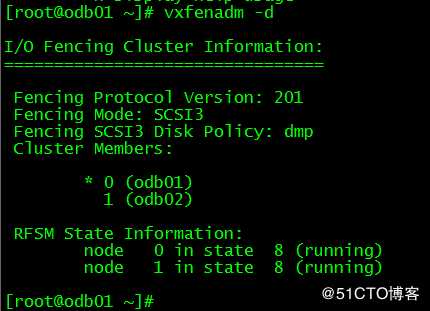

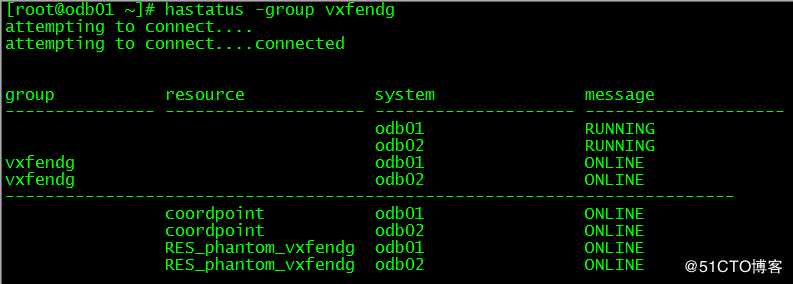
配置完成后,默认会在集群中添加一个新的资源组vxfendg;可以使用hagrp命令进行验证:
5、配置Oracle OCR和VOTE
在安装oracle rac之前,必须配置好ocr和vote。可以创建基于文件系统的,也可以创建基于裸设备的,这里使用基于文件系统的ocr和vote。
[root@odb01 ~]# /opt/VRTS/install/installer -configure


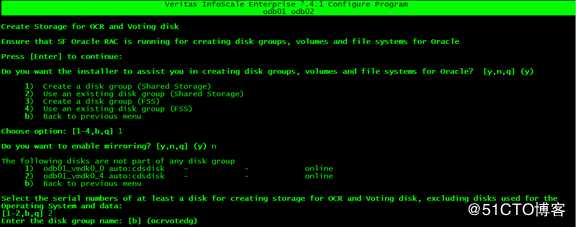


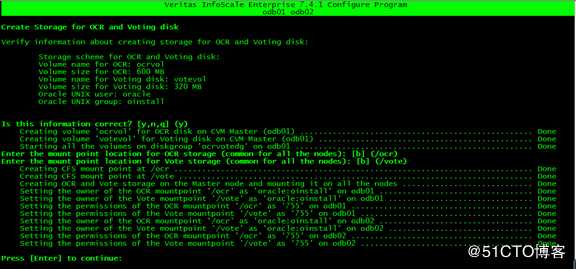

配置完成后,集群服务会增加一个cvm资源组,可以使用如下命令验证查询: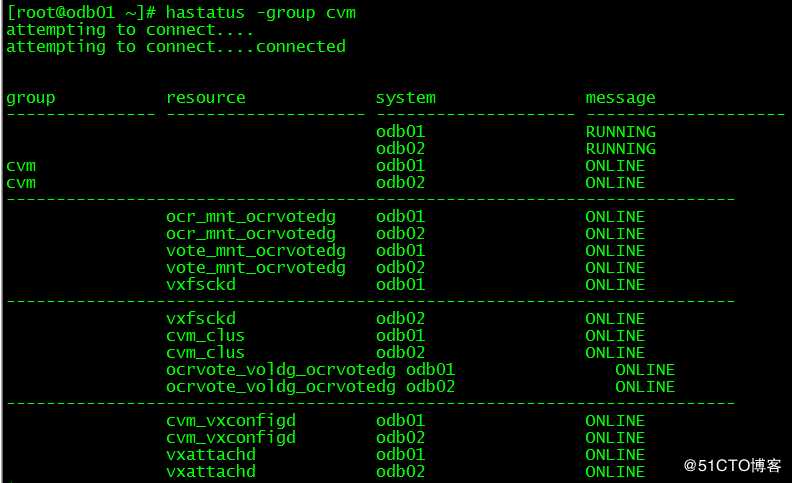
6、Oracle网络配置


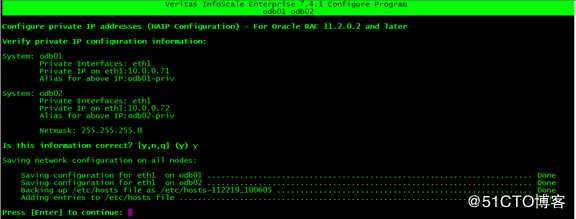
7、创建oracle数据文件磁盘组
--初始化磁盘
[root@odb01 ~]# vxdisksetup -if odb01_vmdk0_0
--创建磁盘组
[root@odb01 ~]# vxdg -s init datadg odb01_vmdk0_0=odb01_vmdk0_0
--创建两个volume
[root@odb01 ~]# vxassist -g datadg make vol01 50G
[root@odb01 ~]# vxassist -g datadg make vol02 50G
--创建vxfs文件系统
[root@odb01 ~]# mkfs -t vxfs -o bsize=8192,largefiles /dev/vx/dsk/datadg/vol01
[root@odb01 ~]# mkfs -t vxfs -o bsize=8192,largefiles /dev/vx/dsk/datadg/vol02
--创建挂载点
[root@odb01 ~]# mkdir -p /u02/{oradata,archive}
[root@odb02 ~]# mkdir -p /u02/{oradata,archive}
8、创建Oracle资源组
[root@odb01 ~]# haconf -makerw
--创建资源组rhn_rg
[root@odb01 ~]# hagrp -add rhn_rg
[root@odb01 ~]# hagrp -modify rhn_rg Parallel 1
[root@odb01 ~]# hagrp -modify rhn_rg SystemList odb01 0 odb02 1
[root@odb01 ~]# hagrp -modify rhn_rg AutoStartList odb01 odb02
--添加datadg_rs资源
[root@odb01 ~]# hares -add datadg_rs CVMVolDg rhn_rg
[root@odb01 ~]# hares -modify datadg_rs CVMDiskGroup datadg
[root@odb01 ~]# hares -modify datadg_rs  CVMActivation sw
[root@odb01 ~]# hares -modify datadg_rs  CVMVolume vol01 vol01
[root@odb01 ~]# hares -modify datadg_rs  NodeList odb01 odb02
[root@odb01 ~]# hares -modify datadg_rs Critical 0
--添加文件系统资源
[root@odb01 ~]# hares -add oradata_mnt CFSMount rhn_rg
[root@odb01 ~]# hares -add archive_mnt CFSMount rhn_rg
[root@odb01 ~]# hares -modify oradata_mnt MountPoint "/u02/oradata"
[root@odb01 ~]# hares -modify archive_mnt MountPoint "/u02/archive"
[root@odb01 ~]# hares -modify oradata_mnt BlockDevice /dev/vx/dsk/datadg/vol01
[root@odb01 ~]# hares -modify archive_mnt BlockDevice /dev/vx/dsk/datadg/vol02
[root@odb01 ~]# hares -modify archive_mnt Critical 0
[root@odb01 ~]# hares -modify oradata_mnt Critical 0
--启用资源组并online
[root@odb01 ~]# hagrp -enableresources rhn_rg
[root@odb01 ~]# haconf -dump -makero
[root@odb01 ~]# hagrp -online rhn_rg -any
[root@odb01 ~]# chown -R oracle:oinstall /u02
9、部署Oracle RAC系统
这里不详细描述oracle grid和database的安装过程,只做以下说明:
1、安装配置grid组件时,对应的ocr和vote位置选择对应的文件系统;
2、创建数据库实例时,数据文件和归档选择对应的文件系统。
10、创建oracle实例资源
向已创建的rhn_rg资源组添加数据库实例资源信息,如下:
[root@odb01 ~]# haconf -makerw
--添加rhn_rs资源
[root@odb01 ~]# hares -add rhn_rs Oracle rhn_rg
[root@odb01 ~]# hares -modify rhn_rs Owner oracle
[root@odb01 ~]# hares -modify rhn_rs Home /u01/app/oracle/product/11.2.0/db_1
[root@odb01 ~]# hares -modify rhn_rs StartUpOpt SRVCTLSTART
[root@odb01 ~]# hares -modify rhn_rs ShutDownOpt SRVCTLSTOP
--设置各个节点对应的实例名称
[root@odb01 ~]# hares -local rhn_rs Sid
[root@odb01 ~]# hares -modify rhn_rs Sid rhndb1 -sys odb01
[root@odb01 ~]# hares -modify rhn_rs Sid rhndb2 -sys odb02
[root@odb01 ~]# hares -modify rhn_rs Critical 0
--设置资源之间的依赖关系
[root@odb01 ~]# hares -link oradata_mnt datadg_rs
[root@odb01 ~]# hares -link archive_mnt datadg_rs
[root@odb01 ~]# hares -link rhn_rs oradata_mnt
[root@odb01 ~]# hares -link rhn_rs archive_mnt
[root@odb01 ~]# hagrp -link rhn_rg cvm online local firm
[root@odb01 ~]# hagrp -enableresources rhn_rg
[root@odb01 ~]# haconf -dump -makero
[root@odb01 ~]# hagrp -online rhn_rg -any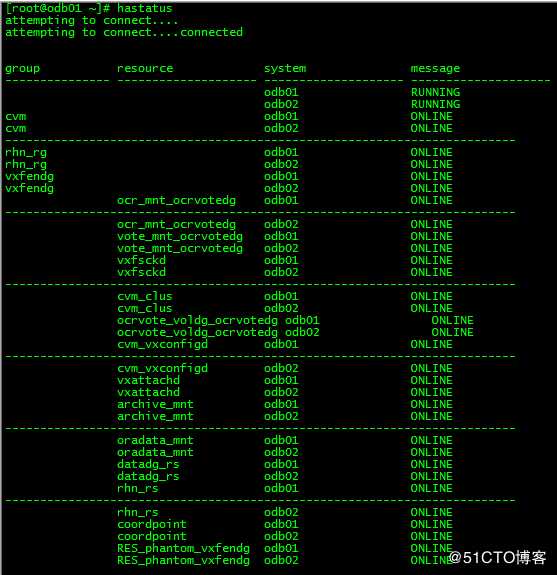
以上是关于Configuring the SF 7.4.1 Oracle RAC cluster随笔的主要内容,如果未能解决你的问题,请参考以下文章
Entity Framework Configuring Relationships with the Fluent API
Configuring the WebSphere Application Server data source
Jmeter-Maven-Plugin高级应用:Configuring the jvm that the jmeter process runs in
Configuring Autofac to work with the ASP.NET Identity Framework in MVC 5
net.sf.json.JSONException: There is a cycle in the hierarchy!
[SF] The term 'Add-AzServiceFabricClusterCertificate' is not recognized as the name of a cmd