vue2-vue-router
Posted
tags:
篇首语:本文由小常识网(cha138.com)小编为大家整理,主要介绍了vue2-vue-router相关的知识,希望对你有一定的参考价值。
参考技术A <router-view></router-view>Vue.use(xxx)
那么 xxx要有install方法
创建我们自己的my-vue-router.js
页面会有报错
说明需要有 两个组件 需要 注册 封闭是router-link 和 router-view
那么我们全家注册一下
但是又产生了新的错误
组件 需要template或者render函数
由于我们写template 的时候,是处于runtime-only 阶段,是没有编译器的,对于template模板无法解析
所有我们只能用render解决
控制台终于不报错了。
接下来处理 router-link
<router-link to="/foo">Go to Foo</router-link>
我们使用 的是上面的形式, 在render中 第一个参数就 ‘router-link(a标签)’, 第二个参数里面就是跳转的地址, 第三个参数就是插槽的内容
现在router-link其实已经变为了a标签,点击 浏览器的url也会相应变化了。
现在我们要处理 把router-link 当前对应组件的内容 拿出来 并放到 router-view中
意思就是我们从url 中找到对应的组件 ,router.js中就有这个映射关系
还有一个就是我们 组件 用h函数也能直接渲染
比如 我们在my-vue.router.js中直接 引入foo组件 并在 router-view中直接渲染
页面直接就渲染出了foo 组件的内容
好,现在我们去拿到url和 routes 里面 的映射表
其中url 通过window.location.hash 就可以拿到
但是 routes 在my-vue-router中就麻烦一下。
router.js
我们在VueRouter 实例化的时候 把参数routes存起来
my-vue-router.js
在router.js中我们是先 use 调用 install方法 ,然后再new VueRouter传入的routes。所有我们要获取routes,
需要再install方法中全局混入beforeCreate的生命周期(只有再new Vue的时候才执行), 这样我们就可以在执行的时候获取到配置的router并给Vue.prototype.$router绑定上, 让所有的组件都可以访问到。
现在我们监控url的变化
my-vue-route.js
我们此时看一下 根组件的 this.$options
这个时候我通过 组件 上的router就能访问到当前 path 和 routes配置项了
然后我们到 router-view组件处理
这个时候的页面我们再点击 route-link的时候 url会变化 ,但是router-view却不会刷新,我们刷新一下页面。router-view才能变化。
原因是 current 不是响应式的,把current 变为响应式后,使用它的组件都会重新render. 这样就会重新渲染了
Vue.util.defineReactive(this, 'current', window.location.hash.slice(1) || '/')
或者我们用new Vue生成响应式 ,由于new Vue 中data是一个对象,所有我们把current 包装一下
完整的my-vue.router.js
Vue: vue-router路由
1. Vue: vue-router路由
Vue Router是Vue.js官方的路由管理器。它和Vue.js的核心深度集成, 让构建单页面应用变得简单.
1.1 安装
进入当前项目,命令行输入
npm install vue-router --save-dev
安装完成后出现

1.2 使用
如果在一个模块化工程中使用它,必须要通过Vue.use()明确地安装路由功能:
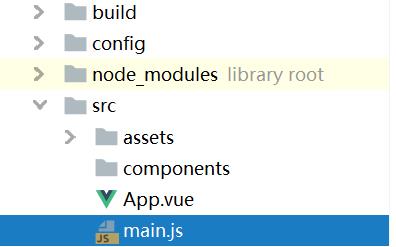
main.js
import Vue from 'vue'
import App from './App'
import VueRouter from 'vue-router' // 导入VueRouter模块

Vue.use(VueRouter); // 使用VueRouter模块


Vue.config.productionTip = false

new Vue({
  el: '#app',
  components: {App},
  template: '<App/>'
})
1.3 测试
1.3.1 先删除没有用的东西
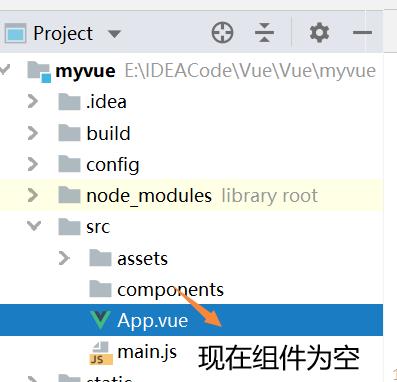
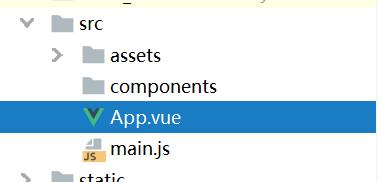
App.vue
把与默认组件HelloWorld有关的内容删除
<template>
  <div id="app">
  </div>
</template>

<script>

  export default {
    name: 'App'
  }
</script>

<style>
  #app {
    font-family: 'Avenir', Helvetica, Arial, sans-serif;
    -webkit-font-smoothing: antialiased;
    -moz-osx-font-smoothing: grayscale;
    text-align: center;
    color: #2c3e50;
    margin-top: 60px;
  }
</style>
1.3.2 components 目录下存放我们自己编写的组件

Content.vue
<template>
  <div>
    <h1>内容页</h1>
  </div>
</template>

<script>
  export default {
    name: "Content"
  }
</script>


<!--scoped表示作用域只为当前组件-->
<style scoped>
  h1 {
    color: orange;
  }
</style>
Main.vue
<template>
  <div>
    <h1>首页</h1>
  </div>
</template>

<script>
  export default {
    name: "Main"
  }
</script>
<style scoped>
  h1 {
    color: cornflowerblue;
  }
</style>
1.3.3 安装路由
在src目录下,新建一个文件夹:router,专门存放路由,配置路由index.js,如下

import Vue from 'vue'
//导入路由插件
import Router from 'vue-router'
//导入上面定义的组件
import Content from '../components/Content'
import Main from '../components/Main'
//安装路由
Vue.use(Router);
//配置路由
export default new Router({
  routes: [
    {
      //路由路径
      path: '/content',
      //路由名称
      name: 'content',
      //跳转到组件
      component: Content
    }, {
      //路由路径
      path: '/main',
      //路由名称
      name: 'main',
      //跳转到组件
      component: Main
    }
  ]
});
1.3.4 在main.js中配置路由
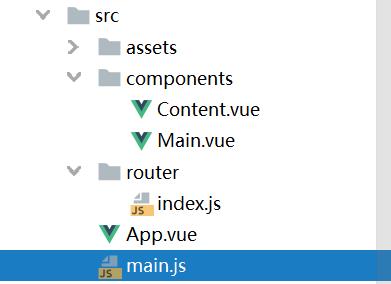
main.js
import Vue from 'vue'
import App from './App'
import VueRouter from 'vue-router' // 导入VueRouter模块
//导入上面创建的路由配置目录
import router from './router' //自动扫描里面的路由配置

Vue.use(VueRouter); // 使用VueRouter模块

// 关闭生产模式下给出的提示
Vue.config.productionTip = false;

new Vue({
  el: '#app',
  router,
  components: {App},
  template: '<App/>'
})
1.3.5 在App.vue中使用路由
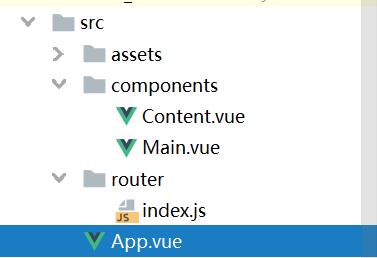
App.vue
<template>
  <div id="app">
    <!--
      router-link:默认会被渲染成一个<a>标签,to属性为指定链接
      router-view:用于渲染路由匹配到的组件
    -->
    <router-link to="/main">首页</router-link>
    <router-link to="/content">内容</router-link>
    <router-view></router-view>
  </div>
</template>

<script>
  export default {
    name: 'App'
  }
</script>
<style>
  #app {
    font-family: 'Avenir', Helvetica, Arial, sans-serif;
    -webkit-font-smoothing: antialiased;
    -moz-osx-font-smoothing: grayscale;
    text-align: center;
    color: #2c3e50;
    margin-top: 60px;
  }
</style>
1.3.6 运行结果

以上是关于vue2-vue-router的主要内容,如果未能解决你的问题,请参考以下文章