ActiveMQ持久化到mysql
配置
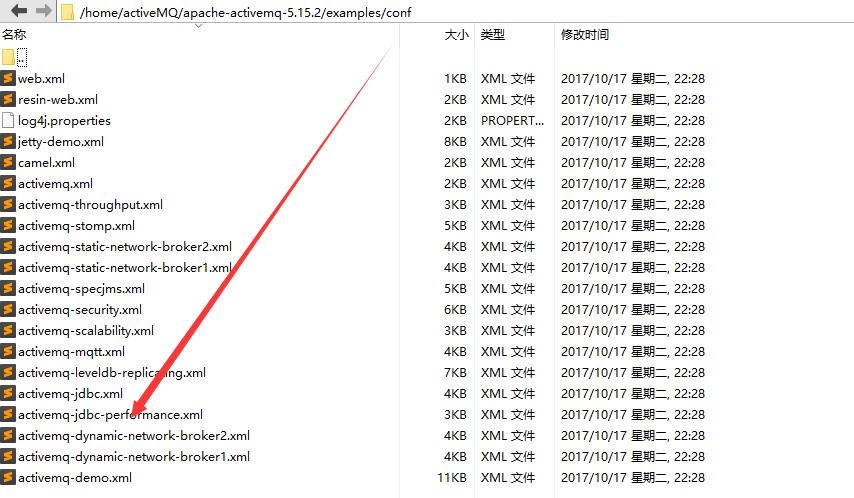
1.找到apache-activemq-5.15.2/examples/conf下面的activemq-jdbc-performance.xml

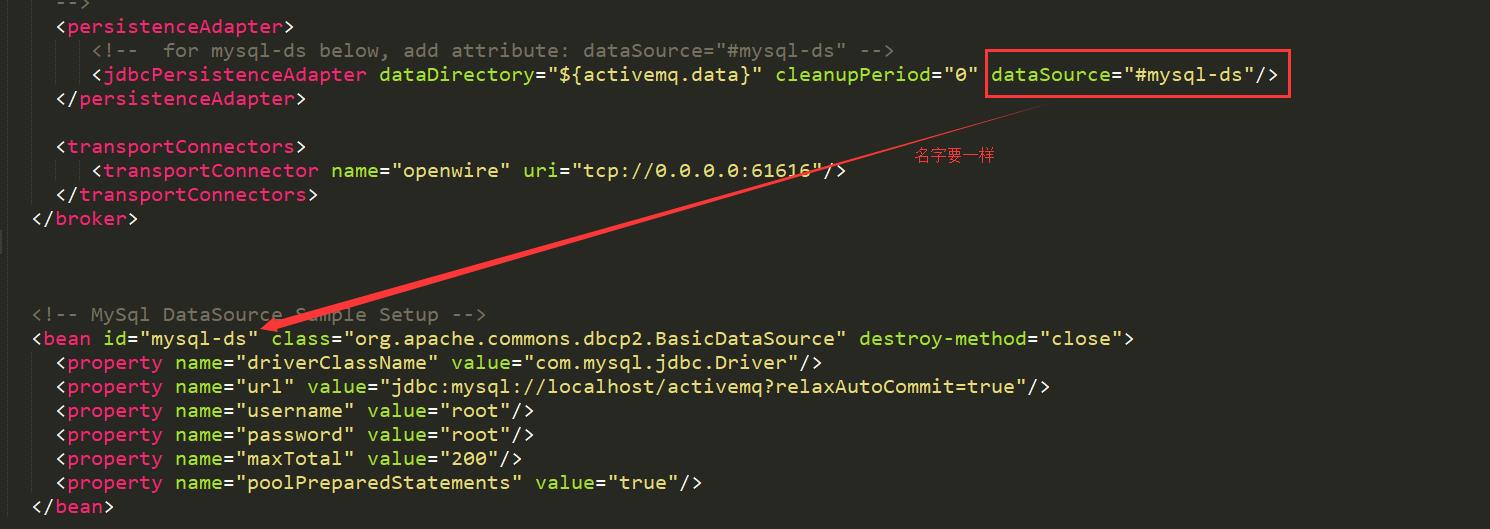
2.打开activemq-jdbc-performance.xml,在persistenceAdapter节点后面添加dataSource="#mysql-ds"
并配置你的数据库
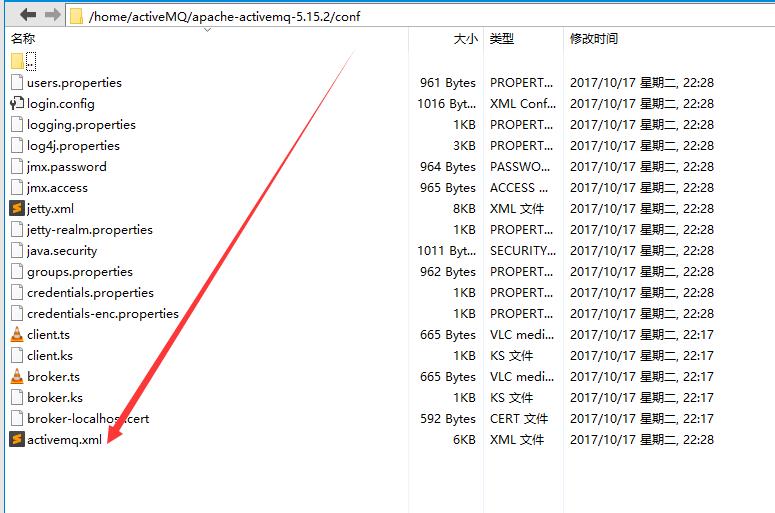
其实可以直接更改apache-activemq-5.15.2/conf/activemq.xml的persistenceAdapter节点.配置下数据库也是可以的
用activemq-jdbc-performance.xml 我的理解应该是高性能模式,连

3.把activemq-jdbc-performance.xml复制到apache-activemq-5.15.2/conf目录下,从命名为activemq.xml,覆盖原来的activemq.xml

4.在对应的数据库创建activemq库,然后重启ActiveMQ
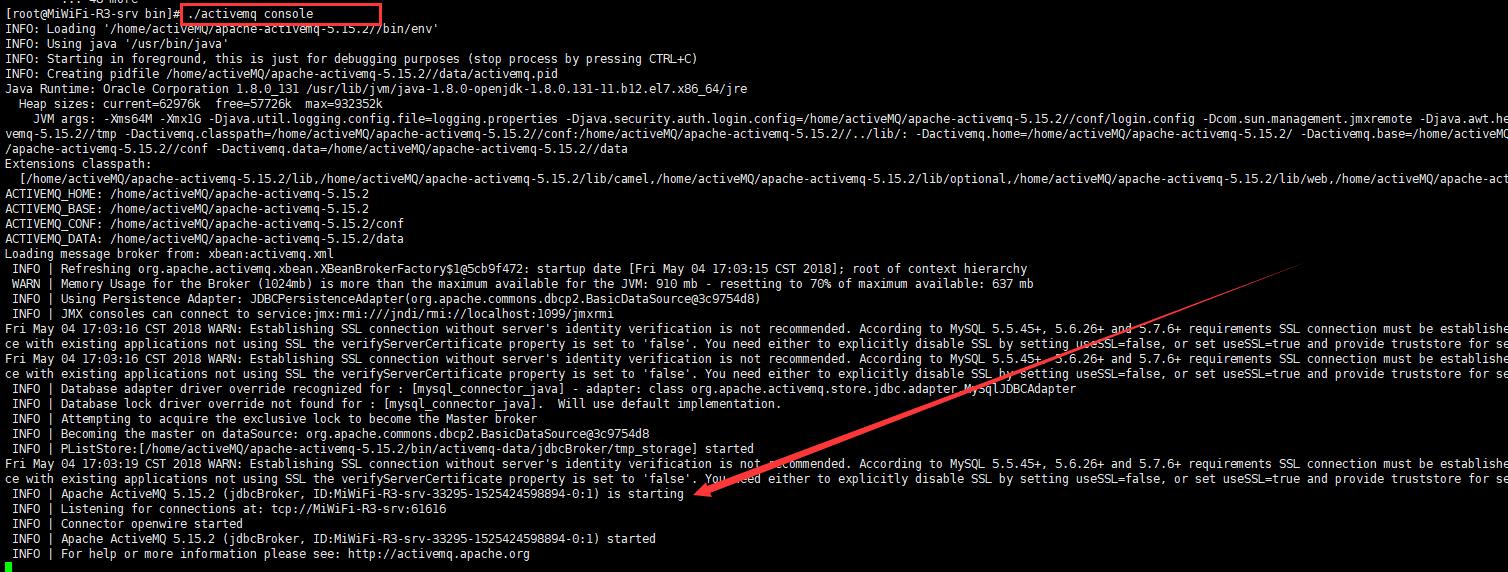
我们这里用debug模式启动,提示没有mysql的jar包

5.我们在apache-activemq-5.15.2/lib下面添加mysql的jar包,再次启动,就不会报错了


6.这时可以看到刚才创建的activemq库多了三张表,说明配置成功了

点对点测试
生产者
import javax.jms.Connection;
import javax.jms.ConnectionFactory;
import javax.jms.Destination;
import javax.jms.JMSException;
import javax.jms.MessageProducer;
import javax.jms.Session;
import javax.jms.TextMessage;

import org.apache.activemq.ActiveMQConnectionFactory;

public class Producer {
         public static void main(String[] args) {
//                   String user = ActiveMQConnection.DEFAULT_USER;
//                   String password = ActiveMQConnection.DEFAULT_PASSWORD;
//                   String url = ActiveMQConnection.DEFAULT_BROKER_URL;
                   String subject = "test.queue";
                   ConnectionFactory contectionFactory = new ActiveMQConnectionFactory("tcp://192.168.1.109:61616");
                //   ConnectionFactory contectionFactory = new ActiveMQConnectionFactory("tcp://127.0.0.1:61616");
                   try{
                            Connection connection = contectionFactory.createConnection();
                            connection.start();
                            Session session = connection.createSession(Boolean.TRUE, Session.AUTO_ACKNOWLEDGE);
                            Destination destination = session.createQueue(subject);
                            MessageProducer producer = session.createProducer(destination);
                         //   producer.setDeliveryMode(DeliveryMode.PERSISTENT);//设置为持久化
                            for(int i = 0; i < 20;) {
                                     TextMessage createTextMessage = session.createTextMessage("这是要发送的第"+ ++i +"条消息消息");
                                     producer.send(createTextMessage);
                                     System.out.println("第"+ i +"条消息已发送");
                            }
                            Thread.sleep(2000);
                            session.commit();
                            session.close();
                            connection.close();
                   }catch (JMSException e) {
                      //      e.printStackTrace();
                   }catch (InterruptedException e) {
                       //     e.printStackTrace();
                   }

         }

}
消费者
import java.util.Date;

import javax.jms.Connection;
import javax.jms.ConnectionFactory;
import javax.jms.Destination;
import javax.jms.JMSException;
import javax.jms.Message;
import javax.jms.MessageConsumer;
import javax.jms.MessageListener;
import javax.jms.Session;
import javax.jms.TextMessage;
import org.apache.activemq.ActiveMQConnectionFactory;


public class Customer {


    public static void main(String[] args) {

//        String user = ActiveMQConnection.DEFAULT_USER;
//
//        String password = ActiveMQConnection.DEFAULT_PASSWORD;
//
//        String url = ActiveMQConnection.DEFAULT_BROKER_URL;

        String subject = "test.queue";

        ConnectionFactory connectionFactory = new ActiveMQConnectionFactory("tcp://192.168.1.109:61616");
      //  ConnectionFactory connectionFactory = new ActiveMQConnectionFactory("tcp://127.0.0.1:61616");

        Connection connection;

        try {
            connection= connectionFactory.createConnection();

            connection.start();

            final Session session =connection.createSession(Boolean.TRUE, Session.AUTO_ACKNOWLEDGE);

            Destination destination = session.createQueue(subject);

            MessageConsumer message = session.createConsumer(destination);

            message.setMessageListener(new MessageListener() {
                public void onMessage(Message msg){
                	TextMessage message = (TextMessage) msg;
                    try {
                        System.out.println("--收到消息:" +new Date()+message.getText());
                        session.commit();
                    }catch(JMSException e) {
                 //       e.printStackTrace();
                    }

                }

            });
//            Thread.sleep(30000);
//
//            session.close();
//
//            Thread.sleep(30000);
//
//            connection.close();
//
//            Thread.sleep(30000);

        }catch(Exception e) {
        //    e.printStackTrace();
        }

    }

}
这时生产者生产数据,消费者一直不在线,数据就会持久化到数据库的activemq_msgs表,就算ActiveMQ的服务挂了,再次启动后,等消费者在线了就可以再次获取生产者生产的数据(消费之后数据库的数据会自动删除)
