hbase 表的设计与其它大数据框架的集成
Posted
tags:
篇首语:本文由小常识网(cha138.com)小编为大家整理,主要介绍了hbase 表的设计与其它大数据框架的集成相关的知识,希望对你有一定的参考价值。
- 一:hbase 表的设计管理
- 二:hbase hive 集成
- 三:sqoop 与hbase 的集成
- 四:hbase 与hue 集成
- 五:hbase 表的修复
一:hbase 表的设计管理
1.1 hbase 的shell 命令
1.1.1 创建一个命名空间
在新版本的hbase 中 表是存储在命名空间当中,默认的命名空间是default

创建一个命名空间:
create_namespace ‘ns2‘

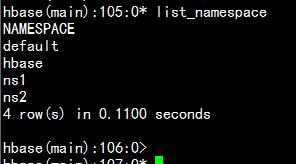
查看有多少个命名空间:
list_namespace

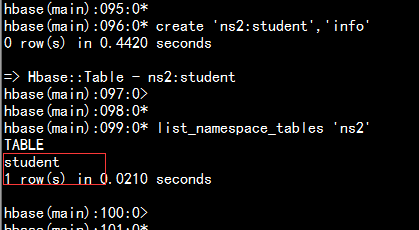
在命名空间中建立表:

create ‘ns2:student‘,‘info‘

查询命名空间中的表:
list_namespace_tables ‘ns2‘

1.1.2 一张表创建多个列簇
create ‘ns1:t1‘, {NAME => ‘f1‘}, {NAME => ‘f2‘}, {NAME => ‘f3‘}
相当于:

create ‘ns1:t1‘, ‘f1‘, ‘f2‘, ‘f3‘

描述一张表:

describe ‘t1‘
1.2.3 创建rowkey 的范围region 区域:
默认情况下hbase 创建表时,会默认划分region 区域
结合实际环境来看,无论是测试环境还是生产环节,我们创建好的hbase 需要大量的的导入数据

file/data --> hfile -> bulk load into hbase tables
方式一:
create ‘t1‘, ‘f1‘, SPLITS => [‘10‘, ‘20‘, ‘30‘, ‘40‘]

ti(rowkey)      Start Key     End Key
region1                         10
region2         10              20
region3         20              30
region4         30              40
region5         40
----
方式二:
cd /home/hadoop/

vim region.txt
20160601
20160602
20160603
20160604

create ‘t2‘, ‘f1‘, SPLITS_FILE => ‘/home/hadoop/region.txt‘, OWNER => ‘johndoe‘

---
方式三: 采用十六进制的这种方式创建
create ‘t3‘, ‘f1‘, {NUMREGIONS => 15, SPLITALGO => ‘HexStringSplit‘} 


1.2 依据话单划分hbase 表:
需求: 查询在一段时间的内的通话数
依据条件查询
telphone + (starttime -- endtime)

---
time  area  active  phone   talktime   mode   price

设计思想:根据rowkey 查询时间比较快

rowkey:
    telphone + time

    18721732851_20151001092345
info:
    area    active  phone   talktime    mode    price

scan
startrow
    18721732851_20150401000000
stoprow
    18721732851_20150413000000

---

实时性

如何在海量数据中,获取我所需要的数据(查询的数据)。

表的rowkey设计中:
    核心思想:
        依据rowkey查询最快
        对rowkey进行范围查询range
        前缀匹配
        表分区的处理
---

新需求:新的需求(话单数据的查询)

phone + time

>>> 依据前面设计的表
    使用filter
      columnFilter
索引表/辅助表(主表) --   功能

phone_time
比如:
    182600937645_2015100100000

    182600937645_2015102400000
列簇:info
列:
    rowkey  ->

Get最快的数据查询

---
主表和索引表的数据 如何同步呢?????
    >> 程序,事物
    >> phoenix
        >> JDBC方式,才能同步
创建索引表
>> solr
    lily
    cloudera search
一张表的详细参数:
 ‘user‘,
{
    NAME => ‘info‘,
    DATA_BLOCK_ENCODING => ‘NONE‘,
    BLOOM FILTER => ‘ROW‘,
    REPLICATION_SCOPE => ‘0‘,
    VERSIONS => ‘1‘,
    COMPRESSION => ‘NONE‘,
    MIN_VERSIONS => ‘0‘,
    TTL => ‘FOREVER‘,
    KEEP_DELETED_CELLS => ‘false‘,
    BLOCKSIZE => ‘65536‘,
    IN_MEMORY => ‘false‘,
    BLOCKCACHE => ‘true‘
}
1.3 hbase 启用压缩功能:
压缩参数:COMPRESSION => ‘NONE‘,
---
cd /home/hadoop/yangyang/hadoop
bin/hadoop checknative
配置hbase-site.xml 增加:

<property>
<name>hbase.regionserver.codecs</name>
<value>snappy</value>
</property>
tar -zxvf hadoop-snappy-0.0.1-SNAPSHOT.tar.gz
cd hadoop-snappy-0.0.1-SNAPSHOT/lib
cp -p hadoop-snappy-0.0.1-SNAPSHOT.jar /home/hadoop/yangyang/hbase/lib/
cd /home/hadoop/yangyang/hbase/lib
mkdir native
cd native
ln -s /home/hadoop/yangyang/hadoop/lib/native ./Linux-amd64-64
---
从新启动hbase
bin/stop-hbase.sh
bin/start-hbase.sh
hbase 创建压缩的表
create ‘t1_snappy‘ ,{NAME => ‘f1‘,COMPRESSION => ‘SNAPPY‘}
put ‘t1_snappy‘,‘1001‘,‘f1:name‘,‘zhangyy‘1.4 hbase 启用块缓存
RegionServer   -  12G

    >> MemStore    40%
        write
    >> BlockCache  40%
        read
    >> other       20%
块缓存参数:BLOCKCACHE => ‘true‘
---
关于:Memstore& BlockCache
1.HBase上Regionserver的内存分为两个部分,一部分作为Memstore,主要用来写;另外一部分作为BlockCache,主要用于读。
2.写请求会先写入Memstore,Regionserver会给每个region提供一个Memstore,当Memstore满64MB以后,会启动flush刷新到磁盘。当Memstore的总大小超过限制时(heapsize * hbase.regionserver.global.memstore.upperLimit * 0.9),会强行启动flush进程,从最大的Memstore开始flush直到低于限制。
3.读请求先到Memstore中查数据,查不到就到BlockCache中查,再查不到就会到磁盘上读,并把读的结果放入BlockCache。由于BlockCache采用的是LRU策略,因此BlockCache达到上限(heapsize * hfile.block.cache.size * 0.85)后,会启动淘汰机制,淘汰掉最老的一批数据。
4.在注重读响应时间的应用场景下,可以将BlockCache设置大些,Memstore设置小些,以加大缓存的命中率。
---
BlockCache:
将Cache分级思想的好处在于:
1.首先,通过inMemory类型Cache,可以有选择地将in-memory的column families放到RegionServer内存中,例如Meta元数据信息;
2.通过区分Single和Multi类型Cache,可以防止由于Scan操作带来的Cache频繁颠簸,将最少使用的Block加入到淘汰算法中。
3.默认配置下,对于整个BlockCache的内存,又按照以下百分比分配给Single、Multi、InMemory使用:0.25、0.50和0.25。
1.5 hbase 表的管理:
概述:

随着memstore 中的数据不断的刷写到磁盘中,会产生越来越多的HFile 文件, HBASE 内部有一个解决这个问题的管理机制,即用合并将多个文件合并成一个较大的文件,合并有两种:minor合并(minor compaction)和major 合并(major compaction). minor 合并将多个小文件从写为数据量较少的大文件,减少对存储文件的数量,这个过程实际上是个多路归并的过程,以为HFile 的每个文件都是经过归类的,所以合并速度很快,只受到磁盘I/O的性能影响。

major 合并将一个region 中一个列簇的若干个Hfile 从写为一个新的Hfile,与minor 合并相比,还有更独特的功能:major 合并 能扫描所有的键/值对,顺序从写全部的数据,重写数据的过程中略过做凌删除标记的数据,断言删除此时生效,比如:对于那些超过版本号限制的数据以及生存时间到期的数据,在重写数据时就不再写入磁盘了。
HRegoin Server上的storefile文件是被后台线程监控的,以确保这些文件保持在可控状态。磁盘上的storefile的数量会随着越来越多的memstore被刷新而变等于越来越多——每次刷新都会生成一个storefile文件。当storefile数量满足一定条件时(可以通过配置参数类调整),会触发文件合并操作——minor compaction,将多个比较小的storefile合并成一个大的storefile文件,直到合并的文件大到超过单个文件配置允许的最大值时会触发一次region的自动分割,即region split操作,将一个region平分成2个。1. minor compaction:轻量级
将符合条件的最早生成的几个storefile合并生成一个大的storefile文件,它不会删除被标记为“删除”的数据和以过期的数据,并且执行过一次minor合并操作后还会有多个storefile文件。
2. major compaction,重量级
把所有的storefile合并成一个单一的storefile文件,在文件合并期间系统会删除标记为"删除"标记的数据和过期失效的数据,同时会block所有客户端对该操作所属的region的请求直到合并完毕,最后删除已合并的storefile文件。二: hbase 与其它框架的集成
2.1 hbase 与hive 集成:
2.1.1 hive 同步hbase 的jar 包
参考官网:
https://cwiki.apache.org/confluence/display/Hive/HBaseIntegration
进行配置
cd /home/hadoop/yangyang/hive/lib/
---
ln -s /home/hadoop/yangyang/hbase/lib/hbase-server-0.98.6-cdh5.3.6.jar ./hbase-server-0.98.6-cdh5.3.6.jar
ln -s /home/hadoop/yangyang/hbase/lib/hbase-client-0.98.6-cdh5.3.6.jar ./hbase-client-0.98.6-cdh5.3.6.jar
ln -s /home/hadoop/yangyang/hbase/lib/hbase-protocol-0.98.6-cdh5.3.6.jar ./hbase-protocol-0.98.6-cdh5.3.6.jar
ln -s /home/hadoop/yangyang/hbase/lib/hbase-it-0.98.6-cdh5.3.6.jar ./hbase-it-0.98.6-cdh5.3.6.jar
ln -s /home/hadoop/yangyang/hbase/lib/htrace-core-2.04.jar ./htrace-core-2.04.jar
ln -s /home/hadoop/yangyang/hbase/lib/hbase-hadoop2-compat-0.98.6-cdh5.3.6.jar ./hbase-hadoop2-compat-0.98.6-cdh5.3.6.jar
ln -s /home/hadoop/yangyang/hbase/lib/hbase-hadoop-compat-0.98.6-cdh5.3.6.jar ./hbase-hadoop-compat-0.98.6-cdh5.3.6.jar
ln -s /home/hadoop/yangyang/hbase/lib/high-scale-lib-1.1.1.jar ./high-scale-lib-1.1.1.jar
2.1.2 hive 增加zookeeper 的属性
vim hive-site.xml 增加:
---
<property>
  <name>hbase.zookeeper.quorum</name>
  <value>namenode01.hadoop.com</value>
</property>
2.1.3 重新启动hbase
cd /home/hadoop/yangyang/hbase
bin/stop-hbase.sh
bin/start-hbase.sh
2.1.4 创建hive中创建表测试
介于hive管理表:

CREATE TABLE hbase_table_1(key int, value string)
STORED BY ‘org.apache.hadoop.hive.hbase.HBaseStorageHandler‘
WITH SERDEPROPERTIES ("hbase.columns.mapping" = ":key,cf1:val")
TBLPROPERTIES ("hbase.table.name" = "xyz");

---

hive 截取表的数据到 另一张表:

insert overwrite table hbase_table_1 select empno,ename from emp;

查询这个表:

select * from hbase_table_1;

hbase 查询xyz 表:
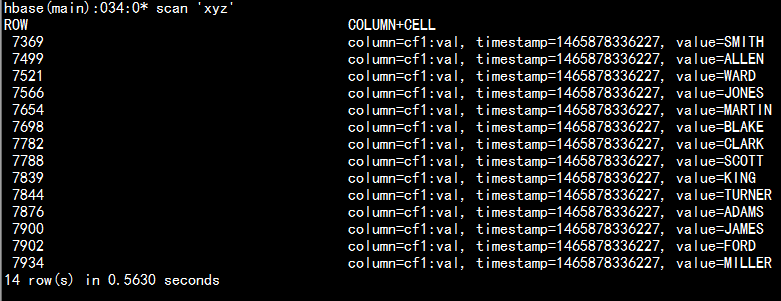
scan ‘xyz‘

注:hive 的管理表中,如果在hive中删除了这张表,hbase 的生成的表也会消失。 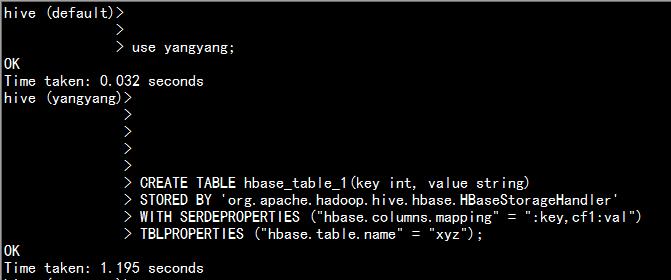
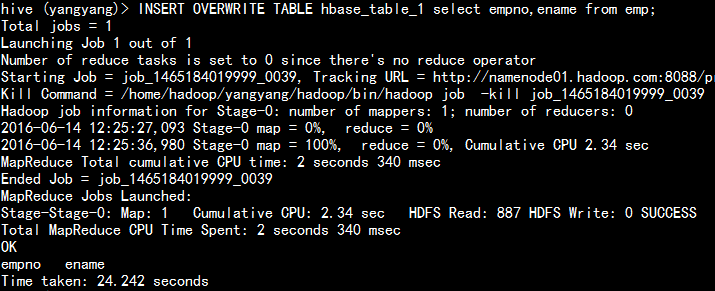
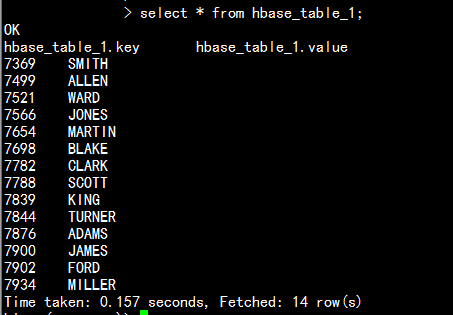
2.1.5 hive中创建外部表 与hbase 集成:
在hbase 创建一种空表

create ‘huser‘,‘info‘
put ‘huser‘,‘1001‘,‘info:name‘,‘zhangyy‘
put ‘huser‘,‘1001‘,‘info:age‘,‘12‘
put ‘huser‘,‘1002‘,‘info:name‘,‘harry‘
put ‘huser‘,‘1002‘,‘info:age‘,‘22‘

hive 中创建外部表进行与hbase 关联:

CREATE EXTERNAL TABLE hbase_user(id int, name string,age int)
STORED BY ‘org.apache.hadoop.hive.hbase.HBaseStorageHandler‘
WITH SERDEPROPERTIES ("hbase.columns.mapping" = ":key,info:name,info:age")
TBLPROPERTIES ("hbase.table.name" = "huser");

select * from hbase_user;

2.2 :sqoop 与hbase 的集成
使用sqoop 将mysql 里面的表提取到hbase 当中
cd /home/hadoop/yangyang/sqoop

bin/sqoop import --connect jdbc:mysql://namenode01.hadoop.com:3306/yangyang --username root --password 123456 --table my_user --hbase-create-table --hbase-table student --column-family info --hbase-row-key id

---
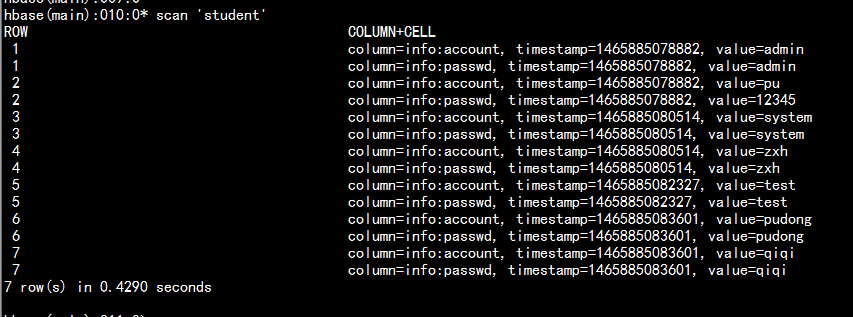
查看hbase 中的表:
scan ‘student‘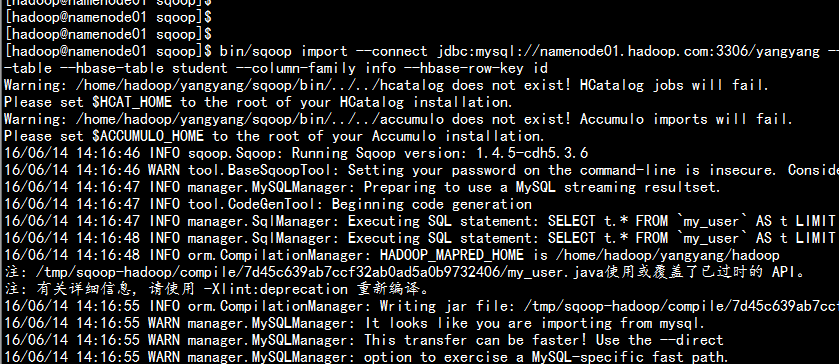
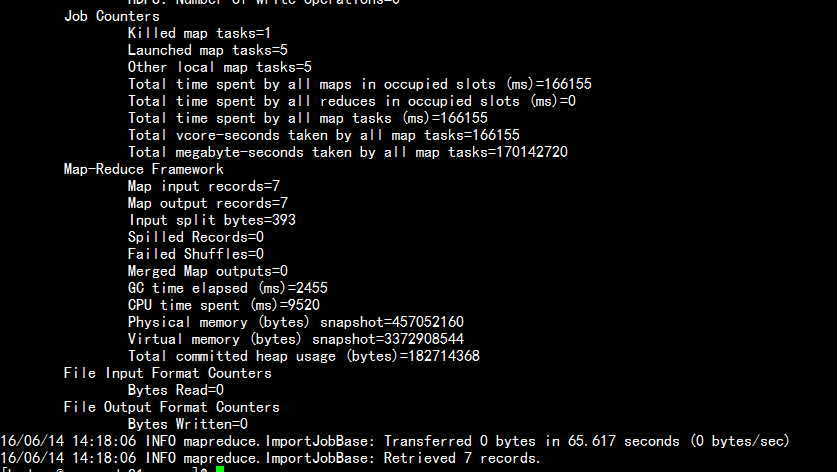
2.3:hbase 与hue 集成
2.3.1 启动hbase 的thrift
cd /home/hadoop/yangyang/hbase
bin/hbase-daemon.sh start  thrift
[hbase]
  # Comma-separated list of HBase Thrift servers for clusters in the format of ‘(name|host:port)‘.
  # Use full hostname with security.
  ## hbase_clusters=(Cluster|localhost:9090)
  hbase_clusters=(Cluster|namenode01.hadoop.com:9090)

  # HBase configuration directory, where hbase-site.xml is located.
  hbase_conf_dir=/home/hadoop/yangyang/hbase/conf

  # Hard limit of rows or columns per row fetched before truncating.
  ## truncate_limit = 500

  # ‘buffered‘ is the default of the HBase Thrift Server and supports security.
  # ‘framed‘ can be used to chunk up responses,
  # which is useful when used in conjunction with the nonblocking server in Thrift.
  ## thrift_transport=buffered
重启hue 测试:
cd /home/hadoop/yangyang/hue
build/env/bin/supervisor & 
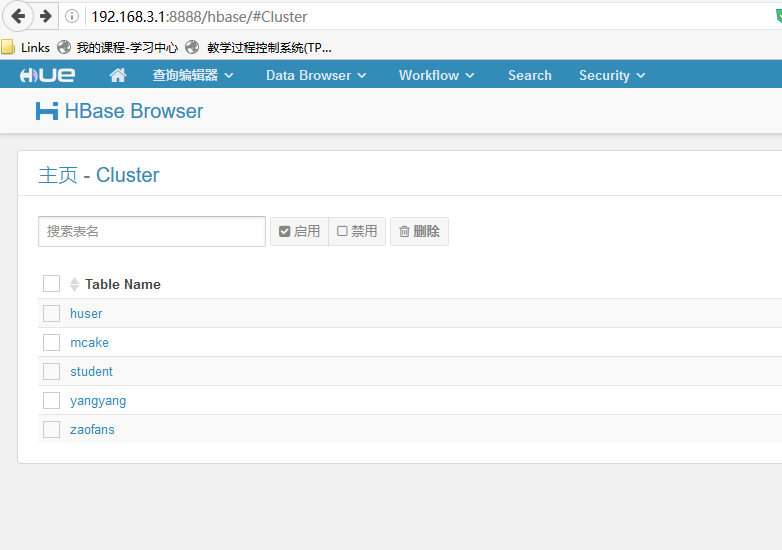
打开浏览器测试:
三:hbase 表的修复
 5.1:当hbase数据表meta 出现问题的时候需要涉及修复:
 5.2 当hbase 表的迁移时,根据hdfs 数据block块迁移到另一hdfs 集群 的时候,新的hbase表会出现源没有的这种情况需要重新生成数据源meta
进行修复
3.1 修复命令:
查看hbasemeta情况
hbase hbck
1.重新修复hbase meta表(根据hdfs上的regioninfo文件,生成meta表)
hbase hbck -fixMeta
2.重新将hbase meta表分给regionserver(根据meta表,将meta表上的region分给regionservere)
hbase hbck -fixAssignments
以上是关于hbase 表的设计与其它大数据框架的集成的主要内容,如果未能解决你的问题,请参考以下文章


