selenium测试框架快速搭建(ui自动化测试)
Posted 什么鬼昵称
tags:
篇首语:本文由小常识网(cha138.com)小编为大家整理,主要介绍了selenium测试框架快速搭建(ui自动化测试)相关的知识,希望对你有一定的参考价值。
一、介绍
selenium目前主流的web自动化测试框架;支持多种编程语言Java、pythan、go、js等;selenium 提供一系列的api 供我们使用,因此在web测试时我们要点页面中的某一个按钮,那么我们只需要获取页面,然后根据id或者name找到对应的按钮,然后执行click操作就可以完成点击这一个动作。测试点点点虽然容易复现,但做回归测试的时候会出现大量重复的工作,因此可以通过自动化,每次做回归测试我们只需要运行相关的脚本即可。Selenium2:使用Selenium自动化测试框架,主要用到Selenium Webdriver模块,能模拟提供浏览器、页面元素定位、元素操作、鼠标键盘等相关的操作和方法;
ui自动化测试主要应用在回归测试、兼容性测试、冒烟测试等测试场景;适合的是需求稳定、项目周期长、测试脚本可以复用的项目。
二、selenium安装及配置
浏览器:谷歌chrome(推荐)、火狐、IE等
驱动:chromedriver.exe(谷歌) 地址:ChromeDriver - WebDriver for Chrome - Downloads
安装selenium包:pip install selenium -U ,-U 表示已安装则更新
下载对应浏览器版本 的chromedriver.exe,否则有可能会报找不到驱动的错;把驱动包放到python的根目录下
WebDriver原理图:WebDriver是一个基于HTTP的协议,它提供了一系列的接口用于发现和控制 Web 文档中的 DOM 元素,几乎可以操作浏览器做任何事情。总的来说就是python编写代码,通过webdriver控制浏览器。

三、脚本实例
from selenium import webdriver
import time

#打开浏览器
driver = webdriver.Chrome()
#浏览器最大化
driver.maximize_window()
# 打开baidu
driver.get("http://www.baidu.com")
#打印浏览器地址
print(driver.current_url)
#打印网页标题
print(driver.title)
#暂停一会,3 秒
time.sleep(3)
#关闭当前窗口
driver.close()
#关闭整个浏览器,并且关闭驱动chromedriver
driver.quit()

Unittest:Python的单元测试框架模块,在此框架下编写具体的业务测试用例脚本,另外此框架能组织测试用例集的执行和测试场景恢复
标准库 time 模块主要提供对时间的相关操作, os.path 模块主要提供对文件路径相关的操作,logging模块主要提供对日志相关的设置 ,smtplib 模块主要负责发送邮件等
第三方模块库:htmlTestRunner 模块主要用于生成HTML格式的可视化测试报告,xlrd模块是读取excel文件数据的模块,xlwt模块是向excel文件中写入数据的模块
四、元素定位
在测试时,浏览器 点击F12打开控制台, 即可以看到页面的所有按钮、输入框等id属性;激活元素选择器;点击对应的按钮、输入框,就可以在控制台看到对应信息;根据id属性定位元素;调用driver提供给的方法定位。
id定位:driver.find_element_by_id('id')
#打开百度,输入软件测试,点击百度一下
driver.find_element_by_id('kw').send_keys('软件测试')
driver.find_element_by_id('su').click()
name定位:el = driver.find_element_by_name('name')
#输入selenium 自动化,点击百度一下
driver.find_element_by_name('wd').send_keys('selenium自动化')
#百度一下按钮没提供名字
driver.find_element_by_id('su').click()
class定位:el = driver.find_element_by_class_name('bt_class')
tagName定位:el = driver.find_element_by_tag_name(tagName)
xpath定位(绝对路径定位):el = driver.find_element_by_xpath(xpath)
css定位:el = driver.find_element_by_css_selector(css)
link_text 定位(根据它的超链接定位):el = driver.find_element_by_link_text(linkText)
partial_link_text定位():el = driver.find_element_by_partial_link_text(linkPartText)
获取当前 页面的url:driver.current_url
获取元素的文本值:driver.find_element_by_id("iptUsername").text
浏览器窗口最大化:driver.maximize_window()
查看浏览器名字:driver.name
打开网页:driver.get("www.baidu.com")
打开浏览器:driver = webdriver.Chrome()
关闭窗口:driver.close()
五、元素操作
元素赋值: el = driver.find_element_by_id("iptUsername").send_keys('admin')
清空元素值 el.clear()
获取元素文本: el.text
获取元素指定属性的值: get_attribute(obj)
上传文件:找到 type=file 的按钮,点击按钮,然后把按钮的文字改为图片名;
driver.find_element_by_css_selector('[type="file"]').click();
driver.find_element_by_css_selector('[type="file"]').send_keys('helloword.jpg');
六、执行JavaScript操作
当webdriver 遇到无法完成的操作时,可以使用javascript来完成,webdriver提供了execute_script()接口来调用js代码。 方法:execute_script(script, *args);执行 JavaScript代码是一个非常强大的功能,可以实现WebElement 接口所有功能,甚至更多的功能。比如在web性能测试中可以调用Web API接口window.performance来测试Web性能。
#打开百度页面,把百度一下 改成 test
driver.get("http://www.baidu.com")
driver.execute_script('document.getElementById("su").value = "test"')
七、窗口切换
浏览器窗口切换:
例如浏览器打开多个窗口,需要从一个窗口跳转到另一个窗口做自动化测试。要转到另一个页面才能找到元素。原理是:每个打开的窗口都有唯一的标识,叫做句柄;可以通过不同的句柄实现窗口切换。
# 当前窗口url地址:
print(driver.current_url)

#暂停一会,10 秒
time.sleep(10)

# 打印所有窗口句柄
windows = driver.window_handles
print(windows,'\\n')


#切换到最后的窗口
driver.switch_to.window(windows[-1])
#打印url,核对下是不是最后的窗口;或者根据网页名等校验
print(driver.current_url)

print('\\n\\n')
time.sleep(3)

#切换到第二个窗口
#先获取现在的窗口
current_window = driver.current_window_handle

# 获取第二个窗口的索引(由当前窗口索引+1)
next_window_index = windows.index(current_window) + 1

# 切换到第二个窗口
driver.switch_to.window(windows[next_window_index])
print(driver.current_url)
iframe切换:
如果元素包含在iframe中,也会导致无法找到元素!例如代码:也会找不到id为kw的input输入框;使用 driver.find_element_by_id('kw') 跑出无法找到的异常。
<iframe src="frame.html" id="myframe" name="myframe">
        <input id="kw" / >
    </iframe>
selenium提供了switch_to.frame()方法用于实现frame的切换,此方法接收id、name、index以及selenium的WebElement对象用来实现切换,比如上述的代码中,要切换到iframe中,则可以使用以下代码实现:
from selenium import webdriver

driver = webdriver.Chrome()
# 通过id切换iframe
driver.switch_to.frame('myframe')
# 通过name切换iframe
# driver.switch_to.frame('myframe')
# 通过index切换iframe,0代表第一个
# driver.switch_to.frame(0)
# 通过WebElement对象切换iframe
# driver.switch_to.frame(driver.find_element_by_tag_name("iframe"))
当操作完frame中的元素后,经常需要重新切换到主界面进行其他操作,切换回主页面使用方法如下:
driver.switch_to.default_content()
若是frame里嵌套frame,这需要一层层切换下去。有多层frame,需要回到上一级的;用父frame:
driver.switch_to.parent_frame()alert弹窗切换:
alert窗口是js提示框,不属于web界面,
#切换到alert窗口 ;获取alert 窗口
alert= driver.switch_to_alert
#获取alert的文本内容
print(alert.text)
#点击确定,关闭弹框
alert.accept()
#点击取消,关闭弹簧
alert.dismiss()
八、鼠标经过操作
selenium鼠标事件(单击/双击/右击/拖动)详细解说,selenium鼠标事件用的是ActionChains。需要import相关模块。
from selenium.webdriver.common.action_chains import ActionChains如找到百度一下按钮,移到该位置;
from selenium.webdriver.common.action_chains import ActionChains
from selenium import webdriver

chr_driver = webdriver.Chrome()
chr_driver.maximize_window()
chr_driver.get("https://www.baidu.com/")

ele = chr_driver.find_element_by_id('su')
# 实例化,悬浮、点击,可以连续调用多个方法,是因为返回的都是self对象
ActionChains(chr_driver).move_to_element(ele).pause(0.5).click(ele).perform()
ActionChains的常用方法:
#单击鼠标左键
click(on_element=None)
#点击鼠标左键,不松开
click_and_hold(on_element=None)
#点击鼠标右键
context_click(on_element=None)
#双击鼠标左键
double_click(on_element=None)
#拖拽到某个元素然后松开
drag_and_drop(source, target)
#拖拽到某个坐标然后松开
drag_and_drop_by_offset(source, xoffset, yoffset)
#按下某个键盘上的键
key_down(value, element=None)
#松开某个键
key_up(value, element=None)
#鼠标移动到某个元素,悬浮
move_to_element(to_element)
#执行链中的所有动作
perform()
九、拖拽
如:打开百度地图拖拽、验证码验证的拖拽动作
from selenium.webdriver.common.action_chains import ActionChains

#打开浏览器
driver = webdriver.Chrome()
#浏览器最大化
driver.maximize_window()
#打开百度地图
driver.get('https://map.baidu.com/@12697919.69,2560977.31,12z')

#定位地图
mask = driver.find_element_by_id('mask')

#动作
ac = ActionChains(driver)
ac.move_to_element(mask).click_and_hold().move_by_offset(50,50).release().perform()
十、页面等待
强制等待 :time.sleep()
隐式等待:driver.implicitly_wait(t) ,隐式等待在指定的时间 t 内等待页面加载完成,如果加载完成的时间小于 t ,剩余的时间就不再等;如果时间 t 内未加载完成则报错。作用范围:全局
显式等待:WebDriverWait(driver , timeout , poll_frequency).until(element)
导入:from selenium.webdriver.support.ui import WebDriverWait
显式等待可以看做是特殊的隐式等待,在指定的时间 t 内等待指定元素加载完成,如果加载完成时间小于 t ,剩余的时间就不再等待,如果没能在 t 时间内加载完成则报错。
方法:WebDriverWait(driver , timeout , poll_frequency)
driver:表示浏览器对象,timeout:表示超时时间,poll_frequency:扫描间隔时间一般0.5秒,扫描一次页面。
element: 指定加载的元素
十一、截图
driver.save_screeshot(file) :file ,图片在本地保存的路径及名字;
如: driver.save_screeshot('./首页.jpg')
driver.get_screenshot_as_file(file)
使用场景:通常是断言失败,有错误的时候保存截图,方便还原现场。
十二、调用js代码
excute_script(js)
如:为只读元素设定值;设定日期;
js = 'document.getElementById("date").value = 2022-05-27'
driver.execute_script(js)
十三、警告框处理
警告框的三种类型:
alert:只有确定按钮;
confirm:有确定和取消按钮
prompt:可以输入内容;
方法:
swtch_to.alert.text:获取警告框中的文本信息
swtch_to.alert.accept():在警告框中点击确定
swtch_to.alert.dismiss():在警告框中点击取消
swtch_to.alert.send_keys(value):在警告框中输入内容
#打印警告框中的文本信息
print(swtch_to.alert.text)
#在警告框中点击确定
driver.swtch_to.alert.accept()
#在警告框中点击取消
driver.swtch_to.alert.dismiss()
#在警告框中输入内容 100块
driver.swtch_to.alert.send_keys('100块')
十四、下拉框
导入模块:from selenium.webdriver.support.select import select
假设下拉框为 s ;选择下拉框中的选项 Select(s).方法()
方法:
options :返回下拉框中的所有选项
select_by_index():通过索引选择
select_by_value():通过选项的value属性值选择
select_by_visible_text():通过选项的文本值选择
#定位下拉框,内容是省份
s = driver.find_element_by_id('province')
#获取下拉框里的所有选项内容
opt = Select(s).options
#通过索引选择;若是通过value选择,则html代码要写有value属性
Select(s).select_by_index(-1)
十五、ActionChains 动作链
ActionChains 可以帮助模拟鼠标操作;如单击、双击、点击鼠标右键、拖拽等等。使用actionchains对象方法,行为事件是存储在actionchains对象队列。当你使用perform(),事件按顺序执行。
调用方法有两种:
#链式写法
ActionChains(driver).click(click_btn).double_click(doubleclick_btn).perform()

#分步写法
ActionChains(driver).click(click_btn)
ActionChains.double_click(doubleclick_btn)
ActionChains.perform()
ActionChains常用方法:
click(on_element=None) ——单击鼠标左键

click_and_hold(on_element=None) ——点击鼠标左键,不松开

context_click(on_element=None) ——点击鼠标右键

double_click(on_element=None) ——双击鼠标左键

drag_and_drop(source, target) ——拖拽到某个元素然后松开

drag_and_drop_by_offset(source, xoffset, yoffset) ——拖拽到某个坐标然后松开

key_down(value, element=None) ——按下某个键盘上的键

key_up(value, element=None) ——松开某个键

move_by_offset(xoffset, yoffset) ——鼠标从当前位置移动到某个坐标

move_to_element(to_element) ——鼠标移动到某个元素

move_to_element_with_offset(to_element, xoffset, yoffset) ——移动到距某个元素(左上角坐标)多少距离的位置

perform() ——执行链中的所有动作

release(on_element=None) ——在某个元素位置松开鼠标左键

send_keys(*keys_to_send) ——发送某个键到当前焦点的元素

send_keys_to_element(element, *keys_to_send) ——发送某个键到指定元素
十六、table表格处理
table表格代码如下:
<table border="1">
    <tr>
        <td>row 1, cell 1</td>
        <td>row 1, cell 2</td>
    </tr>
    <tr>
        <td>row 2, cell 1</td>
        <td>row 2, cell 2</td>
    </tr>
</table>
获取表格里的内容,通过 table->tr->td 层层获取
#获取table
table = driver.find_elements_by_id('table')

#获取 tr
tr = table.find_elements_by_tag_name('tr')

#获取td
td = tr[1].find_elements_by_tag_name('td')

#输出内容
print(td[1].text)
十七、生产报告
连接数据库,把所有的测试用例运行结果输入数据库,然后读取数据库,生成测试报告;如:项目的总测试用例数、成功用例数、失败用例数、跳过数;每个模块的测试用例数、成功用例数、失败用例数、跳过数;
简单Web UI 自动化测试框架 pyse
pyse 更名为 seldom

WebUI automation testing framework based on Selenium and unittest.
基于 selenium 和 unittest 的 Web UI自动化测试框架。
特点
- 提供更加简单API编写自动化测试。
- 提供脚手架,快速生成自动化测试项目。
- 自动生成HTML测试报告生成。
- 自带断言方法,断言title、URL 和 text。
- 支持用例参数化。
- 支持用例失败重跑。
- 用例失败/错误截图。
安装
> pip install seldom
If you want to keep up with the latest version, you can install with github repository url:
> pip install -U git+https://github.com/defnngj/seldom.git@master
Quick Start
1、查看帮助:
> seldom -h
usage: seldom [-h] [-V] [--startproject STARTPROJECT] [-r R]

WebUI automation testing framework based on Selenium.

optional arguments:
  -h, --help            show this help message and exit
  -V, --version         show version
  --startproject STARTPROJECT
                        Specify new project name.
  -r R                  run test case
2、创建项目:
>seldom --startproject mypro
3、目录结构:
mypro/
├── test_dir/
│   ├── test_sample.py
├── report/
└── run.py
test_dir/目录实现用例编写。report/目录存放生成的测试报告。run.py文件运行测试用例。
3、运行项目:
> seldom -r run.py
Python 3.7.1

            _      _
           | |    | |
 ___   ___ | |  __| |  ___   _ __ ___
/ __| / _ \\| | / _` | / _ \\ | \'_ ` _ \\
\\__ \\|  __/| || (_| || (_) || | | | | |
|___/ \\___||_| \\__,_| \\___/ |_| |_| |_|
-----------------------------------------
                             @itest.info

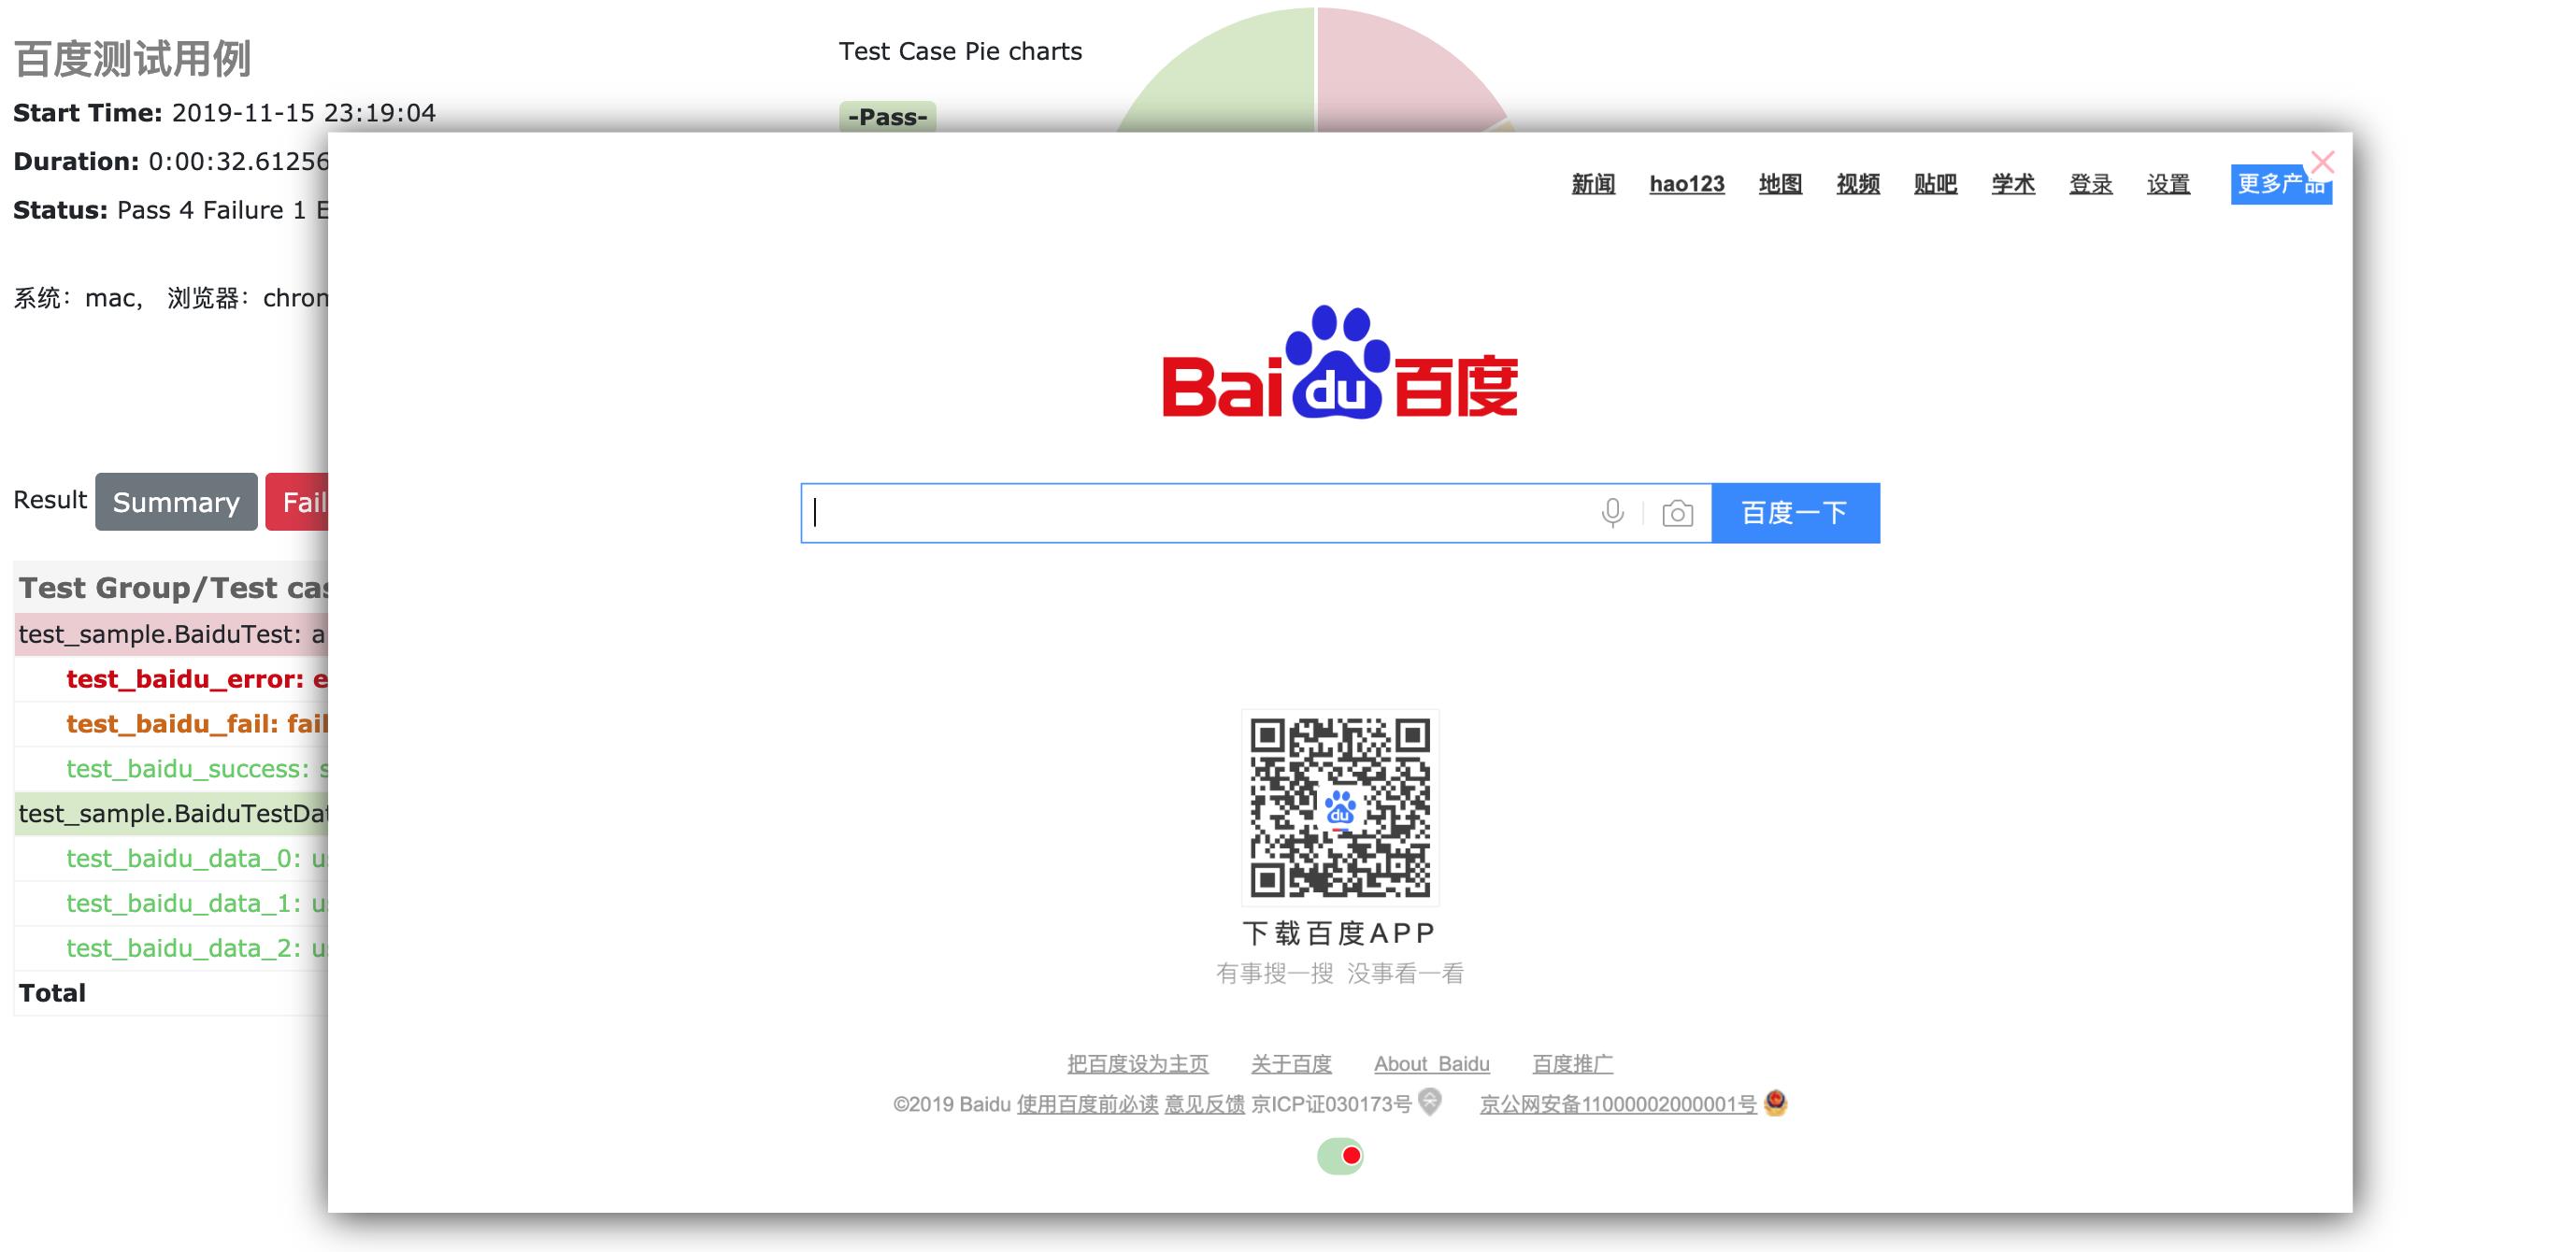
generated html file: file:///D:\\mypro\\reports\\2019_11_12_22_28_53_result.html
.1
4、查看报告
你可以到 mypro\\reports\\ 目录查看测试报告。

API Documents
simple demo
请查看 demo/test_sample.py 文件
import seldom


class YouTest(seldom.TestCase):

    def test_case(self):
        """a simple test case """
        self.open("https://www.baidu.com")
        self.type(id_="kw", text="seldom")
        self.click(css="#su")
        self.assertTitle("seldom")


if __name__ == \'__main__\':
    seldom.main("test_sample.py")
说明:
- 创建测试类必须继承
seldom.TestCase。 - 测试用例文件命名必须以
test开头。 - seldom的封装了
assertTitle、assertUrl和assertText等断言方法。
main() 方法
import seldom

# ...

if __name__ == \'__main__\':

    seldom.main(path="./",
              browser="chrome",
              title="百度测试用例",
              description="测试环境:chrome",
              debug=False,
              rerun=0,
              save_last_run=False
    )
说明:
- path : 指定测试目录或文件。
- browser: 指定测试浏览器,默认
Chrome。 - title : 指定测试报告标题。
- description : 指定测试报告描述。
- debug : debug模式,设置为True不生成测试HTML测试,默认为
False。 - rerun : 设置失败重新运行次数,默认为
0。 - save_last_run : 设置只保存最后一次的结果,默认为
False。
Run the test
import seldom

seldom.main(path="./")  # 当前目录下的所有测试文件
seldom.main(path="./test_dir/")  # 指定目录下的所有测试文件
seldom.main(path="./test_dir/test_sample.py")  # 指定目录下的测试文件
seldom.main(path="test_sample.py")  # 指定当前目录下的测试文件
说明:
- 如果指定的目录,测试文件必须以
test开头。 - 如果要运行子目录下的文件,必须在子目录下加
__init__.py文件。
支持的浏览器及驱动
如果你想指定测试用例在不同的浏览器中运行,非常简单,只需要在seldom.main()方法中通过browser 参数设置。
import seldom

if __name__ == \'__main__\':
    seldom.main(browser="chrome") # chrome浏览器,默认值
    seldom.main(browser="firefox") # firefox浏览器
    seldom.main(browser="ie")  # IE浏览器
    seldom.main(browser="opera") # opera浏览器
    seldom.main(browser="edge") # edge浏览器
    seldom.main(browser="chrome_headless") # chrome浏览器headless模式
    seldom.main(browser="firefox_headless") # Firefox浏览器headless模式
不同浏览器驱动下载地址:
geckodriver(Firefox):https://github.com/mozilla/geckodriver/releases
Chromedriver(Chrome):https://sites.google.com/a/chromium.org/chromedriver/home
IEDriverServer(IE):http://selenium-release.storage.googleapis.com/index.html
operadriver(Opera):https://github.com/operasoftware/operachromiumdriver/releases
MicrosoftWebDriver(Edge):https://developer.microsoft.com/en-us/microsoft-edge/tools/webdriver
==========================================================
元素定位
<form id="form" class="fm" action="/s" name="f">
    <span class="bg s_ipt_wr quickdelete-wrap">
        <input id="kw" class="s_ipt" name="wd">
定位方式:
self.type(id_="kw", text="seldom")
self.type(name="wd", text="seldom")
self.type(class_name="s_ipt", text="seldom")
self.type(tag="input", text="seldom")
self.type(link_text="hao123", text="seldom")
self.type(partial_link_text="hao", text="seldom")
self.type(xpath="//input[@id=\'kw\']", text="seldom")
self.type(css="#kw", text="seldom")
参数化测试用例
seldom 支持参数化测试用例,集成了parameterized。
import seldom
from seldom import ddt

# ...

class BaiduTest(seldom.TestCase):

    @ddt.data([
        (1, \'seldom\'),
        (2, \'selenium\'),
        (3, \'unittest\'),
    ])
    def test_baidu(self, name, keyword):
        """
         used parameterized test
        :param name: case name
        :param keyword: search keyword
        """
        self.open("https://www.baidu.com")
        self.type(id_="kw", text=keyword)
        self.click(css="#su")
        self.assertTitle(search_key+"_百度搜索")
page objects 设计模式
seldom 支持Page objects设计模式,可以配合poium 使用。
import seldom
from poium import Page, PageElement


class BaiduPage(Page):
    """baidu page"""
    search_input = PageElement(id_="kw")
    search_button = PageElement(id_="su")


class BaiduTest(seldom.TestCase):
    """Baidu serach test case"""

    def test_case(self):
        """
        A simple test
        """
        page = BaiduPage(self.driver)
        page.get("https://www.baidu.com")
        page.search_input = "seldom"
        page.search_button.click()
        self.assertTitle("seldom_百度搜索")


if __name__ == \'__main__\':
    seldom.main("test_po_demo.py")
poium提供了更多好用的功能,使Page层的创建更加简单。
感谢
感谢从以下项目中得到思路和帮助。
交流
QQ群:948994709
以上是关于selenium测试框架快速搭建(ui自动化测试)的主要内容,如果未能解决你的问题,请参考以下文章