微信小程序-模仿绘制聊天界面
Posted 学习者+1
tags:
篇首语:本文由小常识网(cha138.com)小编为大家整理,主要介绍了微信小程序-模仿绘制聊天界面相关的知识,希望对你有一定的参考价值。
参考文章
1、小程序模仿微信聊天界面
2、微信小程序实现仿微信聊天界面(各种细节处理)
3、微信小程序之页面中关于聊天框三角形的制作和使用
4、仿微信聊天记录时间显示
5、微信小程序-同时获取麦克风、相机权限、获取多个权限
6、【uni-app】模仿微信实现简易发送/取发语音功能
前言
代码参考自上述文章,样式和功能上根据自己需要做了一些改动以及删减,灰常感谢上述博主大大。ps:软键盘弹出还未进行测试。
消息交互的实现使用openfire,这里代码不做展示。
-----------------------2022/07/21修改-添加时间显示
-----------------------2022/07/22修改-发送按钮、空白消息提示
-----------------------2022/07/26修改-图片、语音消息
效果图
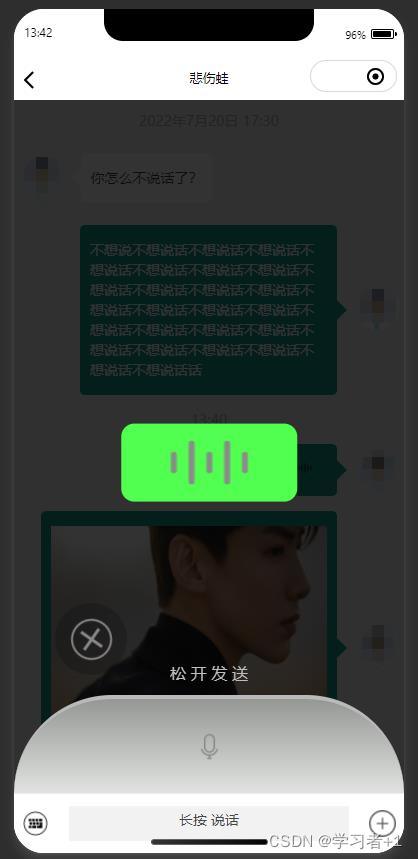
整体效果:

发送语音时(丑了点哈哈哈哈哈):
点击加号图标时:

代码
1、wxml
<wxs module="filters" src="../../../../utils/addmul.wxs"></wxs>
<view>
  <view >
    <scroll-view scroll-y scroll-into-view='toView'  style='height: scrollHeight;' refresher-enabled="true" bindrefresherrefresh="loadMore" refresher-triggered="triggered">
      <view class='scrollMsg' >
        <block wx:key="key" wx:for='msgList' wx:for-index="index">
            <!-- 时间显示,时间间隔为5分钟(5分钟内的消息不必再显示时间) -->
            <view class="showTime" wx:if="item.showTime !== null">
              item.showTime
            </view>

            <!-- 单个消息1 客服发出(左) -->
            <view class="server" wx:if="item.jid == 'server'" id='msg-index'>
              <view class="serverIcon">
                <image src='head_img'></image>
              </view>
              <view class="serverContent">
                <view class="Angle">
                </view>
                <view class="Data">
                  <view class="leftMsg" wx:if="item.type == '1' ">item.msg</view>

                  <view class="leftMsg" wx:if="item.type == '2' ">
                      <image src="item.msg" class="image" catchtap="picture" data-src="item.msg"></image>
                  </view>

                  <view class="leftMsg" wx:if="item.type == '3' ">
                      <view bindtap='playVoice' data-item="item" data-index="index">
                        <image style='height:32rpx;width:32rpx;'
                          src="imgs.yyxx" mode="aspectFit"></image>
                          filters.toFix(item.duration / 1000)"
                      </view>
                    </view>
                </view>
            </view>
            </view>

            <!-- 单个消息2 用户发出(右) -->
            <view class="customer" wx:else id='msg-index'>
                <!-- 发起方的聊天框 -->
                <view class="customerContent">
                  <view class="Data">

                    <view class="rightMsg" wx:if="item.type == '1' ">item.msg</view>

                    <view class="rightMsg" wx:if="item.type == '2' ">
                      <image class="image" src="item.msg" catchtap="picture" data-src="item.msg"></image>
                    </view>

                    <view class="rightMsg" wx:if="item.type == '3' ">
                      <view bindtap='playVoice' data-item="item" data-index="index">
                        filters.toFix(item.duration / 1000)"
                        <image style='height:32rpx;width:32rpx;margin-right:28rpx;'
                          src="imgs.yyxx" mode="aspectFit"></image>
                      </view>
                    </view>
                  </view>
                  <view class="AngleRight">
              </view>
            </view>
              <!-- 发起方的头像 -->
              <view class="serverIcon">
                <image  src='head_img'></image>
              </view>
            </view>
        </block>
      </view>
    </scroll-view>
  </view>

  <!-- 底部键盘、语音、加号 -->
  <view class='inputRoom' style="bottom: inputBottom  + 'px'">
    <image src='!voice ? imgs.icon_yy : imgs.xjp' catchtap="addSpeakMsg"  mode='widthFix'></image>
    <input wx:if="!voice" bindconfirm='sendClick' adjust-position='false' value="inputVal" confirm-type='send' bindfocus='focus' bindblur='blur' bindinput="getInputVal" maxlength="100"></input>
    <view wx:else class="touch" bindtouchstart="touchdown"  bindtouchend="touchup" bindtouchmove="touchmove">长按 说话</view>
    <image src='imgs.icon_gdgn' mode='widthFix' catchtap="addOtherFormatMsg"></image>
  </view>

  <!-- 点击加号图标 -->
  <view class="chat-camera" wx:if="camera">
      <view wx:for="feature" wx:key="index" class="camera-feature" catchtap="featch" data-index="index">
        <view class="feature-src">
          <image src="item.src"></image>
        </view>
        <view class="feature-text">item.name</view>
      </view>
  </view>

</view>

<!-- 语音遮罩层 -->
<view class="voice-mask" wx:if="mask">
	<!--语音条 -->
	<view class="voice-bar needCancel ? 'voiceDel' : ''">
		<image src="imgs.sb_c" class="voice-volume needCancel ? 'voiceDel' : ''"></image>
	</view>
	<!-- 底部区域 -->
	<view class="voice-send">
		<!-- 取消图标 -->
		<view class="voice-middle-wrapper">
			<!-- 取消 -->
			<view class="voice-left-wrapper">
				<view class="voice-middle-inner close needCancel ? 'bigger' : ''">
					<image src="imgs.voiceCancel" class="close-icon"></image>
				</view>
			</view>
			<view class="send-tip needCancel ? sendTipNone:''">sendtip</view>
		</view>
		<!-- 底部语音显示 -->
		<view class="mask-bottom">
			<image src="imgs.ht"></image>
		</view>
	</view>
</view>
2、wxss
page
background-color: #f1f1f1;
.inputRoom
width: 100vw;
height: 60px;
border-top: 1px solid #EEE;
background-color: #fff;
position: fixed;
bottom: 0;
display: flex;
flex-direction: row;
justify-content: space-between;
align-items: center;
z-index: 20;
padding: 0 2vw;
.inputRoom image
width: 7vw;
input
width: 70vw;
height: 45%;
background-color: #F2F2F2;
border-radius: 2px;
padding: 4px;
font-size: 28rpx;
color: #444;
.touch
width: 72vw;
height: 60%;
text-align: center;
background-color: #F2F2F2;
border-radius: 2px;
padding: 4px;
font-size: 28rpx;
color: #444;
.leftMsg
padding: 2vh 2.5vw;
background-color: #fff;
border-radius: 10rpx;
z-index: 10;
font-size: 14px;
color: #3B3B3B;
line-height: 20px;
font-weight: 400;
.rightMsg
font-size: 14px;
line-height: 20px;
padding: 2vh 2.5vw;
background-color: #149C89;
border-radius: 10rpx;
z-index: 10;
color: #FDFDFD;
font-weight: 400;
.Angle
display:flex;
width:0;
height:0;
border-width:10px;
border-style:solid;
border-color:transparent #fff transparent transparent;
.AngleRight
display:flex;
width:0;
height:0;
border-width:10px;
border-style:solid;
border-color:transparent transparent transparent #149C89 ;
.showTime
display: flex;
justify-content: center;
color:#AEAEAE;
font-size: 14px;
padding: 1vh 0;
.server
display: flex;
padding: 2vh 11vw 2vh 2vw;
flex-direction: row;
justify-content: flex-start;
align-items: center;
.serverIcon
width: 10vw;
height: 10vw;
.serverIcon image
width: 100%;
height: 100%;
.serverContent
width: 71vw;
height: auto;
display: flex;
justify-content: flex-start;
align-items: center;
z-index: 9;
.customer
display: flex;
justify-content: flex-end;
padding: 1vh 2vw 1vh 11vw;
align-items: center;
.customerContent
width: 71vw;
height: auto;
display: flex;
justify-content: flex-end;
align-items: center;
z-index: 9;
.chat-camera
width: 100%;
height: 100px;
float: left;
overflow: hidden;
background-color: #EDEDED;
overflow-y: auto;
margin-top: 60px;
.camera-feature
margin: 5% 0 0 5%;
width微信小程序|基于小程序+C#实现聊天功能
文章目录
一、文章前言
此文主要实现在小程序内聊天对话功能,使用C#作为后端语言进行支持,界面友好,开发简单。


二、开发流程及准备
2.1、注册微信公众平台账号。
2.2、下载安装Visual Studio(后端语言开发工具),SQL Server数据库,微信Web开发者工具。

三、开发步骤
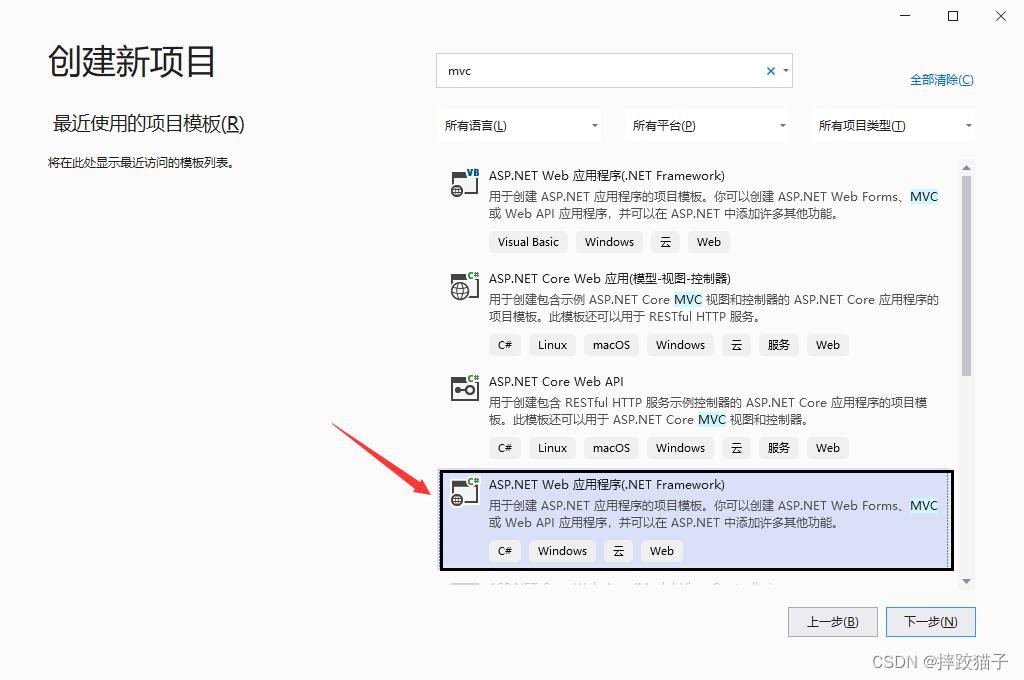
3.1、打开Visual Studio,创建新项目,选择ASP.NET Web应用程序(.NET Framework)。
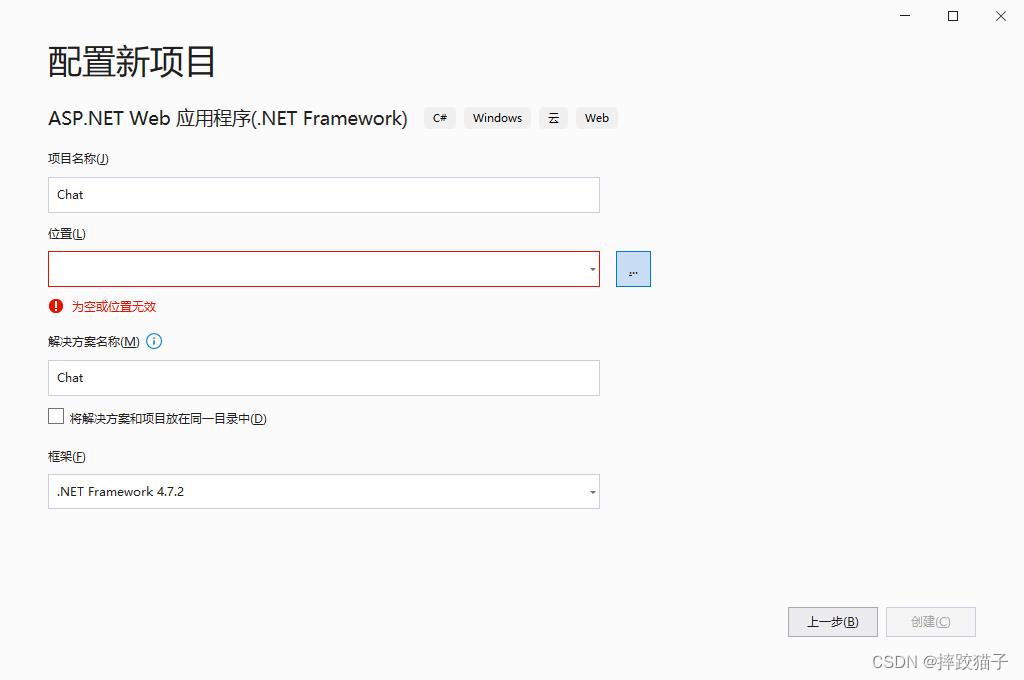
3.2、填写项目名称及选择对应的保存位置,框架版本我们这里选择4.7.2。
3.3、这一步骤我们选择MVC,因为我们主要是用它来搭建API接口,其他的选项默认即可。
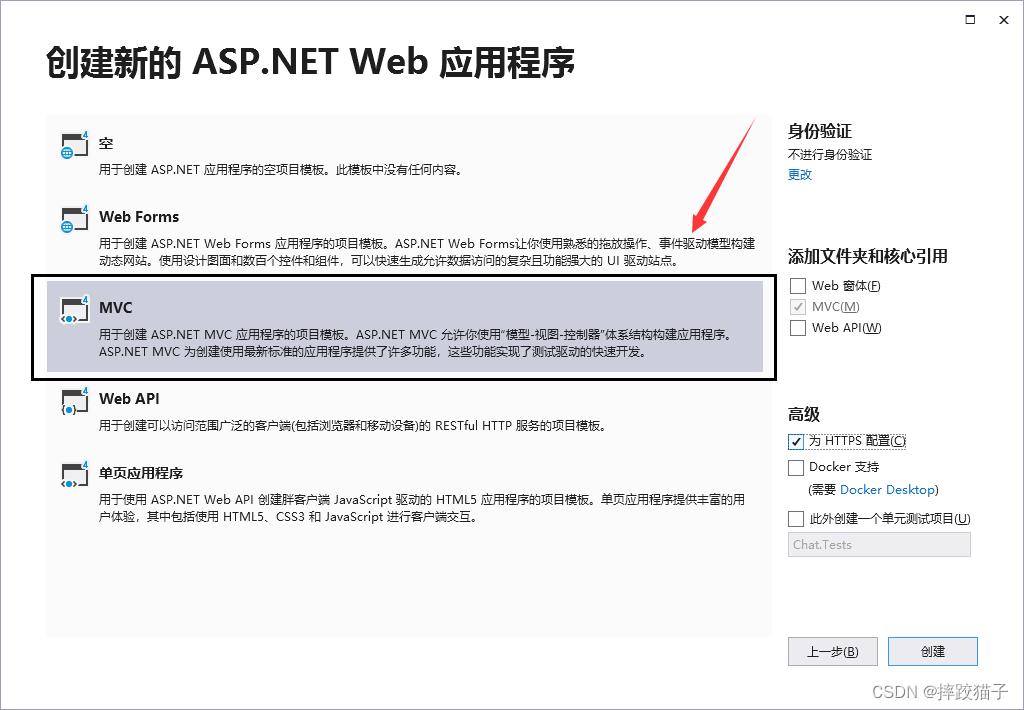
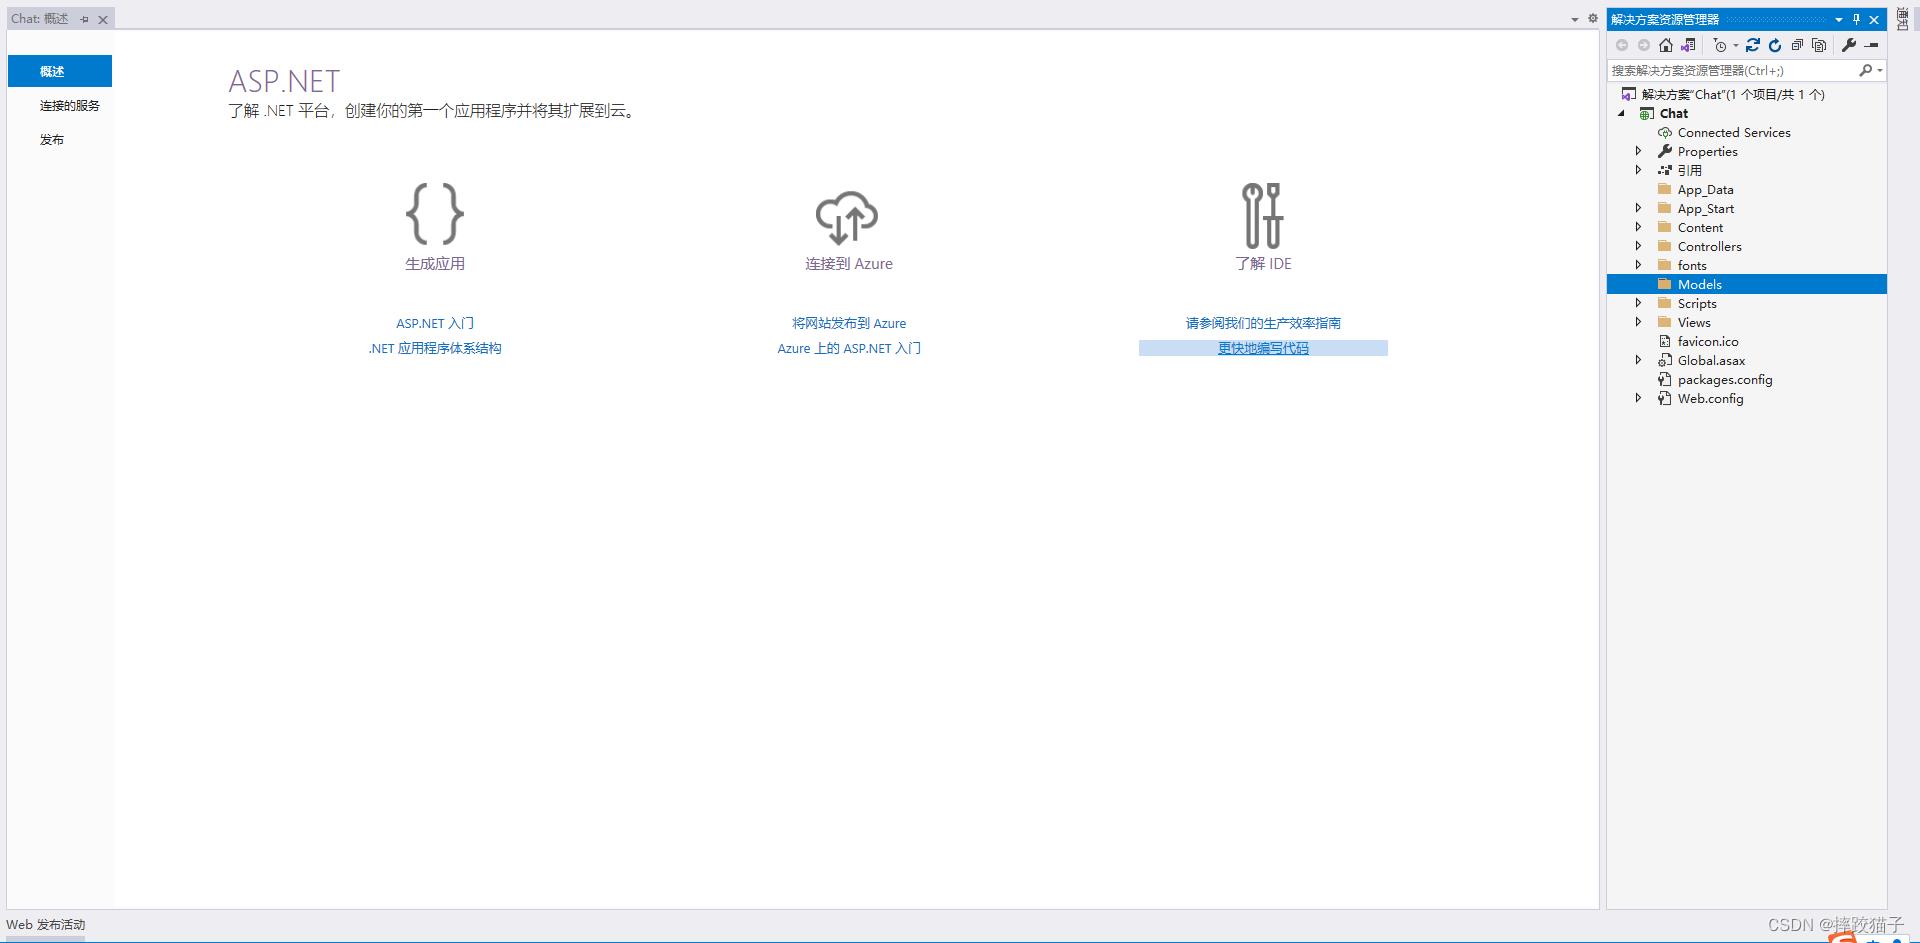
3.4、创建完成后,显示这个界面就证明第一步完成了,右边的就是传统MVC架构方案。
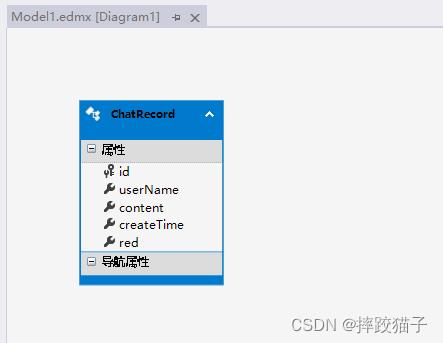
3.5、打开SQL Server创建数据库及对应的表用于存储数据。(可以先插入两条测试数据)
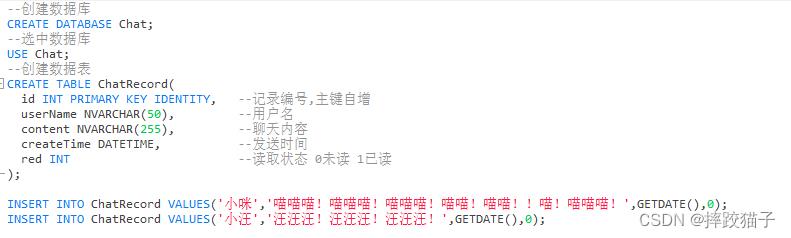
--创建数据库
CREATE DATABASE Chat;
--选中数据库
USE Chat;
--创建数据表
CREATE TABLE ChatRecord(
id INT PRIMARY KEY IDENTITY, --记录编号,主键自增
userName NVARCHAR(50), --用户名
content NVARCHAR(255), --聊天内容
createTime DATETIME, --发送时间
red INT --读取状态 0未读 1已读
);
INSERT INTO ChatRecord VALUES('小咪','喵喵喵!喵喵喵!喵喵喵!喵喵!喵喵!!喵!喵喵喵!',GETDATE(),0);
INSERT INTO ChatRecord VALUES('小汪','汪汪汪!汪汪汪!汪汪汪!',GETDATE(),0);
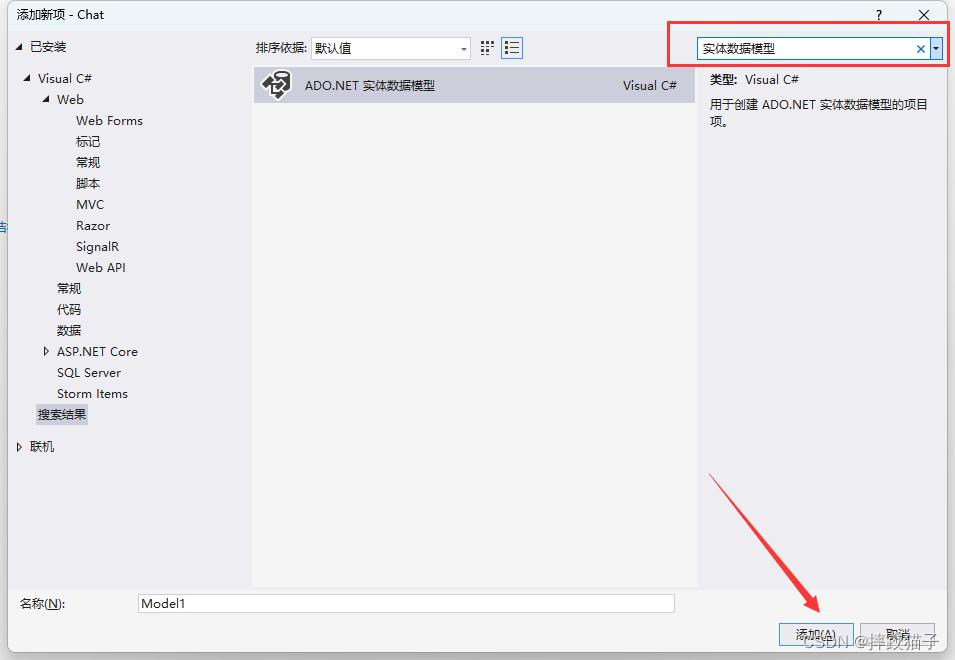
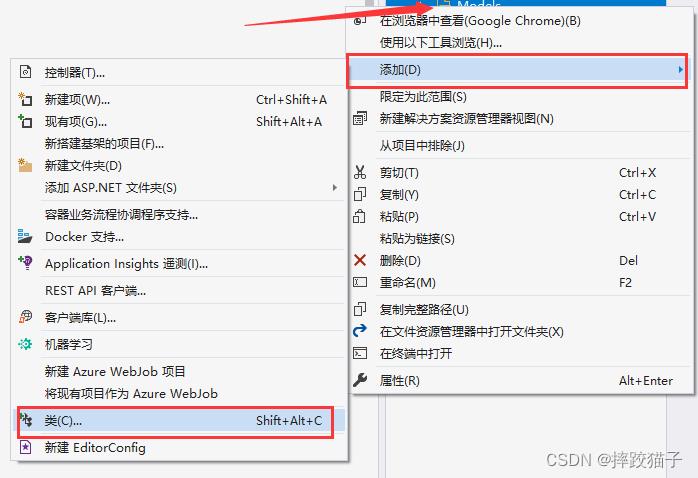
3.6、回到Visual Studio,选择Models文件夹,Model在MVC中就是M,也就是实体,然后点击添加,选择新建项。

3.7、右上方搜索框输入实体数据模型,选择然后点击添加。
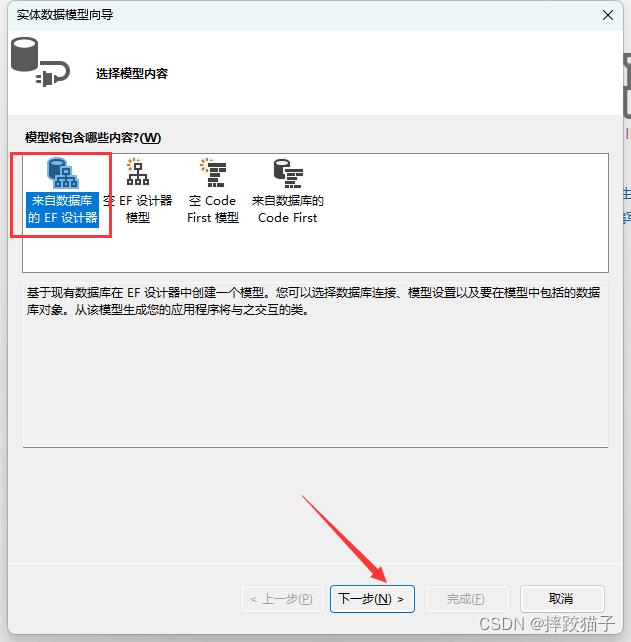
3.8、选择来自数据库的EF设计器,点击下一步。

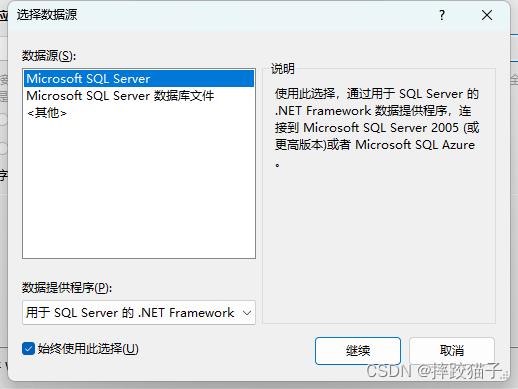
3.9、数据源选择Microsoft SQL Server,点击继续。
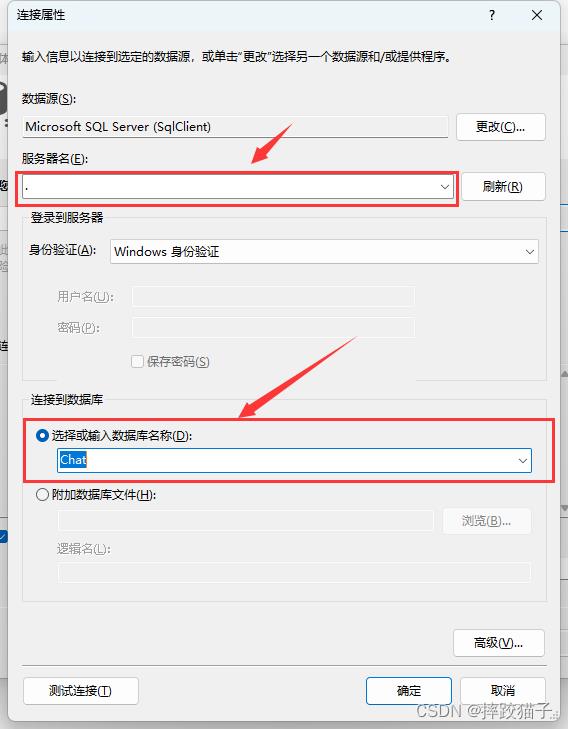
3.10、在服务器名文本框输入一个" . ",在这里代表的是本机的意思,输入之后在下面的选择数据库下拉框选择我们上面所创建的Chat数据库。
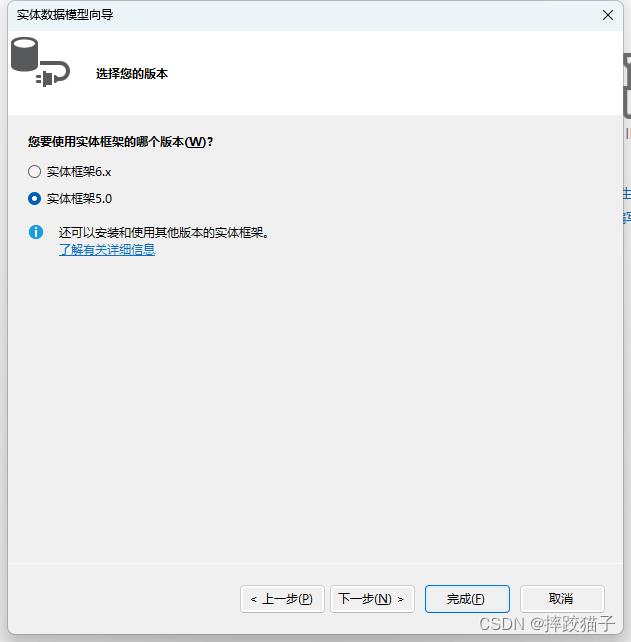
3.11、选择对应的实体框架版本,这里选择5.0跟6.x都可以,点击下一步。
3.12、我们这里只创建了数据表,只需要选择表就可以,点击完成,即可生成对应的实体数据模型。

3.13、选择Models文件夹,选择添加,点击类,建立一个上下文类,用于帮助我们操作数据库。这里需要注意引入命名空间。
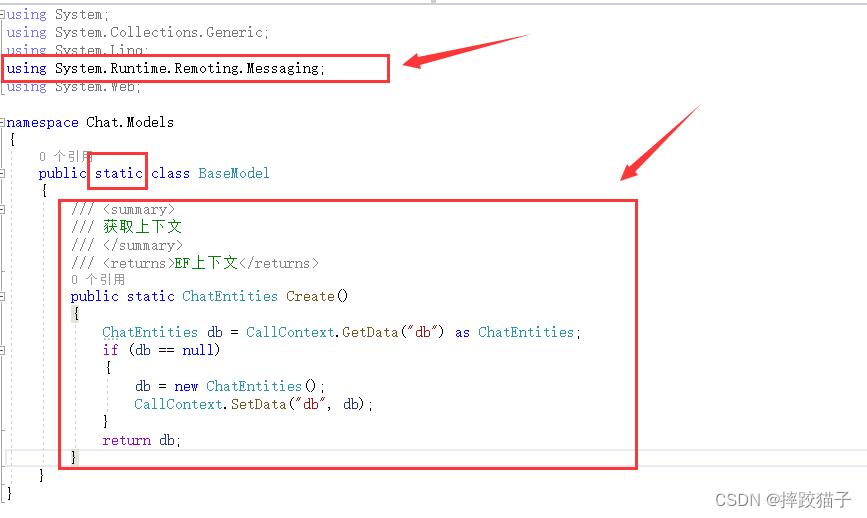
/// <summary>
/// 获取上下文
/// </summary>
/// <returns>EF上下文</returns>
public static ChatEntities Create()
ChatEntities db = CallContext.GetData("db") as ChatEntities;
if (db == null)
db = new ChatEntities();
CallContext.SetData("db", db);
return db;
3.14、继续选择Models文件夹,新建一个Services类,编写我们的业务逻辑代码,Linq语法我们这里就不一一赘述了,这里我们主要实现根据创建时间排序查询聊天记录及新增聊天记录的两个方法。


/// <summary>
/// 定义返回数据帮助类
/// </summary>
public class JsonResult
/// <summary>
/// 状态码 0 失败 1成功
/// </summary>
public int Code get; set;
/// <summary>
/// 提示消息
/// </summary>
public string Msg get; set;
/// <summary>
/// 数据
/// </summary>
public object Data get; set;
// 查询聊天记录列表
public static JsonResult GetChatRecord()
JsonResult res = new JsonResult() Code = 0, Msg = "暂无数据" ;
var db = BaseModel.Create();
//使用linq根据创建时间排序返回消息记录
var list = db.ChatRecord.OrderBy(x => x.createTime).ToList();
res.Code = 1;
res.Msg = "查询成功";
res.Data = list;
return res;
// 新增消息
public static JsonResult AddChatRecord(ChatRecord jsonData)
JsonResult res = new JsonResult() Code = 0, Msg = "发送失败" ;
var db = BaseModel.Create();
ChatRecord info = new ChatRecord();
info.userName = jsonData.userName;
info.content = jsonData.content;
info.createTime = DateTime.Now;
info.red = 0;
db.ChatRecord.Add(info);
if (db.SaveChanges() > 0)
res.Code = 1;
res.Msg = "发送成功";
return res;
return res;
3.15、业务代码编写完毕后,我们需要在控制器进行调用,这里需要引入Models的命名空间。

/// <summary>
/// 查询聊天记录
/// </summary>
/// <returns></returns>
public ActionResult GetChatRecord()
return Json(Services.GetChatRecord(), JsonRequestBehavior.AllowGet);
/// <summary>
/// 新增聊天
/// </summary>
/// <param name="jsonData"></param>
/// <returns></returns>
public ActionResult AddChatRecord(ChatRecord jsonData)
return Json(Services.AddChatRecord(jsonData));
3.16、点击顶上方的调试、开始执行(不调试按钮),启动项目,打开的是默认的Index界面。


3.17、通过URL访问对应的控制器/动作方法,测试接口是否能够正常访问。

3.18、可以看到接口数据能够正常返回,就是我们在创建数据库时所添加的两条测试数据,但是创建时间返回的是时间戳模式,我们需要在返回数据的时候进行一下处理。
public static JsonResult GetChatRecord()
JsonResult res = new JsonResult() Code = 0, Msg = "暂无数据" ;
var db = BaseModel.Create();
//使用linq根据创建时间排序返回消息记录
var list = db.ChatRecord.OrderBy(x => x.createTime).ToList().Select(x => new
x.userName,
x.content,
createTime = Convert.ToDateTime(x.createTime).ToString("yyyy-MM-dd:hh:mm"),//时间戳转换为yyyyMMdd:hh:mm
);
res.Code = 1;
res.Msg = "查询成功";
res.Data = list;
return res;

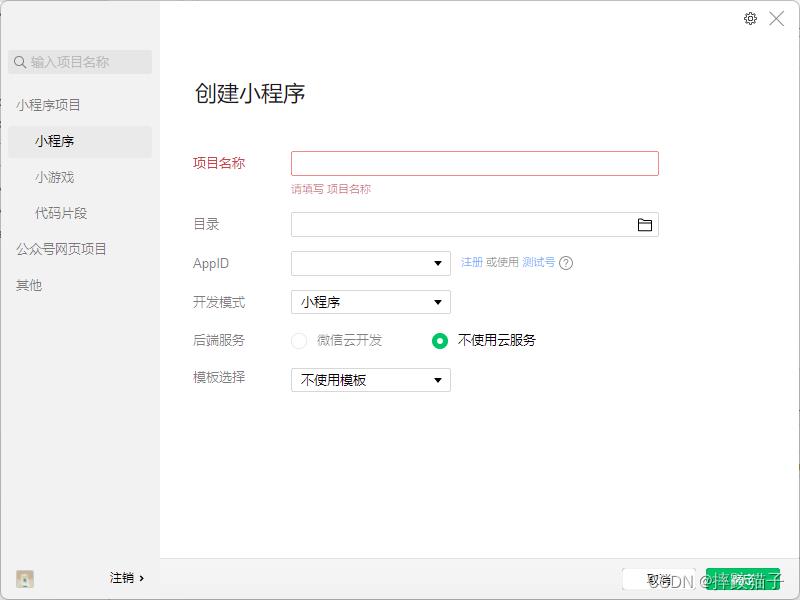
3.19、接口能够正常访问后,我们就可以开始小程序的开发了,打开微信开发者工具,新建项目,选择不使用模板、不使用云服务。
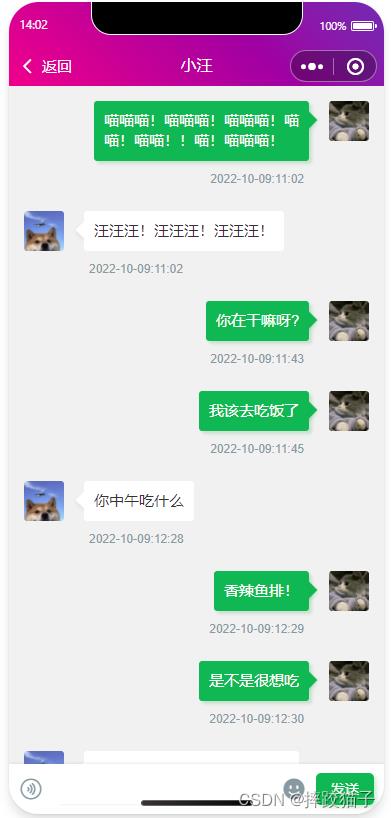
3.20、在pages文件夹下面创建一个文件夹并新建对应的page文件,并实现聊天对话框样式。

<view class="cu-chat" id="j_page">
<view class="cu-item 'self'" wx:for="chatData">
<view class="main">
<view class="content shadow bg-green">
<text>item.content</text>
</view>
</view>
<view class="cu-avatar radius" style="background-image:url(../../../images/cat.jpg)"></view>
<view class="date">item.createTime</view>
</view>
</view>
<view class="cu-bar foot input InputBottom!=0?'cur':''" style="bottom:InputBottompx">
<view class="action">
<text class="cuIcon-sound text-grey"></text>
</view>
<input class="solid-bottom" value="content" bindinput="formMsg" bindfocus="InputFocus" bindblur="InputBlur" adjust-position="false" focus="false" maxlength="300" cursor-spacing="10"></input>
<view class="action">
<text class="cuIcon-emojifill text-grey"></text>
</view>
<button class="cu-btn bg-green shadow" bindtap="sendMsg">发送</button>
</view>
.cu-chat
display: flex;
flex-direction: column;
.cu-chat .cu-item
display: flex;
padding: 30rpx 30rpx 70rpx;
position: relative;
.cu-chat .cu-item>.cu-avatar
width: 80rpx;
height: 80rpx;
.cu-chat .cu-item>.main
max-width: calc(100% - 260rpx);
margin: 0 40rpx;
display: flex;
align-items: center;
.cu-chat .cu-item>image
height: 320rpx;
.cu-chat .cu-item>.main .content
padding: 20rpx;
border-radius: 6rpx;
display: inline-flex;
max-width: 100%;
align-items: center;
font-size: 30rpx;
position: relative;
min-height: 80rpx;
line-height: 40rpx;
text-align: left;
.cu-chat .cu-item>.main .content:not([class*="bg-"])
background-color: var(--white);
color: var(--black);
.cu-chat .cu-item .date
position: absolute;
font-size: 24rpx;
color: var(--grey);
width: calc(100% - 320rpx);
bottom: 20rpx;
left: 160rpx;
.cu-chat .cu-item .action
padding: 0 30rpx;
display: flex;
align-items: center;
.cu-chat .cu-item>.main .content::after
content: "";
top: 27rpx;
transform: rotate(45deg);
position: absolute;
z-index: 100;
display: inline-block;
overflow: hidden;
width: 24rpx;
height: 24rpx;
left: -12rpx;
right: initial;
background-color: inherit;
.cu-chat .cu-item.self>.main .content::after
left: auto;
right: -12rpx;
3.21、在JS中实现请求聊天列表及新增聊天信息的接口,请求接口时可以设一个定时器,每隔多少秒请求一次消息,新增消息时先将用户名写死,后续可以更改为获取用户token。实现新增聊天信息的时候需要给文本框绑定对应的bindinput事件,每次用户有编辑时即获取文本框的值存储到data中。
setInterval(function ()
wx.request(
url: 'https://localhost:44382/home/GetChatRecord',
method: 'post',
dataType: "json",
success: function (res)
that.setData(
chatData: res.data.Data
);
);
, 1000);
formMsg(e)
this.setData(
content: e.detail.value.trim()
)
,
let info =
userName: '小咪',
content: that.data.content,
;
wx.request(
url: 'https://localhost:44382/home/AddChatRecord',
data: info,
method: 'post',
dataType: "json",
success: function (identify)
that.setData(
content: '',
);
//发送消息后 刷新数据
wx.request(
url: 'https://localhost:44382/home/GetChatRecord',
method: 'post',
dataType: "json",
success: function (res)
that.setData(
chatData: res.data.Data
);
);
);
3.22、准备两张头像,在WXML中根据对应的用户名判断聊天记录是否是自己发出,并赋对应的class样式,后续这个步骤可以直接在接口返回的数据中进行判断,请求查询列表的接口将用户token作为参数传输过去即可。


<view class="cu-chat" id="j_page">
<view class="cu-item item.userName=='小咪'?'self':''" wx:for="chatData">
<view class="cu-avatar radius" style="background-image:url(../../../images/dog.jpg)" wx:if="item.userName=='小汪'"></view>
<view class="main">
<view class="content shadow item.userName=='小咪'?'bg-green':''">
<text>item.content</text>
</view>
</view>
<view class="cu-avatar radius" style="background-image:url(../../../images/cat.jpg)" wx:if="item.userName=='小咪'"></view>
<view class="date">item.createTime</view>
</view>
</view>
3.23、请求聊天记录的接口和新增聊天信息的接口都跑通后,我们将现有小程序复制一份,在复制出的这份小程序中的JS将用户名改为小汪,然后发送消息。这里需要注意的是,我们需要在每次发送消息后将页面内容定位在底部,一直保持一个阅读最新消息的状态。
wx.pageScrollTo(
scrollTop: 9999
)
这里采用的一个比较简单的方式实现的聊天功能,性能及设计方面有很大的提升空间,后续会用ws长连接或者接入第三方插件的方式来实现这个功能,完成后源码会以资源的形式上传提供给大家。
以上是关于微信小程序-模仿绘制聊天界面的主要内容,如果未能解决你的问题,请参考以下文章