小程序测试之微信开发者工具
Posted 三也_小也
tags:
篇首语:本文由小常识网(cha138.com)小编为大家整理,主要介绍了小程序测试之微信开发者工具相关的知识,希望对你有一定的参考价值。
一、为什么要使用微信开发者工具?
小程序的测试方法有很多种,直接用真实测试机扫码体验版就可以测试,那为什么还要选择使用工具呢?
使用微信开发者工具的优势:
1、相比真机测试,使用工具可以节省资源,大公司感受不到,小公司真的没有那么多测试机过兼容哇哇
2、小程序内部的跳转,有些可能逻辑复杂,不好造条件,使用工具可以直接跳转页面测试
3、抓包、看接口很方便
4、其他我没有深入了解的优势
5、多会一个工具,面试吹一下
二、安装微信开发者工具
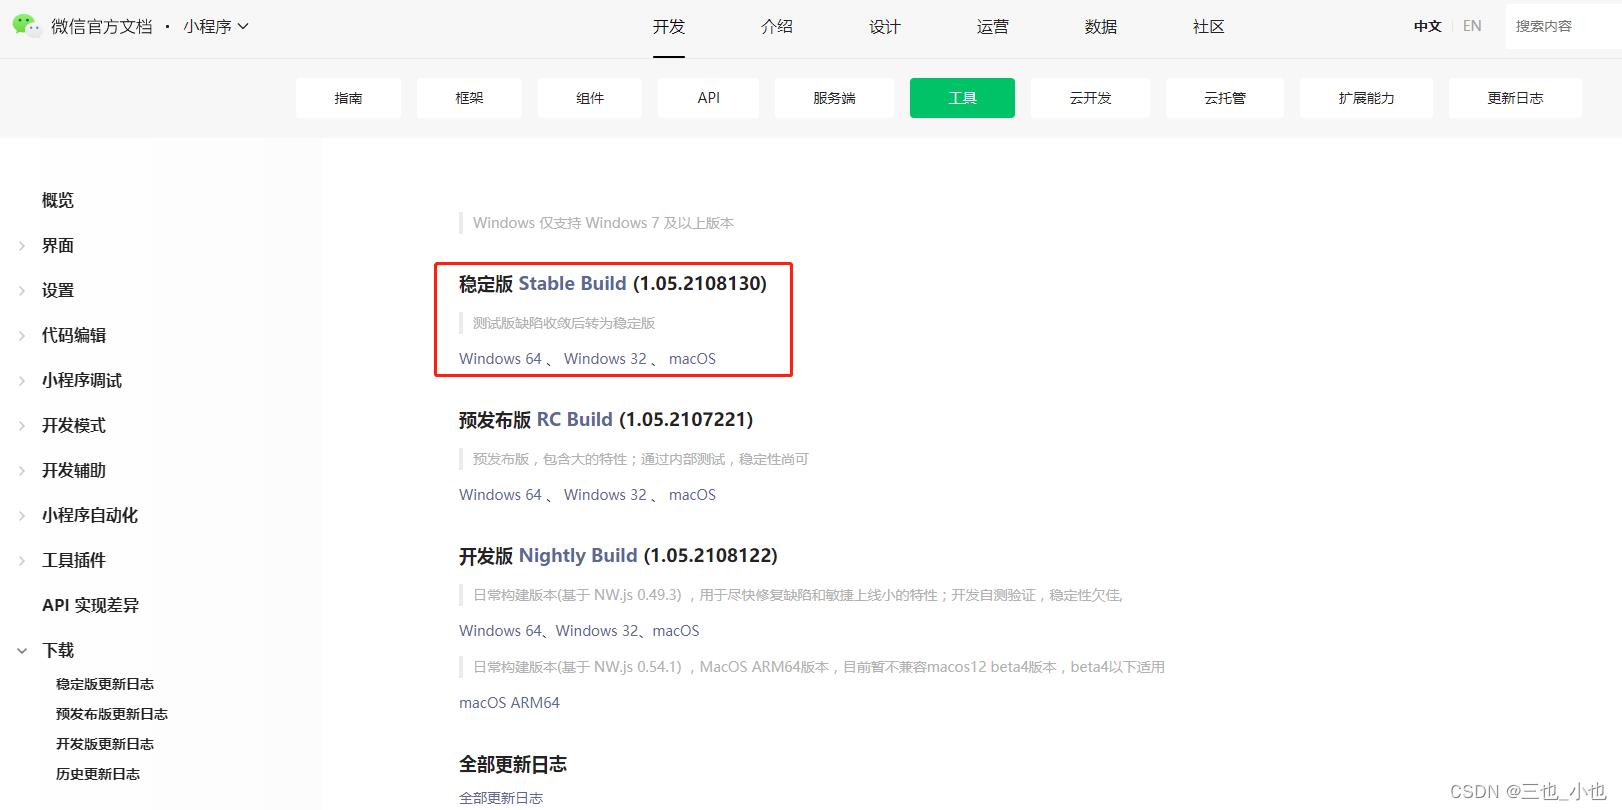
1、下载微信开发者工具:https://developers.weixin.qq.com/miniprogram/dev/devtools/download.html
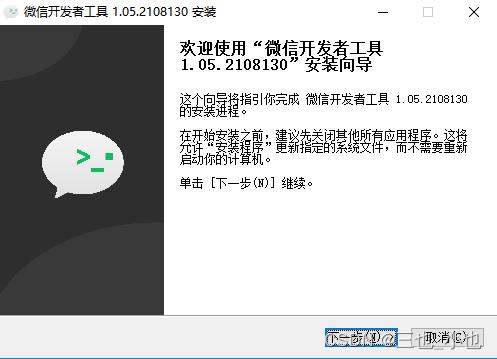
2、安装,没有什么特别的,下一步下一步
三、使用微信开发者工具
1、登录已开通开发者权限的微信账号,导入小程序的安装包,选择小程序包路径,和正确的appid:
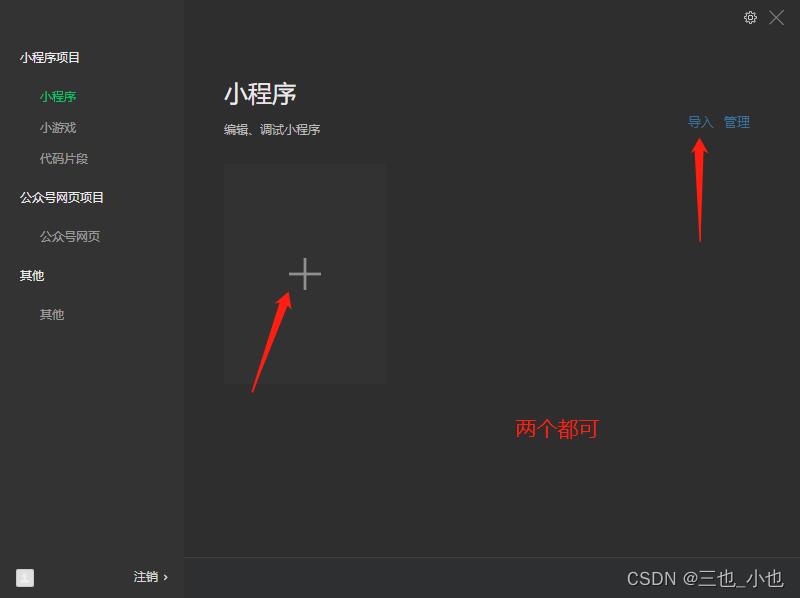
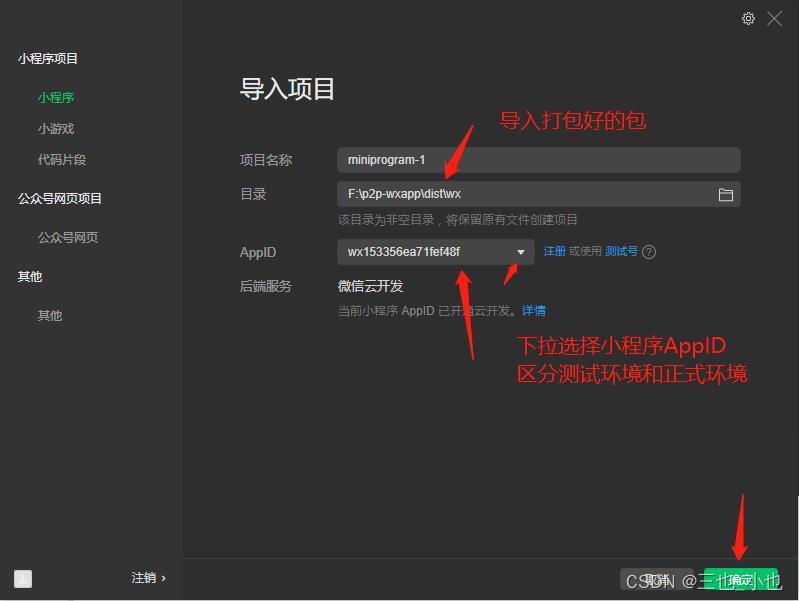
上图导入打好的包:这个包可以找开发打,打好提供包就可以,也可以自己打,打包方法另一篇博文有写到
2、愉快的探索开发者工具测试小程序
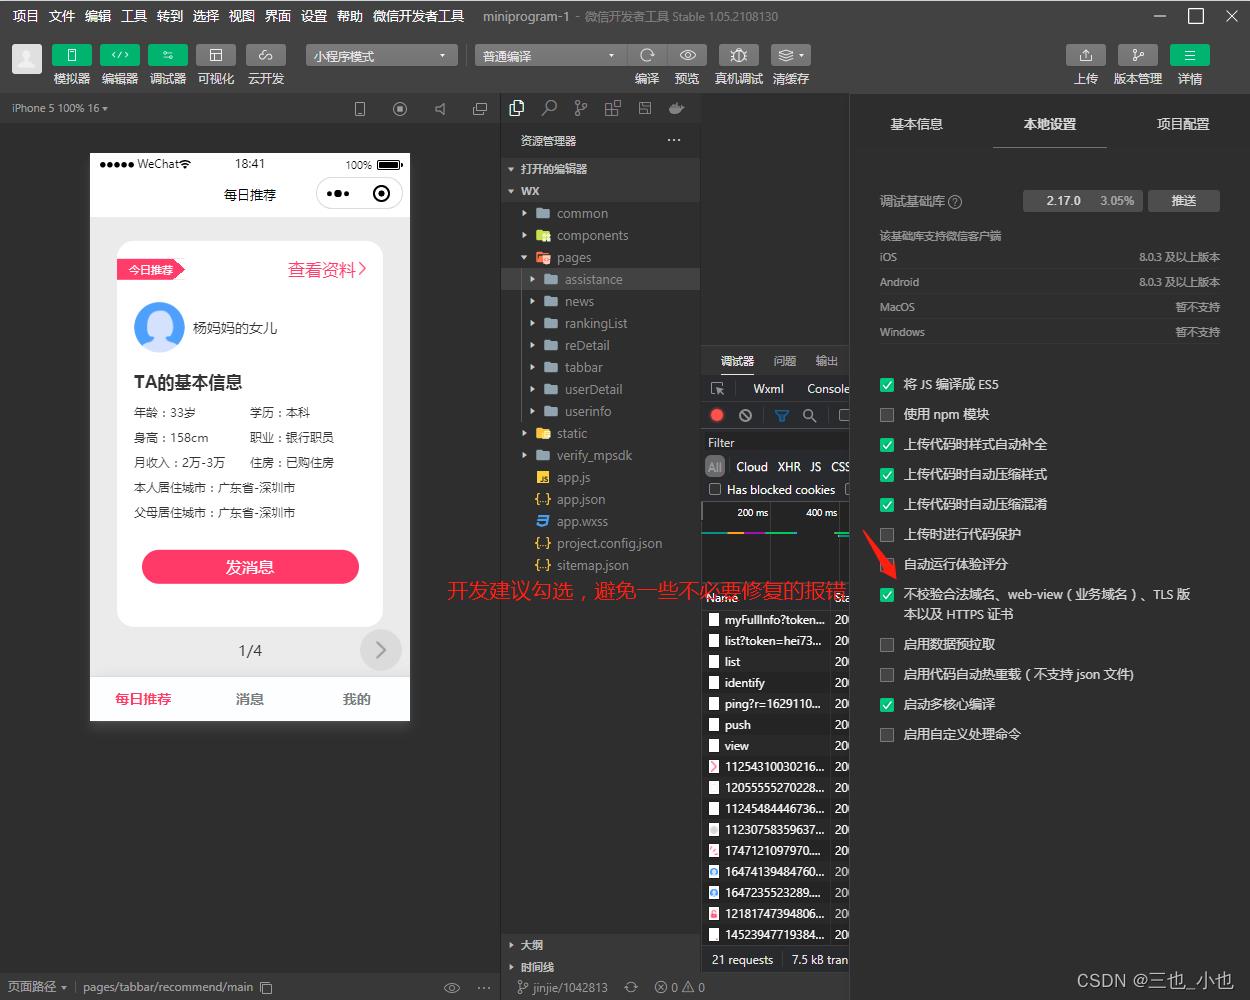
设置:
四、微信小程序内部使用的一点点介绍
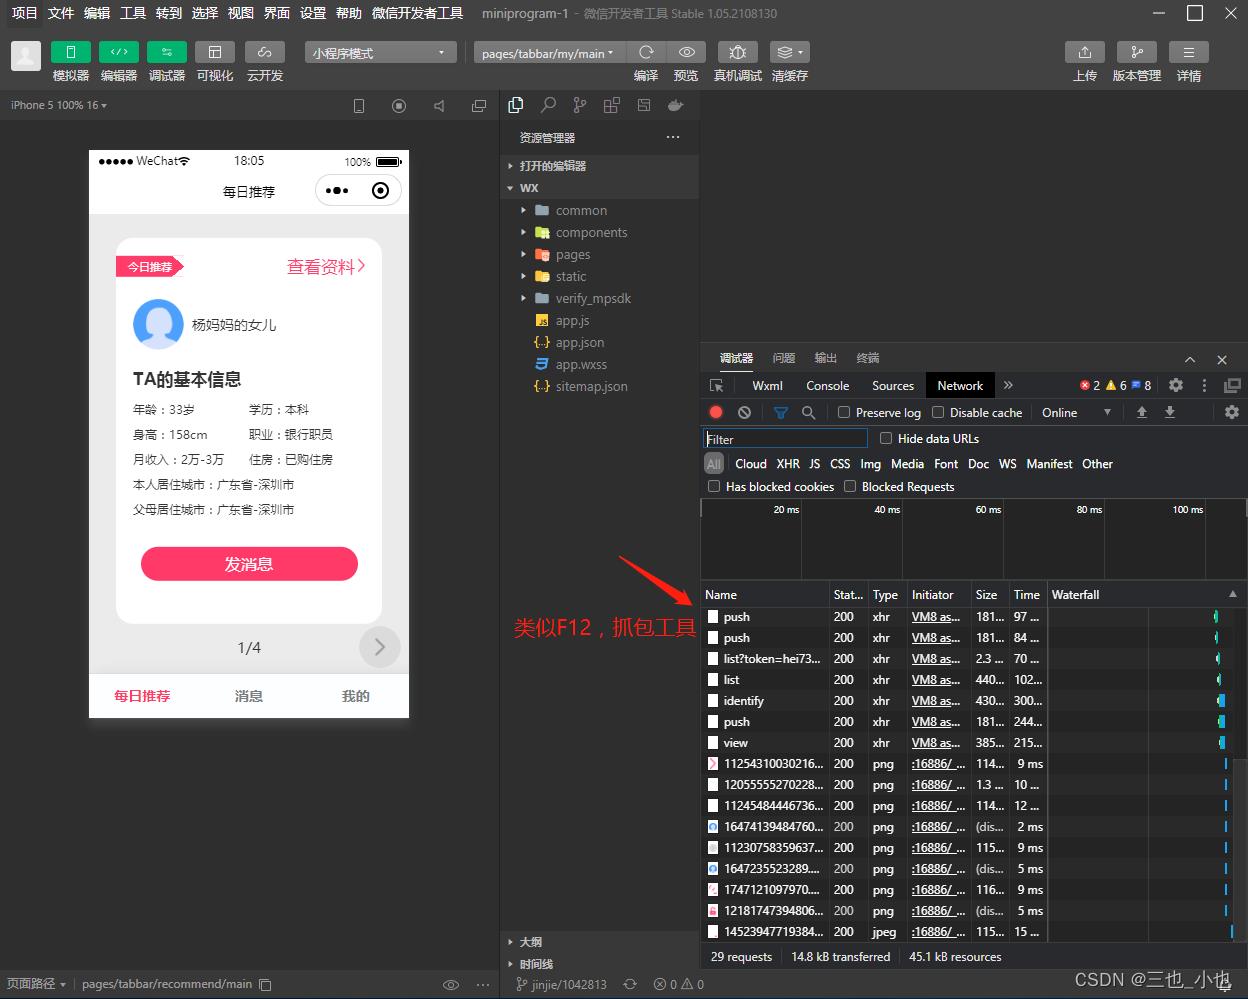
小程序内抓包:
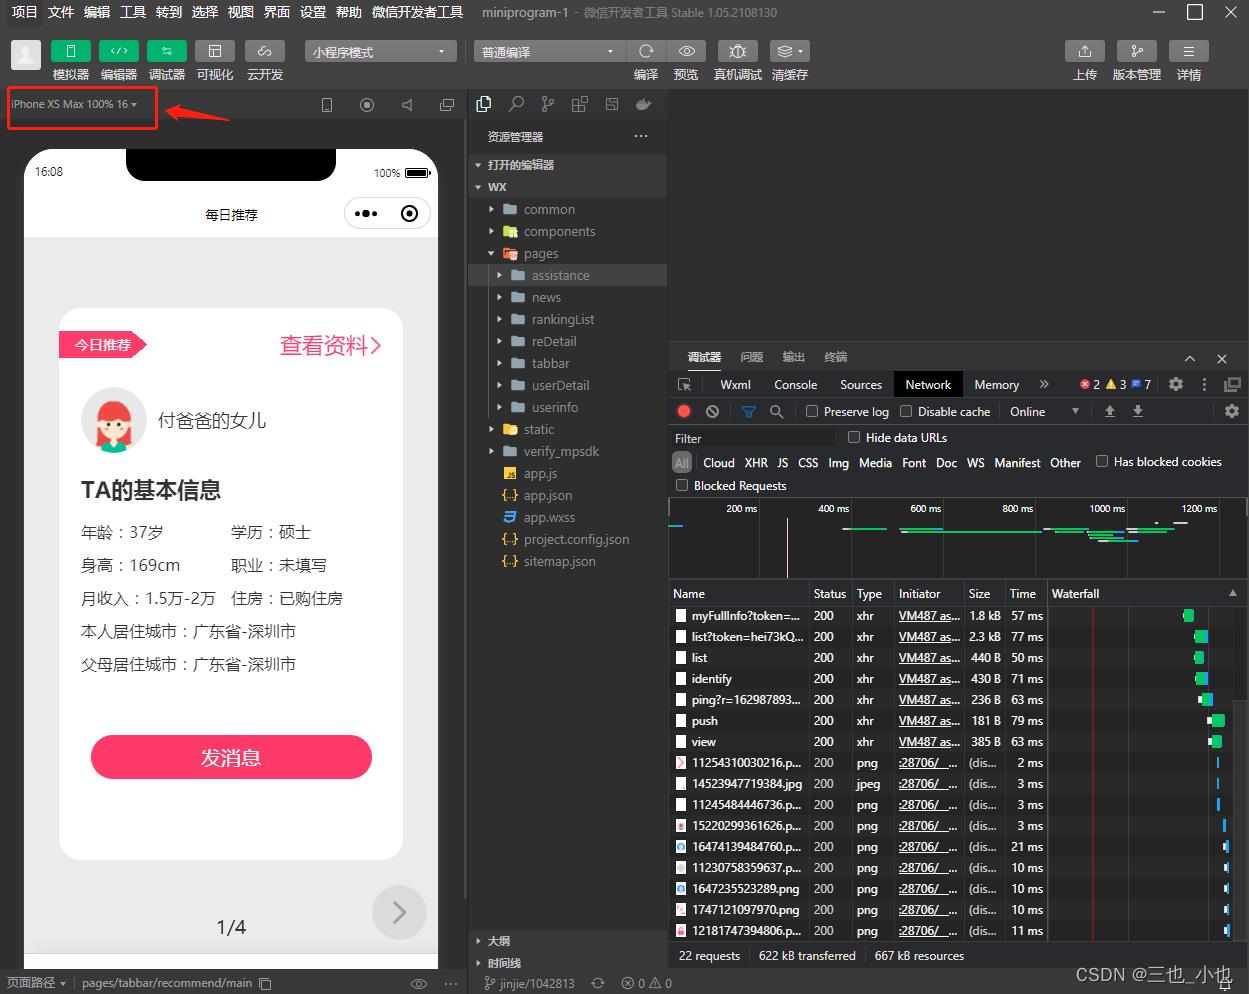
机型切换测试兼容:
三种编译模式:
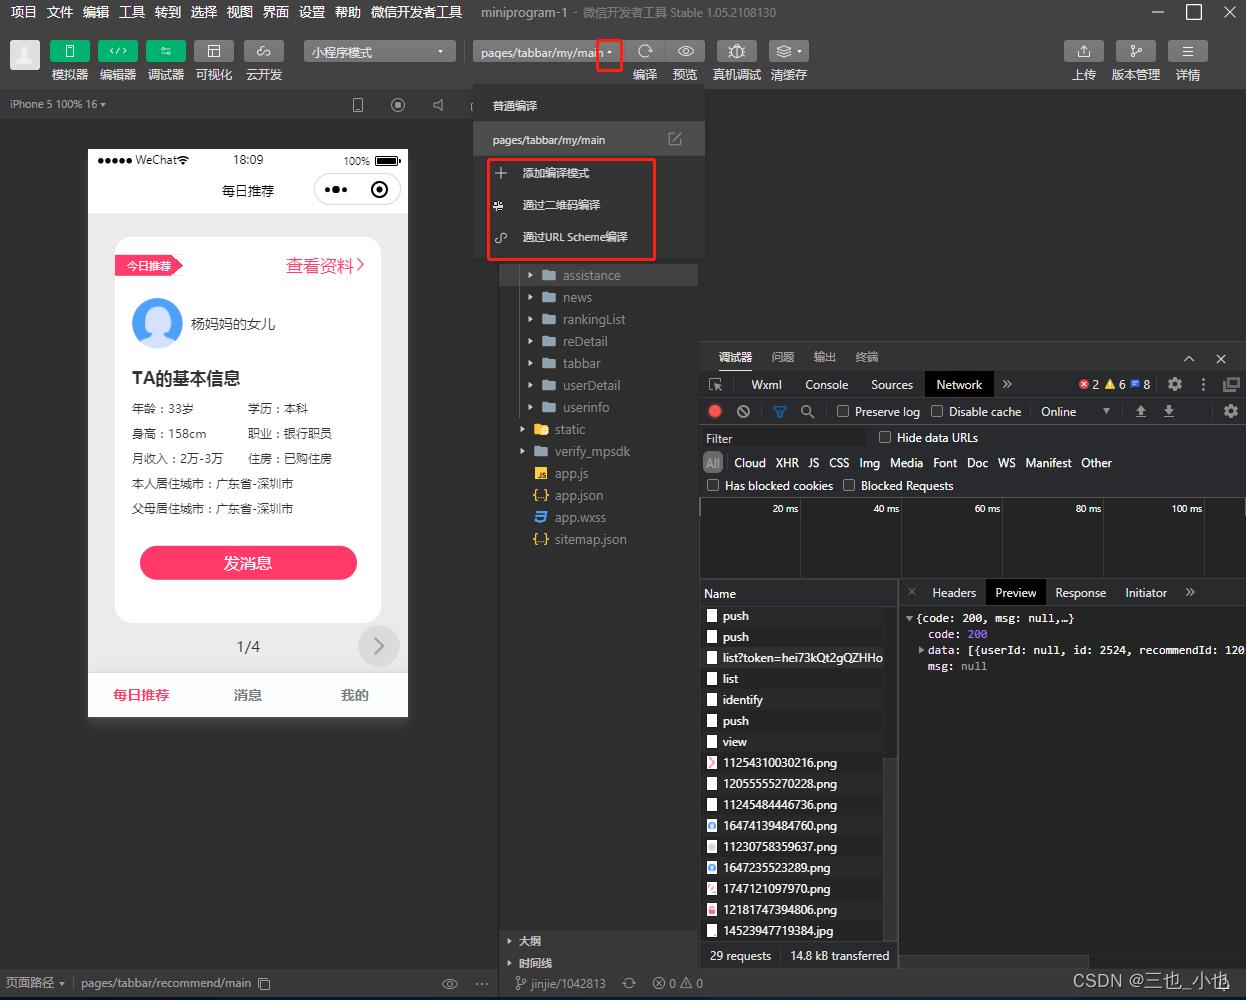
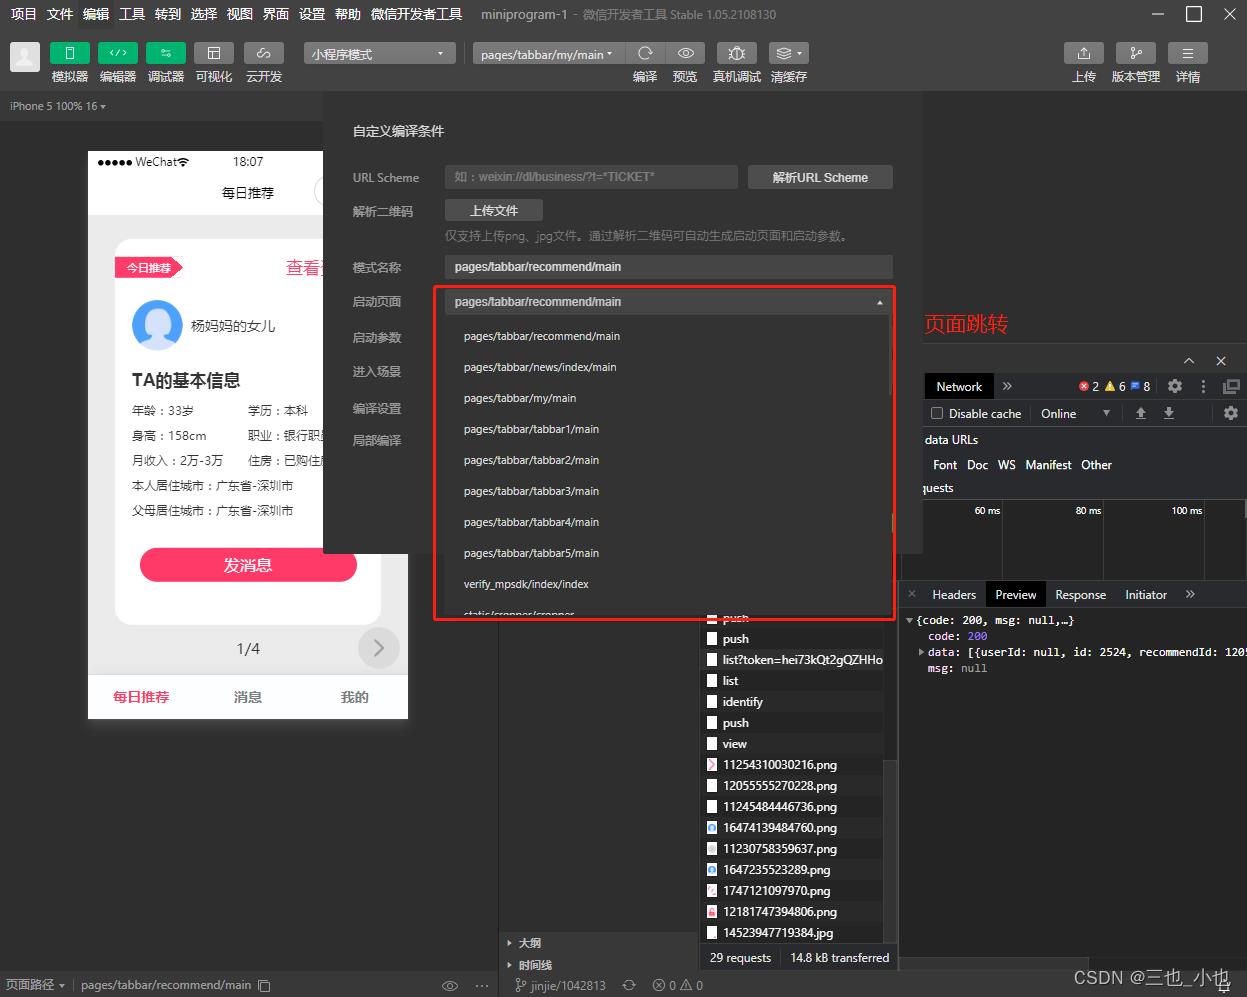
页面测试,可以在这里直接跳转:
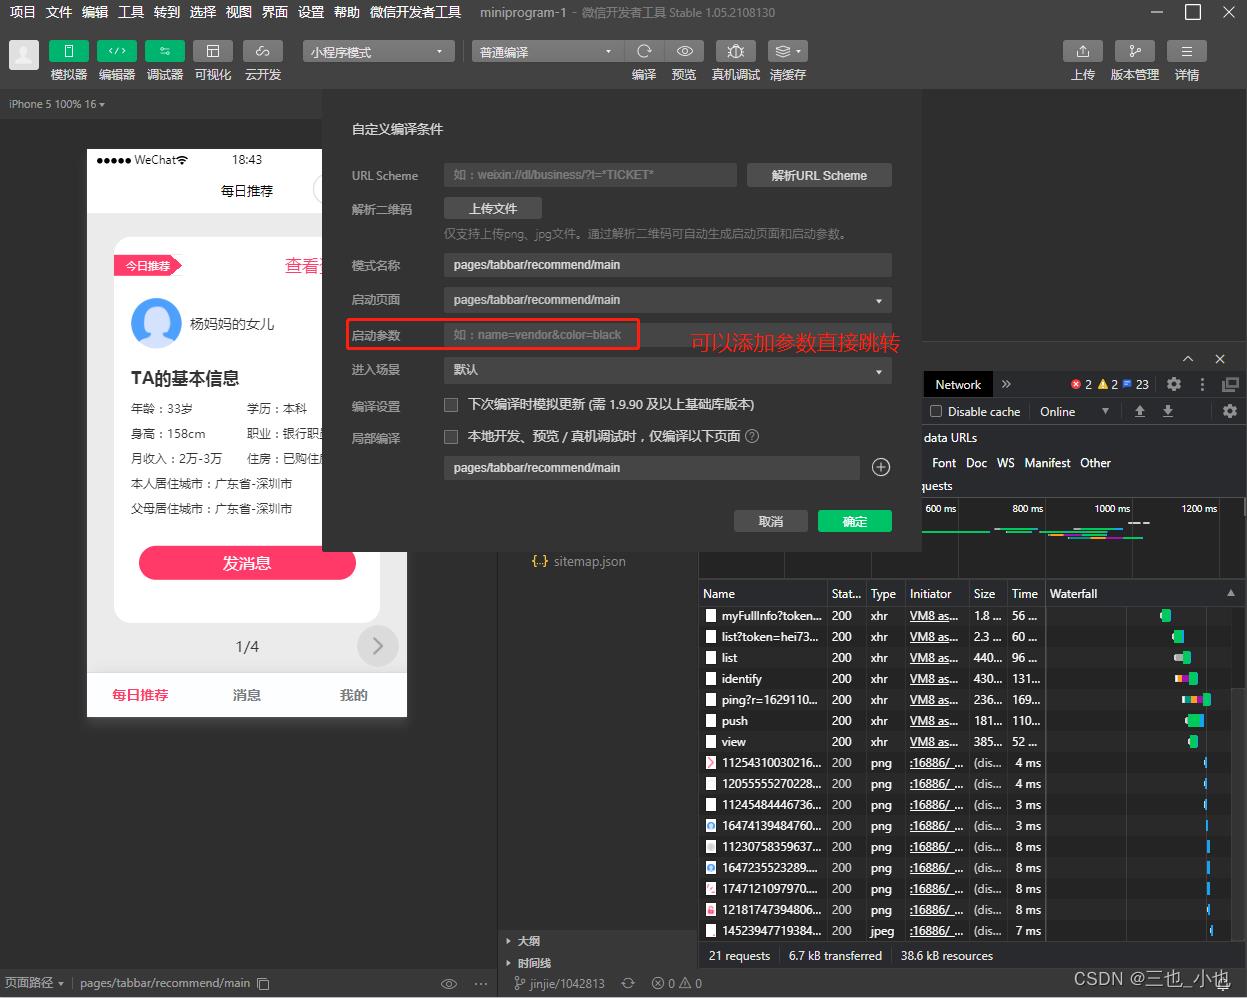
链接添加参数直接跳转:
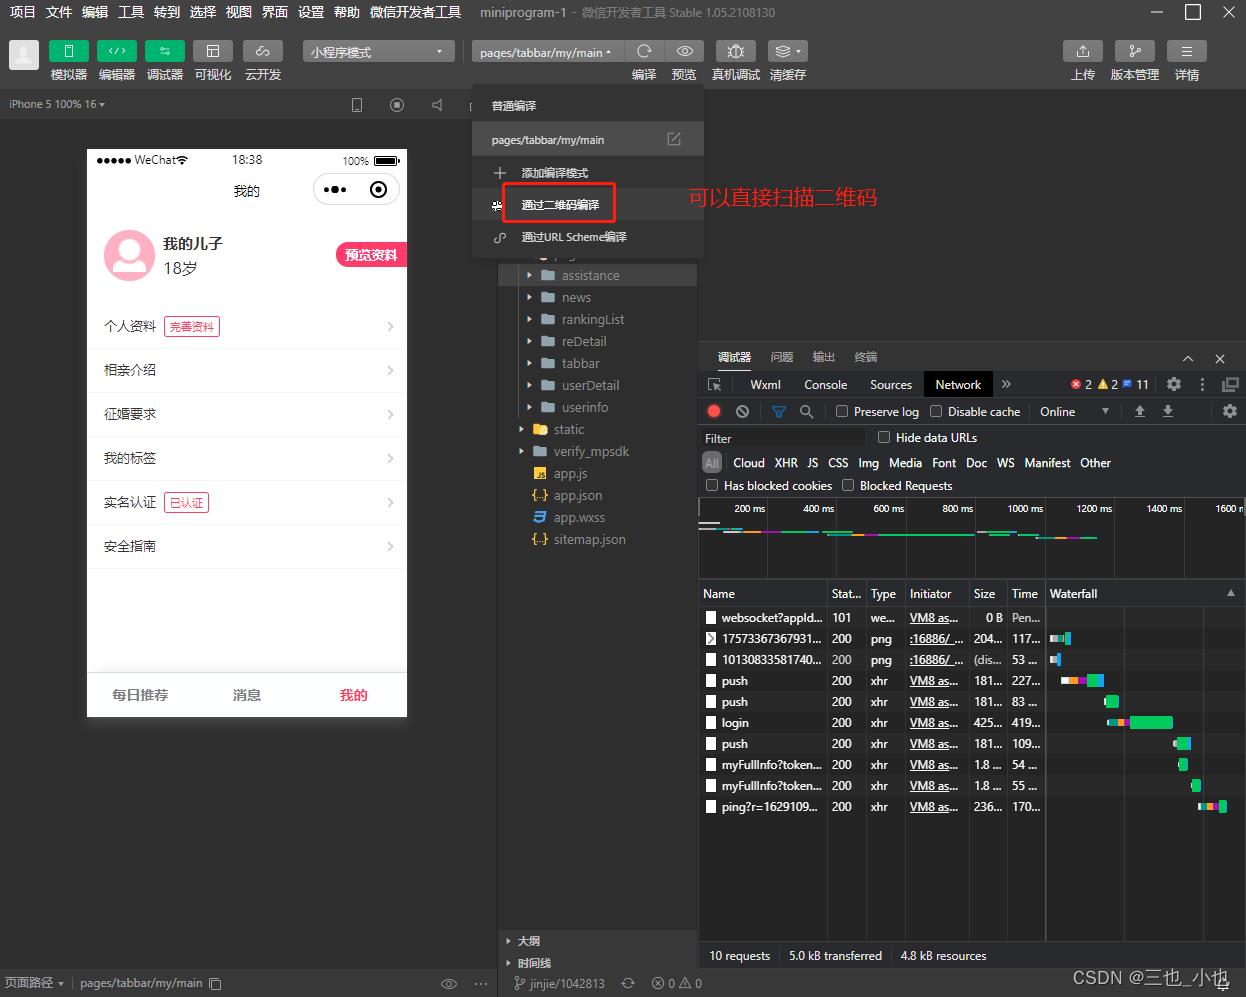
扫描二维码跳转:
真机调试:
1、需要对应真机登录已开通开发者权限的账号
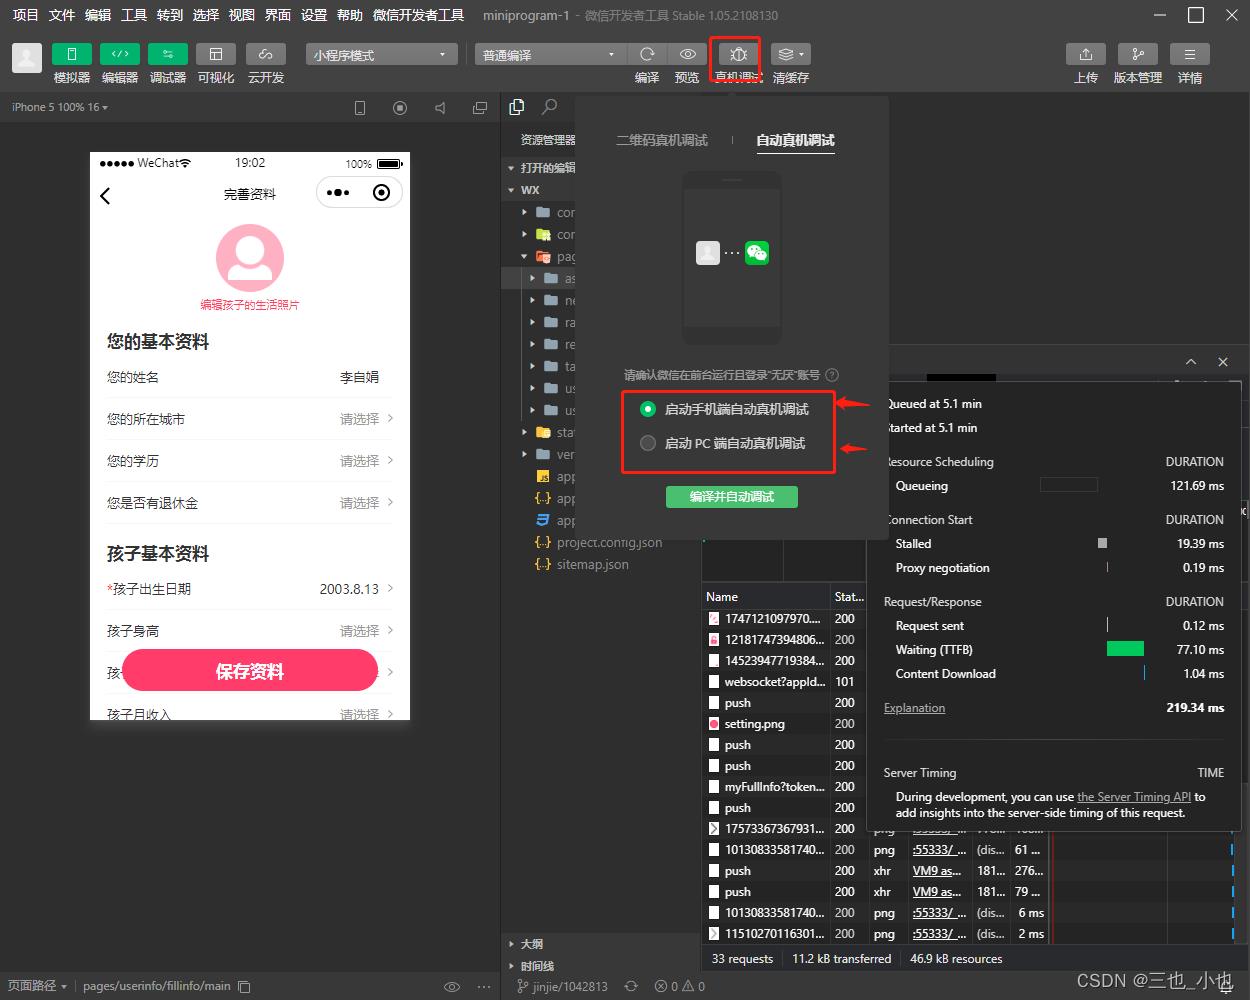
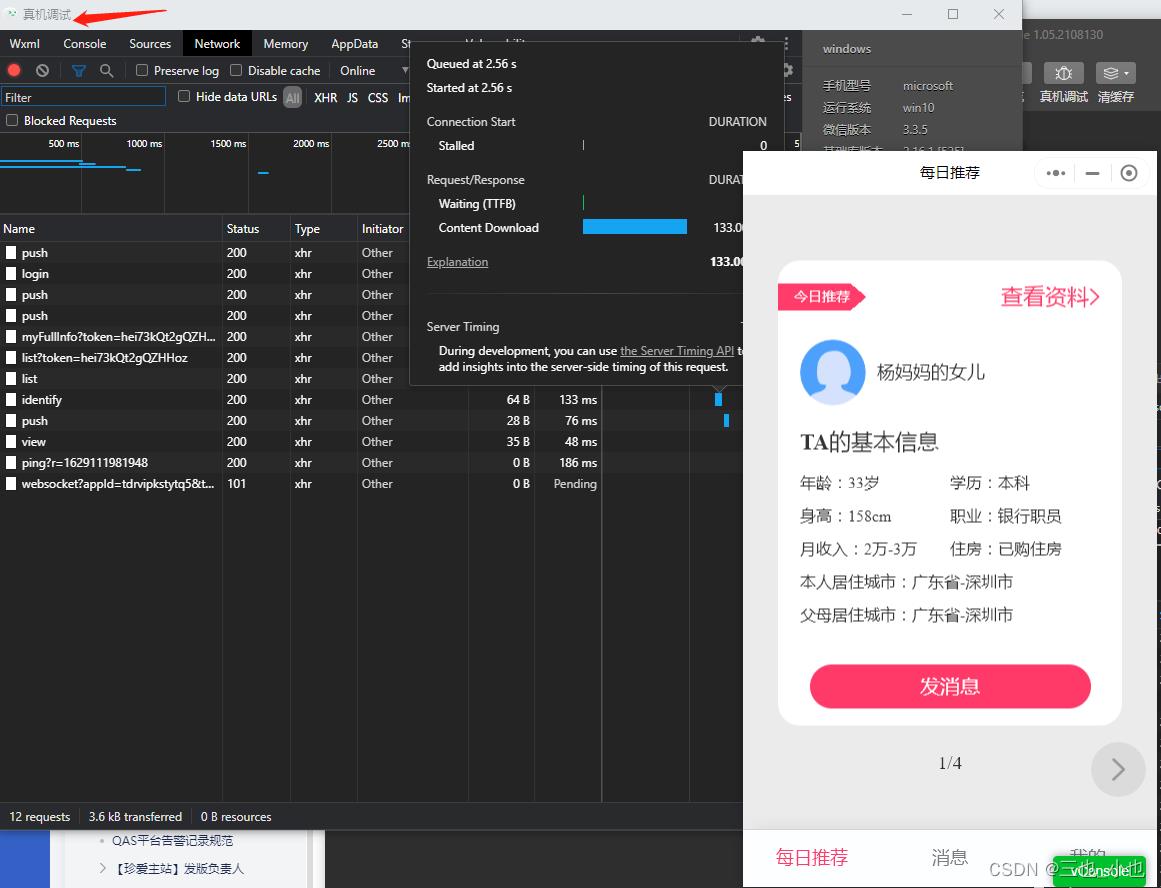
2、PC端真机调试:
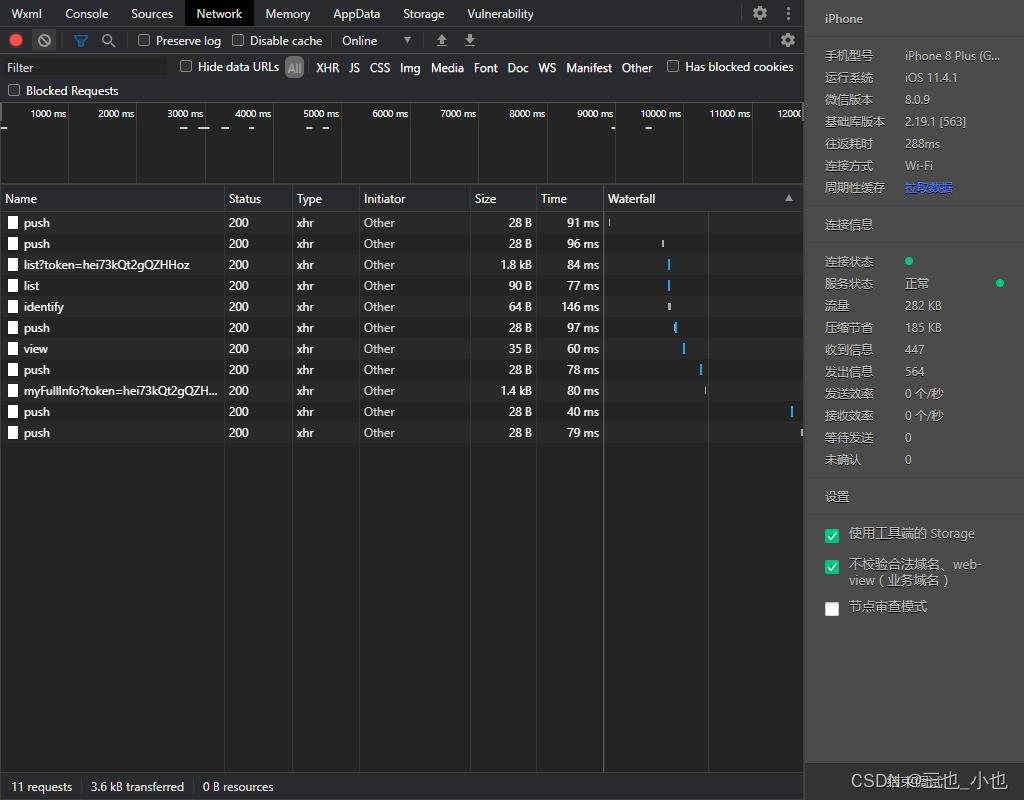
3、手机端真机调试:
《scrollTop VS scrollLeft 之微信小程序》
背景
公司使用微信小程序来开发公司的一个产品,有幸参与到其中。在最近的一次迭代中,体验优化有这样一个点,点击类目时,分别实现横向滚动和纵向滚动的中间定位:
技术方案
横向滚动
一、wxml-核心代码
    <scroll-view
      class="showFold ? 'subC-top-nav-fold' : 'subC-top-nav'"
      enhanced="true"
      bounces="true"
      scroll-anchoring="true"
      scroll-x="true"
      scroll-with-animation="true"
      scroll-animation-duration="100"
      enable-flex="true"
      scroll-left="scrollLeft"
    >
      <view class="subC-container">
        <view
          class="subC-content"
          wx:for="subList"
          wx:key="id"
          id="tab_item.id"
          data-item="item"
          data-key="secondarycategorylist-currentInfo.categoryId-item.id"
          catchtap="changeSubCategory(item,index)"
        >
          <view class="tabs-item g-column g-center report-expo">
            <image class="currentInfo.subCategoryId == item.id ? 'image-selected' : 'item-image'" mode="aspectFit" src="item.picUrl"></image>
            <text class="currentInfo.subCategoryId == item.id ? 'item-text-selected': 'item-text'"> item.name </text>
          </view>
        </view>
      </view>
    </scroll-view>
二、wxs-核心代码
    changeSubCategory(item, index)
      // 计算横向滚动位置
      this.computedScrollLeft(index)
    ,
    // 计算横向滚动位置
    computedScrollLeft(index)
      const windowWidth = getApp().globalData.ww
      if (this.subList.length > 3)
        if (index < 2)
          this.scrollLeft = 0
         else
          this.scrollLeft = ((index - 2) * 134 * windowWidth) / 750


    ,
纵向滚动
一、wxml-核心代码
    <scroll-view
      class="leftNav-area"
      style="width: 100%; height: 100%"
      enhanced="true"
      bounces="true"
      scroll-with-animation="true"
      scroll-anchoring="true"
      scroll-animation-duration="100"
      scroll-y="true"
      scroll-top="scrollTop"
    >
      <view
        wx:for="categorys"
        wx:key="categoryCityId"
        class="topC-leftNav-item item.categoryCityId === currentCategoryCityId? 'focus' : ''"
        id="category_item.id"
        data-index="index"
        catchtap="selectNav(item, index)"
        data-item="item"
        data-activeIndex="index"
      >
        <view class="focus-slide"></view>
        <image class="topC-leftNav-item-icon" wx:if="item.iconUrl" src="item.iconUrl"></image>
        <text> item.name </text>
        <view class="corner top-corner"></view>
        <view class="corner bottom-corner"></view>
      </view>
      <view class="topcClass" wx:class="currentCategoryCityId === bottomCategoryCityId ? 'settle-bar-radius': ''"></view>
    </scroll-view>
二、wxs-核心代码
    selectNav(item, index)
      // 计算纵向滚动位置
      this.computeMidScrollTop(index)
    ,
    // 计算纵向滚动位置
    computeMidScrollTop(index)
      // 滚动位置---------------start---------------------------------
      const windowHeight = getApp().globalData.hh
      const midIndex = Math.floor((windowHeight - 130) / (46 * 2))
      const leftCategroy = this.categorys.length - index + 1
      if (index < midIndex && leftCategroy > index)
        this.scrollTop = 0
       else
        this.scrollTop = (index + 1 - midIndex) * 60
思考
需要注意的是,在微信小程序开发,需要有rpx和px的换算
最初的实现方案是:https://www.cnblogs.com/langxiyu/p/13159055.html,「在本项目中由于兼容性,放弃掉」
实现原理是:
效果一: 可直接使用 scroll-into-view 属性实现 或者 也可使用 scroll-left
思路:第一种, scroll-into-view 绑定一个动态 ID,子元素循环产出ID,点击时进行绑定(这次就不做代码产出了)
第二种, 计算每个子元素的宽度,点击时获取当前点击元素前面的元素宽度之和
效果二:使用 scroll-left
思路:计算每个子元素的宽度,点击时获取当前点击元素索引 - 1 的前面元素宽度之和,相比于效果一的第二种情况,这里少算当前点击元素前面的一个元素的宽度,实现留一
效果三:使用 scroll-left
思路:当前点击子元素距离左边栏的距离 - scroll-view 宽度的一半 + 当前点击子元素一半的宽度 实现居中展示
以上是关于小程序测试之微信开发者工具的主要内容,如果未能解决你的问题,请参考以下文章