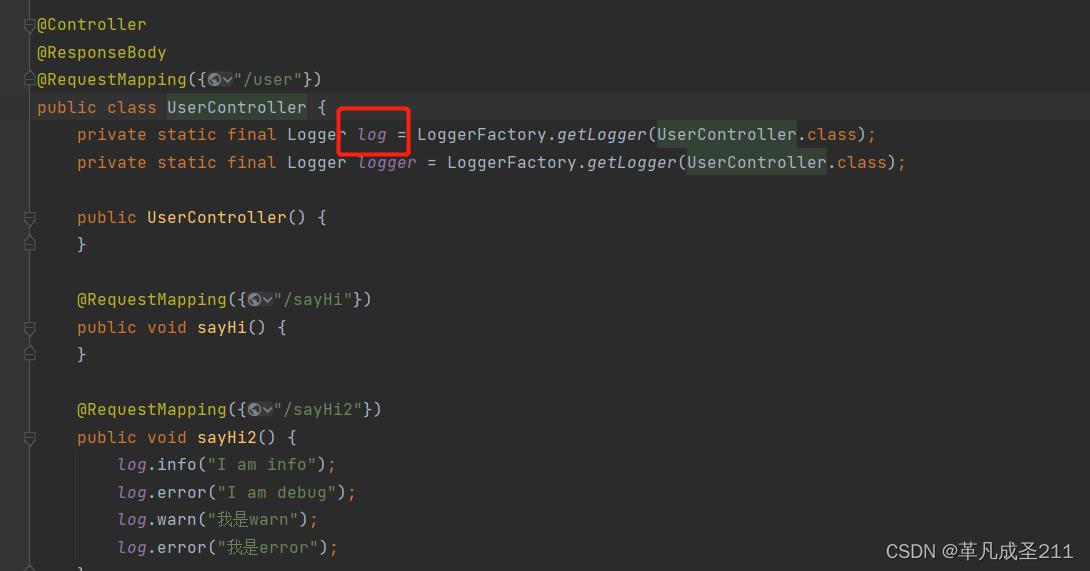
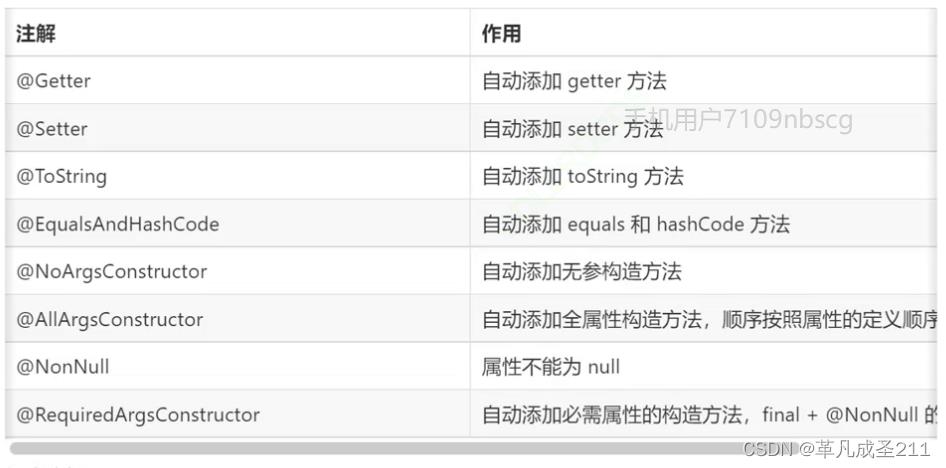
在本篇文章中不会详细介绍日志如何配置、如果切换另外一种日志工具之类的内容,只用于记录作者本人在工作过程中对日志的几种处理方式。
1. Debug 日志管理
在开发的过程中,总会遇到各种莫名其妙的问题,而这些问题的定位一般会使用到两种方式,第一种是通过手工 Debug 代码,第二种则是直接查看日志输出。Debug 代码这种方式只能在 IDE 下使用,一旦程序移交部署,就只能通过日志来跟踪定位了。
在测试环境下,我们无法使用 Debug 代码来定位问题,所以这时候需要记录所有请求的参数及对应的响应报文。而在 数据交互篇 中,我们将请求及响应的格式都定义成了Json,而且传输的数据还是存放在请求体里面。而请求体对应在 HttpServletRequest 里面又只是一个输入流,这样的话,就无法在过滤器或者拦截器里面去做日志记录了,而必须要等待输入流转换成请求模型后(响应对象转换成输出流前)做数据日志输出。
有目标那就好办了,只需要找到转换发生的地方就可以植入我们的日志了。通过源码的阅读,终于在 AbstractMessageConverterMethodArgumentResolver 个类中发现了我们的期望的那个地方,对于请求模型的转换,实现代码如下:
@SuppressWarnings("unchecked")
protected <T> Object readWithMessageConverters(HttpInputMessage inputMessage, MethodParameter parameter,
        Type targetType) throws IOException, HttpMediaTypeNotSupportedException, HttpMessageNotReadableException {

    MediaType contentType;
    boolean noContentType = false;
    try {
        contentType = inputMessage.getHeaders().getContentType();
    }
    catch (InvalidMediaTypeException ex) {
        throw new HttpMediaTypeNotSupportedException(ex.getMessage());
    }
    if (contentType == null) {
        noContentType = true;
        contentType = MediaType.APPLICATION_OCTET_STREAM;
    }

    Class<?> contextClass = (parameter != null ? parameter.getContainingClass() : null);
    Class<T> targetClass = (targetType instanceof Class ? (Class<T>) targetType : null);
    if (targetClass == null) {
        ResolvableType resolvableType = (parameter != null ?
                ResolvableType.forMethodParameter(parameter) : ResolvableType.forType(targetType));
        targetClass = (Class<T>) resolvableType.resolve();
    }

    HttpMethod httpMethod = ((HttpRequest) inputMessage).getMethod();
    Object body = NO_VALUE;

    try {
        inputMessage = new EmptyBodyCheckingHttpInputMessage(inputMessage);

        for (HttpMessageConverter<?> converter : this.messageConverters) {
            Class<HttpMessageConverter<?>> converterType = (Class<HttpMessageConverter<?>>) converter.getClass();
            if (converter instanceof GenericHttpMessageConverter) {
                GenericHttpMessageConverter<?> genericConverter = (GenericHttpMessageConverter<?>) converter;
                if (genericConverter.canRead(targetType, contextClass, contentType)) {
                    if (logger.isDebugEnabled()) {
                        logger.debug("Read [" + targetType + "] as \"" + contentType + "\" with [" + converter + "]");
                    }
                    if (inputMessage.getBody() != null) {
                        inputMessage = getAdvice().beforeBodyRead(inputMessage, parameter, targetType, converterType);
                        body = genericConverter.read(targetType, contextClass, inputMessage);
                        body = getAdvice().afterBodyRead(body, inputMessage, parameter, targetType, converterType);
                    }
                    else {
                        body = getAdvice().handleEmptyBody(null, inputMessage, parameter, targetType, converterType);
                    }
                    break;
                }
            }
            else if (targetClass != null) {
                if (converter.canRead(targetClass, contentType)) {
                    if (logger.isDebugEnabled()) {
                        logger.debug("Read [" + targetType + "] as \"" + contentType + "\" with [" + converter + "]");
                    }
                    if (inputMessage.getBody() != null) {
                        inputMessage = getAdvice().beforeBodyRead(inputMessage, parameter, targetType, converterType);
                        body = ((HttpMessageConverter<T>) converter).read(targetClass, inputMessage);
                        body = getAdvice().afterBodyRead(body, inputMessage, parameter, targetType, converterType);
                    }
                    else {
                        body = getAdvice().handleEmptyBody(null, inputMessage, parameter, targetType, converterType);
                    }
                    break;
                }
            }
        }
    }
    catch (IOException ex) {
        throw new HttpMessageNotReadableException("Could not read document: " + ex.getMessage(), ex);
    }

    if (body == NO_VALUE) {
        if (httpMethod == null || !SUPPORTED_METHODS.contains(httpMethod) ||
                (noContentType && inputMessage.getBody() == null)) {
            return null;
        }
        throw new HttpMediaTypeNotSupportedException(contentType, this.allSupportedMediaTypes);
    }

    return body;
}
上面的代码中有一处非常重要的地方,那就在在数据转换前后都存在 Advice 相关的方法调用,显然,只需要在 Advice 里面完成日志记录就可以了,下面开始实现自定义 Advice。
首先,请求体日志切面 LogRequestBodyAdvice 实现如下:
@ControllerAdvice
public class LogRequestBodyAdvice implements RequestBodyAdvice {

    private Logger logger = LoggerFactory.getLogger(LogRequestBodyAdvice.class);

    @Override
    public boolean supports(MethodParameter methodParameter, Type targetType,
                            Class<? extends HttpMessageConverter<?>> converterType) {
        return true;
    }

    @Override
    public Object handleEmptyBody(Object body, HttpInputMessage inputMessage,
                                  MethodParameter parameter, Type targetType,
                                  Class<? extends HttpMessageConverter<?>> converterType) {
        return body;
    }

    @Override
    public HttpInputMessage beforeBodyRead(HttpInputMessage inputMessage,
                                           MethodParameter parameter, Type targetType,
                                           Class<? extends HttpMessageConverter<?>> converterType) throws IOException {
        return inputMessage;
    }

    @Override
    public Object afterBodyRead(Object body, HttpInputMessage inputMessage,
                                MethodParameter parameter, Type targetType,
                                Class<? extends HttpMessageConverter<?>> converterType) {
        Method method = parameter.getMethod();
        String classMappingUri = getClassMappingUri(method.getDeclaringClass());
        String methodMappingUri = getMethodMappingUri(method);
        if (!methodMappingUri.startsWith("/")) {
            methodMappingUri = "/" + methodMappingUri;
        }
        logger.debug("uri={} | requestBody={}", classMappingUri + methodMappingUri, JSON.toJSONString(body));
        return body;
    }

    private String getMethodMappingUri(Method method) {
        RequestMapping methodDeclaredAnnotation = method.getDeclaredAnnotation(RequestMapping.class);
        return methodDeclaredAnnotation == null ? "" : getMaxLength(methodDeclaredAnnotation.value());
    }

    private String getClassMappingUri(Class<?> declaringClass) {
        RequestMapping classDeclaredAnnotation = declaringClass.getDeclaredAnnotation(RequestMapping.class);
        return classDeclaredAnnotation == null ? "" : getMaxLength(classDeclaredAnnotation.value());
    }

    private String getMaxLength(String[] strings) {
        String methodMappingUri = "";
        for (String string : strings) {
            if (string.length() > methodMappingUri.length()) {
                methodMappingUri = string;
            }
        }
        return methodMappingUri;
    }
}
得到日志记录如下:
2017-05-02 22:48:15.435 DEBUG 888 --- [nio-8080-exec-1] c.q.funda.advice.LogRequestBodyAdvice    : uri=/sys/user/login |
requestBody={"password":"123","username":"123"}
对应的,响应体日志切面 LogResponseBodyAdvice 实现如下:
@ControllerAdvice
public class LogResponseBodyAdvice implements ResponseBodyAdvice {

    private Logger logger = LoggerFactory.getLogger(LogResponseBodyAdvice.class);

    @Override
    public boolean supports(MethodParameter returnType, Class converterType) {
        return true;
    }

    @Override
    public Object beforeBodyWrite(Object body, MethodParameter returnType, MediaType selectedContentType, Class selectedConverterType, ServerHttpRequest request, ServerHttpResponse response) {
        logger.debug("uri={} | responseBody={}", request.getURI().getPath(), JSON.toJSONString(body));
        return body;
    }
}
得到日志记录如下:
2017-05-02 22:48:15.520 DEBUG 888 --- [nio-8080-exec-1] c.q.funda.advice.LogResponseBodyAdvice   : uri=/sys/user/login |
responseBody={"code":10101,"msg":"手机号格式不合法"}
2. 异常日志管理
Debug 日志只适用于开发及测试阶段,一般应用部署生产,鉴于日志里面的敏感信息过多,往往只会在程序出现异常时输出明细的日志信息,在 ExceptionHandler 标注的方法里面输入异常日志无疑是最好的,但摆在面前的一个问题是,如何将 @RequestBody 绑定的 Model 传递给异常处理方法?我想到的是通过 ThreadLocal 这个线程本地变量来存储每一次请求的 Model,这样就可以贯穿整个请求处理流程,下面使用 ThreadLocal 来协助完成异常日志的记录。
在绑定时,将绑定 Model 有存放到 ThreadLocal:
@RestController
@RequestMapping("/sys/user")
public class UserController {

    public static final ThreadLocal<Object> MODEL_HOLDER = new ThreadLocal<>();

    @InitBinder
    public void initBinder(WebDataBinder webDataBinder) {
        MODEL_HOLDER.set(webDataBinder.getTarget());
    }

}
异常处理时,从 ThreadLocal 中取出变量,并做相应的日志输出:
@ControllerAdvice
@ResponseBody
public class ExceptionHandlerAdvice {

    private Logger logger = LoggerFactory.getLogger(ExceptionHandlerAdvice.class);

    @ExceptionHandler(Exception.class)
    public Result handleException(Exception e, HttpServletRequest request) {
        logger.error("uri={} | requestBody={}", request.getRequestURI(),
                JSON.toJSONString(UserController.MODEL_HOLDER.get()));
        return new Result(ResultCode.WEAK_NET_WORK);
    }

}
当异常产生时,输出日志如下:
2017-05-03 21:46:07.177 ERROR 633 --- [nio-8080-exec-1] c.q.funda.advice.ExceptionHandlerAdvice  : uri=/sys/user/login |
requestBody={"password":"123","username":"13632672222"}
注意:当 Mapping 方法中带有多个参数时,需要将 @RequestBody 绑定的变量当作方法的最后一个参数,否则 ThreadLocal 中的值将会被其它值所替换。如果需要输出 Mapping 方法中所有参数,可以在 ThreadLocal 里面存放一个 Map 集合。
项目的 github 地址:https://github.com/qchery/funda
原文地址:http://blog.csdn.net/chinrui/article/details/71056847


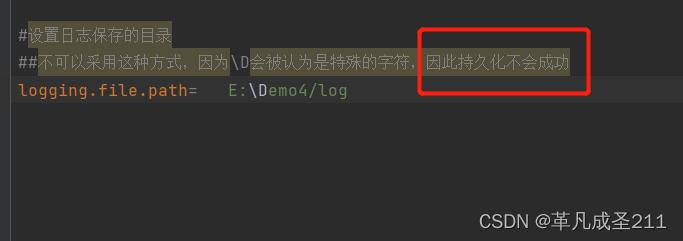

 如果真的想改成"\\"的形式来进行保存,那么就需要使用到转义:
