Mac系统homebrew安装MySQL等环境
Posted 程序员允诺
tags:
篇首语:本文由小常识网(cha138.com)小编为大家整理,主要介绍了Mac系统homebrew安装MySQL等环境相关的知识,希望对你有一定的参考价值。
MacOS 安装 Homebrew
Homebrew 是苹果系统的扩展包安装工具,可以以非常优雅的方式安装 MariaDB,Redis、等工具。下面就是安装Homebrew的教程,本教程使用国内的清华镜像作为Homebrew镜像源,这样可以改善软件下载速度,提升使用体验。
1 首先需要安装Command Line Tools (CLT) for Xcode
安装Command Line Tools (CLT) for Xcode的目的是为MacOS添加命令工具:git 和 curl
打开Mac的终端

在终端中输入命令,安装Command Line Tools (CLT) for Xcode
xcode-select --install

2 安装Homebrew
在终端输入以下几行命令设置环境变量,设定使用清华Homebrew镜像源:
export HOMEBREW_BREW_GIT_REMOTE="https://mirrors.tuna.tsinghua.edu.cn/git/homebrew/brew.git"
export HOMEBREW_CORE_GIT_REMOTE="https://mirrors.tuna.tsinghua.edu.cn/git/homebrew/homebrew-core.git"
export HOMEBREW_BOTTLE_DOMAIN="https://mirrors.tuna.tsinghua.edu.cn/homebrew-bottles"
然后,在终端运行以下命令以安装 Homebrew:
# 从清华镜像下载安装脚本并安装 Homebrew
git clone --depth=1 https://mirrors.tuna.tsinghua.edu.cn/git/homebrew/install.git brew-install
/bin/bash brew-install/install.sh
rm -rf brew-install
3 Apple Silicon CPU 设备上的 macOS 系统
如果您设备是Apple Silicon CPU 设备上的 macOS 系统,则需要设置进行如下设置,如果是Intel CPU 系统则跳过这步。
在终端输入命令检查处理器类型:
uname -m
如果得到:
arm64
则说明您使用的是 Apple Silicon CPU 设备上的 macOS 系统(ARM 处理器)需要进行如下设置:
test -r ~/.bash_profile && echo 'eval "$(/opt/homebrew/bin/brew shellenv)"' >> ~/.bash_profile
test -r ~/.zprofile && echo 'eval "$(/opt/homebrew/bin/brew shellenv)"' >> ~/.zprofile
对基于 Intel CPU 设备上的 macOS 系统(命令行运行 uname -m 应输出 x86_64)的用户可跳过本步。
4 替换现有仓库
Homebrew默认仓库在境外,访问非常慢,替换为国内镜像仓库可以大大加快访问速度,这里设置是是清华镜像仓库,可以替换 brew 程序本身的源:
# 或使用下面的几行命令自动设置
export HOMEBREW_CORE_GIT_REMOTE="https://mirrors.tuna.tsinghua.edu.cn/git/homebrew/homebrew-core.git"
for tap in core cask,-fonts,-drivers,-versions command-not-found; do
    brew tap --custom-remote --force-auto-update "homebrew/$tap" "https://mirrors.tuna.tsinghua.edu.cn/git/homebrew/homebrew-$tap.git"
done
brew update
然后设置系统环境变量,如果用户设置了环境变量 HOMEBREW_BREW_GIT_REMOTE 和 HOMEBREW_CORE_GIT_REMOTE,则每次执行 brew update 时,brew 程序本身和 Core Tap (homebrew-core) 的远程将被自动设置。推荐用户将这两个环境变量设置加入 shell 的 profile 设置中:
test -r ~/.bash_profile && echo 'export HOMEBREW_BREW_GIT_REMOTE="https://mirrors.tuna.tsinghua.edu.cn/git/homebrew/brew.git"' >> ~/.bash_profile  # bash
test -r ~/.bash_profile && echo 'export HOMEBREW_CORE_GIT_REMOTE="https://mirrors.tuna.tsinghua.edu.cn/git/homebrew/homebrew-core.git"' >> ~/.bash_profile
test -r ~/.bash_profile && echo 'export HOMEBREW_BOTTLE_DOMAIN="https://mirrors.tuna.tsinghua.edu.cn/homebrew-bottles"' >> ~/.bash_profile
test -r ~/.profile && echo 'export HOMEBREW_BREW_GIT_REMOTE="https://mirrors.tuna.tsinghua.edu.cn/git/homebrew/brew.git"' >> ~/.profile
test -r ~/.profile && echo 'export HOMEBREW_CORE_GIT_REMOTE="https://mirrors.tuna.tsinghua.edu.cn/git/homebrew/homebrew-core.git"' >> ~/.profile
test -r ~/.profile && echo 'export HOMEBREW_BOTTLE_DOMAIN="https://mirrors.tuna.tsinghua.edu.cn/homebrew-bottles"' >> ~/.profile
test -r ~/.zprofile && echo 'export HOMEBREW_BREW_GIT_REMOTE="https://mirrors.tuna.tsinghua.edu.cn/git/homebrew/brew.git"' >> ~/.zprofile
test -r ~/.zprofile && echo 'export HOMEBREW_CORE_GIT_REMOTE="https://mirrors.tuna.tsinghua.edu.cn/git/homebrew/homebrew-core.git"' >> ~/.zprofile
test -r ~/.zprofile && echo 'export HOMEBREW_BOTTLE_DOMAIN="https://mirrors.tuna.tsinghua.edu.cn/homebrew-bottles"' >> ~/.zprofile
如果您熟悉 vim 等编辑名,您可以手动编辑 .zprofile .profile 和 .bash_profile文件。
如果您使用的是 zsh 编辑.zprofile即可
MacOS 利用homebrew安装mysql
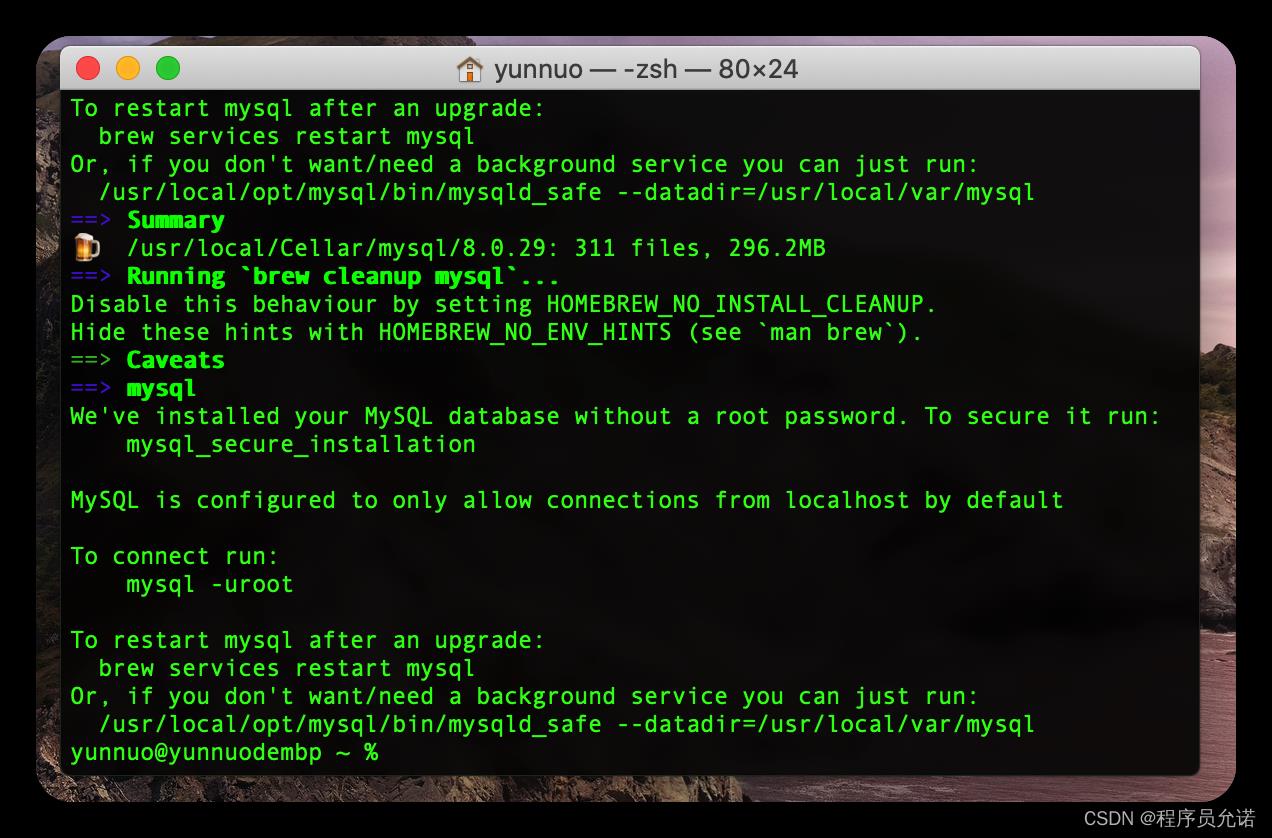
1.安装mysql 终端执行下面命令
使用homebrew一键安装相应的包,因为homebrew会检测最新的版本,所以下载的mysql版本是5.7.*版本
最近安装的时候最新版本更新到8.x版本
homebrew install mysql

2.设置及修改密码 终端执行下面命令
mysql_secure_installation
执行后会有一系列操作,如下
~ git:(master) ✗ mysql_secure_installation

Securing the MySQL server deployment.

Enter password for user root:

VALIDATE PASSWORD COMPONENT can be used to test passwords
and improve security. It checks the strength of password
and allows the users to set only those passwords which are
secure enough. Would you like to setup VALIDATE PASSWORD component?

Press y|Y for Yes, any other key for No: No
Using existing password for root.
Change the password for root ? ((Press y|Y for Yes, any other key for No) : No

 ... skipping.
By default, a MySQL installation has an anonymous user,
allowing anyone to log into MySQL without having to have
a user account created for them. This is intended only for
testing, and to make the installation go a bit smoother.
You should remove them before moving into a production
environment.

Remove anonymous users? (Press y|Y for Yes, any other key for No) : y
Success.


Normally, root should only be allowed to connect from
'localhost'. This ensures that someone cannot guess at
the root password from the network.

Disallow root login remotely? (Press y|Y for Yes, any other key for No) : No

 ... skipping.
By default, MySQL comes with a database named 'test' that
anyone can access. This is also intended only for testing,
and should be removed before moving into a production
environment.


Remove test database and access to it? (Press y|Y for Yes, any other key for No) : y
 - Dropping test database...
Success.

 - Removing privileges on test database...
Success.

Reloading the privilege tables will ensure that all changes
made so far will take effect immediately.

Reload privilege tables now? (Press y|Y for Yes, any other key for No) : y
Success.

All done!
【重置MySQL密码】
1、进入mysql的bin路径
#下面路径可能不太一样,请自行检查
cd /usr/local/Cellar/mysql@5.7/5.7.38/bin
#没有通过homebrew安装的路径可能如下
cd /usr/local/mysql/bin
2、停止mysql服务
#此步没有通过homebrew安装的可以在设置里面停止
./mysql.server stop
3、开启mysql安全模式
#执行下面命令验证管理员身份
sudo su
#安全模式
./mysqld_safe --skip-grant-tables &
4、进入mysql
mysql -uroot -p
#如果仍然输入密码直接回车
5、更改mysql密码
#逐行执行
use mysql
flush privileges;
#设置新密码
ALTER USER 'root'@'localhost' IDENTIFIED BY '新密码';
flush privileges;
6、重启mysql服务
./mysql.server stop
./mysql.server start
【Brew 卸载MySql】
brew remove mysql
brew cleanup
launchctl unload -w ~/Library/LaunchAgents/com.mysql.mysqld.plist
rm ~/Library/LaunchAgents/com.mysql.mysqld.plist
sudo rm -rf /usr/local/var/mysql
【配置环境变量】
注意此方法只适用于ZSH的shell窗口,适用于mac 的10.15系统以上版本,包含macOS Big Sur和macOS Monterey最新版本等!
第一步,检查打开的终端信息是否为zsh窗口,如果是bash,请使用老方法。

第二步,通过使用vim编辑器zshrc文件进行配置永久mysql的环境变量。
vim ~/.zshrc
第三步,在vim编辑器中输入i进入编辑模式,然后进行复制以下内容,复制完以下内容后,进行输入:”,再输入wq保存退出即可
export PATH=$PATH:/usr/local/mysql/bin
第四步,进行设置环境变量来源信息,在终端中输入以下信息即可:
source .bash_profile
最后,输入mysql --version或者mysql -u 用户名称 -p验证mysql是否能够使用吧!
mysql --version
MacOS 安装 MariaDB(MySQL)
1 关于MariaDB
MySQL隶属当时的SUN公司,SUN被Oracle收购以后,MySQL也随之变成Oracle的产品,开源社区对MySQL进行了分支。由于MySQL品牌属于Oracle公司,开源社区开启了一个新的产品名称MariaDB。MariaDB是MySQL开源精神的继承者。目前Linux系统默认的数据库都是MariaDB。
简单的说 MariaDB就是 MySQL 数据库!
在Mac上可以使用Homebrew轻松的安装MariaDB数据库。
2 安装MairaDB
在MacOS的终端上执行如下命令就可以安装MariaDB:
brew install mariadb
如果希望启动MariaDB服务器:
brew services start mariadb
这个命令也设置每次重新启动电脑, 自动启动MariaDB服务。
如果希望关闭MariaDB服务器,可以使用命令:
brew services stop mariadb
如果希望检查MariaDB服务的运行状态,可以使用命令:
brew services info mariadb
3 登陆到MySQL
在MariaDB服务启动以后,利用命令可以登录到MySQL
mysql
或者使用root用户登陆:
sudo mysql -u root
4 设置root用户登陆密码
默认安装后不能直接使用root用户登录到localhost,设置密码后才能登录。设置root用户到密码,首先使用mysql登陆到数据库,然后使用SQL命令设置root用户到密码,这里设置密码为“root”:
grant all privileges on *.* to root@localhost identified by 'root';
设置以后就可以在Java程序中使用root用户连接到mariadb了。
5 其他
启动/停止
启动/停止 mariadb 有两种方式,按需选择其中一种就可以:
方式一: 通过brew启动/停止
这种方法可以跟随系统启动(改plist那些操作麻烦并且会造成不稳定因素)
启动:
brew services start mariadb
停止:
brew services stop mariadb
方式二: 通过mysql.server,这个不能够跟随系统启动,每次重启MAC需要手动运行
启动:
mysql.server start
停止:
mysql.server stop
初始化mariadb(mysql)
1. 初始化数据库,将数据库信息安装上去
sudo mysql_install_db
可能有的人会提示已经安装,不管它,跑一次这个。
2. 初始化root账号及数据库各种设定
这一步很重要,下面会列出所有需要设置的选项,运行:
sudo mysql_secure_installation
运行之后会进行初始化引导,每一步都有详细的说明。
下面列出每个选项的翻译,根据自己需要配置:
Enter current password for root (enter for none): <– 初次运行直接回车
…
Set root password? [Y/n] <– 是否设置root用户密码,建议设置,输入Y按回车
…
New password: <– 设置root用户的密码
Re-enter new password: <– 再输入一次你设置的root的密码
…
Remove anonymous users? [Y/n] <– 是否删除匿名用户,建议删除,Y删除,n不删除
…
Disallow root login remotely? [Y/n] <– 是否禁止root远程登录,按需配置,Y禁止远程登录,n开启远程登录
…
Remove test database and access to it? [Y/n] <– 是否删除test数据库,Y删除、n留着
…
Reload privilege tables now? [Y/n]<– 是否重新加载权限表,建议重新加载,Y重新加载,n不重新加载
…
All done! If you’ve completed all of the above steps, your MariaDB
installation should now be secure.
Thanks for using MariaDB!
通过这个就可以配置好mariadb。
卸载
卸载mariadb分几步:
1. brew卸载
brew uninstall mariadb
2. 手动删除残留
sudo rm /usr/local/mysql
sudo rm -rf /usr/local/mysql*
sudo rm -rf /Library/StartupItems/MySQLCOM
sudo rm -rf /Library/PreferencePanes/My*
rm -rf ~/Library/PreferencePanes/My*
sudo rm -rf /Library/Receipts/mysql*
sudo rm -rf /Library/Receipts/MySQL*
sudo rm -rf /private/var/db/receipts/*mysql*
macOS安装Redis
1 安装Redis
在终端中运行:
brew install redis
homebrew将在你的系统上安装Redis。
2 在前台独立启动和停止Redis
为了测试Redis安装是否成功,你可从命令行运行redis-server命令,独立启动Redis服务器:
redis-server
如果成功,你会看到 Redis 的启动日志,这些信息表示 Redis 安装成功可以运行了。
要停止这个独立运行的Redis,请输入 Ctrl-C。
3 使用 launchd 启动和停止 Redis
也可以使用 launchd 在后台启动该进程,这样macOS启动时候就可以自动启动Redis服务:
brew services start redis
你可以通过运行以下内容来检查 launchd 管理的 Redis 的状态:
brew services info redis
如果该服务正在运行,你会看到如下的输出:
redis (homebrew.mxcl.redis)
Running: ✔
Loaded: ✔
User: miranda
PID: 67975
要停止该服务,请运行:
brew services stop redis
4. 连接到Redis
Redis 运行后,你可以通过运行 redis-cli 客户端连接到Redis:
redis-cli
打开Redis的客户端后,使用命令进行测试:
127.0.0.1:6379> lpush demos redis-macOS-demo
OK
127.0.0.1:6379> rpop demos
"redis-macOS-demo"
5 安装Redis 客户端 Another Redis Desktop Manager
Another Redis Desktop Manager
稳定的Redis桌面(GUI)管理客户端,兼容Windows、Mac、Linux,性能出众,轻松加载海量键值,安装方法:
brew install --cask another-redis-desktop-manager
安装后就可以直接找到图标启动了!
macOS安装RabbitMQ
1 安装RabbitMQ
用以下方法安装 RabbitMQ 服务器:
brew install rabbitmq
Homebrew会自动安装 RabbitMQ相关的关键依赖包,比如:Erlang。
2 RabbitMQ服务
也可以使用 launchd 在后台启动RabbitMQ进程,这样macOS启动时候就可以自动启动RabbitMQ服务:
brew services start rabbitmq
你可以通过运行以下内容来检查 launchd 管理的 RabbitMQ 的状态:
brew services info rabbitmq
要停止该服务,请运行:
brew services stop rabbitmq
3 连接到RabbitMQ
打开浏览器访问地址:http://localhost:15672/
输入默认用户名gueat和密码guest,就可以登录到RabbitMQ。
4 配置环境变量PATH
如果为了方便使用,需要配置环境变量,M1 芯片的MacOS和Intel芯片的MacOS略有不同:
M1芯片MacOS:
test -r ~/.bash_profile && echo 'export PATH=$PATH:/opt/homebrew/opt/rabbitmq/sbin' >> ~/.bash_profile
test -r ~/.zprofile && echo 'export PATH=$PATH:/opt/homebrew/opt/rabbitmq/sbin' >> ~/.zprofile
export PATH=$PATH:/opt/homebrew/opt/rabbitmq/sbin
Intel芯片MacOS:
test -r ~/.bash_profile && echo 'export PATH=$PATH:/usr/local/opt/rabbitmq/sbin' >> ~/.bash_profile
test -r ~/.zprofile && echo 'export PATH=$PATH:/usr/local/opt/rabbitmq/sbin' >> ~/.zprofile
export PATH=$PATH:/usr/local/opt/rabbitmq/sbin
MacOS 安装 Node.js
首先,确保你已经安装了Homebrew。
并且需要配置 HOMEBREW_BOTTLE_DOMAIN 环境变量,使用命令检查:
echo $HOMEBREW_BOTTLE_DOMAIN
如果没有设置HOMEBREW_BOTTLE_DOMAIN环境变量,请使用命令进行设置:
test -r ~/.zprofile && echo 'export HOMEBREW_BOTTLE_DOMAIN="https://mirrors.tuna.tsinghua.edu.cn/homebrew-bottles"' >> ~/.zprofile
test -r ~/.bash_profile && echo 'export HOMEBREW_CORE_GIT_REMOTE="https://mirrors.tuna.tsinghua.edu.cn/git/homebrew/homebrew-core.git"' >> ~/.bash_profile
export HOMEBREW_BOTTLE_DOMAIN="https://mirrors.tuna.tsinghua.edu.cn/homebrew-bottles"
1 安装Node.js
用以下方法安装 Node.js 服务器:
brew install node
安装后使用命令检查Node.js:
node --version
2 配置npm仓库
npm 是Node.js 提供的包管理工具,其默认仓管在国际网,访问速度较慢,通过设置为国内镜像能够改善性能:
npm config set registry=http://registry.npm.taobao.org
或者安装cnpm工具,替代npm工具:
npm install -g cnpm --registry=https://registry.npm.taobao.org
检查
npm config get registry
Mac系统HomeBrew安装过程
目录
前言
今天重装系统了,记录下安装Brew的安装过程。
一、Homebrew是什么?
Homebrew 是一个包管理器,用来在 macOS 安装 Linux 工具包。
二、安装环境
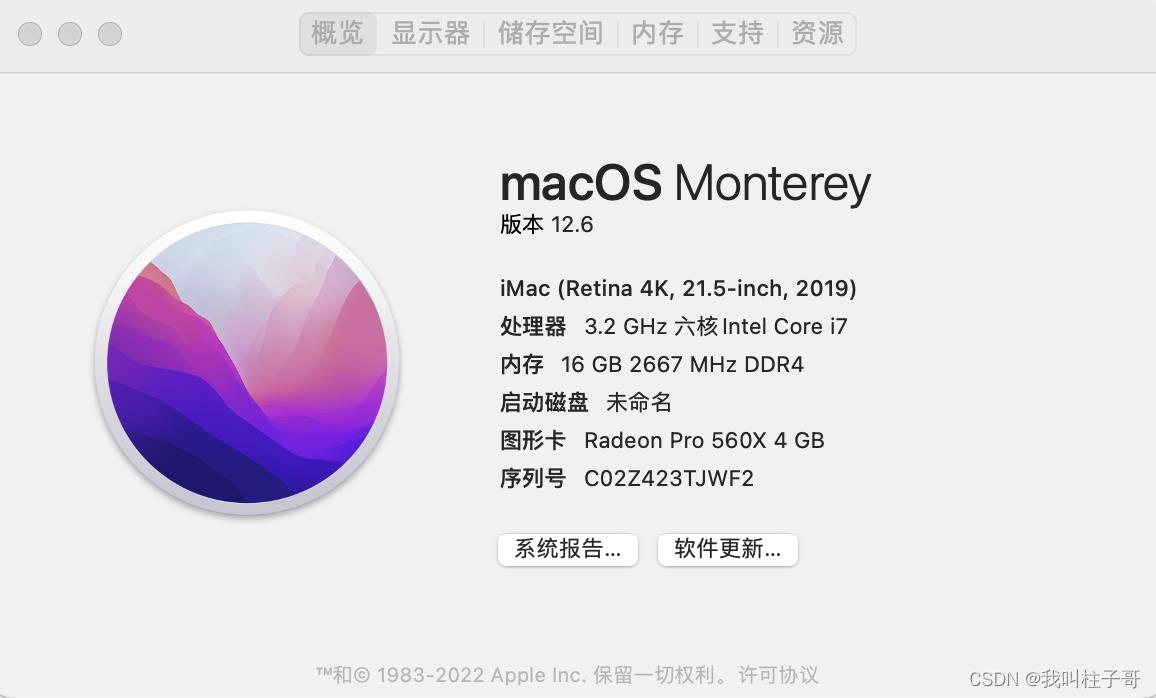
我的系统是macOS Monterey 12.6,完整的信息如下图:

三、安装步骤
把下面命令复制粘贴到终端
/bin/zsh -c "$(curl -fsSL https://gitee.com/cunkai/HomebrewCN/raw/master/Homebrew.sh)"
安装过程中可能会要求输入密码。按照步骤一步一步执行即可。
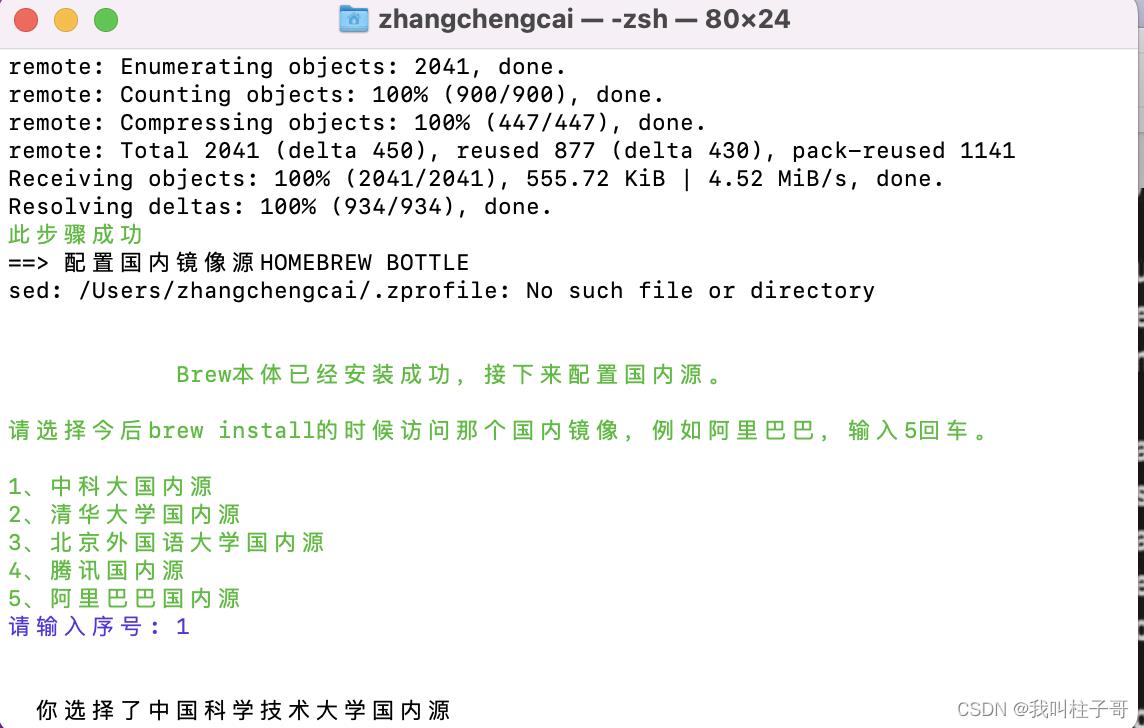
安装的过程很快,本体安装成功之后,终端会有绿色的文字提示:

我选的是中科大的国内源。
之后终端自动安装Brew。安装好之后记得运行下面命令。
source /Users/zhangchengcai/.zprofile
四、确认知否安装成功
brew --version
成功之后,可以安装一个火狐浏览器,看看效果(这个不是必须的步骤,我个人比较喜欢使用火狐浏览器)。我把命令贴到了下面
brew install --cask firefox
总结
这里仅仅做一个记录,自己亲测,可用。如果有问题,可以一起来讨论。
以上是关于Mac系统homebrew安装MySQL等环境的主要内容,如果未能解决你的问题,请参考以下文章