03Android Studio创建一个最基本的Activity
Posted 我的火龙果呢
tags:
篇首语:本文由小常识网(cha138.com)小编为大家整理,主要介绍了03Android Studio创建一个最基本的Activity相关的知识,希望对你有一定的参考价值。
创建一个最基本的Activity
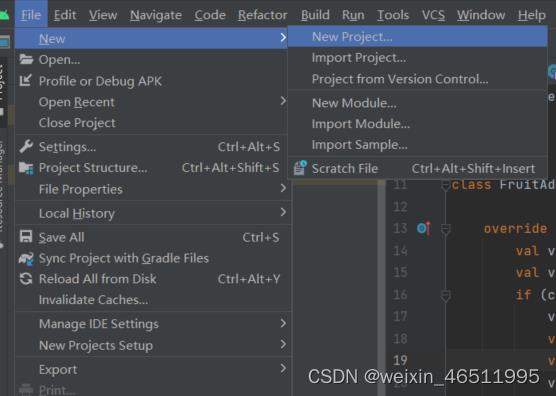
打开android Studio点击file--->New Project,选择No Activity创建一个空的Activity
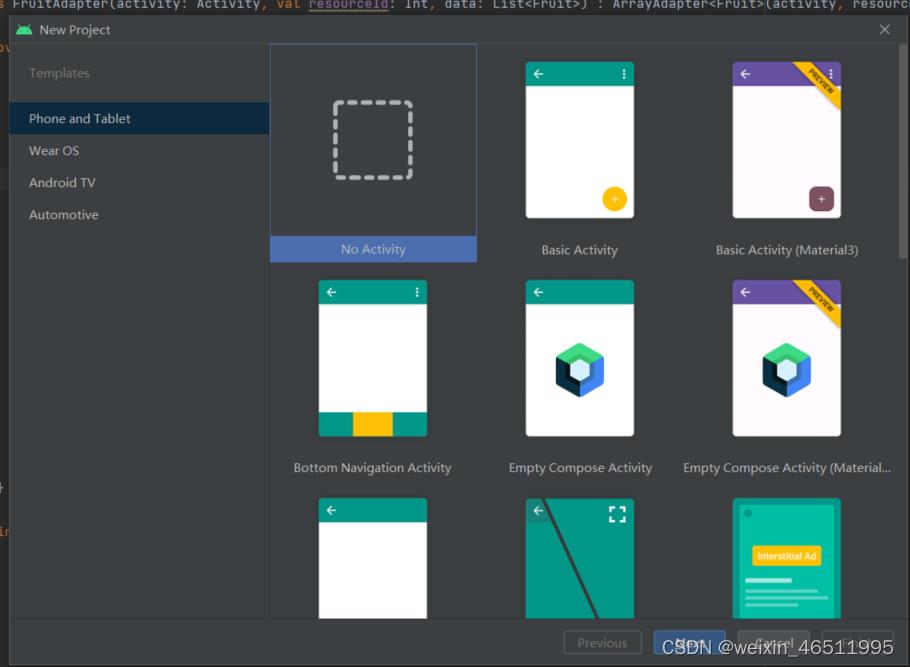
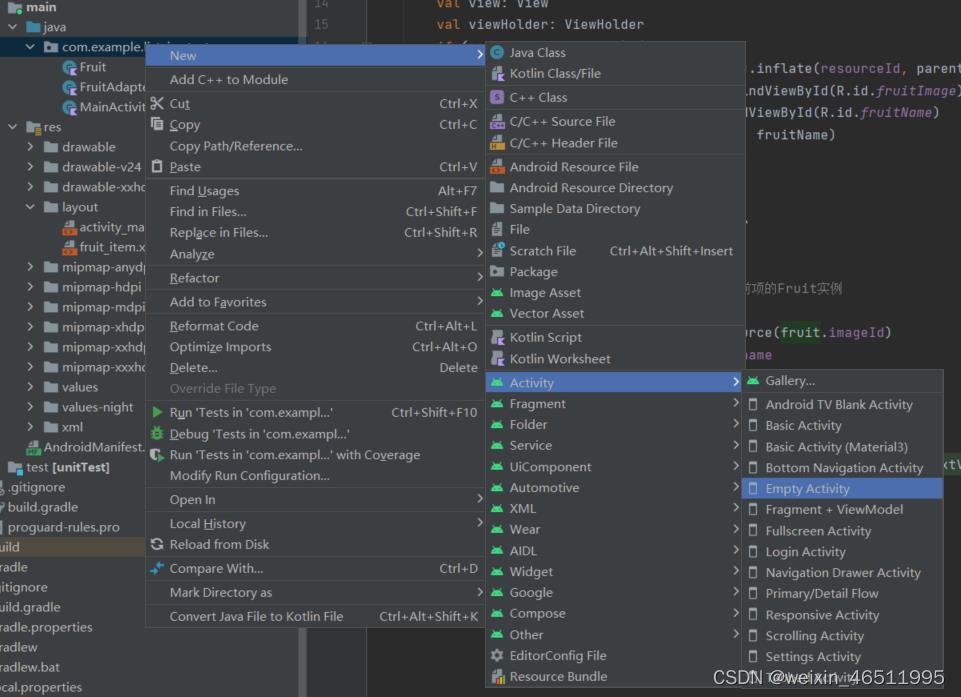
点击nex他,等项目创建好之后,在com.example.listviewtest右键点击New->Activity->Empty Activity
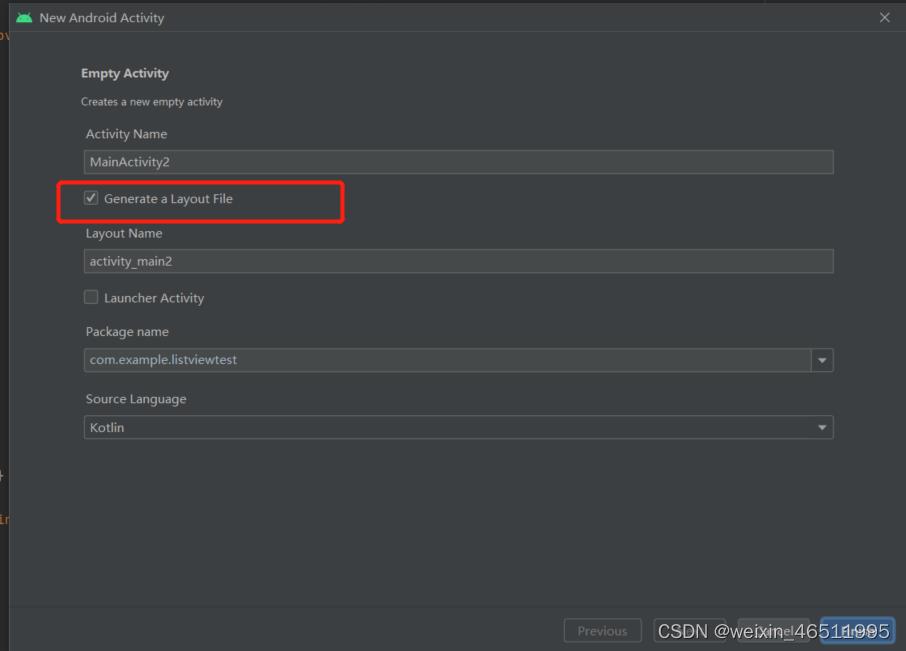
勾选Generate a Layout File让Android Studio自动帮我们创建一个layout布局xml文件
这时再去AndroidManifest.xml里面注册刚刚创建的Activity(一般AndroidStudio会自动注册),如果这是这个空项目里面第一个Activity(Android:name是来指定具体注册哪一个Activity),但是现在项目还是启动不起来,因为还没有配置主Activity,所以在标签<activity>里面加入<intent-filter>标签并在这个标签里面添加<action>和<category>

       <activity
            android:name=".MainActivity"
            android:exported="true">
            <intent-filter>
                <action android:name="android.intent.action.MAIN"></action>
                <category android:name="android.intent.category.LAUNCHER"></category>
            </intent-filter>
        </activity>
在app目录下的build.gradle中在加入一个kotlion插件
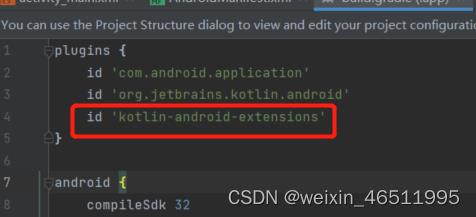
id 'kotlin-android-extensions'现在这个Activity已经创建好了,我们在创建的Activity里面试一下
首先在layout文件夹中该Activity的.xml文件里面添加了一个Button元素
<?xml version="1.0" encoding="utf-8"?>
<LinearLayout xmlns:android="http://schemas.android.com/apk/res/android"
    android:orientation="vertical"
    android:layout_width="match_parent"
    android:layout_height="match_parent">

    <Button
        android:id="@+id/button1"
        android:layout_width="match_parent"
        android:layout_height="wrap_content"
        android:text="BUTTON1"
        />

</LinearLayout>
然后在Button元素内部添加了几个属性,android:id是给当前的元素定义一个唯一的标识符,之后可以在代码里面对这个元素进行操作,android:layout_width指定当前元素的宽度这里使用match_parent表示让当前元素和父元素一样宽,android:layout_height指定当前元素的高度,这里使用wrap_content表示当前元素的高度只要能刚好包含里面的内容就行,Android:text指定了元素中显示的内容
然后去Activity里面加载这个布局
class FirstActivity : BaseActivity()
    override fun onCreate(savedInstanceState: Bundle?)
        super.onCreate(savedInstanceState)
        Log.d("FirstActivity", "Task id is $taskId")
        setContentView(R.layout.XXXX_layout)
最后运行一下
Android Studio基础对话框AlertDialog最基本的使用
Android Studio基础对话框AlertDialog最基本的使用
1、对按钮添加一个点击事件,需要配合Activity.java进行实现
第一步:在该布局XML中对按钮增加ID值,进行唯一性参照物
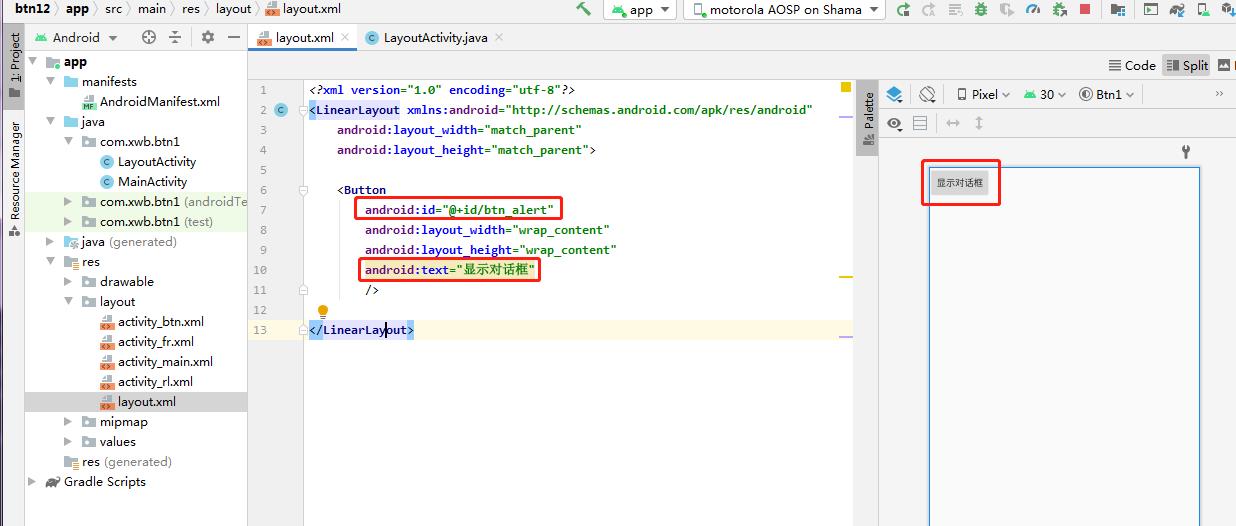
<?xml version="1.0" encoding="utf-8"?>
<LinearLayout xmlns:android="http://schemas.android.com/apk/res/android"
    android:layout_width="match_parent"
    android:layout_height="match_parent">

    <Button
        android:id="@+id/btn_alert"
        android:layout_width="wrap_content"
        android:layout_height="wrap_content"
        android:text="显示对话框"
        />

</LinearLayout>
第二步:到LayoutActivity.java配置,首先绑定布局xml文件
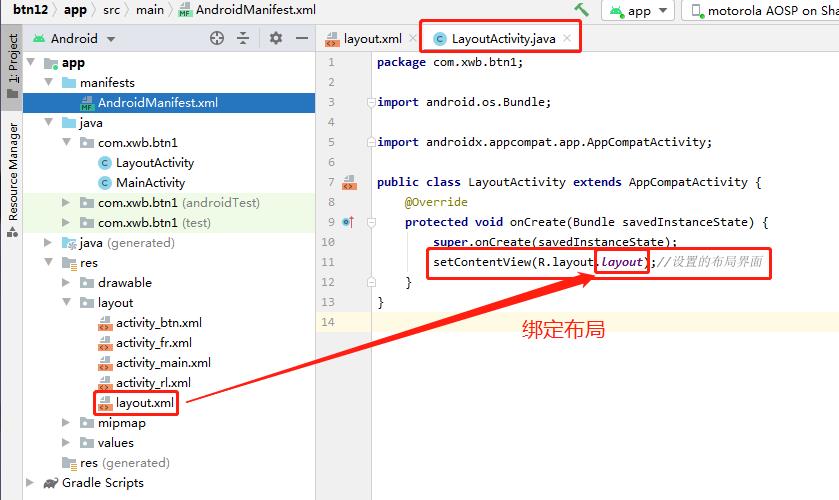

1)通过接口方式进行实现
在public class LayoutActivity extends AppCompatActivity后面导入 implements View.OnClickListener
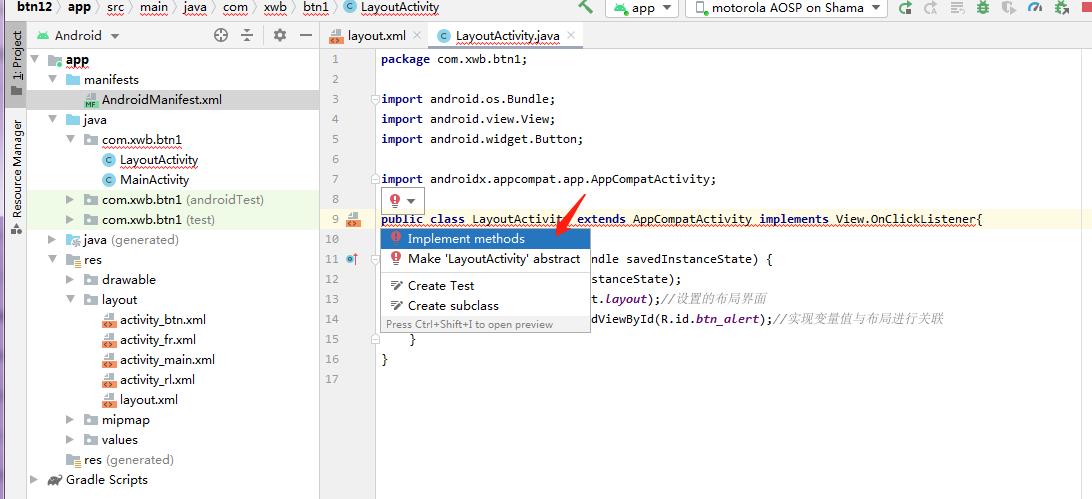
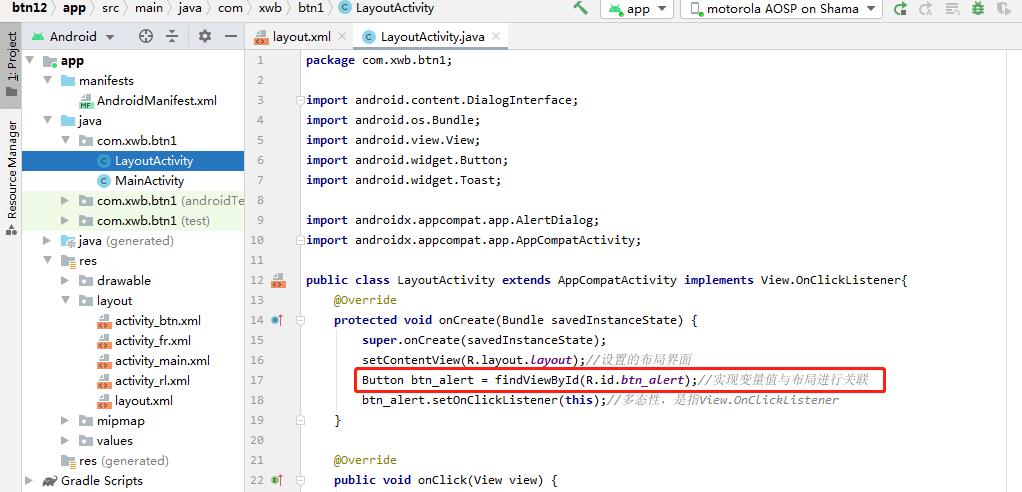
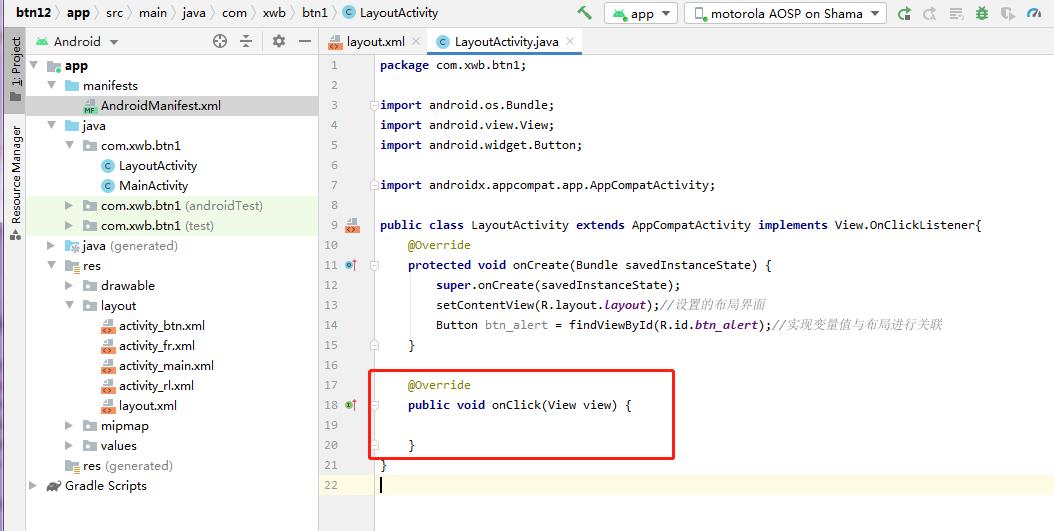
2)实现该接口View.OnClickListener自动生成此接口抽象方法,代码内容如下
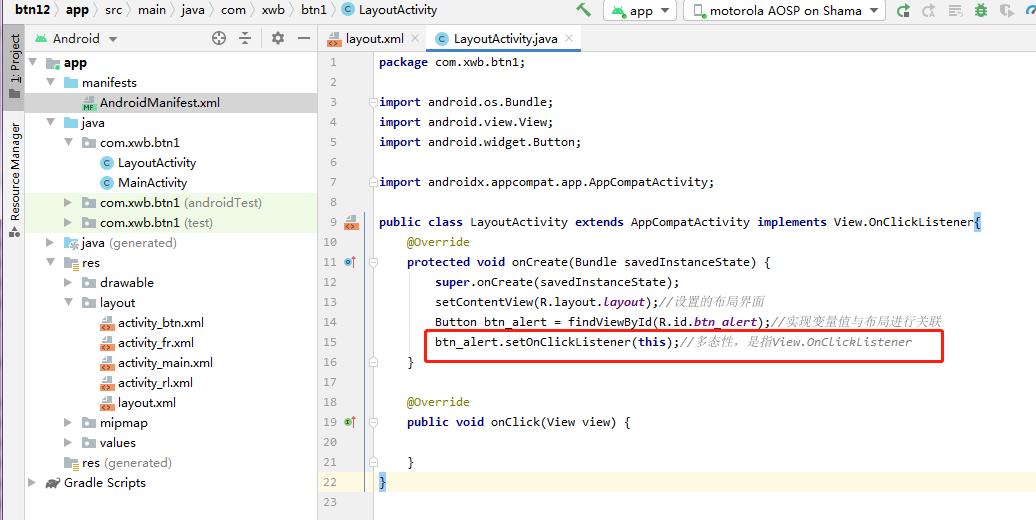
3)使用多态性btn_alert.setOnClickListener(this);
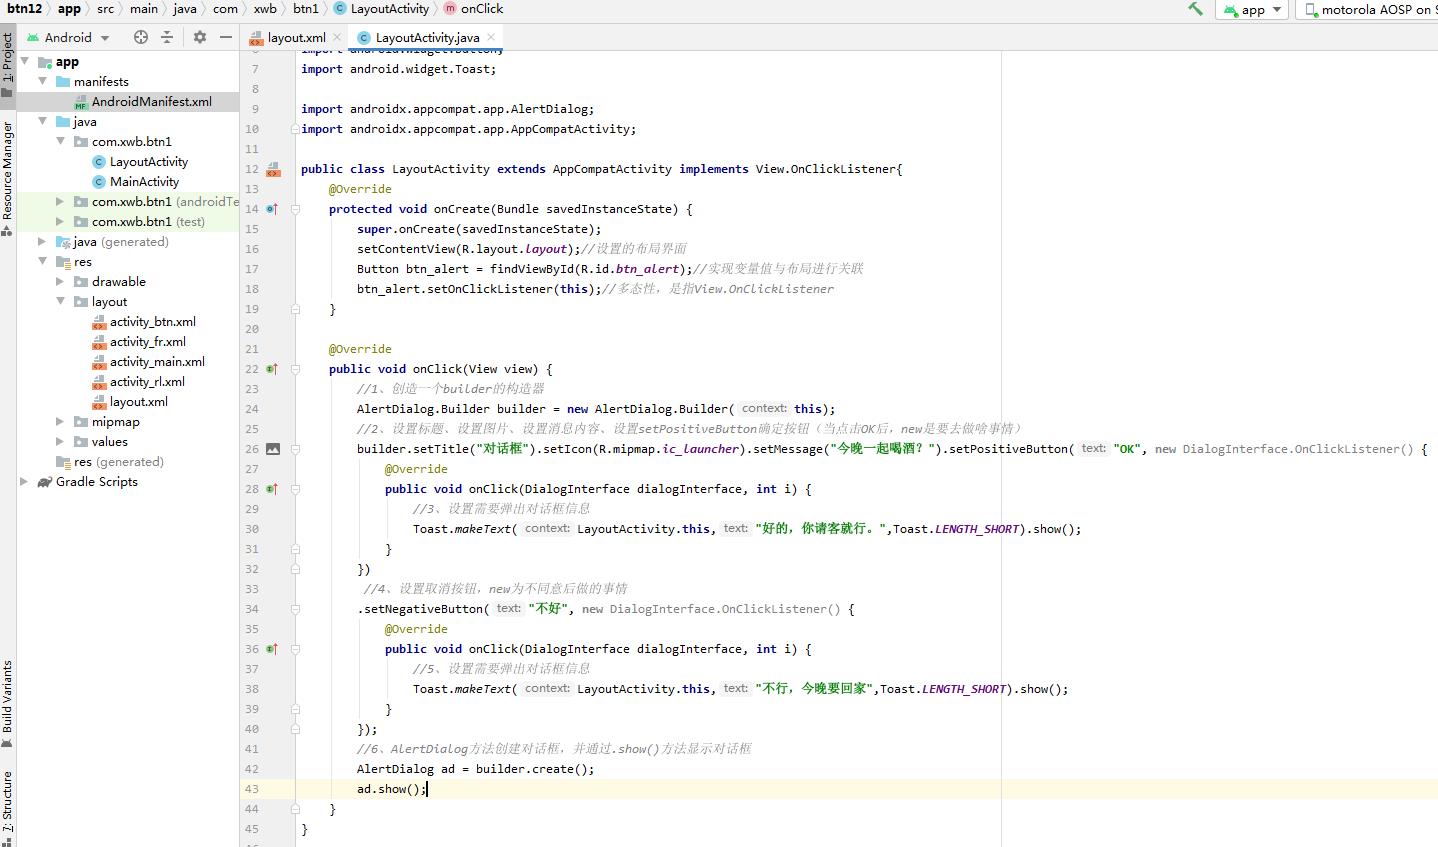
4)编写该接口的抽象方法
package com.xwb.btn1;

import android.content.DialogInterface;
import android.os.Bundle;
import android.view.View;
import android.widget.Button;
import android.widget.Toast;

import androidx.appcompat.app.AlertDialog;
import androidx.appcompat.app.AppCompatActivity;

public class LayoutActivity extends AppCompatActivity implements View.OnClickListener
    @Override
    protected void onCreate(Bundle savedInstanceState)
        super.onCreate(savedInstanceState);
        setContentView(R.layout.layout);//设置的布局界面
        Button btn_alert = findViewById(R.id.btn_alert);//实现变量值与布局进行关联
        btn_alert.setOnClickListener(this);//多态性,是指View.OnClickListener


    @Override
    public void onClick(View view)
        //1、创造一个builder的构造器
        AlertDialog.Builder builder = new AlertDialog.Builder(this);
        //2、设置标题、设置图片、设置消息内容、设置setPositiveButton确定按钮(当点击OK后,new是要去做啥事情)
        builder.setTitle("对话框").setIcon(R.mipmap.ic_launcher).setMessage("今晚一起喝酒?").setPositiveButton("OK", new DialogInterface.OnClickListener()
            @Override
            public void onClick(DialogInterface dialogInterface, int i)
                //3、设置需要弹出对话框信息
                Toast.makeText(LayoutActivity.this,"好的,你请客就行。",Toast.LENGTH_SHORT).show();

        )
         //4、设置取消按钮,new为不同意后做的事情
        .setNegativeButton("不好", new DialogInterface.OnClickListener()
            @Override
            public void onClick(DialogInterface dialogInterface, int i)
                //5、设置需要弹出对话框信息
                Toast.makeText(LayoutActivity.this,"不行,今晚要回家",Toast.LENGTH_SHORT).show();

        );
        //6、AlertDialog方法创建对话框,并通过.show()方法显示对话框
        AlertDialog ad = builder.create();
        ad.show();
第三步:运行APP效果
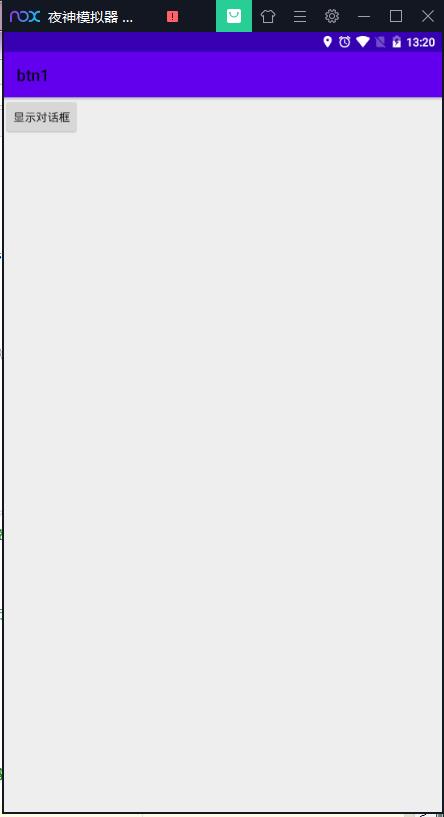
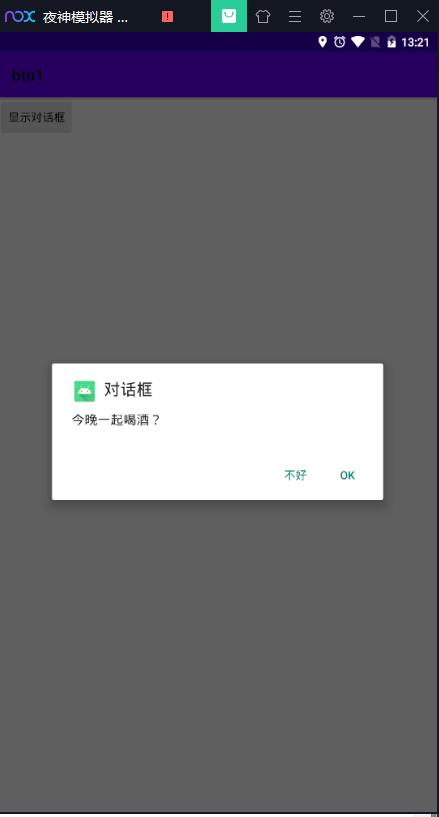
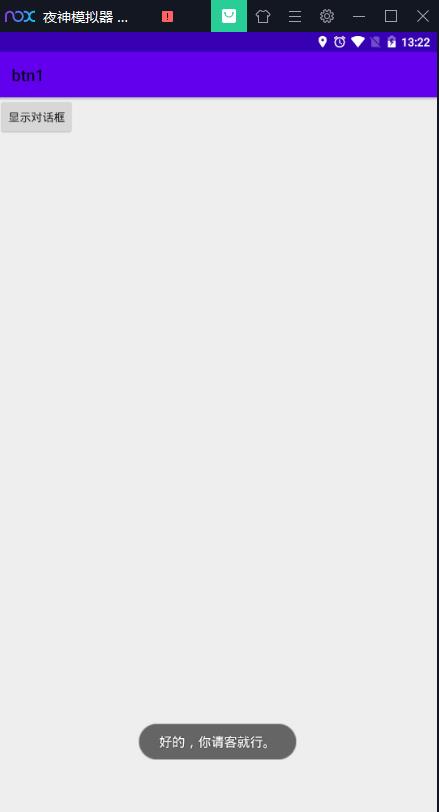
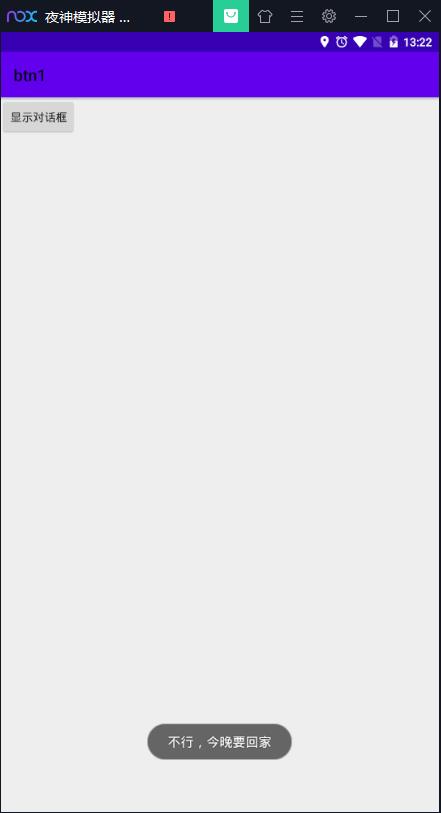
此类对话框场景是做“删除”操作可以使用。
参考:
https://blog.csdn.net/weixin_33735077/article/details/85784360
https://blog.csdn.net/lpCrazyBoy/article/details/80538257
以上是关于03Android Studio创建一个最基本的Activity的主要内容,如果未能解决你的问题,请参考以下文章