Switchhosts Mac 安装
Posted woowen!
tags:
篇首语:本文由小常识网(cha138.com)小编为大家整理,主要介绍了Switchhosts Mac 安装相关的知识,希望对你有一定的参考价值。
SwitchHosts! Mac版是一款管理切换编辑Mac系统hosts的工具。支持编辑mac hosts文件,自定义以及添加多个hosts文件配置,备份hosts文件

brew方式安装
在 macOS 上,也可以使用 brew cask 安装,命令如下:
brew cask install switchhosts
scoop 方式安装
在 Windows 上,也可以使用 scoop 安装,命令如下:
scoop install switchhosts
SwitchHosts! 的数据文件位置
SwitchHosts! 的数据文件在 ~/.SwitchHosts 目录下(Windows 用户为个人主目录下的 .SwitchHosts 目录下),其中 ~/.SwitchHosts/data.json 是 hosts 数据文件,~/.SwitchHosts/prefereces.json 是配置信息。
软件特点:
- 语法高亮
- 支持多hosts组
- 点击行号切换启用/注释当前行host
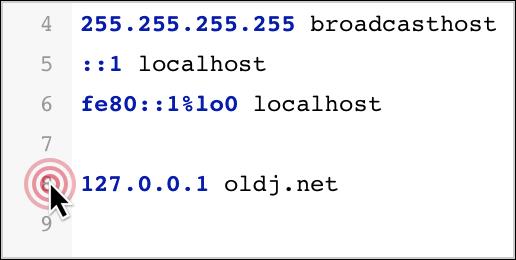
- 在状态栏快速切换
- 支持本地/远端hosts
- 支持导入/导出
- 支持Alfred搜索 (仅适用于Mac)
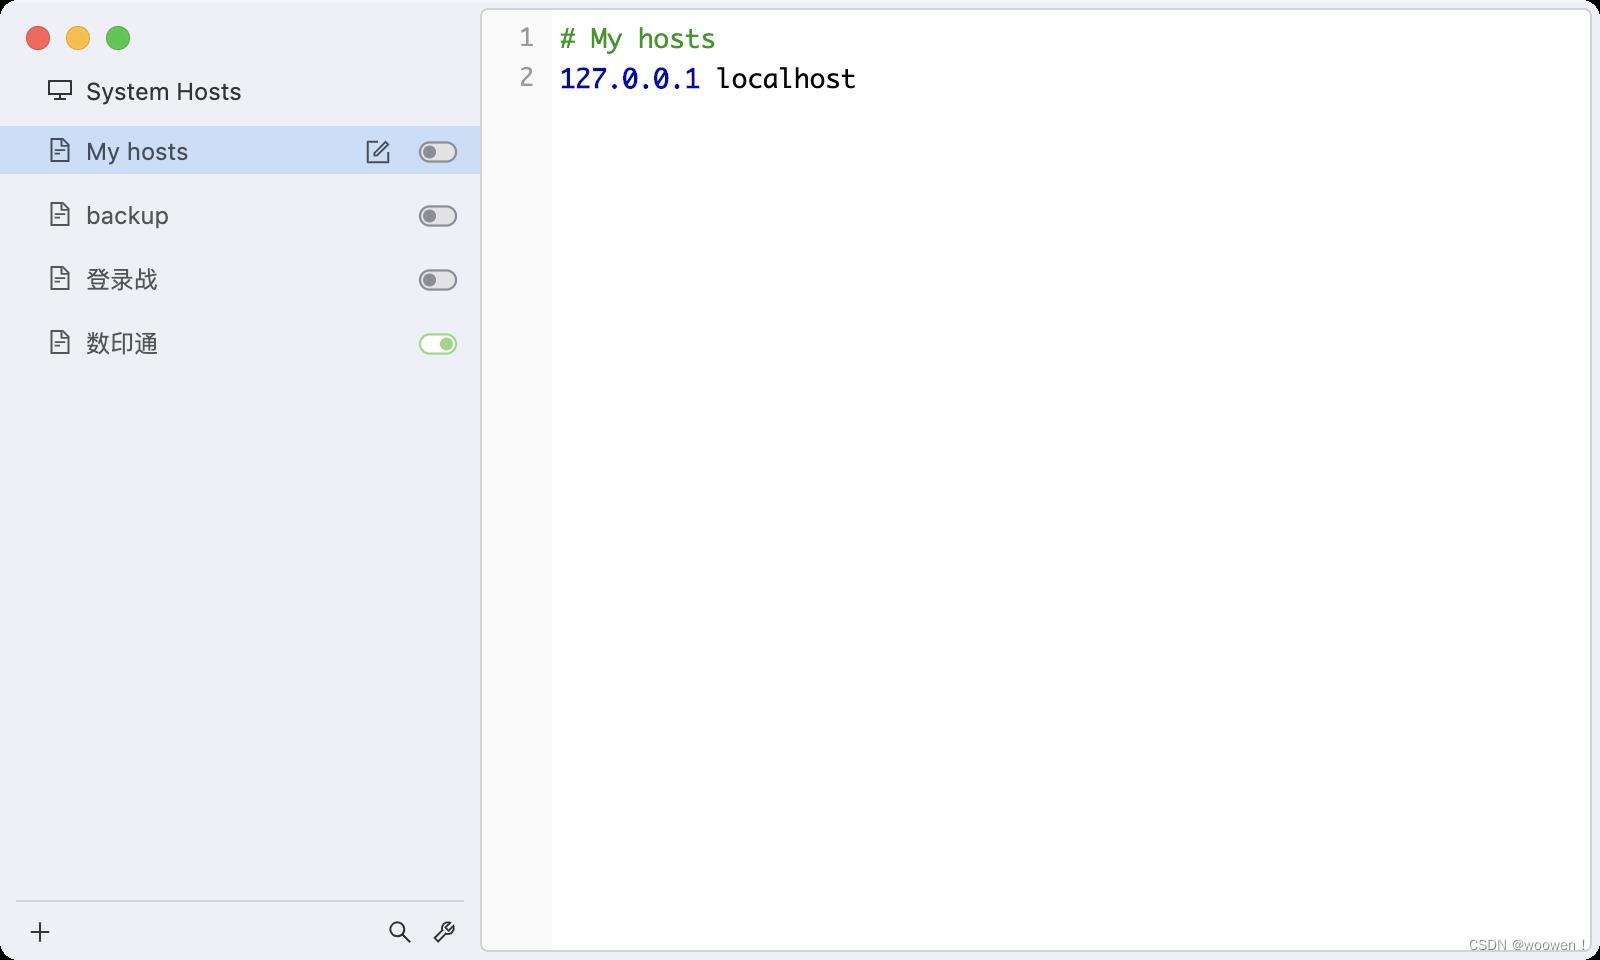
SwitchHosts Mac中文设置
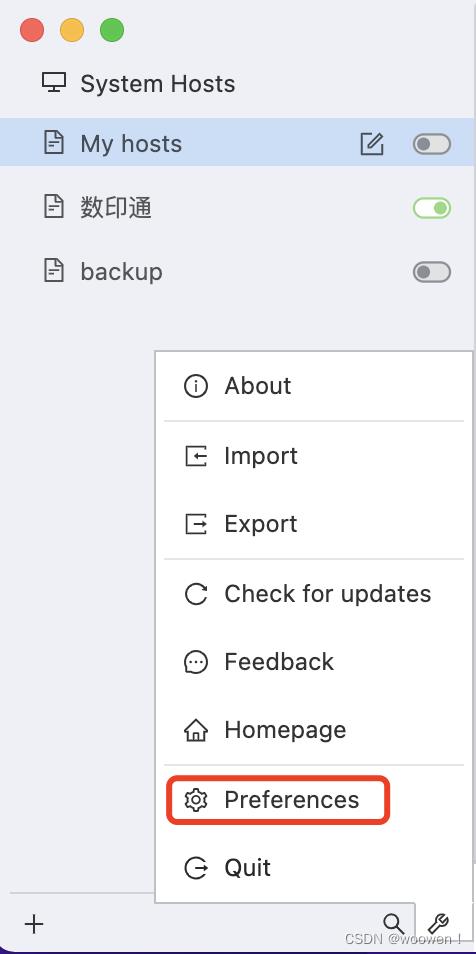
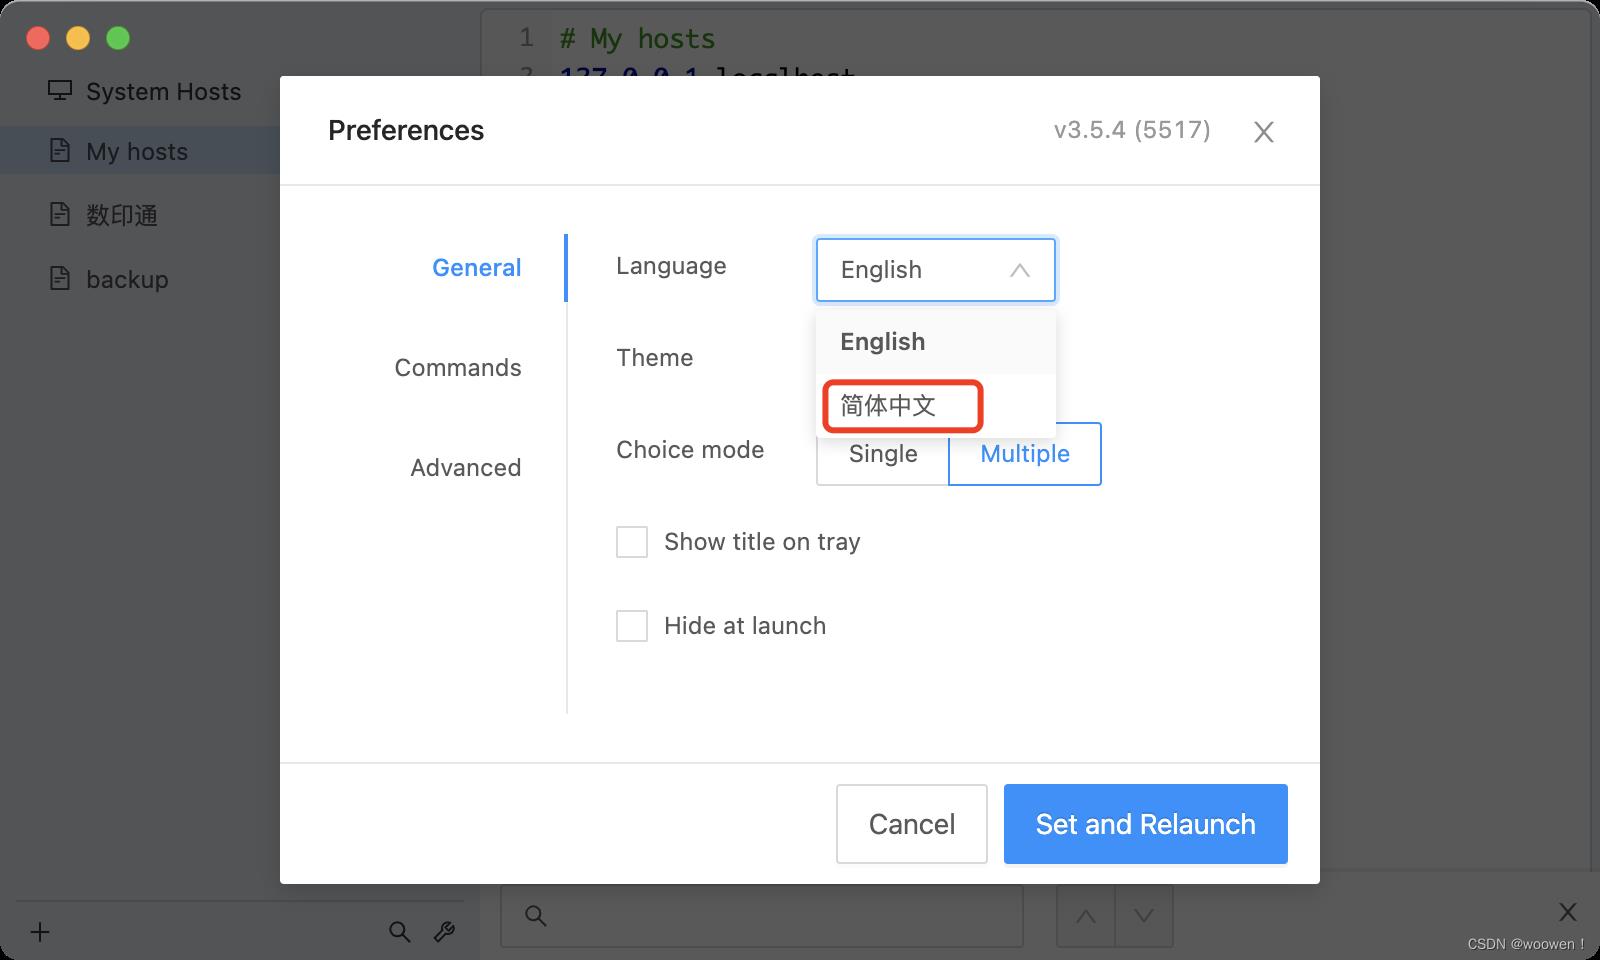
最后重新启动即可生效!
nginx实现反向代理 switchhosts tomacat
工具下载:
nginx下载地址:https://nginx.org/en/download.html (建议下载稳定版)
switchhosts下载地址:https://pan.baidu.com/s/1ddj3WSi-XBO4KB3olEnDEQ(由于hosts的文件路径比较隐蔽,使用switchhosts更加便捷,该软件主要带有两个功能:编辑hosts和切换hosts)
tomcat下载地址:https://tomcat.apache.org/download-90.cgi
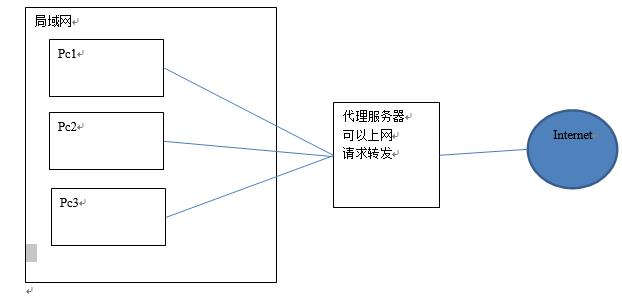
正向代理,架设在客户机与目标主机之间,只用于代理内部网络对Internet的连接请求,客户机必须指定代理服务器,并将本来要直接发送到Web服务器上的http请求发送到代理服务器中。
反向代理服务器架设在服务器端,通过缓冲经常被请求的页面来缓解服务器的工作量,将客户机请求转发给内部网络上的目标服务器;并将从服务器上得到的结果返回给Internet上请求连接的客户端,此时代理服务器与目标主机一起对外表现为一个服务器。
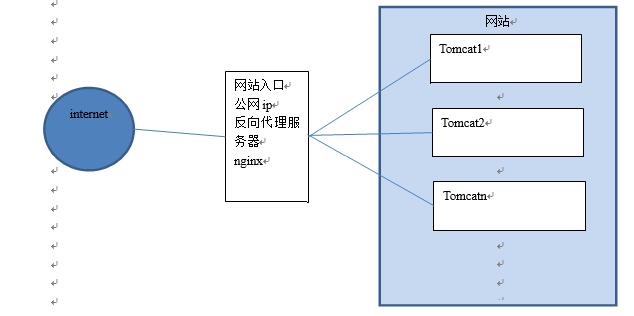
接下来实现反向代理
举例说明:
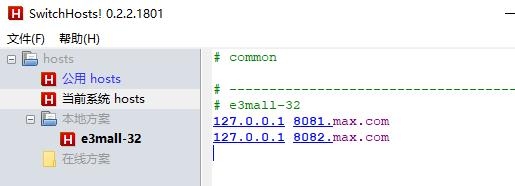
域名和ip的对应 127.0.0.1 8081.max.com 127.0.0.1 8082.max.com(步骤一)
端口号:8081;8082(步骤二)
1.使用switchhosts工具修改hosts文件中配置的域名和ip的对应关系
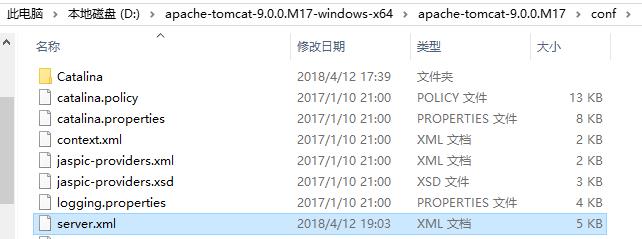
2.修改tomcat文件下的server.xml(以我安装的路径为例)
为tomcat添加端口:(默认端口号8080)
<Server port="8005" shutdown="SHUTDOWN">
  <Listener className="org.apache.catalina.startup.VersionLoggerListener" />
  <Listener className="org.apache.catalina.core.AprLifecycleListener" SSLEngine="on" />
  <Listener className="org.apache.catalina.core.JreMemoryLeakPreventionListener" />
  <Listener className="org.apache.catalina.mbeans.GlobalResourcesLifecycleListener" />
  <Listener className="org.apache.catalina.core.ThreadLocalLeakPreventionListener" />
  <GlobalNamingResources>
    <Resource name="UserDatabase" auth="Container"
              type="org.apache.catalina.UserDatabase"
              description="User database that can be updated and saved"
              factory="org.apache.catalina.users.MemoryUserDatabaseFactory"
              pathname="conf/tomcat-users.xml" />
  </GlobalNamingResources>
  <Service name="Catalina">
    <Connector port="8080" protocol="HTTP/1.1"
               connectionTimeout="20000"
               redirectPort="8443" />
    <Connector port="8009" protocol="AJP/1.3" redirectPort="8443" />
    <Engine name="Catalina" defaultHost="localhost">
      <Realm className="org.apache.catalina.realm.LockOutRealm">
        <Realm className="org.apache.catalina.realm.UserDatabaseRealm"
               resourceName="UserDatabase"/>
      </Realm>
      <Host name="localhost"  appBase="webapps"
            unpackWARs="true" autoDeploy="true">
        <Valve className="org.apache.catalina.valves.AccessLogValve" directory="logs"
               prefix="localhost_access_log" suffix=".txt"
               pattern="%h %l %u %t "%r" %s %b" />
      </Host>
    </Engine>
  </Service>
  <Service name="tomcatserver1">
    <Connector port="8081" protocol="HTTP/1.1"
               connectionTimeout="20000"
               redirectPort="8443" />
    <Connector port="8011" protocol="AJP/1.3" redirectPort="8443" />
    <Engine name="Catalina" defaultHost="localhost">
      <Realm className="org.apache.catalina.realm.LockOutRealm">
        <Realm className="org.apache.catalina.realm.UserDatabaseRealm"
               resourceName="UserDatabase"/>
      </Realm>
      <Host name="localhost"  appBase="webapps2"
            unpackWARs="true" autoDeploy="true">
        <Valve className="org.apache.catalina.valves.AccessLogValve" directory="logs"
               prefix="localhost_access_log" suffix=".txt"
               pattern="%h %l %u %t "%r" %s %b" />
      </Host>
    </Engine>
  </Service>
  <Service name="tomcatserver2">
    <Connector port="8082" protocol="HTTP/1.1"
               connectionTimeout="20000"
               redirectPort="8443" />
    <Connector port="8012" protocol="AJP/1.3" redirectPort="8443" />
    <Engine name="Catalina" defaultHost="localhost">
      <Realm className="org.apache.catalina.realm.LockOutRealm">
        <Realm className="org.apache.catalina.realm.UserDatabaseRealm"
               resourceName="UserDatabase"/>
      </Realm>
      <Host name="localhost"  appBase="webapps3"
            unpackWARs="true" autoDeploy="true">
        <Valve className="org.apache.catalina.valves.AccessLogValve" directory="logs"
               prefix="localhost_access_log" suffix=".txt"
               pattern="%h %l %u %t "%r" %s %b" />
      </Host>
    </Engine>
  </Service>
</Server>
红色为默认部分,蓝色为添加部分,区分默认部分的位置颜色嵌套;
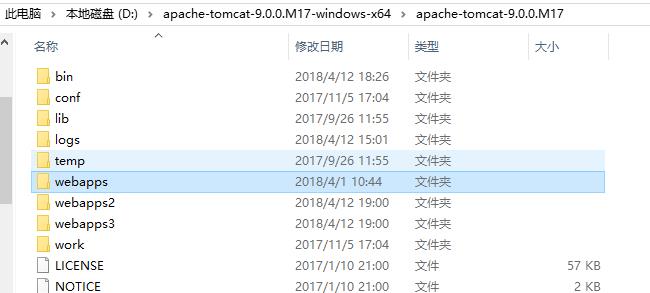
问题来了:我们tomcat文件中并没有webapps2,webapps3那么需要我们复制webapps
复制后的状态:
3.我们需要解决的是如何使nginx与tomcat服务器进行连接
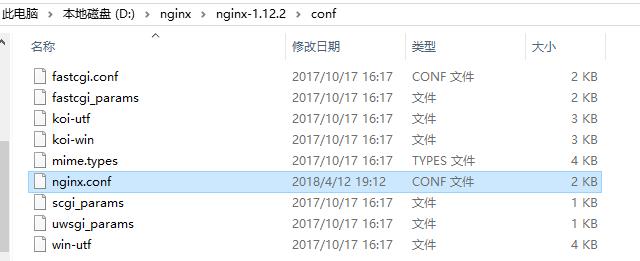
那么就需要配置nginx.conf,路径与我的安装路径为例
#user  nobody;
worker_processes  1;
#error_log  logs/error.log;
#error_log  logs/error.log  notice;
#error_log  logs/error.log  info;

#pid        logs/nginx.pid;
events {
    worker_connections  1024;
}
http {
    include       mime.types;
    default_type  application/octet-stream;
    sendfile        on;
    keepalive_timeout  65;
	upstream tomcatserver1{
		server 172.0.0.1:8081;
	}
	upstream tomcatserver2{
		server 172.0.0.1:8082;
	}
    server {
        listen       80;
        server_name  8081.max.com;
        location / {
           #root   html;
           #index  index.html index.htm;
	  proxy_pass http://tomcatserver1;
		}
        error_page   500 502 503 504  /50x.html;
        location = /50x.html {
            root   html;
        }
    }
 server {
        listen       80;
        server_name  8082.max.com;

        location / {
            #root   html1;
            #index  index.html index.htm;
	  proxy_pass   http://tomcatserver2;
        }
        error_page   500 502 503 504  /50x.html;
        location = /50x.html {
            root   html1;
        }
    }
}
重新启动tomcat,运行nginx,访问8081.max.com;和8082.max.com
出现的结果如图


执行成功
以上是关于Switchhosts Mac 安装的主要内容,如果未能解决你的问题,请参考以下文章