前言
使用虚拟机VMWARE安装Oracle 11g R2 RAC,需要模拟两个主机节点和一个共享存储,安装系统和创建虚拟存储文件这里不作介绍,可以自行百度方法,很简单。
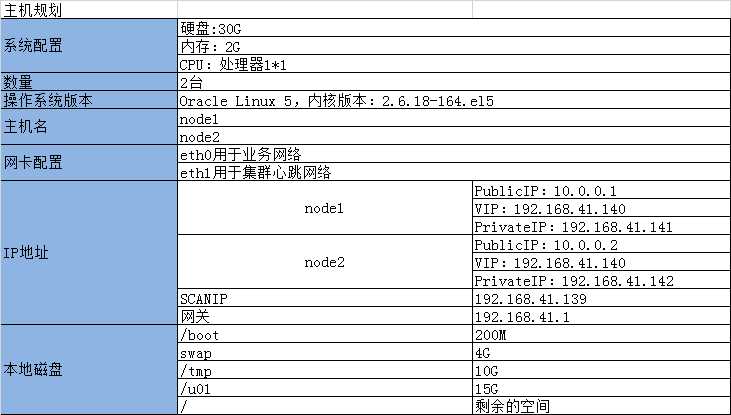
一、主机规划

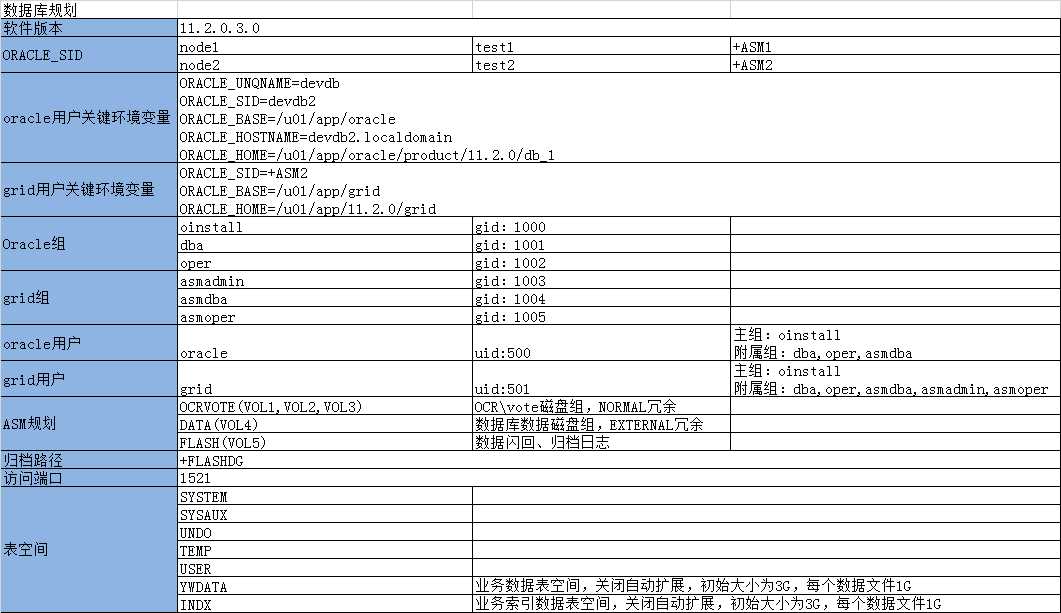
二、数据库规划
三、准备工作
3.1、HOSTS和主机名配置
#在所有节点添加主机名,重启生效:
[[email protected] ~]# cat /etc/sysconfig/network
NETWORKING=yes
HOSTNAME=node1
NTPSERVERARGS=iburst

[[email protected] ~]# cat /etc/sysconfig/network
NETWORKING=yes
HOSTNAME=node2
NTPSERVERARGS=iburst

#在所有节点添加hosts:
[[email protected] ~]# cat /etc/hosts
127.0.0.1   localhost localhost.localdomain localhost4 localhost4.localdomain4
::1         localhost localhost.localdomain localhost6 localhost6.localdomain6

10.0.0.1 node1-priv
10.0.0.2 node2-priv

192.168.41.141 node1
192.168.41.142 node2

192.168.41.143 node1-vip
192.168.41.144 node2-vip

192.168.41.139 scanip

[[email protected] ~]# cat /etc/hosts
127.0.0.1   localhost localhost.localdomain localhost4 localhost4.localdomain4
::1         localhost localhost.localdomain localhost6 localhost6.localdomain6

10.0.0.1 node1-priv
10.0.0.2 node2-priv

192.168.41.141 node1
192.168.41.142 node2

192.168.41.143 node1-vip
192.168.41.144 node2-vip

192.168.41.139 scanip
3.2、禁用防火墙、SElinux和NTP
#所有节点执行,关闭防火墙:
[[email protected] ~]# service iptables stop
[[email protected] ~]# chkconfig iptables off

#所有节点执行,关闭SElinux:
[[email protected] ~]# setenforce 0
[[email protected] ~]# sed -i ‘s/SELINUX=enforcing/SELINUX=disabled/g‘ /etc/selinux/config

#所有节点执行,关闭NTP服务(禁用ntp并删除配置文件后,rac的grid安装时会自动使用其自带的CTSS进行时间管理):
[[email protected] ~]# service ntpd stop
[[email protected] ~]# chkconfig ntpd off
[[email protected] ~]# mv /etc/ntp.conf /etc/ntp.conf.bak
3.3、配置用户、环境变量、依赖包等
为了提高效率和减少配置的出错,写了一个简单的脚本,在所有节点执行:
[[email protected] home]# sh oracleInstall.sh
脚本如下:
#!/usr/bin/bash

. /etc/init.d/functions

#安装依赖包
function yumPackge
{
    echo "######################安装依赖包########################"
	yum install -y binutils* >/dev/null 2>&1 && action "安装binutils*" /bin/true || action "安装binutils*" /bin/false
	yum install -y compat-libstdc* >/dev/null 2>&1 && action "安装compat-libstdc*" /bin/true || action "安装compat-libstdc*" /bin/false
	yum install -y elfutils-libelf* >/dev/null 2>&1 && action "安装elfutils-libelf*" /bin/true || action "安装elfutils-libelf*" /bin/false
	yum install -y gcc* >/dev/null 2>&1 && action "安装gcc*" /bin/true || action "安装gcc*" /bin/false
	yum install -y glibc* >/dev/null 2>&1 && action "安装glibc*" /bin/true || action "安装glibc*" /bin/false
	yum install -y ksh* >/dev/null 2>&1 && action "安装ksh*" /bin/true || action "安装ksh*" /bin/false
	yum install -y libaio* >/dev/null 2>&1 && action "安装libaio*" /bin/true || action "安装libaio*" /bin/false
	yum install -y libaio.so.1 >/dev/null 2>&1 && action "安装libaio.so.1" /bin/true || action "安装libaio.so.1" /bin/false
	yum install -y libgcc* >/dev/null 2>&1 && action "安装libgcc*" /bin/true || action "安装libgcc*" /bin/false
	yum install -y libstdc* >/dev/null 2>&1 && action "安装libstdc*" /bin/true || action "安装libstdc*" /bin/false
	yum install -y make* >/dev/null 2>&1 && action "安装make*" /bin/true || action "安装make*" /bin/false
	yum install -y sysstat* >/dev/null 2>&1 && action "安装sysstat*" /bin/true || action "安装sysstat*" /bin/false
	yum install -y libXp* >/dev/null 2>&1 && action "安装libXp*" /bin/true || action "安装libXp*" /bin/false
	yum install -y glibc-kernheaders >/dev/null 2>&1 && action "安装glibc-kernheaders" /bin/true || action "安装glibc-kernheaders" /bin/false
	echo "#########################结束###########################"
}

function modifyKennel
{
	echo "
	fs.aio-max-nr = 1048576
	fs.file-max = 6815744
	kernel.shmall = 2097152
	kernel.shmmax = 4294967295
	kernel.shmmni = 4096
	kernel.sem = 250 32000 100 128
	net.ipv4.ip_local_port_range = 9000 65500
	net.core.rmem_default = 262144
	net.core.rmem_max = 4194304
	net.core.wmem_default = 262144
	net.core.wmem_max = 1048576
	" >> /etc/sysctl.conf
	if [ "$?" -eq 0 ];then
	sysctl -p >/dev/null 2>&1
	action "修改内核参数" /bin/true
	else
	action "修改内核参数" /bin/false
	fi
}

function modifyLimit
{
	echo "
	oracle soft nproc 2047
	oracle hard nproc 16384
	oracle soft nofile 1024
	oracle hard nofile 65536
	oracle soft stack 10240
	grid soft nproc 16384
	grid hard nproc 16384
	grid soft nofile 65536
	grid hard nofile 65536
	grid soft stack 10240
	grid hard stack 10240
	" >> /etc/security/limits.conf
	if [ "$?" -eq 0 ];then
	action "修改资源限制" /bin/true
	else
	action "修改资源限制" /bin/false
	fi
}

function modifyProfile
{
	echo "
	session required /lib/security/pam_limits.so
	session required pam_limits.so
	" >> /etc/pam.d/login && action "修改login" /bin/true || action "修改login" /bin/false
	echo "
	if [ $USER = "oracle" ]; then
	if [ $SHELL = "/bin/ksh" ]; then
	ulimit -p 16384
	ulimit -n 65536
	else
	ulimit -u 16384 -n 65536
	fi
	fi
	" >> /etc/profile
	if [ "$?" -eq 0 ];then
	source /etc/profile
	action "修改profile" /bin/true
	else
	action "修改profile" /bin/false
	fi
}

function createGroup
{
	[ `cat /etc/group|grep dba|wc -l` -gt 0 ] && groupdel dba
	[ `cat /etc/group|grep oinstall|wc -l` -gt 0 ] && groupdel oinstall
	[ `cat /etc/group|grep oper|wc -l` -gt 0 ] && groupdel oper
	[ `cat /etc/group|grep asmadmin|wc -l` -gt 0 ] && groupdel asmadmin
	[ `cat /etc/group|grep asmdba|wc -l` -gt 0 ] && groupdel asmdba
	[ `cat /etc/group|grep asmoper|wc -l` -gt 0 ] && groupdel asmoper
	read -p "依次输入dba,oinstall,oper,asmadmin,asmdba,asmoper组号:" dbagid oinstallgid opergid asmadmingid asmdbagid asmopergid
	groupadd -g $dbagid dba
	groupadd -g $oinstallgid oinstall
	groupadd -g $opergid oper
	groupadd -g $asmadmingid asmadmin
	groupadd -g $asmdbagid asmdba
	groupadd -g $asmopergid asmoper
	[ `cat /etc/group|grep dba|wc -l` -gt 0 ] && action "dba组创建成功" /bin/true || action "dba组创建失败" /bin/false
	[ `cat /etc/group|grep oinstall|wc -l` -gt 0 ] && action "oinstall组创建成功" /bin/true || action "oinstall组创建失败" /bin/false
	[ `cat /etc/group|grep oper|wc -l` -gt 0 ] && action "oper组创建成功" /bin/true || action "oper组创建失败" /bin/false
	[ `cat /etc/group|grep asmadmin|wc -l` -gt 0 ] && action "asmadmin组创建成功" /bin/true || action "asmadmin组创建失败" /bin/false
	[ `cat /etc/group|grep asmdba|wc -l` -gt 0 ] && action "asmdba组创建成功" /bin/true || action "asmdba组创建失败" /bin/false
	[ `cat /etc/group|grep asmoper|wc -l` -gt 0 ] && action "asmoper组创建成功" /bin/true || action "asmoper组创建失败" /bin/false
}


function createUser
{
	[ `cat /etc/passwd|grep oracle|wc -l` -gt 0 ] && userdel oracle
	[ `cat /etc/passwd|grep grid|wc -l` -gt 0 ] && userdel grid
	read -p "请输入oracle ID:" oracleuid
	read -s -p "请输入oracle用户密码:" orapasswd && echo -e "\\r"
	read -p "请输入grid ID:" griduid
	read -s -p "请输入grid用户密码:" gridpasswd && echo -e "\\r"
	useradd -u $oracleuid -g oinstall -G dba,oper,asmdba,asmadmin oracle
	[ $? -eq 0 ] &&	action "创建oracle用户成功" /bin/true || action "创建oracle用户失败" /bin/false
	echo "$orapasswd"|passwd oracle --stdin >/dev/null
	useradd -u $griduid -g oinstall -G dba,asmadmin,asmdba,asmoper grid
	[ $? -eq 0 ] &&	action "创建grid用户成功" /bin/true || action "创建grid用户失败" /bin/false
	echo "$gridpasswd"|passwd grid --stdin >/dev/null
}

function createDIR
{
	rm -rf /u01/app
	mkdir -p /u01/app/11.2.0/grid
	mkdir -p /u01/app/grid
	mkdir -p /u01/app/oracle/product/11.2.0/db_1
	if [ -d /u01/app/11.2.0/grid ] && [ -d /u01/app/grid ] && [ -d /u01/app/oracle/product/11.2.0/db_1 ];then
		action "创建目录成功" /bin/true
	else
		action "创建目录失败" /bin/false
	fi
	chown -R grid:oinstall /u01
	chmod -R 775 /u01/
	chown -R oracle:oinstall /u01/app/oracle
}


function oracleProfile
{
	if [ `su - oracle -c "env|grep ORA|wc -l"` -gt 0 ];then
		action "修改oracle环境" /bin/true
	else
		su - oracle -c ‘echo -e "export ORACLE_SID=orcl\\nexport ORACLE_BASE=/u01/app/oracle\\nexport ORACLE_HOME=/u01/app/oracle/product/11.2.0/db_1" >> ~/.bash_profile‘
		su - oracle -c ‘echo -e "export ORACLE_TERM=xterm\\nexport PATH=/usr/sbin:$PATH\\nexport PATH=$ORACLE_HOME/bin:$PATH" >> ~/.bash_profile‘
		su - oracle -c ‘echo -e "export LD_LIBRARY_PATH=$ORACLE_HOME/lib:/lib:/usr/lib\\nexport CLASSPATH=$ORACLE_HOME/JRE:$ORACLE_HOME/jlib:$ORACLE_HOME/rdbms/jlib" >> ~/.bash_profile‘
		su - oracle -c ‘echo -e "ulimit -u 16384 -n 65536\\numask 022" >> ~/.bash_profile && source ~/.bash_profile‘
		if [ `su - oracle -c "env|grep ORA|wc -l"` -gt 0 ];then
			action "修改oracle环境" /bin/true
		else
			action "修改oracle环境" /bin/false
		fi
	fi
}

function gridProfile
{
	if [ `su - grid -c "env|grep ORA|wc -l"` -gt 0 ];then
		action "修改grid环境" /bin/true
	else
		su - grid -c ‘echo -e "export export ORACLE_SID=+ASM\\nexport ORACLE_BASE=/u01/app/grid\\nexport ORACLE_HOME=/u01/app/11.2.0/grid" >> ~/.bash_profile‘
		su - grid -c ‘echo -e "export PATH=$PATH:$HOME/bin\\nexport PATH=/usr/sbin:$PATH:$ORACLE_HOME/bin:$PATH" >> ~/.bash_profile‘
		su - grid -c ‘echo -e "export LD_LIBRARY_PATH=$ORACLE_HOME/lib:/lib:/usr/lib\\nexport CLASSPATH=$ORACLE_HOME/JRE:$ORACLE_HOME/jlib:$ORACLE_HOME/rdbms/jlib" >> ~/.bash_profile‘
		su - grid -c ‘echo -e "export TEMP=/tmp\\nexport TMP=/tmp\\nexport TMPDIR=/tmp\\numask 022" >> ~/.bash_profile && source ~/.bash_profile‘
		if [ `su - grid -c "env|grep ORA|wc -l"` -gt 0 ];then
			action "修改grid环境" /bin/true
		else
			action "修改grid环境" /bin/false
		fi
	fi
}

function main
{
	yumPackge
	modifyLimit
	modifyKennel
	modifyProfile
	createGroup
	createUser
	createDIR
	oracleProfile
	gridProfile
}

main
3.4、安装和配置自动存储管理ASM
#查看内核版本,下载对应的rpm包
[[email protected] ~]# uname -r
2.6.32-696.18.7.el6.x86_64

#对应的rpm包
[[email protected] u01]# ll|grep oracleasm
-rw-r--r--. 1 root   root          13300 Jan 13 16:36 oracleasmlib-2.0.4-1.el6.x86_64.rpm
-rw-r--r--. 1 root   root          74984 Jan 13 16:40 oracleasm-support-2.1.8-1.el6.x86_64.rpm

#在所有节点都安装rpm包
[[email protected] u01]# rpm -ivh oracleasm-support-2.1.8-1.el6.x86_64.rpm
warning: oracleasm-support-2.1.8-1.el6.x86_64.rpm: Header V3 RSA/SHA256 Signature, key ID ec551f03: NOKEY
Preparing...                ########################################### [100%]
        package oracleasm-support-2.1.8-1.el6.x86_64 is already installed
[[email protected] u01]# rpm -ivh oracleasmlib-2.0.4-1.el6.x86_64.rpm
warning: oracleasmlib-2.0.4-1.el6.x86_64.rpm: Header V3 RSA/SHA256 Signature, key ID ec551f03: NOKEY
Preparing...                ########################################### [100%]
        package oracleasmlib-2.0.4-1.el6.x86_64 is already installed
#配置oracleasm,输入grid用户和属组:
[[email protected] u01]# oracleasm configure -i

#初始化
[[email protected] u01]# oracleasm init

#创建磁盘(只需在一个节点创建)
[[email protected] u01]# oracleasm createdisk VOL1 /dev/sdb1

#查看创建后的磁盘
[[email protected] u01]# oracleasm listdisks
VOL1
VOL2
VOL3
VOL4
VOL5
VOL6
[[email protected] u01]# ll /dev/oracleasm/disks/
total 0
brw-rw----. 1 grid asmdba 8, 17 Jan 21 10:35 VOL1
brw-rw----. 1 grid asmdba 8, 33 Jan 21 10:35 VOL2
brw-rw----. 1 grid asmdba 8, 49 Jan 21 10:35 VOL3
brw-rw----. 1 grid asmdba 8, 65 Jan 21 10:35 VOL4
brw-rw----. 1 grid asmdba 8, 81 Jan 21 10:35 VOL5
brw-rw----. 1 grid asmdba 8, 97 Jan 21 10:35 VOL6

#在其他节点,扫描已创建的磁盘
[[email protected] u01]# oracleasm scandisks
四、安装grid软件
#所有节点安装在grid/rpm目录下的rpm包:
[[email protected] rpm]# rpm -ivh cvuqdisk-1.0.7-1.rpm
Preparing...                ########################################### [100%]
        package cvuqdisk-1.0.7-1.x86_64 is already installed
#使用vncserver图形界面安装
[[email protected] ~]$ vncserver

New ‘node1:1 (grid)‘ desktop is node1:1

Starting applications specified in /home/grid/.vnc/xstartup
Log file is /home/grid/.vnc/node1:1.log

#vncserver登录
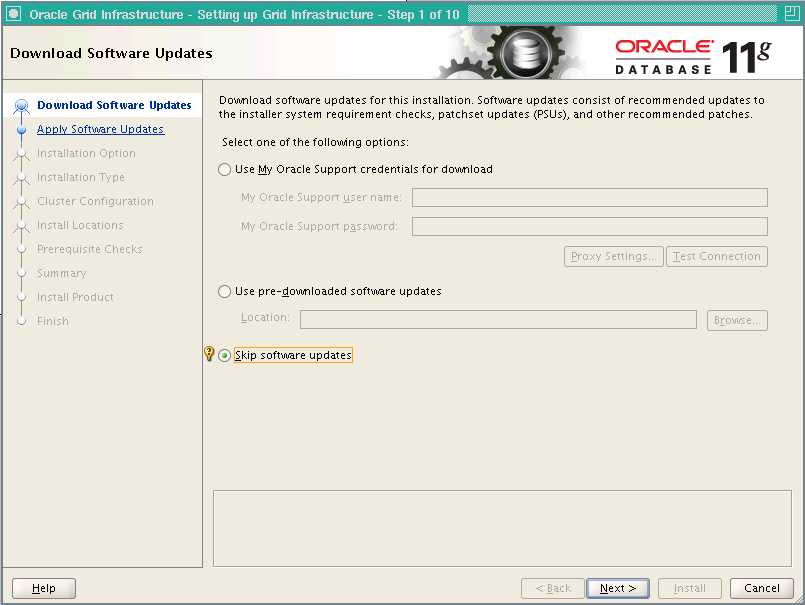
[[email protected] ~]$ cd /u01/grid/
[[email protected] grid]$ ./runInstaller
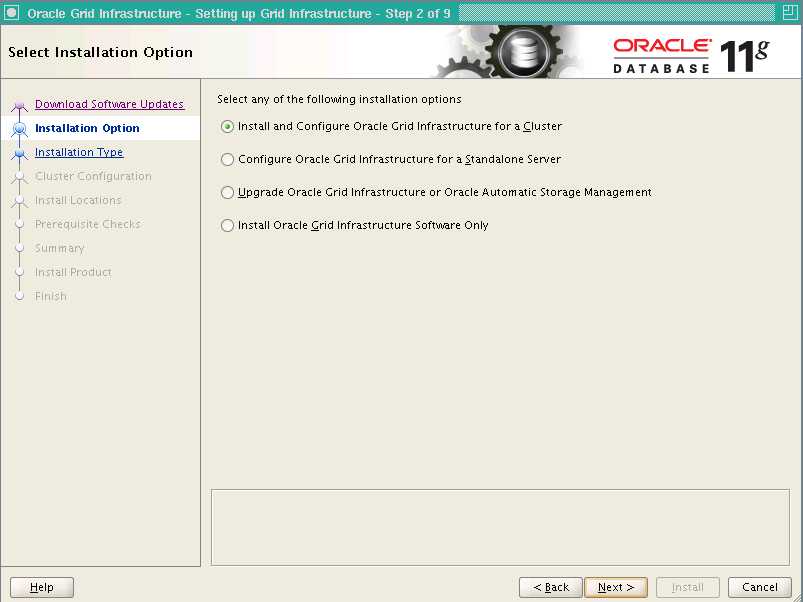
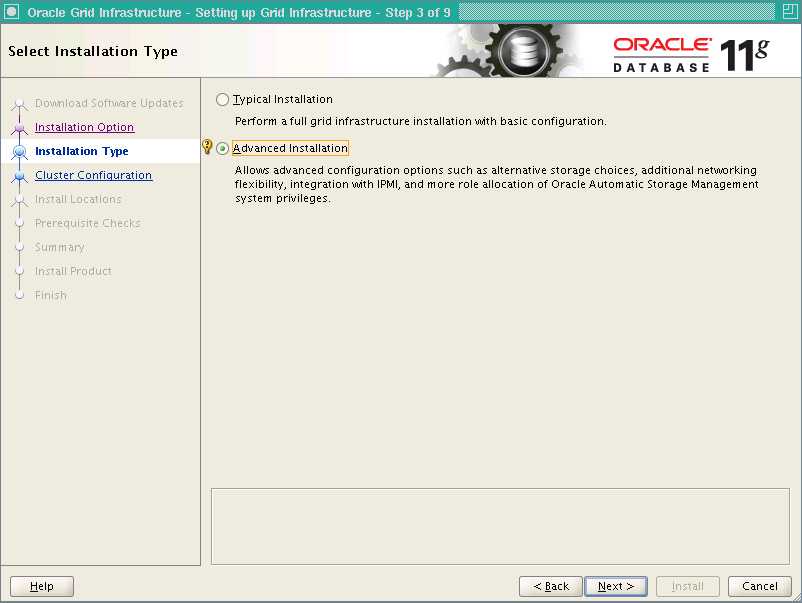
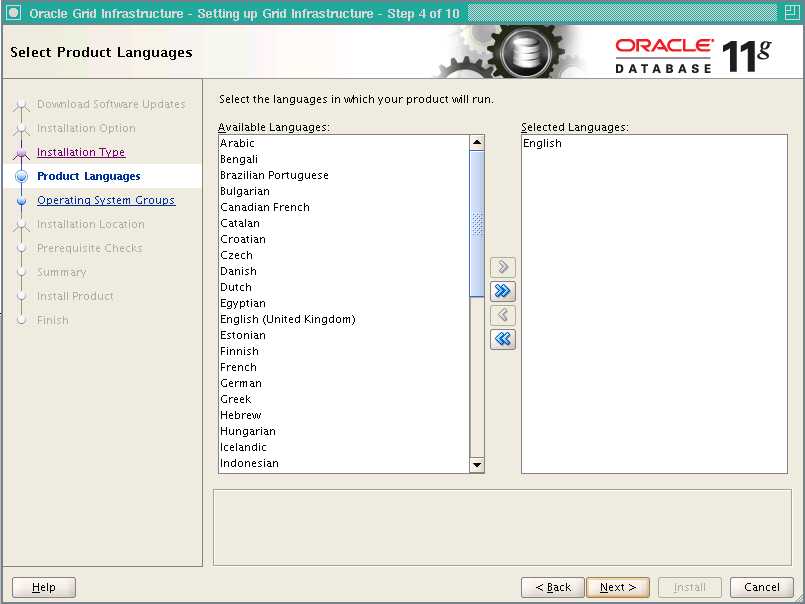
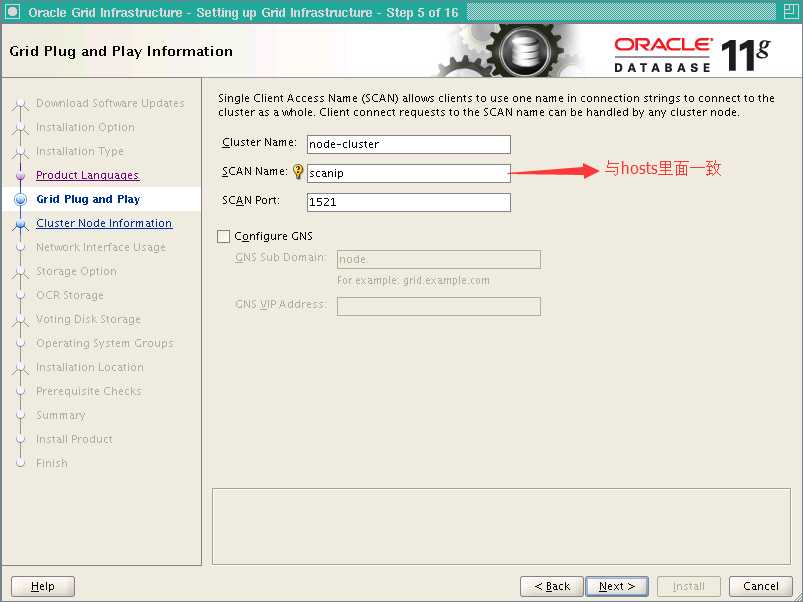
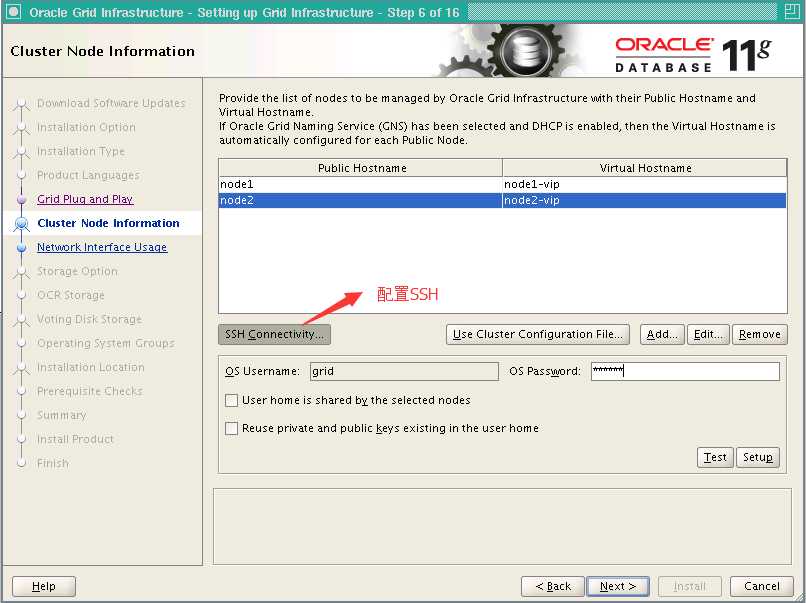
添加节点node2和node2-vip
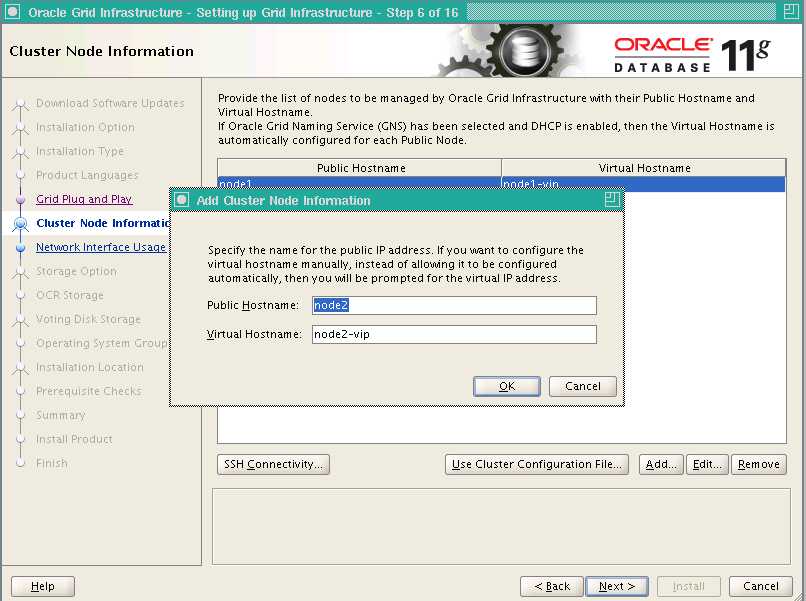
点击配置ssh:
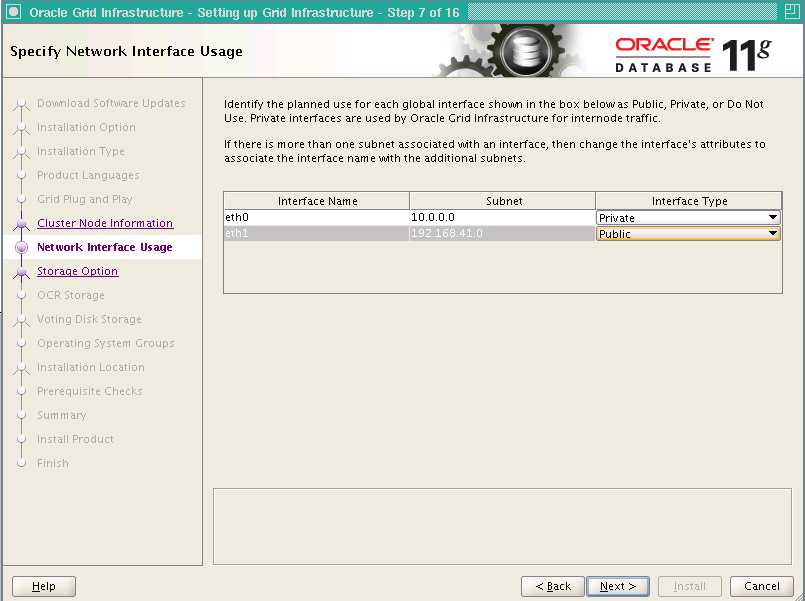
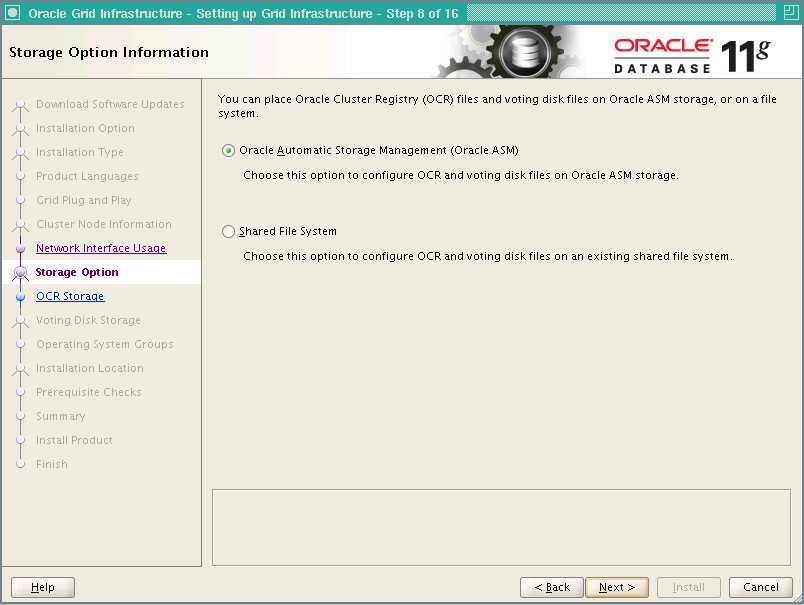
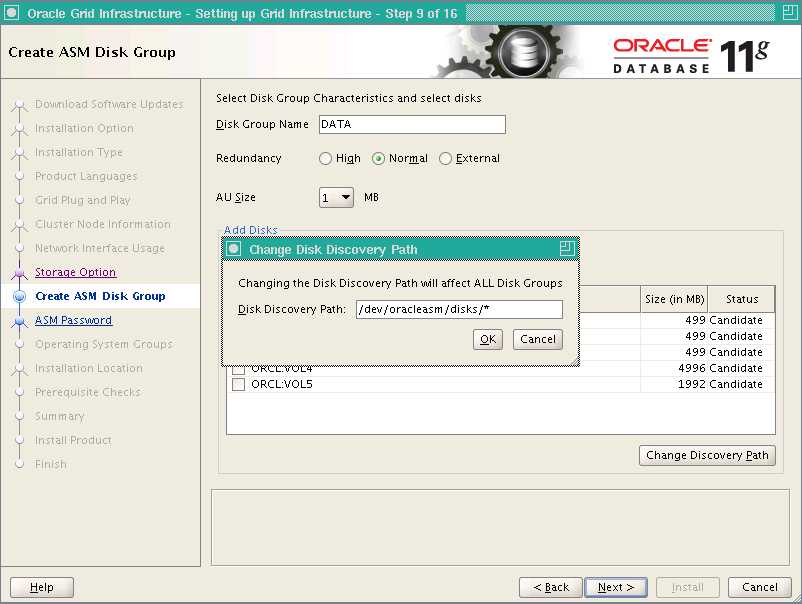
修改磁盘查找路径:
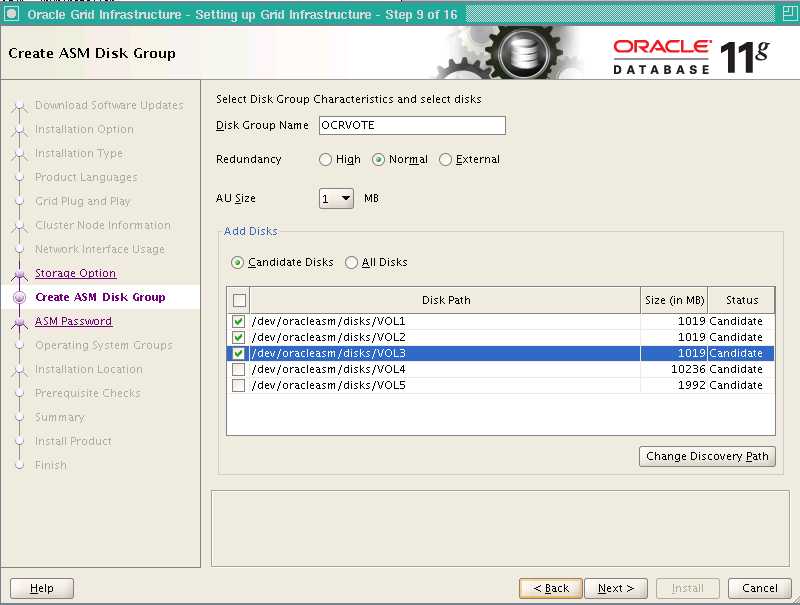
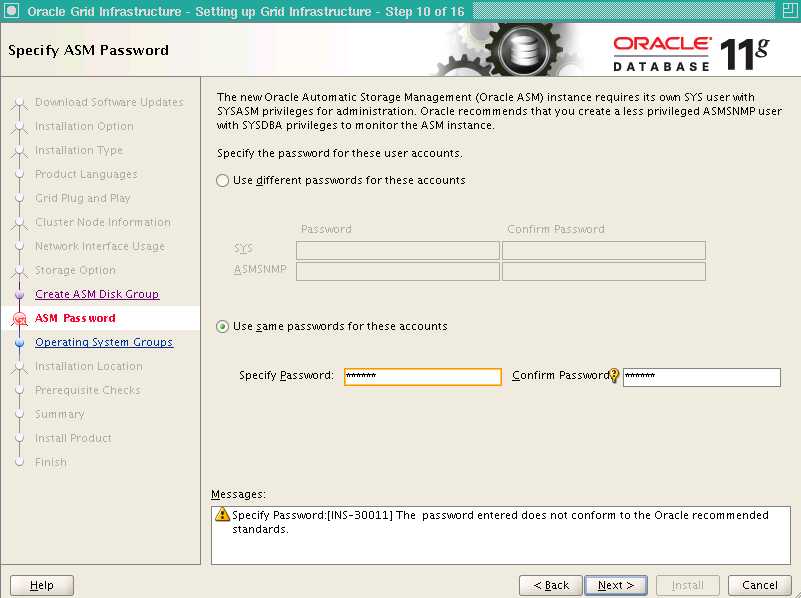
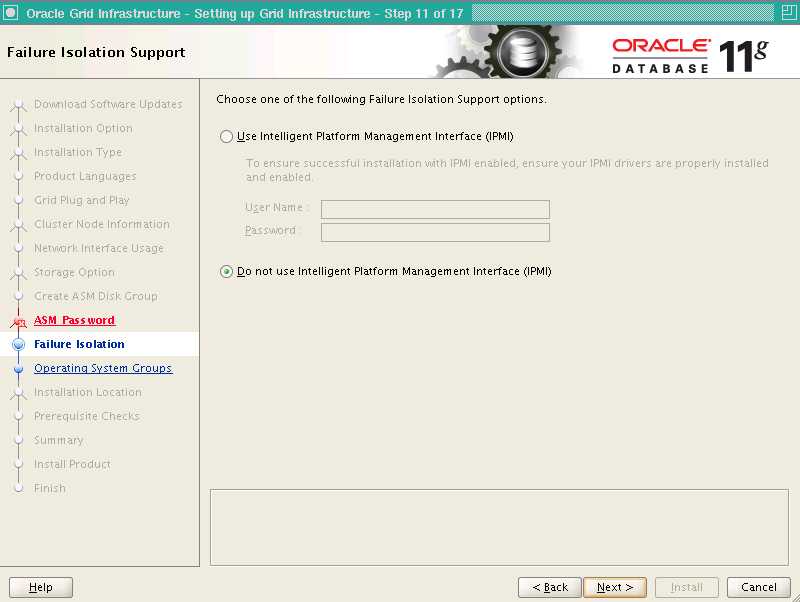
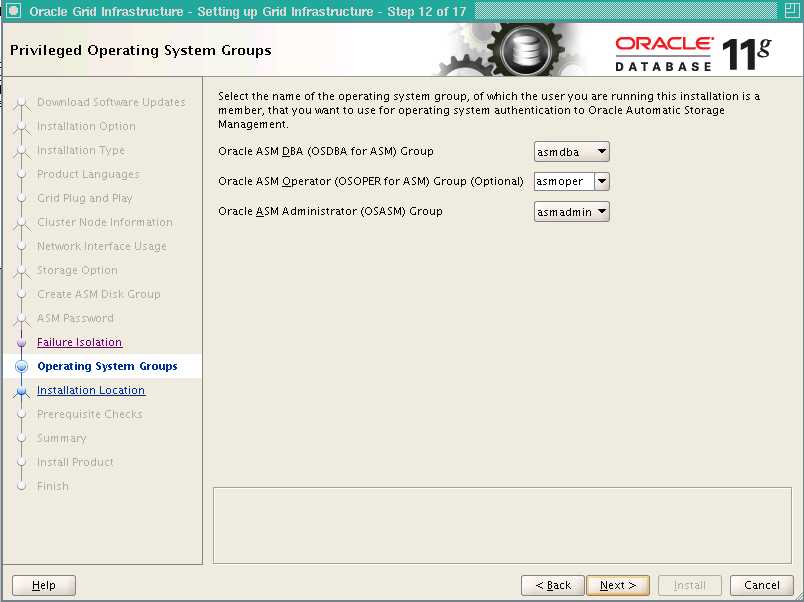
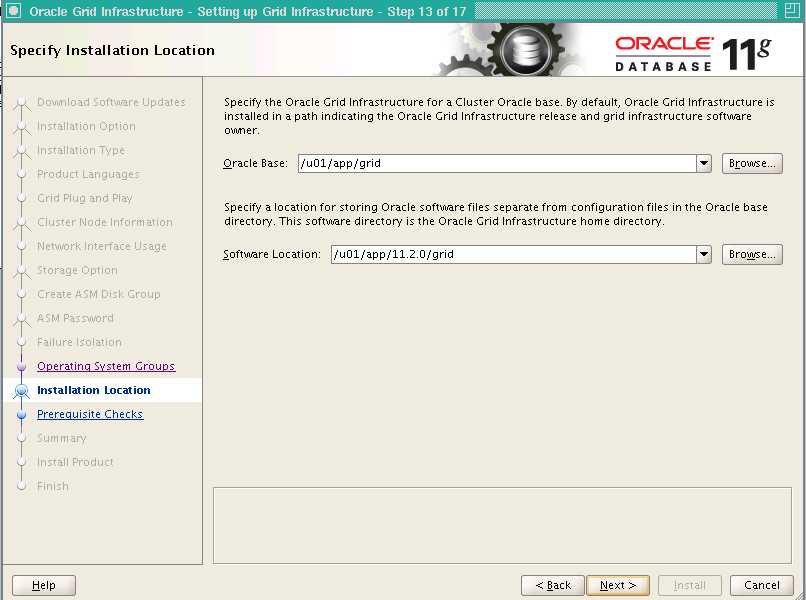
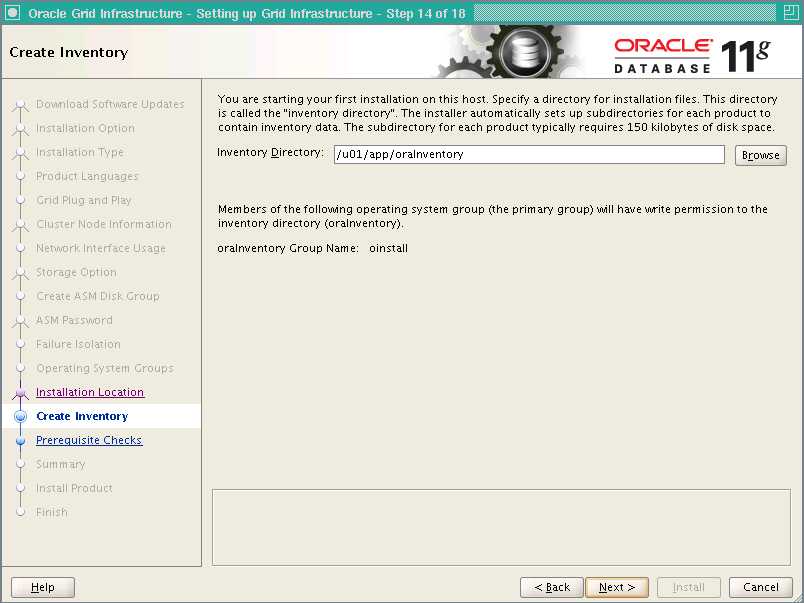
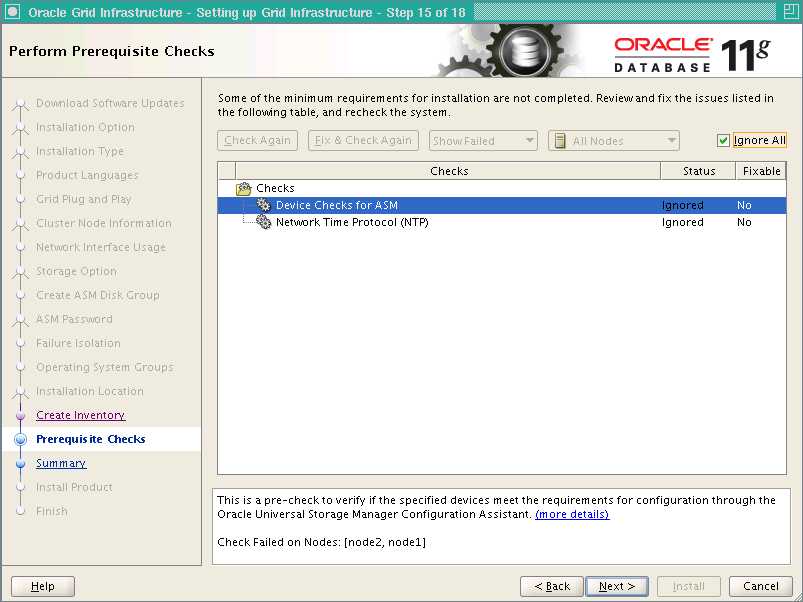
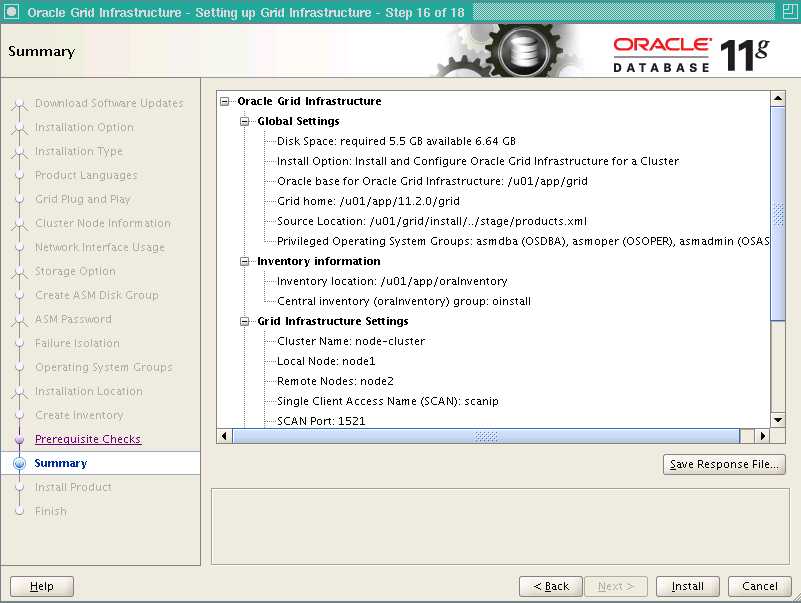
按顺序执行脚本:
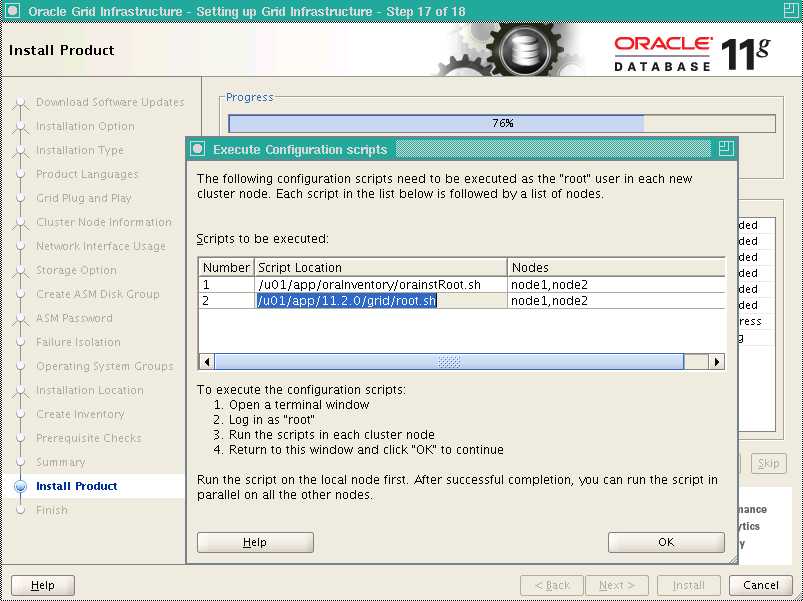
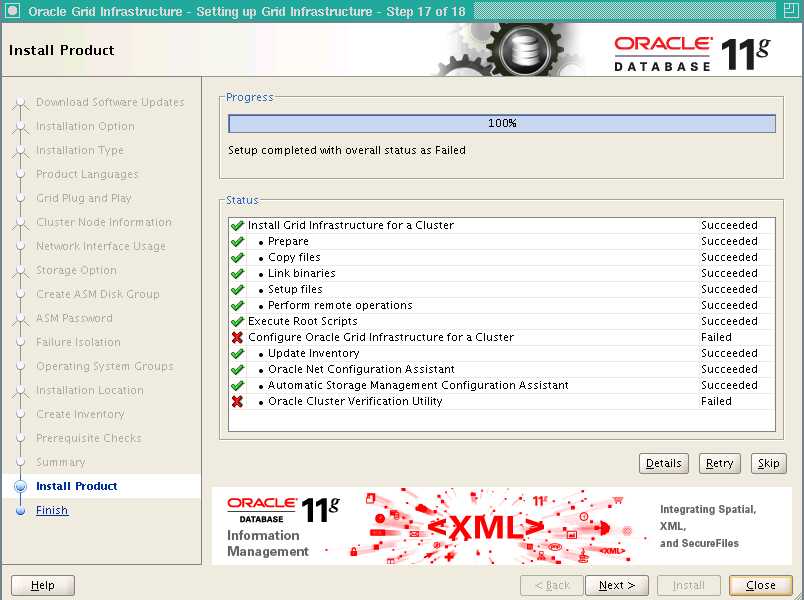
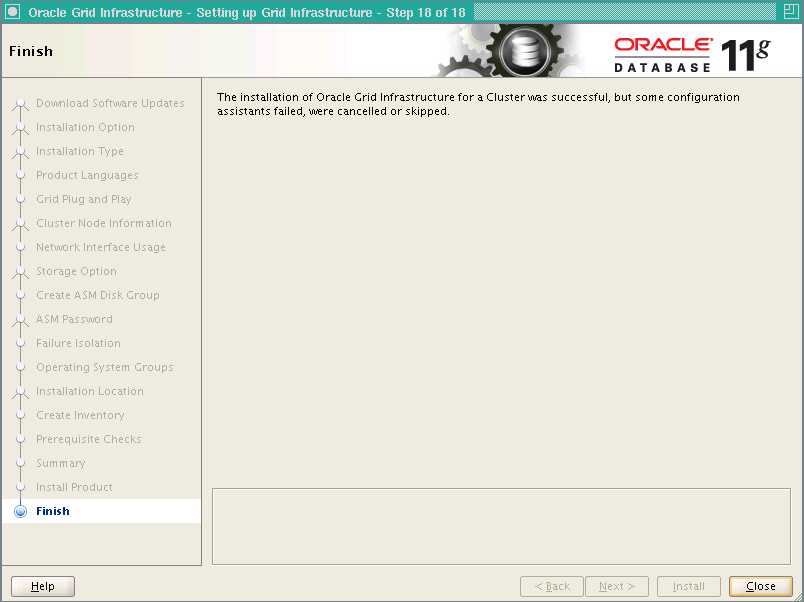
#grid软件已安装完成,用grid用户在所有节点执行
[[email protected] ~]$ crsctl check cluster
[[email protected] ~]$ srvctl status nodeapps
[[email protected] ~]$ srvctl config nodeapps
#查看集群的状态是否正常
[[email protected] ~]$ crsctl check cluster
CRS-4537: Cluster Ready Services is online
CRS-4529: Cluster Synchronization Services is online
CRS-4533: Event Manager is online
[[email protected] ~]$ srvctl status nodeapps
VIP node1-vip is enabled
VIP node1-vip is running on node: node1
VIP node2-vip is enabled
VIP node2-vip is running on node: node2
Network is enabled
Network is running on node: node1
Network is running on node: node2
GSD is disabled
GSD is not running on node: node1
GSD is not running on node: node2
ONS is enabled
ONS daemon is running on node: node1
ONS daemon is running on node: node2
[[email protected] ~]$
[[email protected] ~]$ srvctl config nodeapps
Network exists: 1/192.168.41.0/255.255.255.0/eth1, type static
VIP exists: /node1-vip/192.168.41.143/192.168.41.0/255.255.255.0/eth1, hosting node node1
VIP exists: /node2-vip/192.168.41.144/192.168.41.0/255.255.255.0/eth1, hosting node node2
GSD exists
ONS exists: Local port 6100, remote port 6200, EM port 2016
[[email protected] ~]$
五、安装Oracle软件
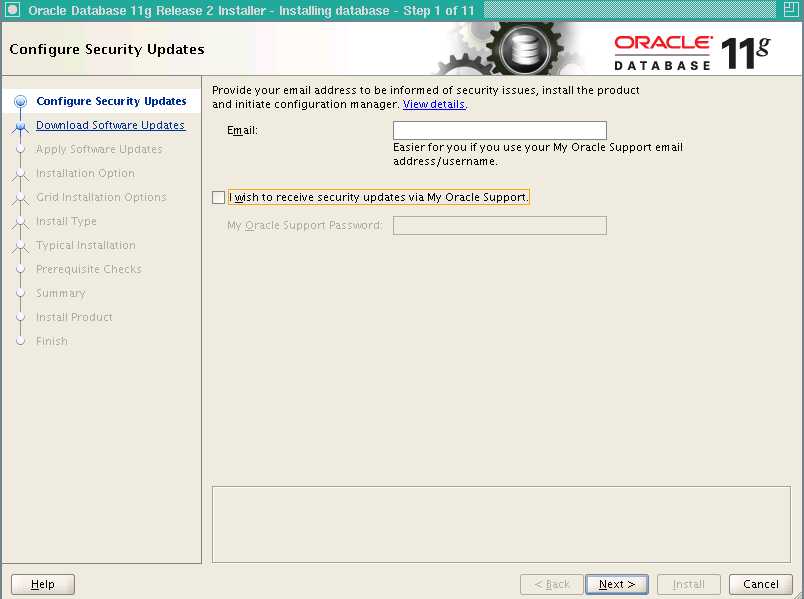
集群框架grid安装完成并开启后,剩下的所有操作均只需在节点1执行即可,其余节点会自动完成配置同步。用oracle登录,使用vncserver安装:
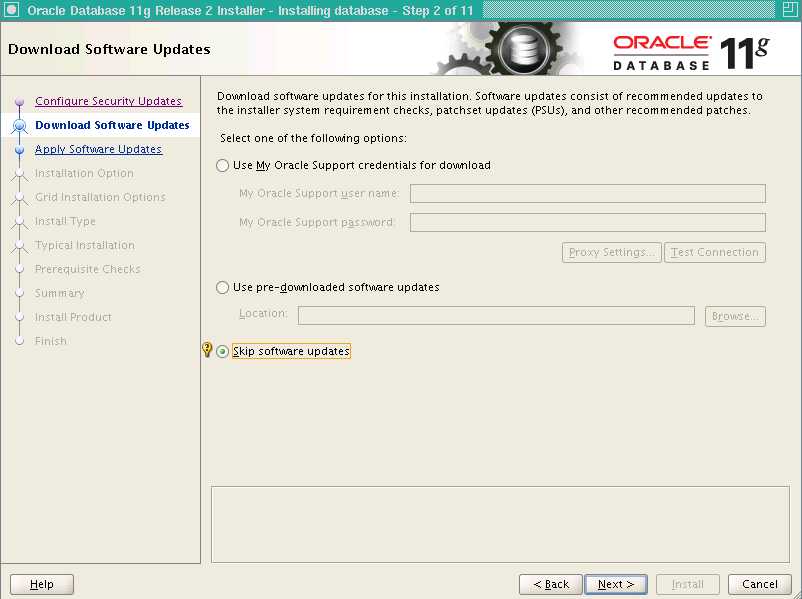
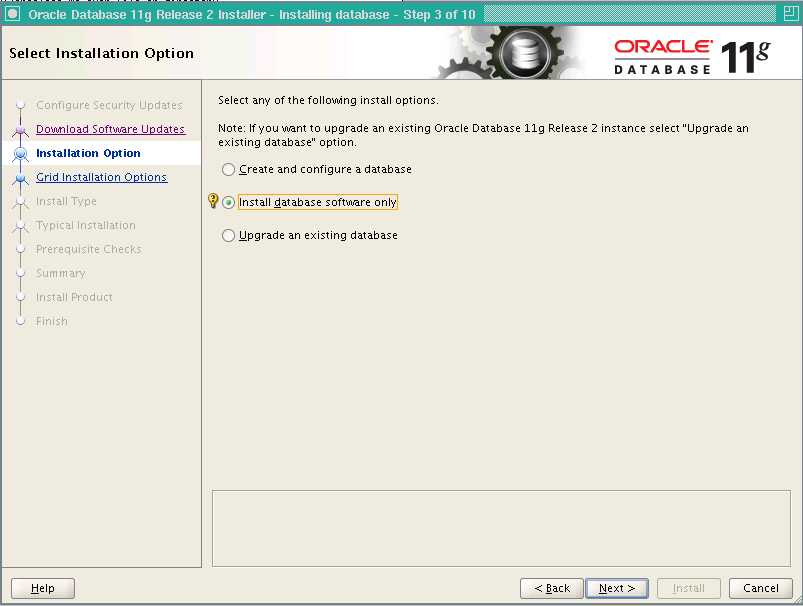
这里同样要点击SSH设置:
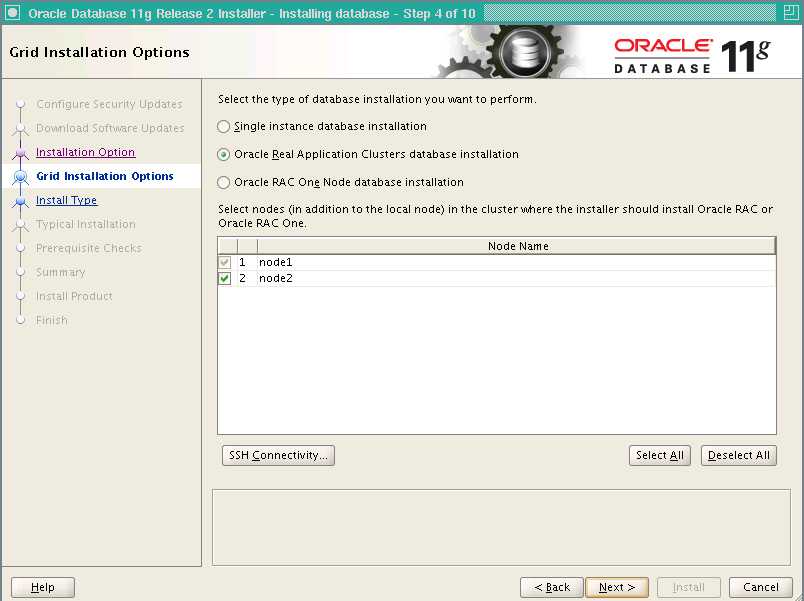
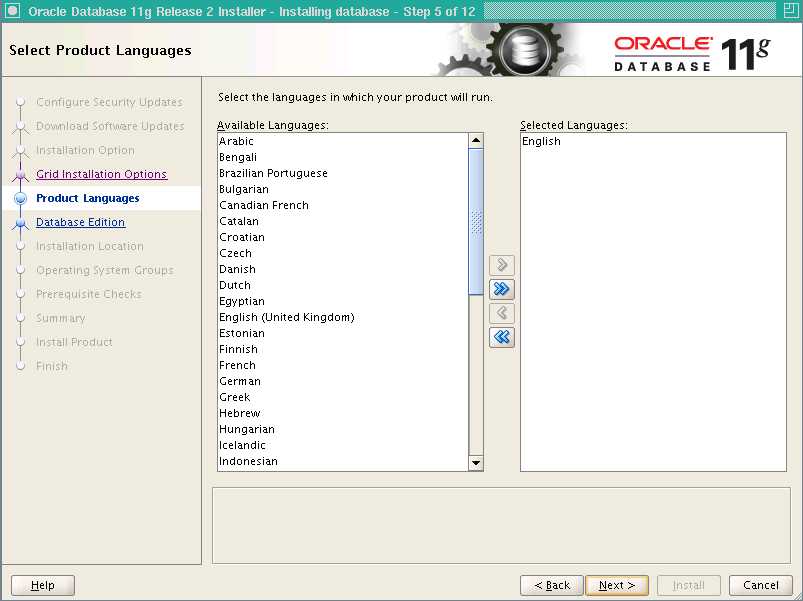
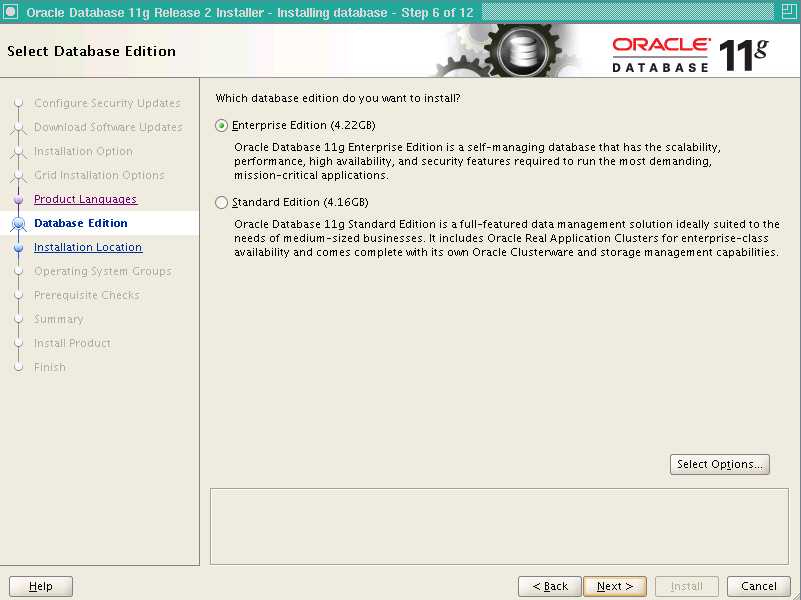
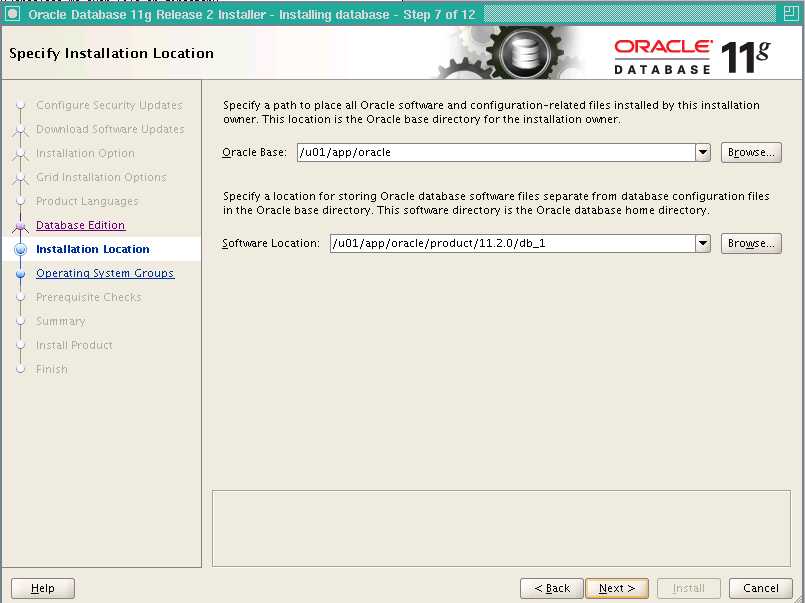
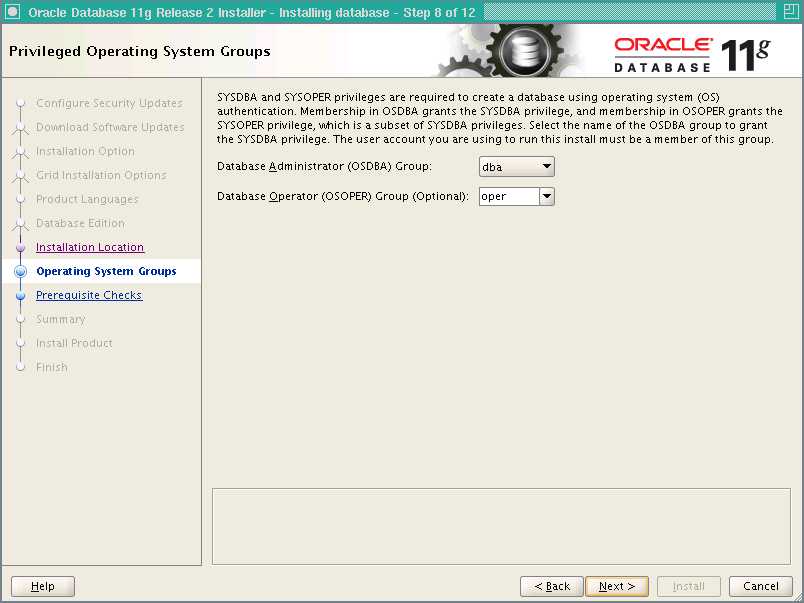
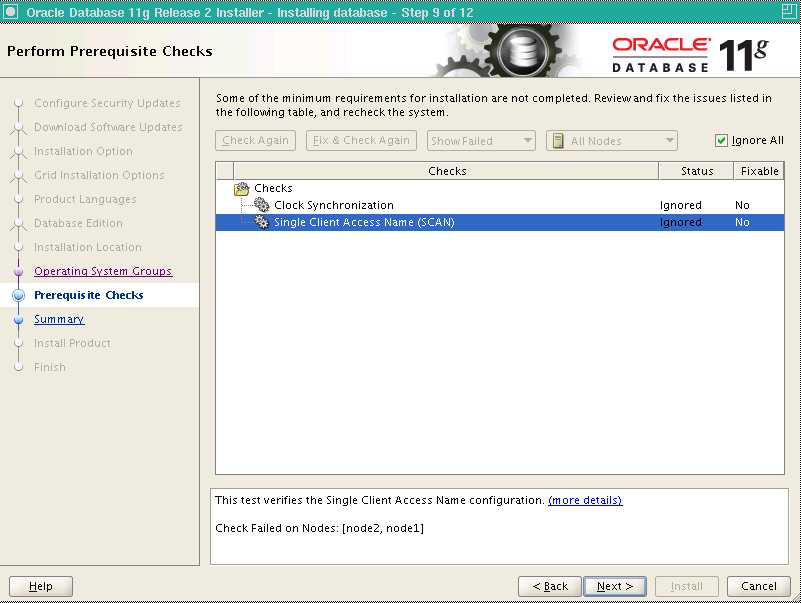
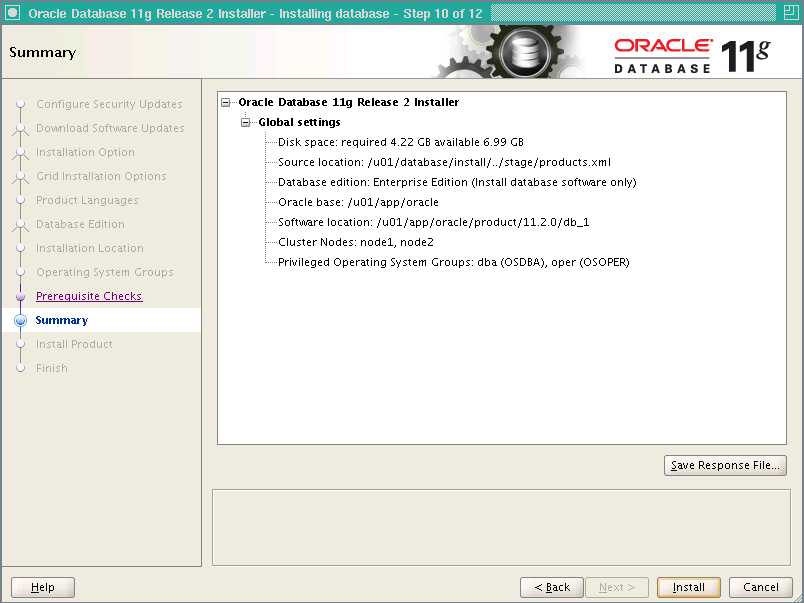
按顺序执行脚本:
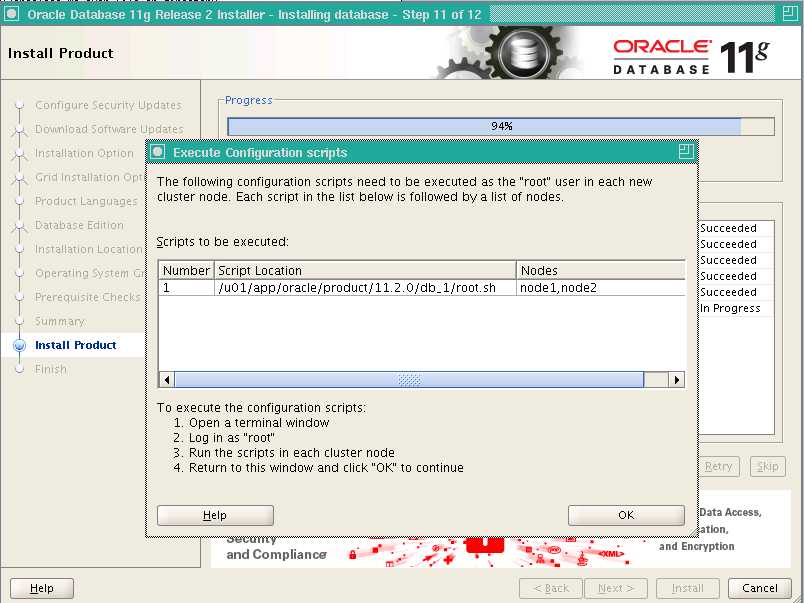
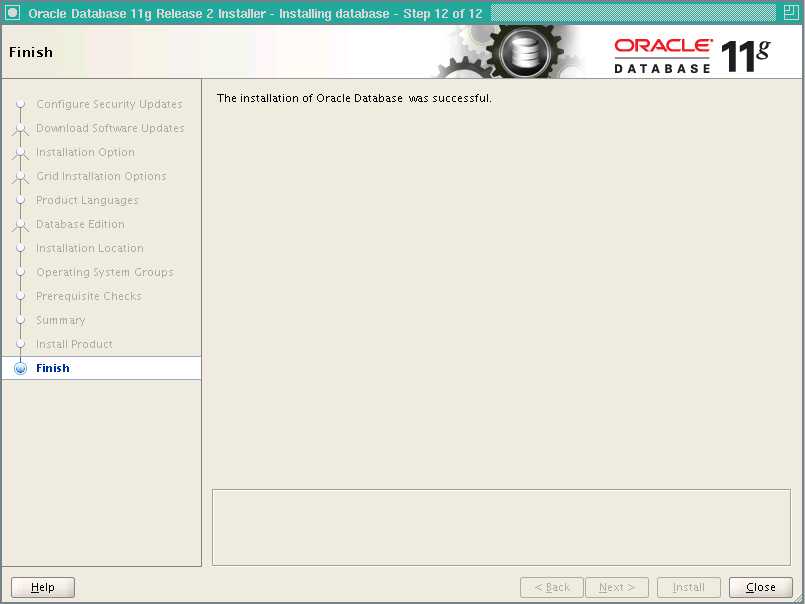
六、创建ASM磁盘
使用ASM配置Oracle RAC集群通常需要创建三个ASM磁盘组:
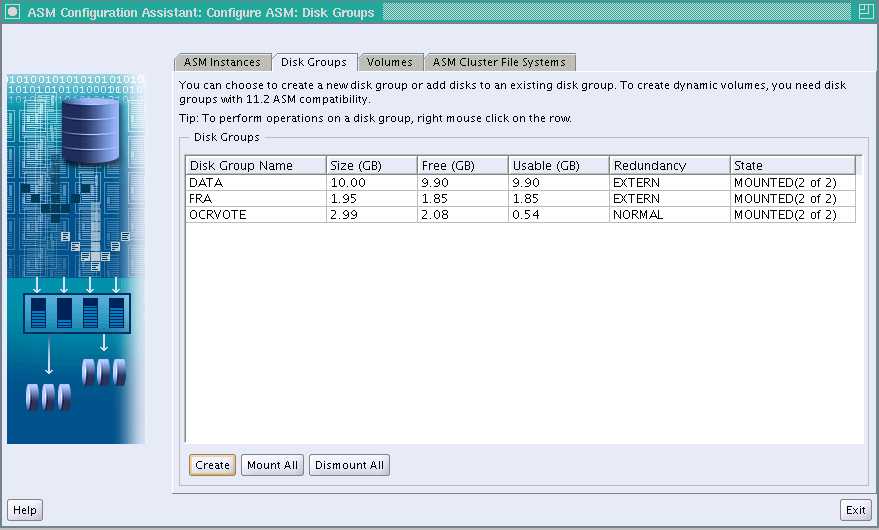
OCR磁盘组:自Oracle 11.2版以后,votedisk(表决盘:记录集群节点信息,提供仲裁防止脑裂)和ocr(oracle集群注册表:记录并维护整个集群的配置信息)已经支持放置于同一个ASM磁盘组中。因此这里为votedisk和ocr提供一个磁盘组:OCRVOTE。
DATA磁盘组:用于存放数据文件的磁盘组。
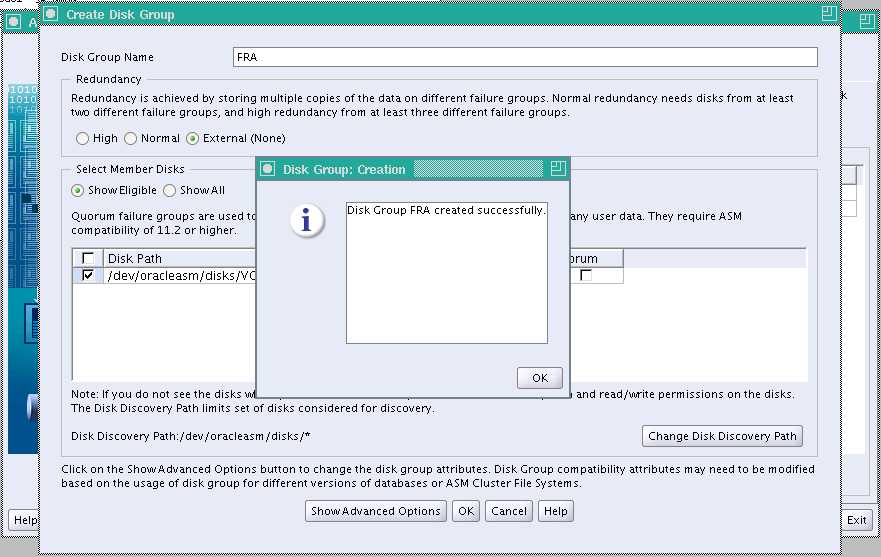
FRA磁盘组:快速恢复区,用于支持数据库快速闪回,同时也是默认的归档日志存放位置。单独创建一个磁盘组。
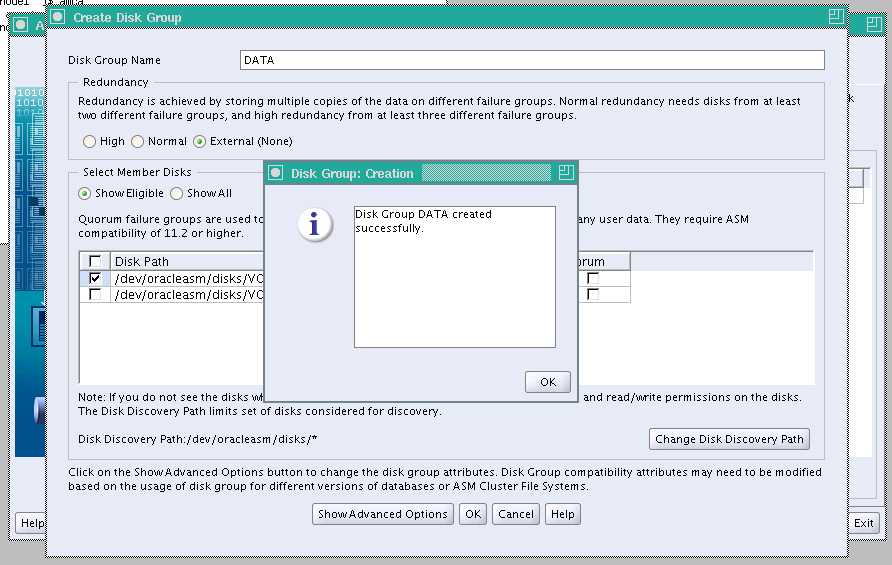
在安装grid的时候,已经创建了必要的OCR磁盘组,接下来需要使用ASM配置助手创建其他两个磁盘组以便完成Oracle数据库的创建。以grid用户输入以下命令开始配置:
#仅在一个节点执行
[[email protected] ~]$ asmca
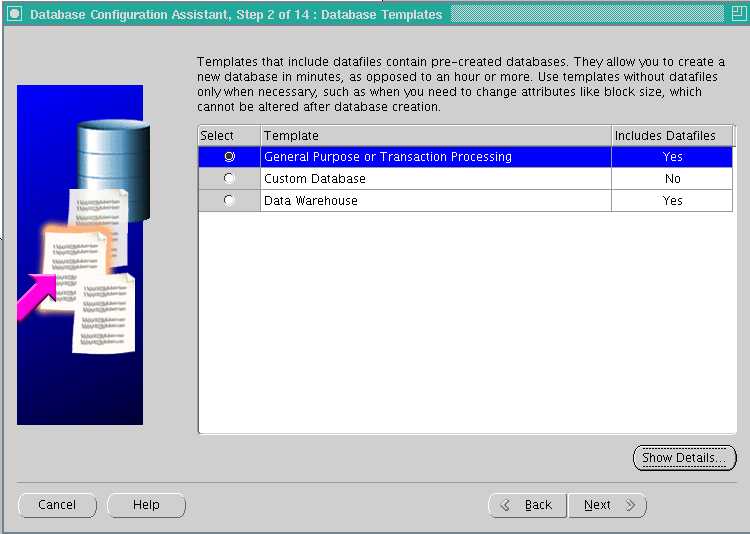
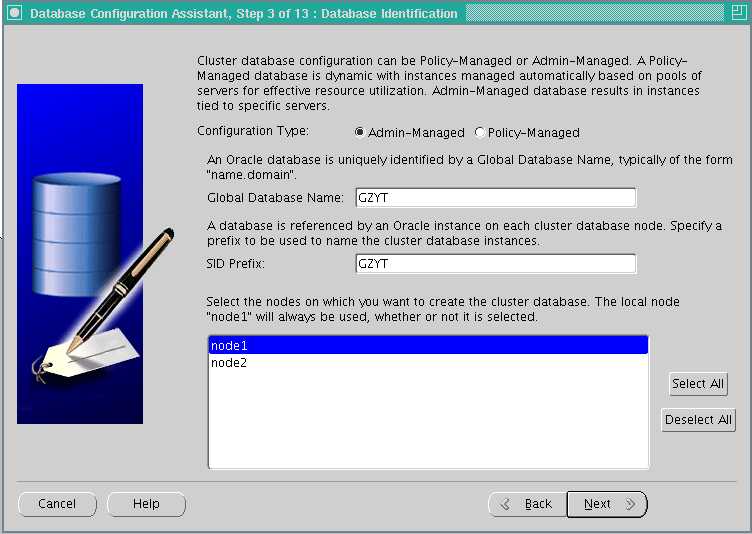
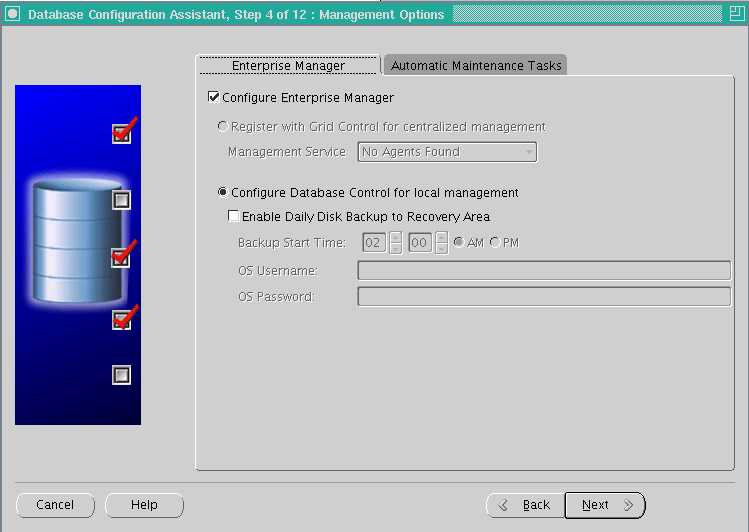
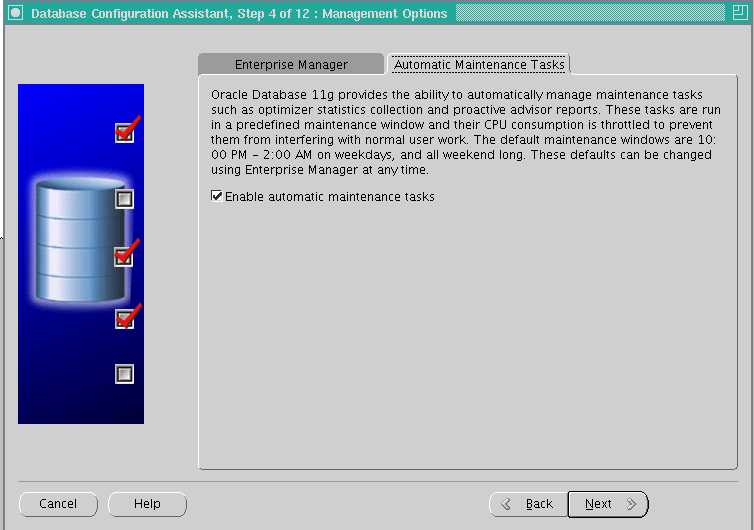
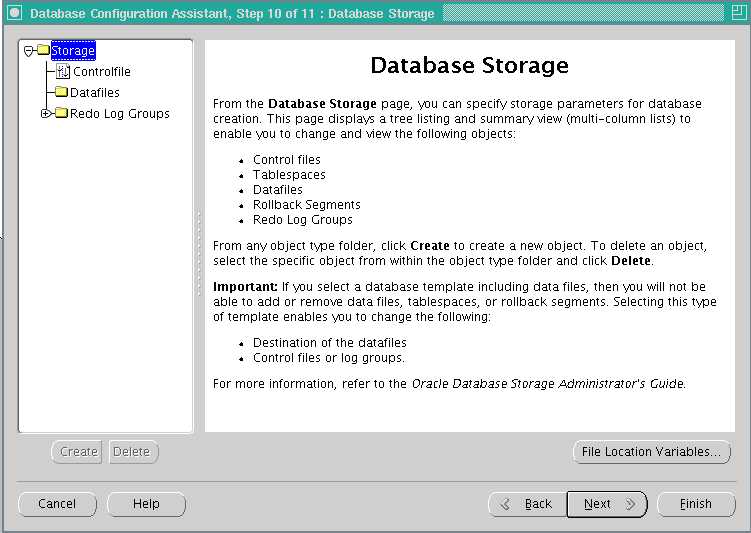
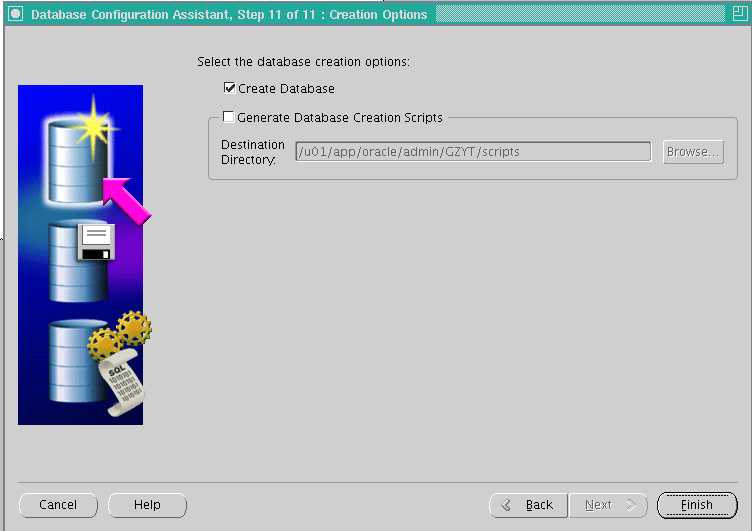
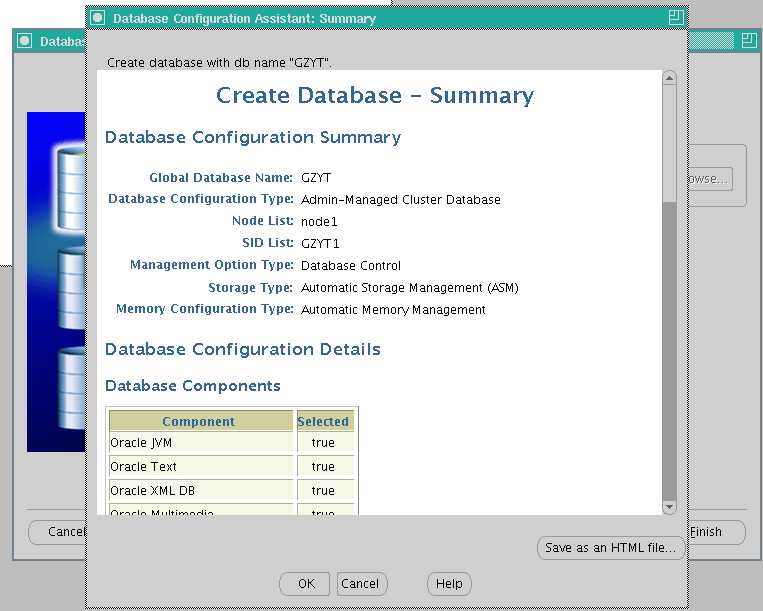
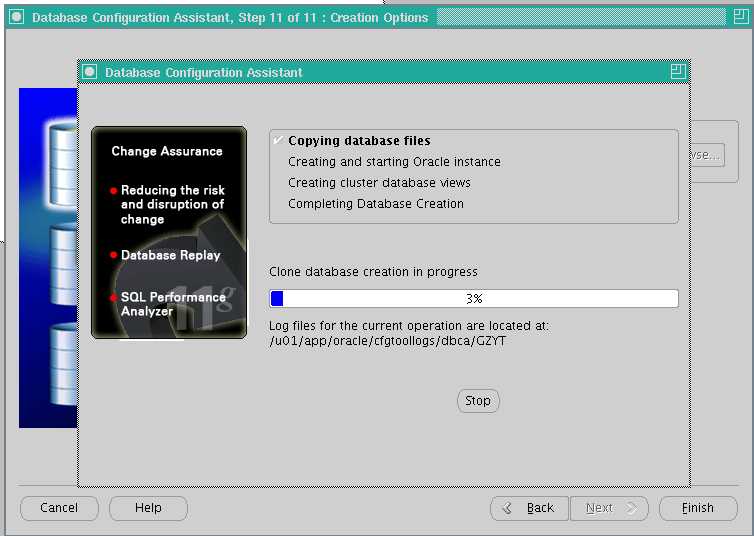
七、创建数据库
#仅在一个节点执行
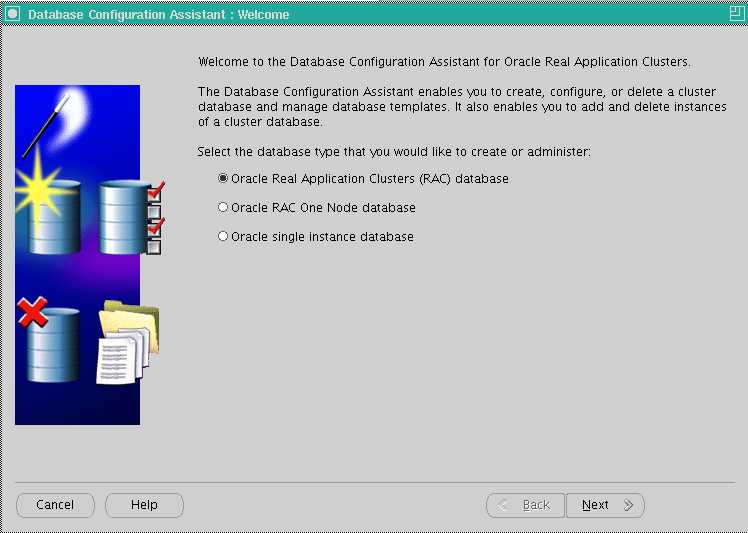
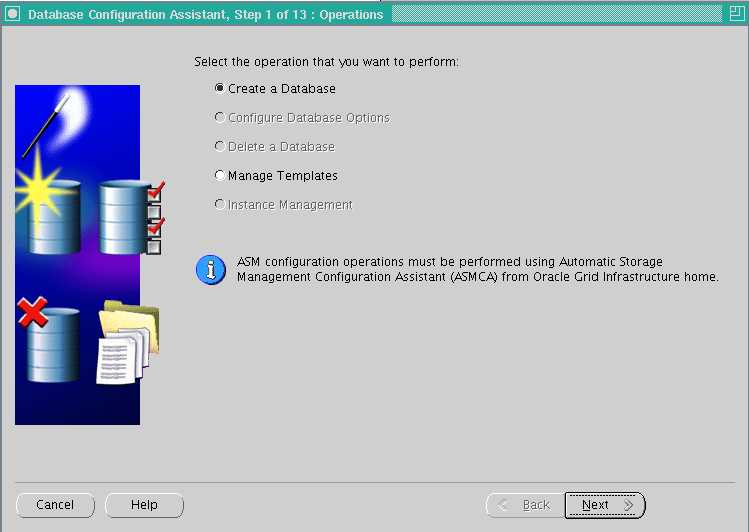
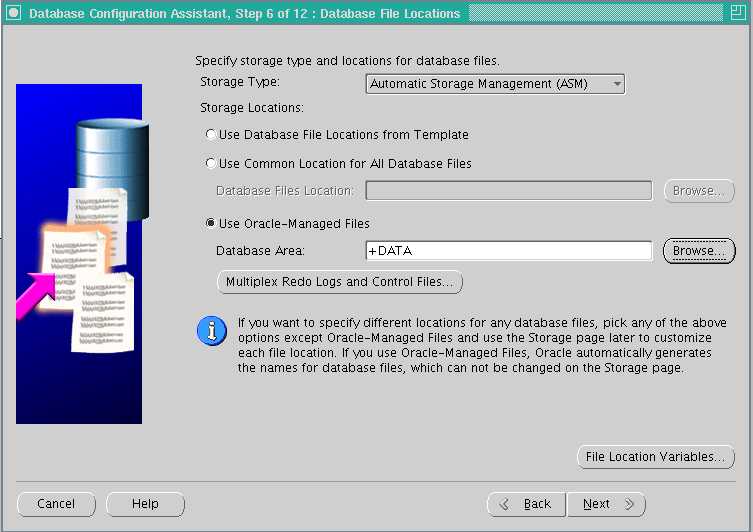
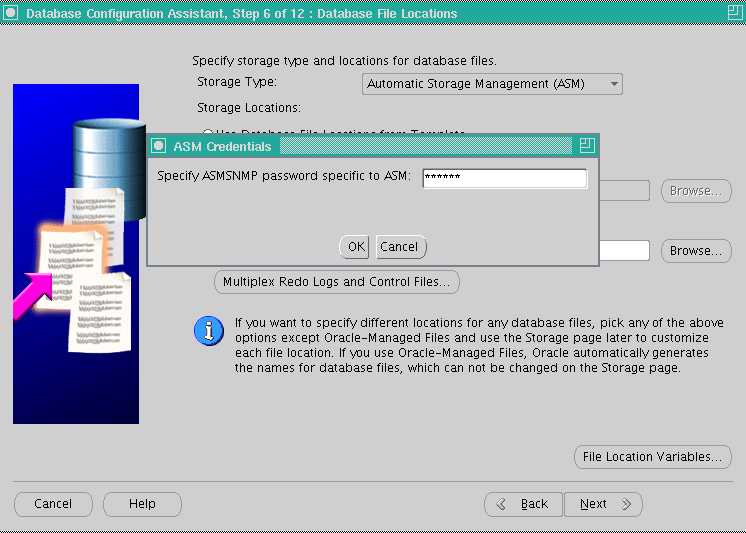
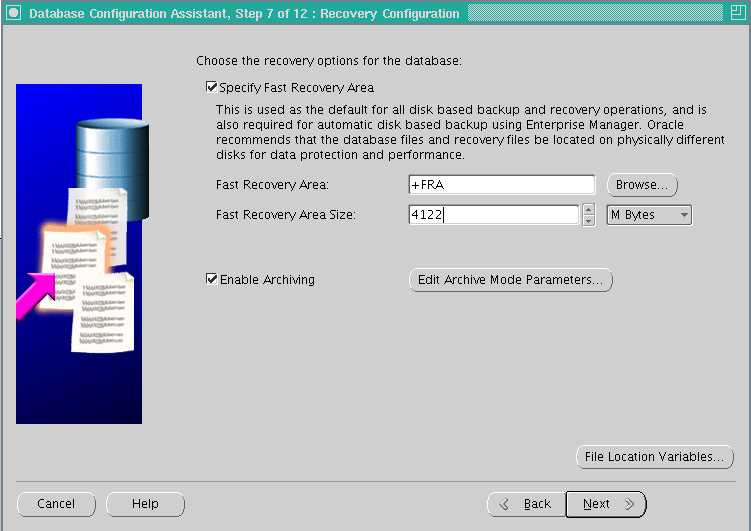
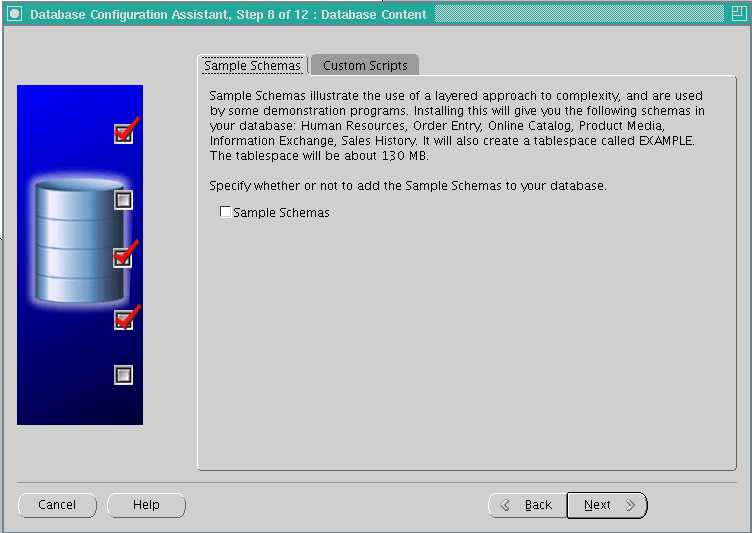
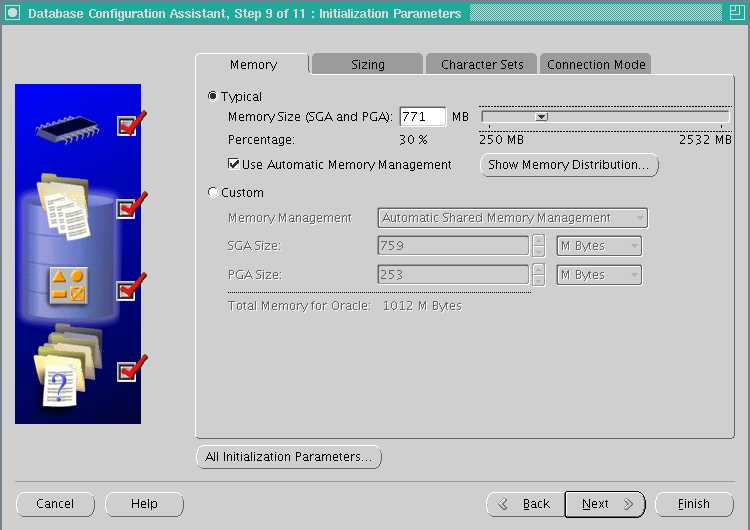
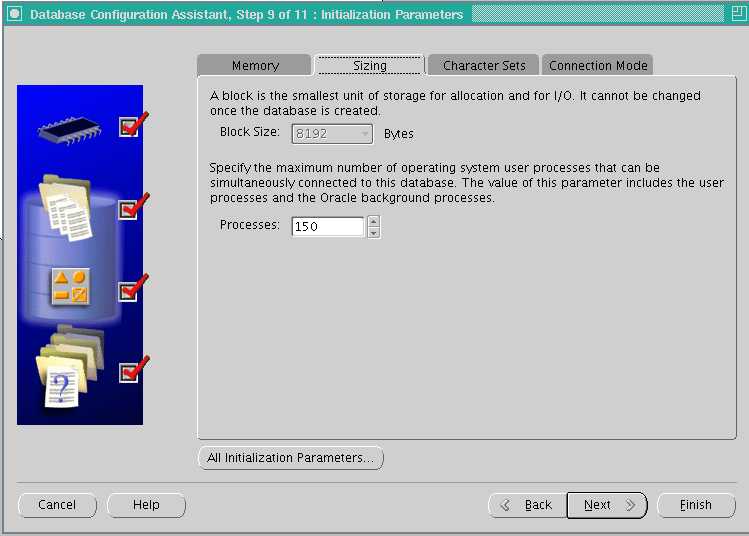
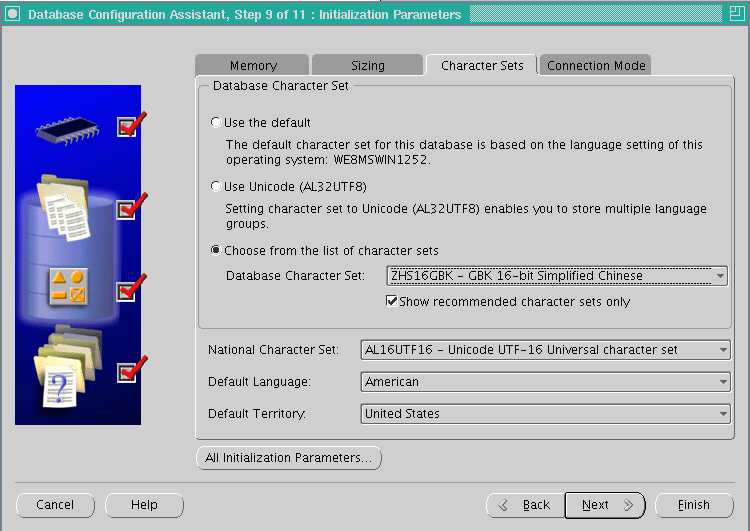
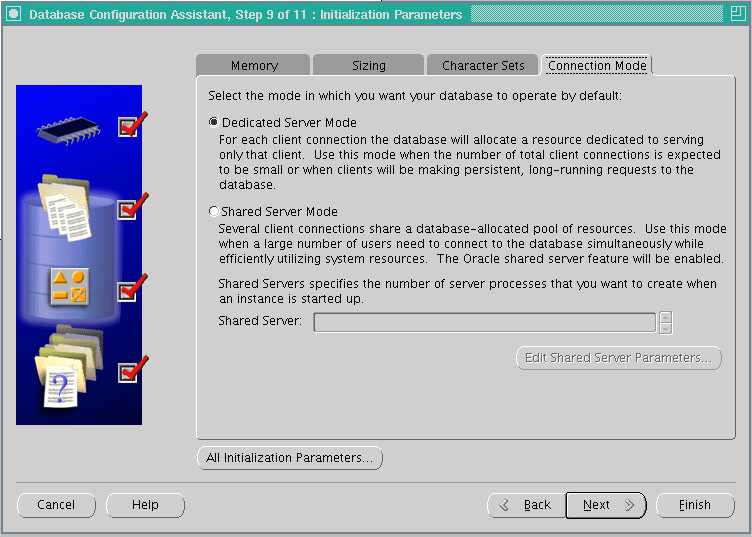
[[email protected] ~]$ dbca
至此,RAC已配置完成。