Ubuntu18.04搭建AirSim+ROS仿真环境
Posted 我只是一只自动小青蛙
tags:
篇首语:本文由小常识网(cha138.com)小编为大家整理,主要介绍了Ubuntu18.04搭建AirSim+ROS仿真环境相关的知识,希望对你有一定的参考价值。
一、安装UE4引擎
AIRSIM是依赖于UE4引擎实现的,因此在安装AIRSIM之前要安装UE4引擎。
1、获取UE4的github许可
在Ubuntu上安装UE4引擎需要从源文件进行编译,因此我们需要访问UE4的github仓库。但想要访问UE4的github仓库,我们就必须建立github与UE4许可的链接,否则直接访问UE4的github仓库时就会404 Not Found。
首先在虚幻4官网注册账号,注册好账号之后进入个人/CONNECTIONS/ACCUNTS中,选择GITHUB进行关联,关联好后会EPIC会发送邮件到github账号邮箱中邀请你加入开发团队,在github上接受邀请后即可获取UE4的github仓库访问许可。这个时候再进入UE4的github仓库就可以正常进入了。
2、安装UE4
根据AIRSIM官方文档推荐,我选择下载4.25版本的UE4(更具体的是4.25.3,这是4.25的最新版本)
下载文件后解压,打开终端,执行以下命令进行编译,注意编译期间会下载几十GB资源,且不要使用make -j指令加速
1.进入工程文件夹
cd UnrealEngine-4.25.4-release/
2.运行脚本,配置依赖环境
./Setup.sh
//运行成功输出信息
**********  SUCCESS ****************
Setup successful.
3.运行工程配置脚本
./GenerateProjectFiles.sh
//运行成功输出信息
Setting up Unreal Engine 4 project files...

Fixing inconsistent case in filenames.
Setting up Mono
Generating data for project indexing... 100%
Generating data for project indexing... 100%
Writing project files... 100%
Generating data for project indexing... 100%
Generating data for project indexing... 100%
Generating data for project indexing... 100%
Generating data for project indexing... 100%
Writing project files... 100%
4.编译UE4
make
报错如下
Using llvm-ar : /home/zhangman/UnrealEngine-4.25.4-release/Engine/Extras/ThirdPartyNotUE/SDKs/HostLinux/Linux_x64/v16_clang-9.0.1-centos7/x86_64-unknown-linux-gnu/bin/llvm-ar
Using fast way to relink  circularly dependent libraries (no FixDeps).
------------------------------
ERROR: Cannot use an old toolchain (missing ToolchainVersion.txt file, assuming version earlier than v11)
Makefile:307: recipe for target 'CrashReportClient-Linux-Shipping' failed
make: *** [CrashReportClient-Linux-Shipping] Error 6
根据这篇博客使用如下命令解决,其中命令前后两个部分的v15_clang-8.0.1-centos7要替换成报错中显示的版本,我这里是v16_clang-9.0.1-centos7
echo "v15_clang-8.0.1-centos7" > Engine/Extras/ThirdPartyNotUE/SDKs/HostLinux/Linux_x64/v15_clang-8.0.1-centos7/ToolchainVersion.txt
二、安装AirSim
1.克隆仓库
git clone https://github.com/Microsoft/AirSim.git
这一步可能会遇见如下报错
error: RPC failed; curl 56 GnuTLS recv error (-54): Error in the pull function.
fatal: The remote end hung up unexpectedly
fatal: 过早的文件结束符(EOF)
fatal: index-pack 失败
这是由于墙限制了文件传输大小,运行如下命令即可解决
git config --global http.postBuffer 524288000
这个时候在运行git clone https://github.com/Microsoft/AirSim.git可能会报错
fatal: unable to access 'https://github.com/Microsoft/AirSim.git/': gnutls_handshake() failed: The TLS connection was non-properly terminated.
这时候需要讲上述命令中的https更改为git,即可成功克隆
git clone git://github.com/Microsoft/AirSim.git
这几个问题发生的原因还不清楚,只是实测这样的解决办法可行,有清楚的大佬还麻烦评论区告知
2.配置AirSim依赖环境
使用AirSim中的setup.sh来配置依赖环境
cd AirSim
./setup.sh
成功输出如下
************************************
AirSim setup completed successfully!
************************************
3.编译AirSim
编译AirSim有两种模式可以选择,release在编译过程中会优化代码使得AirSim达到最优性能,但如果后期要对AirSim进行二次开发时候会难以分析测试。debug则不会优化代码,但方便后期二次开发调试。
./build.sh #普通release编译
./build.sh --debug #to build in debug mode
成功输出如下
==================================================================
 AirSim plugin is built! Here's how to build Unreal project.
==================================================================
If you are using Blocks environment, its already updated.
If you are using your own environment, update plugin using,
rsync -a --delete Unreal/Plugins path/to/MyUnrealProject

For help see:
https://github.com/Microsoft/AirSim/blob/master/docs/build_linux.md
==================================================================
三、UE + AirSim联合测试
1、车辆仿真测试
1.开启UE4引擎
cd UnrealEngine-4.25.4-release/Engine/Binaries/Linux
./UE4Editor

2.打开AirSim项目
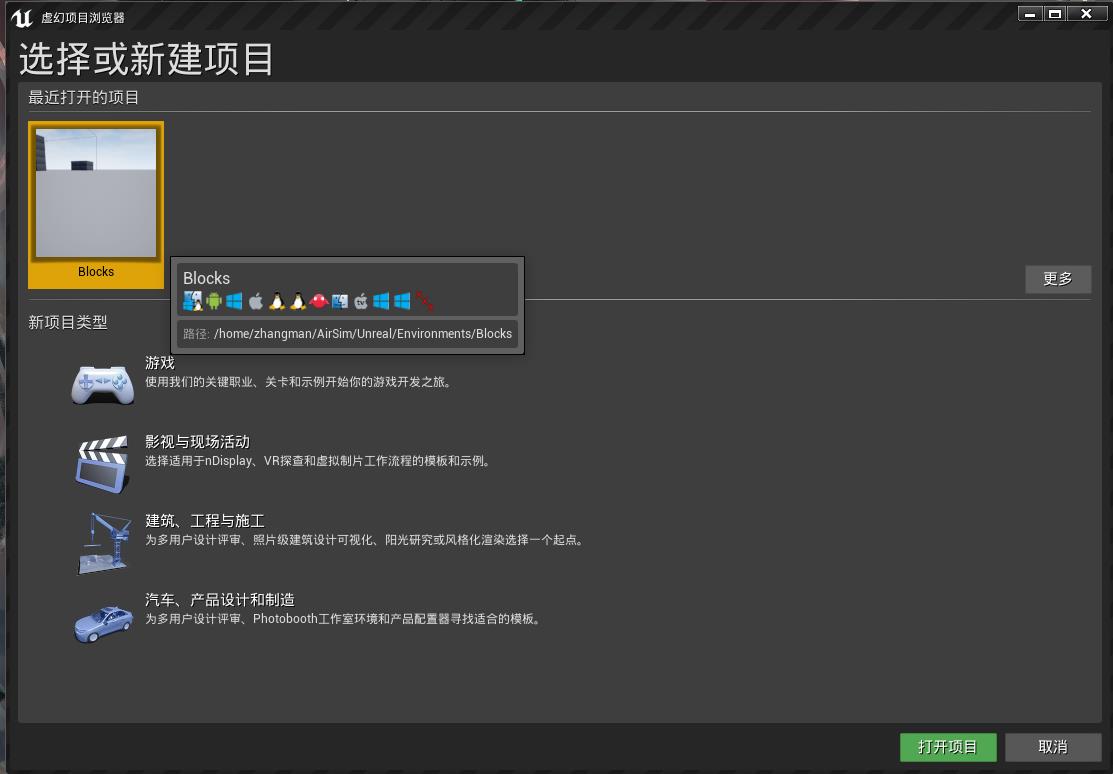
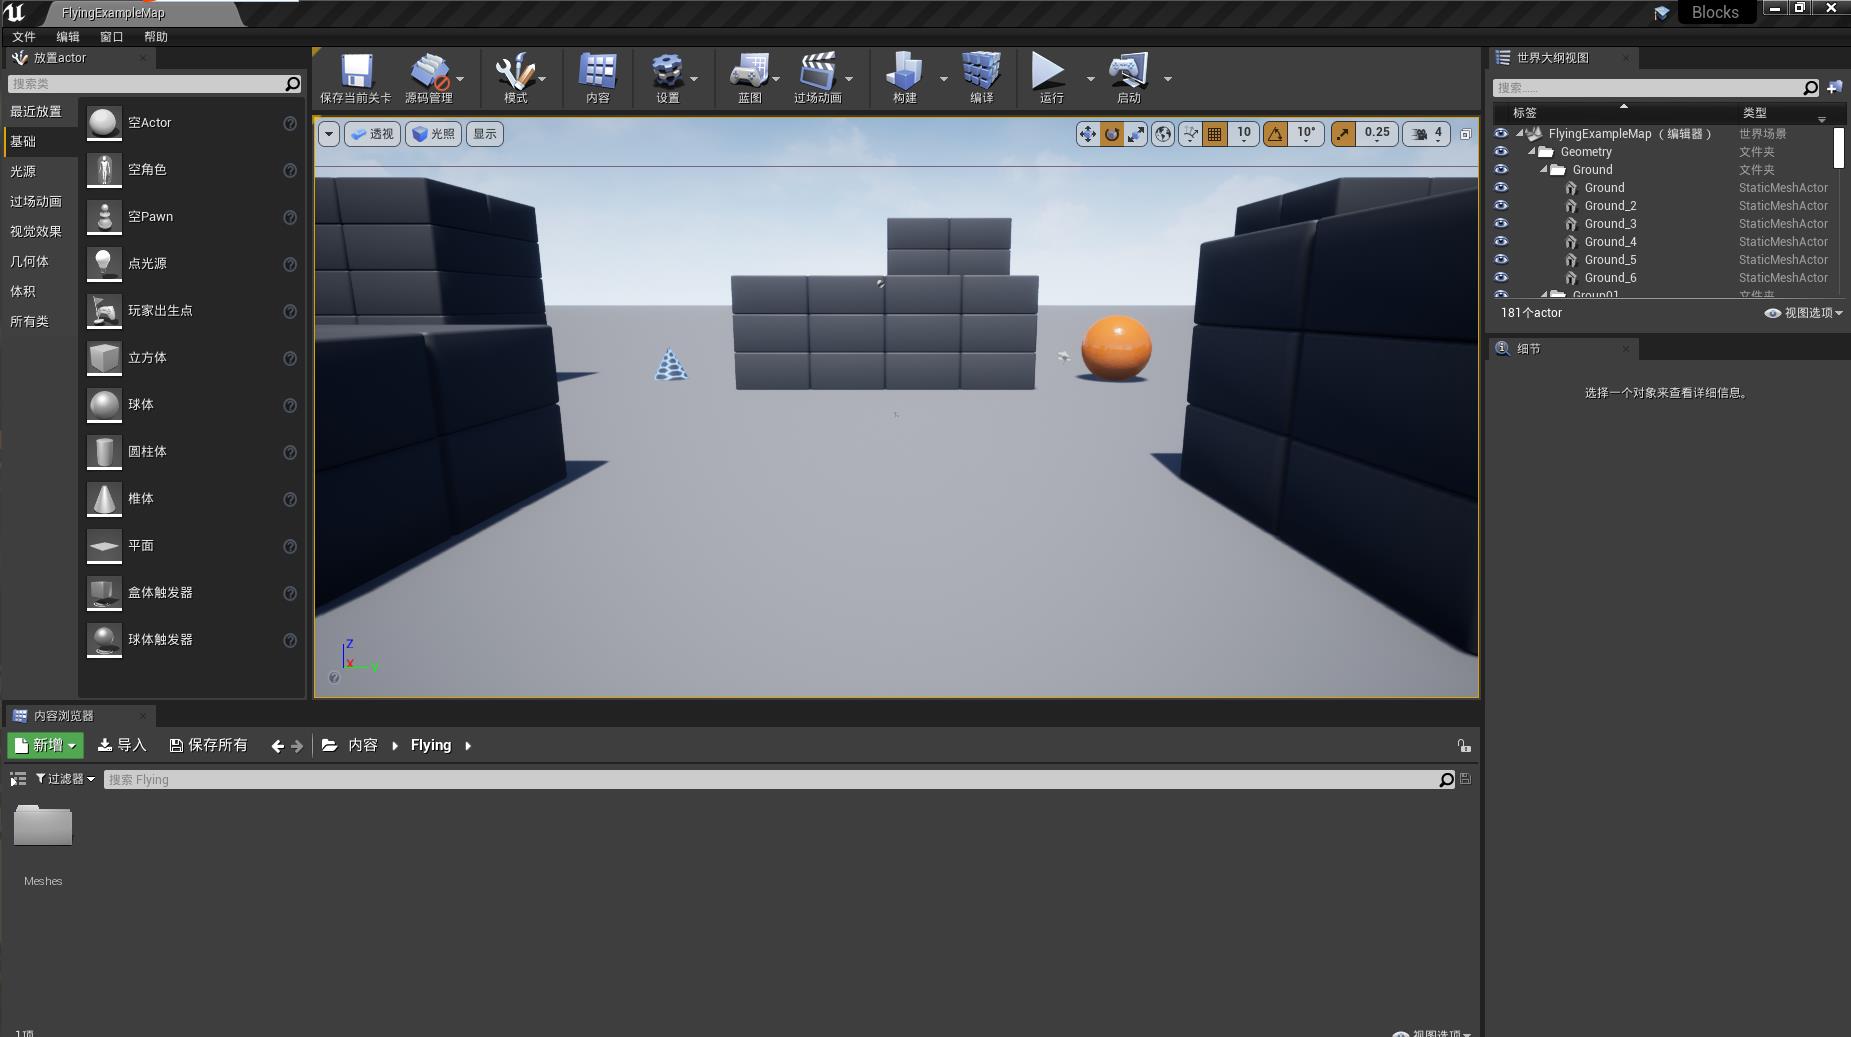
点击界面中的更多,选择/AirSim/Unreal/Environments/Blocks/下面的Blocks uproject工程文件,点击打开项目。首次打来会提示The project was made with a different version of the Unreal Engine,要求进行转换,点击Convert in-place(原位转换)来进行项目转换,转换完成后,UE4会重新加载,进入到项目仿真页面中

3.仿真验证
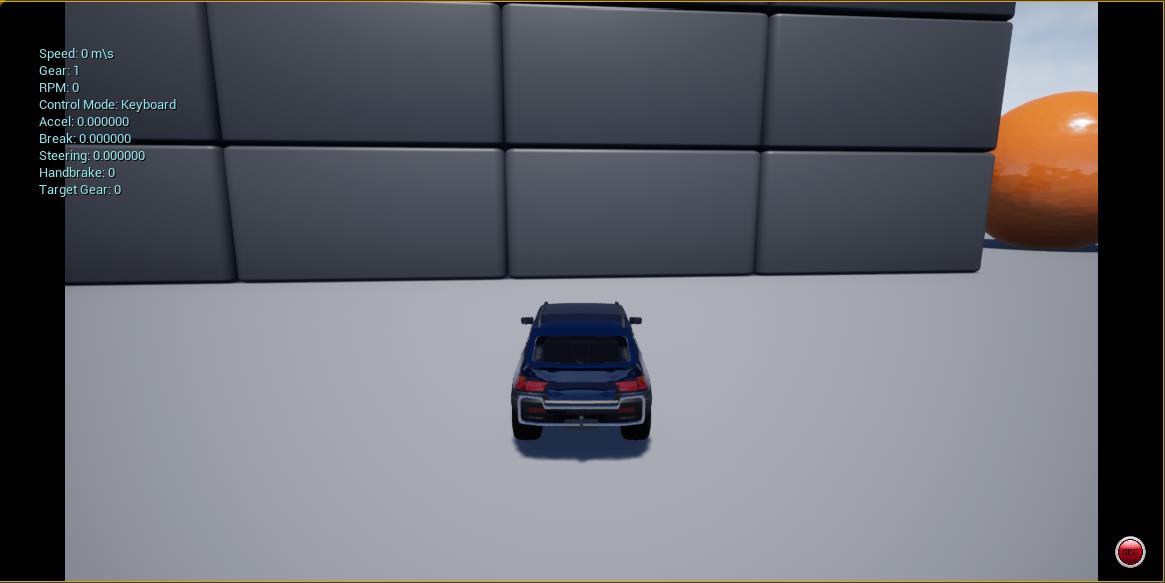
点击运行,出现提示选择yes为车辆仿真,选择no为无人机仿真,这里选择yes,仿真项目中会出现一辆车,按上下左右键可以控制起运行,即运行正常。

2、无人机仿真测试
1.打开AirSim无人机仿真界面
同上,当提示选择yes为车辆仿真,选择no为无人机仿真时选择no,界面出现四旋翼无人机一台
2.运行无人机控制脚本
官方提供的测试控制脚本需要在Python3的环境下运行,如果Ubuntu中安装了ROS,其自带版本是Python2.7,因此我这里使用了conda为AIRSIM创建了一个新环境
conda create --name AIRSIM python=3.6
conda activate AIRSIM
安装两个依赖
pip install opencv-python
pip install msgpack-rpc-python
运行无人机控制脚本
cd ~/AirSim/PythonClient/multirotor
python hello_drone.py
无人机成功起飞,终端输出控制信息
...
    'velocity': <Vector3r>    'x_val': 0.0,
    'y_val': 0.0,
    'z_val': 0.0,
    'is_valid': True,
    'time_stamp': 1640574634647096064
Press any key to takeoff
四、AIRSIM的ROS功能包测试
1、编译AIRSIM
官方文档中需要编译AIRSIM,但我们前面安装AIRSIM的时候已经编译过了,因此我认为这一步应该不是必要的,但还是按照官方来吧
cd AirSim;
./setup.sh;
./build.sh --debug
2、编译AIRSIM的ROS包
1.安装GCC-8和G+±8
sudo apt install gcc-8
sudo apt install g++-8
注意,虽然我们安装了gcc-8和g++ -8,但其默认版本仍是7,因此后面编译的时候应手动指明起版本
2.编译ROS包
cd ros
catkin build -DCMAKE_C_COMPILER=gcc-8 -DCMAKE_CXX_COMPILER=g++-8
成功输出
[build] Summary: All 3 packages succeeded!
[build]   Ignored:   None.
[build]   Warnings:  1 packages succeeded with warnings.
[build]   Abandoned: None.
[build]   Failed:    None.
[build] Runtime: 48.6 seconds total.
[build] Note: Workspace packages have changed, please re-source setup files to use them.
3.更新环境变量
source devel/setup.bash
4.测试
更新环境变量后运行
roslaunch airsim_ros_pkgs airsim_node.launch
不报错
roslaunch airsim_ros_pkgs rviz.launch
不报错,正确打开rviz,则说明编译成功
五、UE4+AIRSIM+ROS联合运行
1.拷贝setting文件
这一步应该是AIRSIM在运行仿真的时候,只会从Documents/AirSim路径下读取settings.json文件作为仿真配置,因此我们需要讲AIRSIM提供的测试配置文件拷贝到该路径下
cd AirSim/ros/src/airsim_tutorial_pkgs/settings
cp front_stereo_and_center_mono.json ~/Documents/AirSim/settings.json
2.使用UE4运行AIRSIM仿真环境
cd UnrealEngine-4.25.4-release/Engine/Binaries/Linux/
./UE4Editor
选择AIRSIM工程文件运行,由于我们的配置文件是针对无人机的,因此我们选择无人机仿真页面
3.开启AIRSIM的node节点
打开新终端
cd AirSim/ros
source devel/setup.bash
roslaunch airsim_ros_pkgs airsim_node.launch
4.运行无人机控制节点
打开新终端
cd AirSim/ros
source devel/setup.bash
roslaunch airsim_tutorial_pkgs front_stereo_and_center_mono.launch
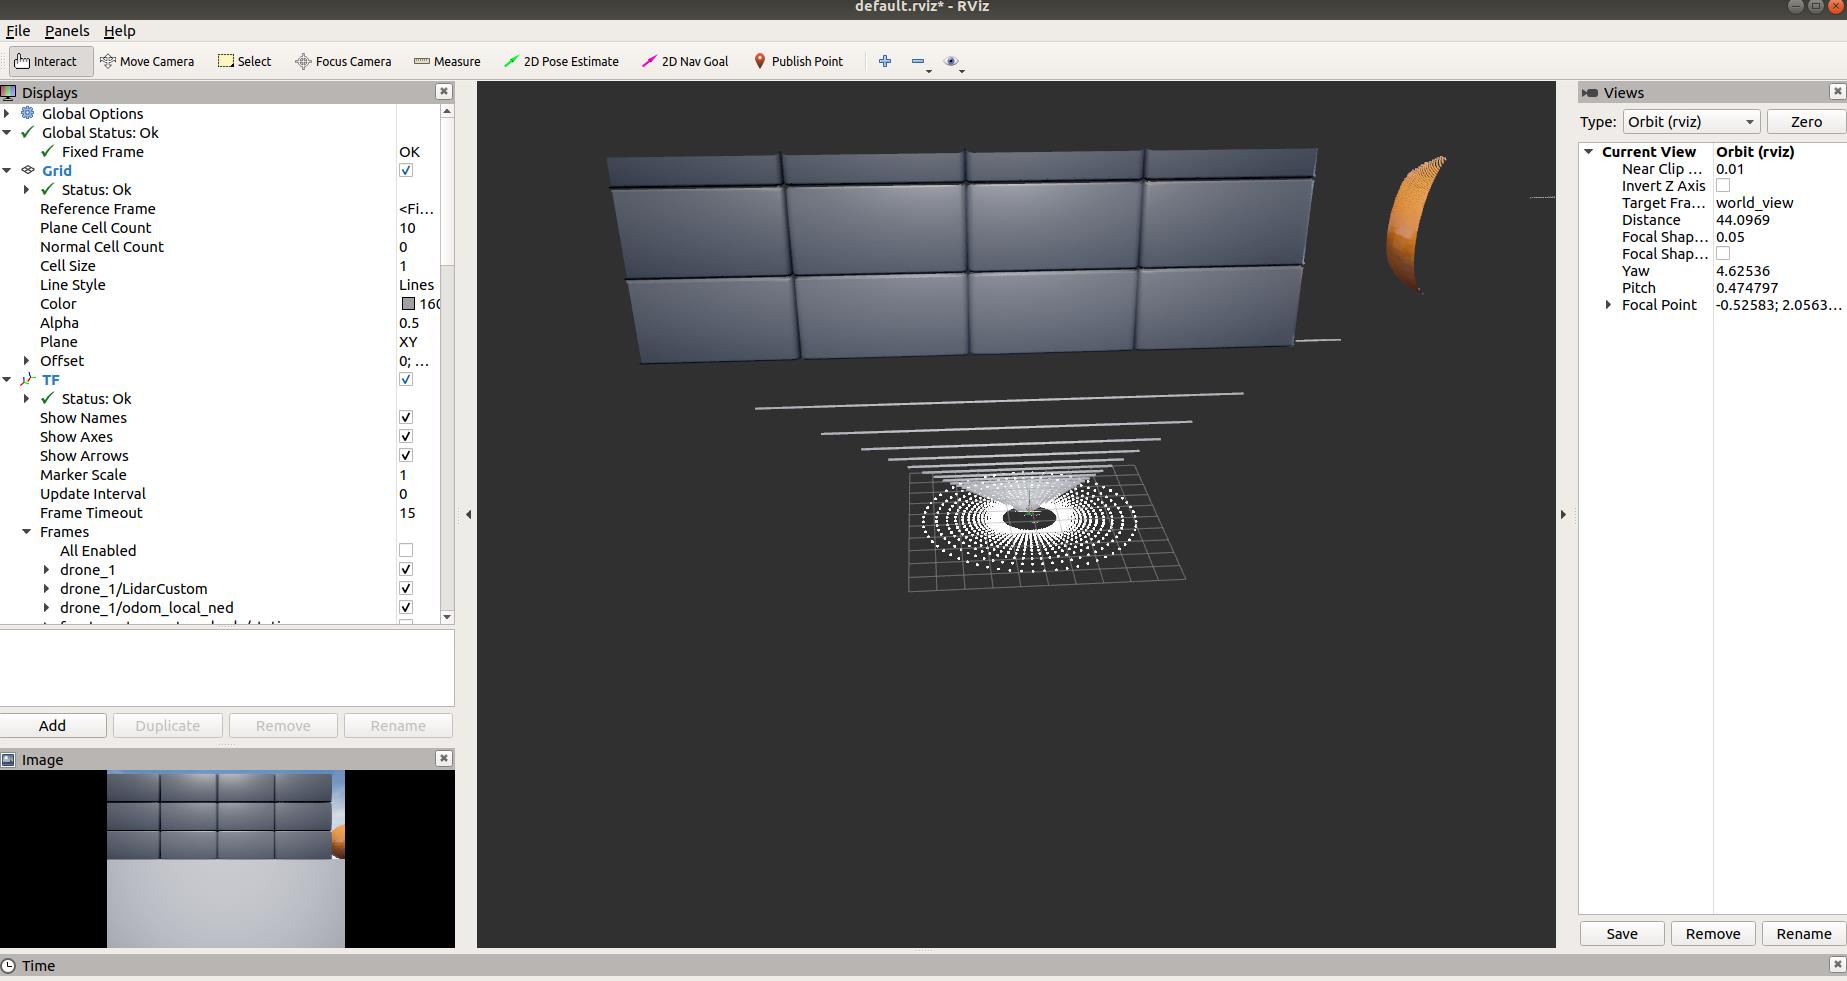
rviz中正常显示无人机传感器数据,测试成功

六、仿真配置
1、更改仿真环境
AIRSim已经为我们搭建了一些仿真环境,我们可以到其网站下载
下载好后解压,以AIRSIMNH环境为例,进入如下路径运行仿真环境
cd AirSimNH/LinuxNoEditor
./AirSimNH.sh
然后参照第五节中的3小节和4小节即可完成新仿真环境中的传感器数据获取
2、更改仿真模型车辆或飞机参数
请更改~/Documents/AirSim路径下的settings.json文件,注意文件名需要保持为settings.json,AIRSIM在进行仿真的时候默认从该文件加载仿真车辆或飞机参数。
具体修改方法见[官方文档](
Carla+ROS1联合仿真环境搭建
1.环境搭建
1.1硬件环境
基于Docker安装
系统环境:ubuntu18.04,nvidia-470,cuda-11.1
1.2.Carla环境搭建
1.拉取镜像
docker pull carlasim/carla:latest
2.运行镜像
主要有2种方式:
- 1.运行docker就直接运行UE4
# 代显示运行
docker run --privileged --gpus all --net=host -e DISPLAY=$DISPLAY carlasim/carla:latest /bin/bash ./CarlaUE4.sh

# 不显示运行
docker run --privileged --gpus all --net=host -v /tmp/.X11-unix:/tmp/.X11-unix:rw carlasim/carla:latest /bin/bash ./CarlaUE4.sh -RenderOffScreen

# 用vulkan显示运行
docker run --privileged --gpus all --net=host -e DISPLAY=$DISPLAY -e SDL_VIDEODRIVER=x11 -v /tmp/.X11-unix:/tmp/.X11-unix:rw carlasim/carla:latest /bin/bash ./CarlaUE4.sh -vulkan

#用opengl显示运行(已经被vulkan替代)
docker run -e DISPLAY=$DISPLAY --net=host --gpus all --runtime=nvidia carlasim/carla:latest /bin/bash CarlaUE4
以上是关于Ubuntu18.04搭建AirSim+ROS仿真环境的主要内容,如果未能解决你的问题,请参考以下文章