MySQL 安装
Posted 那一剑的风情
tags:
篇首语:本文由小常识网(cha138.com)小编为大家整理,主要介绍了MySQL 安装相关的知识,希望对你有一定的参考价值。
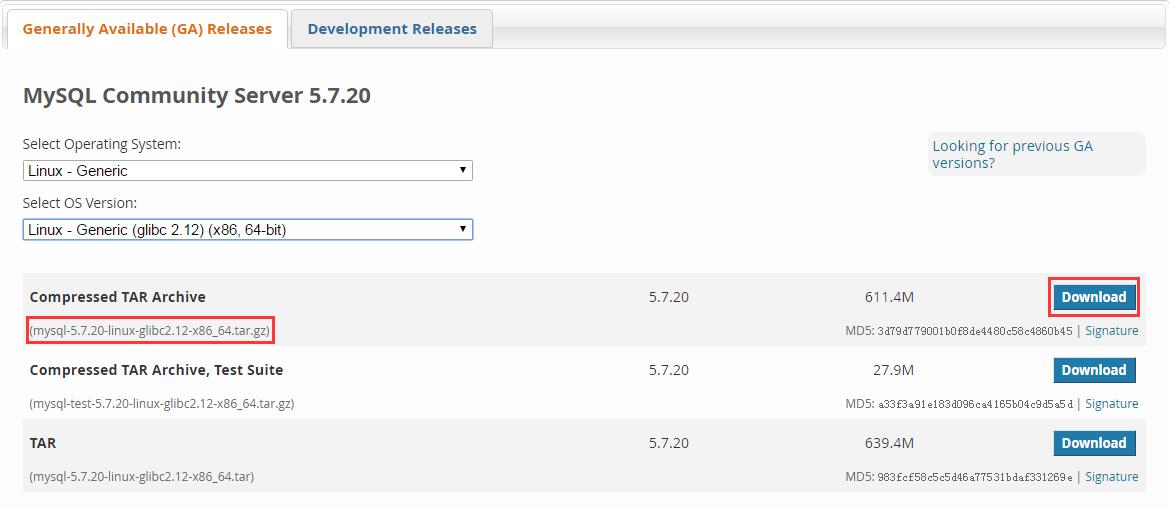
先下载mysql安装包
Linux:
环境:centos 7.0 x64
4.安装数据库
./scripts/mysql_install_db --user=mysql --datadir=/usr/local/mysql/data
这时候报错了,提示我们没有找到./scripts/mysql_install_db 这个里这个文件或者目录

因为 mysql_install_db 这个文件的目录已经改掉,在 bin/ 目录下面,那么我们再运行如下命令 ./bin/mysql_install_db --user=mysql --datadir=/usr/local/mysql/data/mysql/
这时候也报错了,让我们用 mysqld --initialize 来初始化
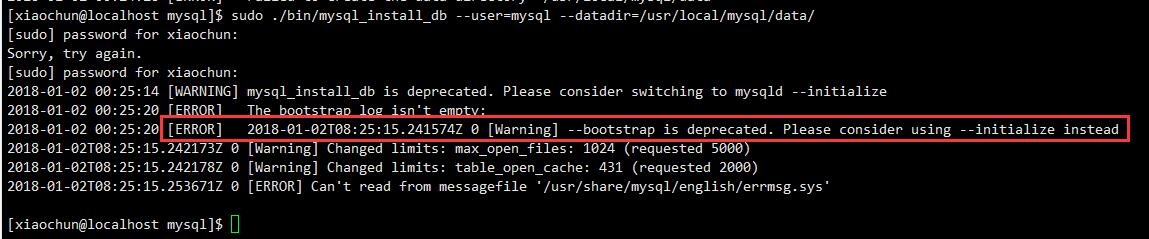
切到 mysql 用户,用 initialize 命令来初始化。
su root
su mysql
./mysqld --initialize --user=mysql --datadir=/usr/local/mysql/data/

5.启动mysql:
报错:ERROR! The server quit without updating PID file

解决方法:
1.
先备份 MySQL 配置文件
sudo mv /etc/my.cnf /etc/my.cnf.backup
再启动
./mysql.server start
2. 查看/usr/local/mysql/data/ 目录下的错误日志 localhost.localdomain.err
解决具体错误。
效果:

6.添加自启动服务
切换到 root 用户执行
cp /usr/local/mysql/support-files/mysql.server /etc/init.d/mysql
添加服务
chkconfig --add mysql
查看服务列表
chkconfig --list
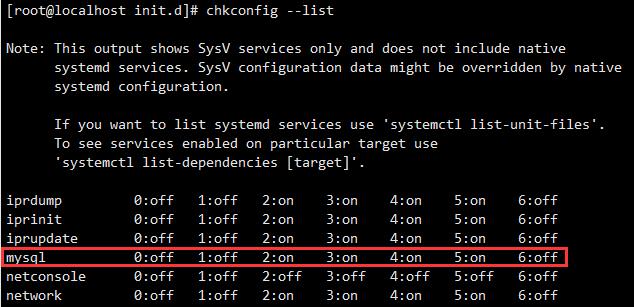
如果看到mysql的服务,并且3,4,5都是on的话则成功,如果是off,则执行:
chkconfig --level 345 mysql on
7.连接数据库
报错:

解决方法:
1.停止运行的mysql
service mysql stop
2.带参数启动
/usr/bin/mysqld_safe --skip-grant-tables &
在启动 mysql 时不启动 grant-tables 授权表。请注意最后一个 & 号,必须要加。
3.启动后通过mysql命令直接进入,不需要密码.设置新密码即可
mysql
mysql> use mysql ;
mysql> update user set password=password(\'xxx\') where user=\'root\';(新版本mysql 用 update user set authentication_string=password(\'xxx\') where user=\'root\';)
mysql> exit
4.杀死当前的mysql进程,并重新启动mysql
ps -ef | grep mysql | grep -v grep | awk -F \' \' \'{print $2}\' | xargs kill -9
service mysql start
效果:

校验:

以上是关于MySQL 安装的主要内容,如果未能解决你的问题,请参考以下文章