linux下mysql安装配置和卸载
Posted
tags:
篇首语:本文由小常识网(cha138.com)小编为大家整理,主要介绍了linux下mysql安装配置和卸载相关的知识,希望对你有一定的参考价值。
虚拟机VMware workstation 12 PRO
# 1.查看系统版本
[[email protected]][/home/xiluhua]$ cat /etc/redhat-release
CentOS Linux release 7.2.1511 (Core)

# 2.到mysql官网下CentOS 7对应的版本,
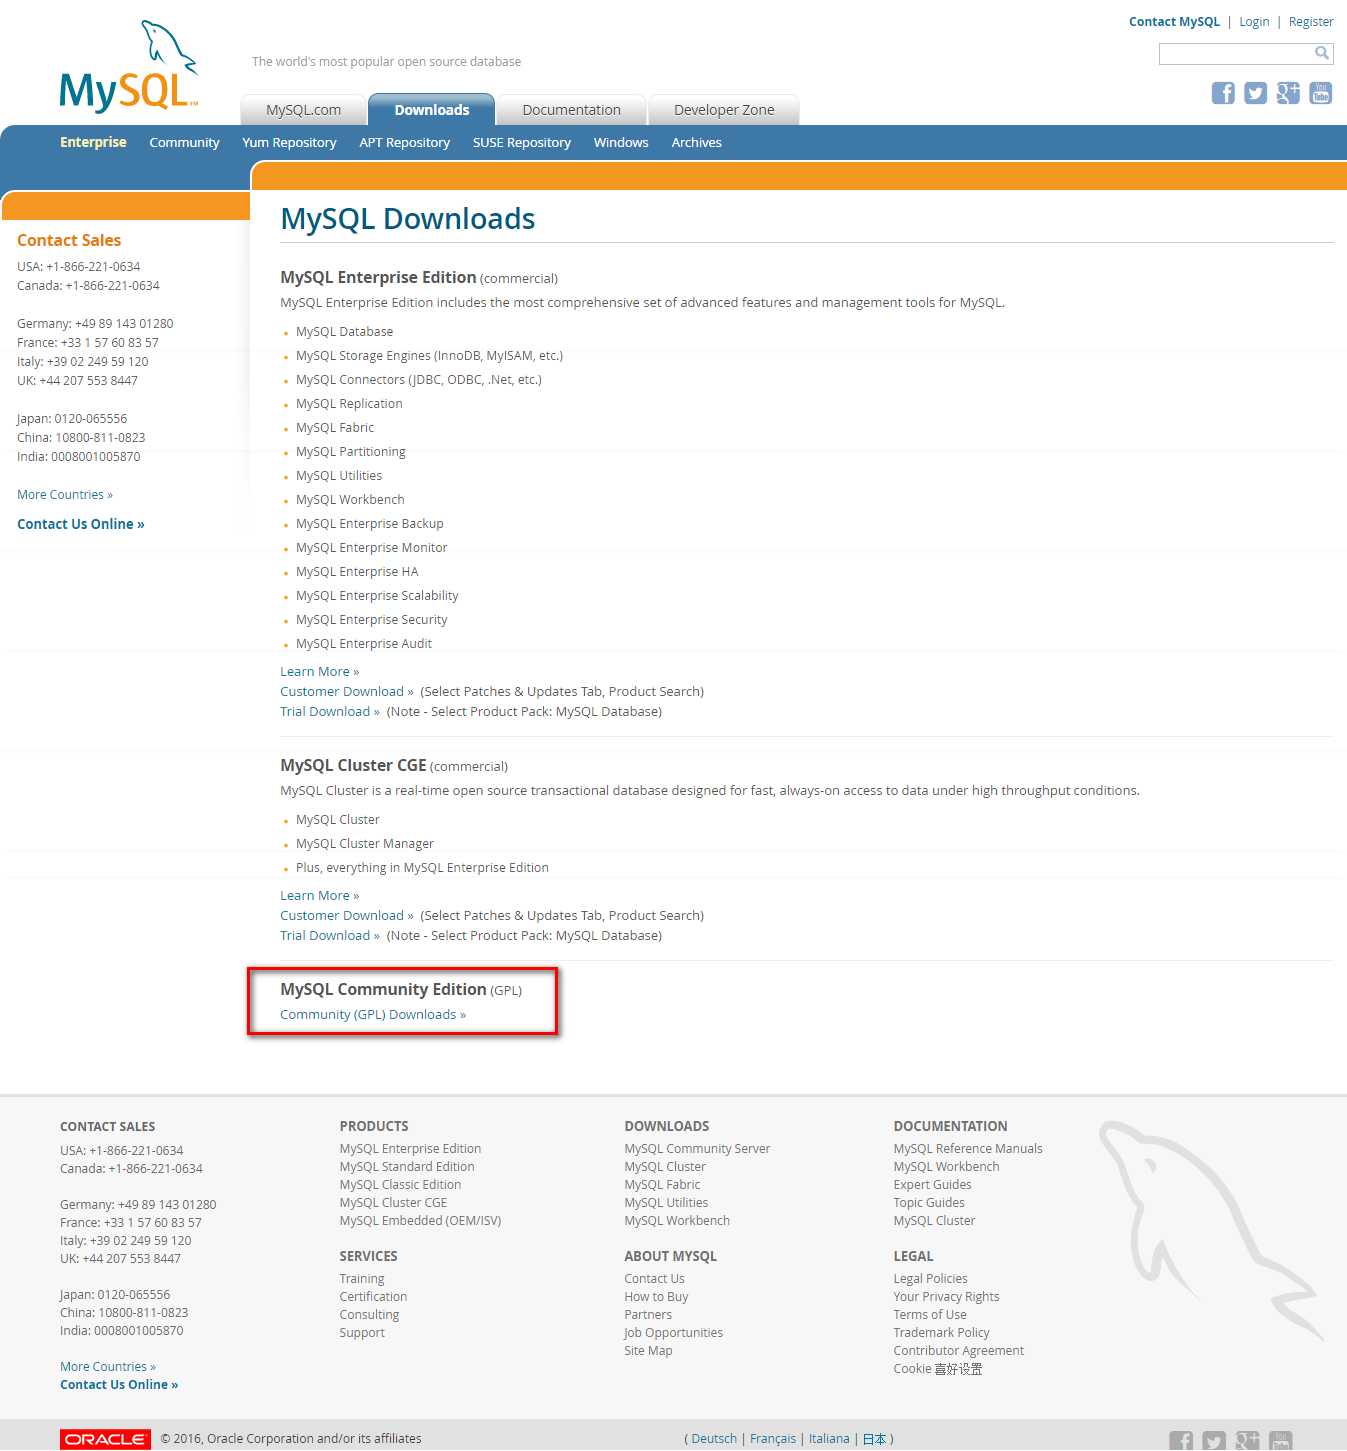
  2.1.选择社区版(红框)

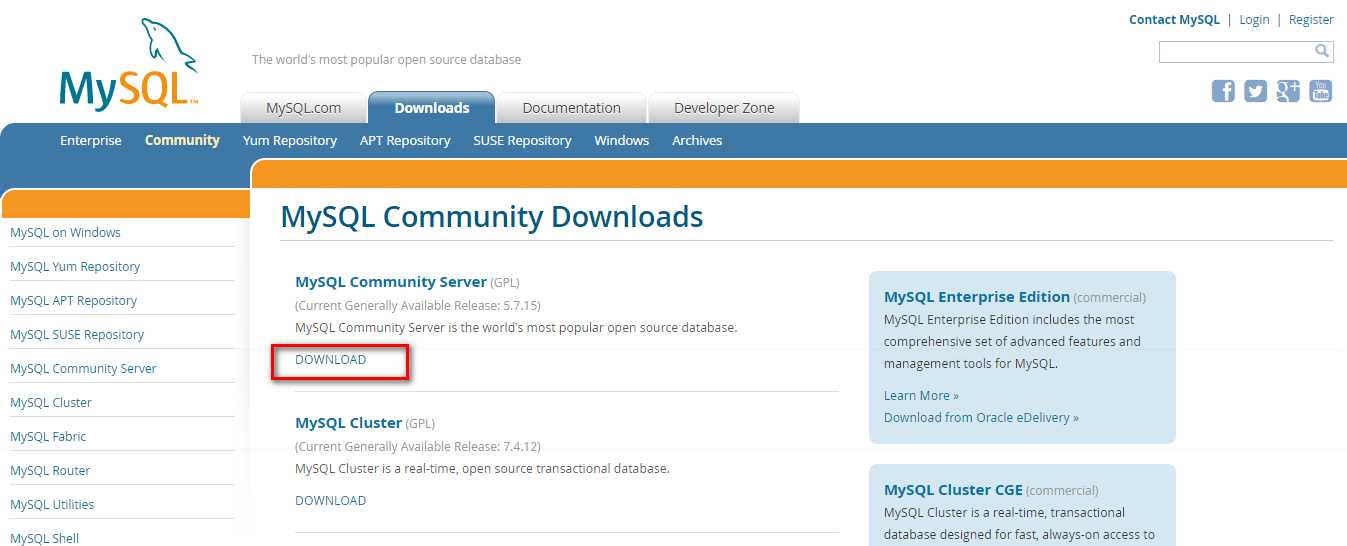
2.2.点击DOWNLOAD(红框)

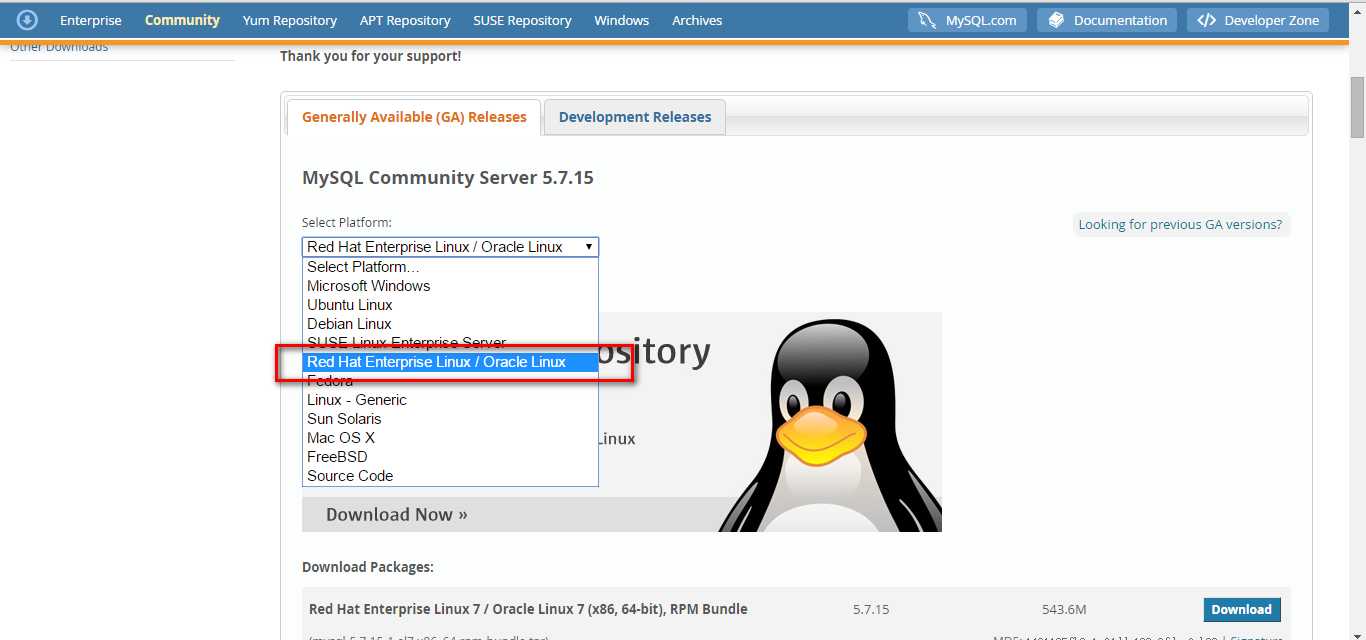
2.3.选择Red Hat Enterprise Linux / Oracle Linux(红框)

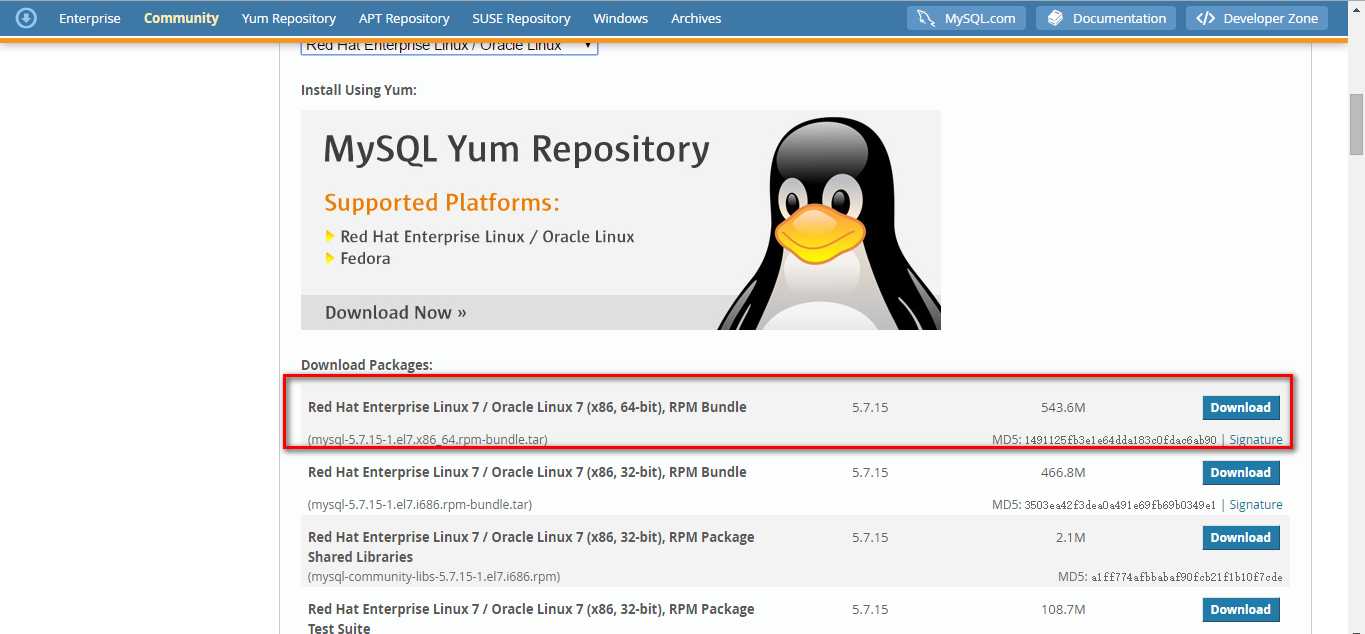
2.4.选择CentOS 7、64位的,也就是第一个rpm安装包版本(红框)

# 3.将下载的安装包放到上传到/usr/local/mysql文件夹下(自己新建准备),解压缩
[[email protected]][/usr/local/mysql]$ tar -xvf mysql-5.7.15-1.el7.x86_64.rpm-bundle.tar
# 3.1.目录结构如下,实际用到的安装包仅为红色部分
[[email protected]][/usr/local/mysql]$ ll
总用量 1113204
-rw-rw-r--. 1 xiluhua xiluhua 569958400 2016/09/15 12:12:42 mysql-5.7.15-1.el7.x86_64.rpm-bundle.tar
-rw-r--r--. 1 7155 31415 25015464 2016/08/26 14:39:32 mysql-community-client-5.7.15-1.el7.x86_64.rpm
-rw-r--r--. 1 7155 31415 277608 2016/08/26 14:39:39 mysql-community-common-5.7.15-1.el7.x86_64.rpm
-rw-r--r--. 1 7155 31415 3768080 2016/08/26 14:39:42 mysql-community-devel-5.7.15-1.el7.x86_64.rpm
-rw-r--r--. 1 7155 31415 45342396 2016/08/26 14:39:53 mysql-community-embedded-5.7.15-1.el7.x86_64.rpm
-rw-r--r--. 1 7155 31415 23925580 2016/08/26 14:40:04 mysql-community-embedded-compat-5.7.15-1.el7.x86_64.rpm
-rw-r--r--. 1 7155 31415 125558080 2016/08/26 14:40:35 mysql-community-embedded-devel-5.7.15-1.el7.x86_64.rpm
-rw-r--r--. 1 7155 31415 2234936 2016/08/26 14:41:01 mysql-community-libs-5.7.15-1.el7.x86_64.rpm
-rw-r--r--. 1 7155 31415 2112740 2016/08/26 14:41:03 mysql-community-libs-compat-5.7.15-1.el7.x86_64.rpm
-rw-r--r--. 1 7155 31415 51539732 2016/08/26 14:41:09 mysql-community-minimal-debuginfo-5.7.15-1.el7.x86_64.rpm
-rw-r--r--. 1 7155 31415 159297016 2016/08/26 14:41:45 mysql-community-server-5.7.15-1.el7.x86_64.rpm
-rw-r--r--. 1 7155 31415 14022528 2016/08/26 14:42:11 mysql-community-server-minimal-5.7.15-1.el7.x86_64.rpm
-rw-r--r--. 1 7155 31415 116851524 2016/08/26 14:42:36 mysql-community-test-5.7.15-1.el7.x86_64.rpm
# 4.安装(需要使用root账户操作,不然没有权限)
  4.1.注意事项:必须依次安装,因为他们之间存在依赖链
  4.2.注意事项:尝试使用rpm工具的--prefix或--relocate指定安装目录,系统反馈不允许
[[email protected]][/usr/local/mysql]$ rpm -ivh mysql-community-common-5.7.15-1.el7.x86_64.rpm
警告:mysql-community-common-5.7.15-1.el7.x86_64.rpm: 头V3 DSA/SHA1 Signature, 密钥 ID 5072e1f5: NOKEY
准备中...                          ################################# [100%]
正在升级/安装...
   1:mysql-community-common-5.7.15-1.e################################# [100%]

[[email protected]-xiluhua][/usr/local/mysql]$ rpm -ivh mysql-community-libs-5.7.15-1.el7.x86_64.rpm
警告:mysql-community-libs-5.7.15-1.el7.x86_64.rpm: 头V3 DSA/SHA1 Signature, 密钥 ID 5072e1f5: NOKEY
准备中...                          ################################# [100%]
正在升级/安装...
   1:mysql-community-libs-5.7.15-1.el7################################# [100%]

[[email protected]-xiluhua][/usr/local/mysql]$ rpm -ivh mysql-community-server-5.7.15-1.el7.x86_64.rpm
警告:mysql-community-server-5.7.15-1.el7.x86_64.rpm: 头V3 DSA/SHA1 Signature, 密钥 ID 5072e1f5: NOKEY
错误:依赖检测失败:
        mysql-community-client(x86-64) >= 5.7.9 被 mysql-community-server-5.7.15-1.el7.x86_64 需要

[[email protected]-xiluhua][/usr/local/mysql]$ rpm -ivh mysql-community-client-5.7.15-1.el7.x86_64.rpm
警告:mysql-community-client-5.7.15-1.el7.x86_64.rpm: 头V3 DSA/SHA1 Signature, 密钥 ID 5072e1f5: NOKEY
准备中...                          ################################# [100%]
正在升级/安装...
   1:mysql-community-client-5.7.15-1.e################################# [100%]

[[email protected]-xiluhua][/usr/local/mysql]$ rpm -ivh mysql-community-server-5.7.15-1.el7.x86_64.rpm
警告:mysql-community-server-5.7.15-1.el7.x86_64.rpm: 头V3 DSA/SHA1 Signature, 密钥 ID 5072e1f5: NOKEY
准备中...                          ################################# [100%]
正在升级/安装...
   1:mysql-community-server-5.7.15-1.e################################# [100%]


# 5.经过以上步骤,安装基本完成,但还需要配置mysql的首次登录参数
[[email protected]-xiluhua][/usr/local/mysql]$ cd /etc/
[[email protected]-xiluhua][/etc]$ less my.cnf

# 6.在my.cnf的[mysqld]代码下方添加skip-grant-tables
[[email protected]-xiluhua][/etc]$ vi my.cnf
# For advice on how to change settings please see
# http://dev.mysql.com/doc/refman/5.7/en/server-configuration-defaults.html
[mysqld]
skip-grant-tables
# 7.启动mysql
[[email protected]-xiluhua][/etc]$ service mysqld start
Redirecting to /bin/systemctl start  mysqld.service
# 8.验证mysql是否启动
[[email protected]-xiluhua][/etc]$ netstat -apln | grep mysql
tcp6       0      0 :::3306                 :::*                    LISTEN      3625/mysqld
unix  2      [ ACC ]     STREAM     LISTENING     92437    3625/mysqld          /var/lib/mysql/mysql.sock

# 9.首次登录(第6步[mysqld]代码下方添加skip-grant-tables,目的是为了首次登录时不用输入密码)
[[email protected]][/etc]$ mysql
Welcome to the MySQL monitor. Commands end with ; or \g.
Your MySQL connection id is 2
Server version: 5.7.15 MySQL Community Server (GPL)
Copyright (c) 2000, 2016, Oracle and/or its affiliates. All rights reserved.
Oracle is a registered trademark of Oracle Corporation and/or its
affiliates. Other names may be trademarks of their respective
owners.
Type ‘help;‘ or ‘\h‘ for help. Type ‘\c‘ to clear the current input statement.
mysql>
# 显示以上,恭喜!安装完成
以上是关于linux下mysql安装配置和卸载的主要内容,如果未能解决你的问题,请参考以下文章