qt+pcl点云库
Posted
tags:
篇首语:本文由小常识网(cha138.com)小编为大家整理,主要介绍了qt+pcl点云库相关的知识,希望对你有一定的参考价值。
有没有人用过QT+PCL点云库的?想在QT界面中显示点云图像(.pcd格式的),具体要怎么配置?一定要依托VS环境么?网上没查到这方面的东西,求救有经验的大神。。。
参考技术A 没用过也 找别人帮吧QT+PCL 点云学习
PCL 点云学习
概念
Point Cloud Libraries 点云库 和opencv处理图像一样,不过是3D图像的处理
支持文件格式
pcd格式文件
PCD不是第一个支持3D点云数据的文件类型,尤其是计算机图形学和计算几何学领域,已经创建了很多格式来描述任意多边形和激光扫描仪获取的点云。包括下面几种格式:
l PLY是一种多边形文件格式,由Stanford大学的Turk等人设计开发;
l STL是3D Systems公司创建的模型文件格式,主要应用于CAD、CAM领域;
l OBJ是从几何学上定义的文件格式,首先由Wavefront Technologies开发;
l X3D是符合ISO标准的基于XML的文件格式,表示3D计算机图形数据;
环境配置
Vtk,(visualization toolkit)是一个开源的免费软件系统,主要用于三维计算机图形学、图像处理和可视化
代码
1.实现读取文件
void main(){
    PointCloud<PointXYZ>::Ptr cloud(new PointCloud<PointXYZ>);

    if(io::loadPCDFile<PointXYZ>("FILEPATH",*cloud)==-1){
        qDebug("read file error");
        return;
    }

    viewer = new visualization::PCLVisualizer("rabbit viewer");

    viewer->addPointCloud(cloud);
    viewer->spin();
}
2.生成随机点云
void MainWindow::on_pushButton_clicked()
{
    PointCloud<PointXYZ>::Ptr cloud(new PointCloud<PointXYZ>);

    //设置点云数量
    cloud->points.resize(1000);

    //填充点云数据
    for(auto& i : cloud->points){//注意使用 auto& 要进行更改
        i.x = 1024*rand()/(RAND_MAX+1.0f);
        i.y = 1024*rand()/(RAND_MAX+1.0f);
        i.z = 1024*rand()/(RAND_MAX+1.0f);
    }


    if(viewer)viewer->close();
    //声明视窗
    viewer = new visualization::PCLVisualizer("3D viewer");
    //将视窗嵌入到qt的QVTKWidget中
    ui->widget->SetRenderWindow(viewer->getRenderWindow());

    //设置背景色
    viewer->setBackgroundColor(1.0f,0.5f,1.0f);
    //预处理点云颜色
    visualization::PointCloudColorHandlerCustom<PointXYZ> magenta(cloud,255,255,255);
    //把点云加载到视窗
    viewer->addPointCloud(cloud,magenta,"cloud");
    //设置点云大小
    viewer->setPointCloudRenderingProperties(visualization::PCL_VISUALIZER_POINT_SIZE,2,"cloud");

    //显示点云
    viewer->spinOnce();
    cloud->clear();

}
3.使用QVTKWidget显示
首先继承一个QVTKWidget类
//RoVTKWidget.hpp
#ifndef ROVTKWIDGET_H
#define ROVTKWIDGET_H

#include "QVTKWidget.h"

class RoVTKWidget : public QVTKWidget
{
public:
    RoVTKWidget(QWidget* parent);
};

#endif // ROVTKWIDGET_H

//RoVTKWidget.cpp
#include "RoVTKWidget.h"

RoVTKWidget::RoVTKWidget(QWidget* parent)
    :QVTKWidget(parent)
{
}
然后在窗口中将widget部件升级到RoVTKWidget
嵌入viewer的代码:
viewer.reset(new visualization::PCLVisualizer("3D viewer",false));
    ui->widget->SetRenderWindow(viewer->getRenderWindow());
    viewer->setupInteractor(ui->widget->GetInteractor(),ui->widget->GetRenderWindow());
    ui->widget->update();
//注意:不要再用viewer.spin()显示图像,而使用ui->widget->update()来显示图像
//需要关闭时,无需其他关闭操作,直接默认关闭窗口就可以,很方便
4.qt代码
头文件
#ifndef MAINWINDOW_H
#define MAINWINDOW_H

#include <QMainWindow>

#include "vtkRenderWindow.h"
#include "RoVTKWidget.h"

#include "vtkJPEGReader.h"
#include "vtkImageActor.h"
#include "vtkImageViewer2.h"

#include "pcl/io/pcd_io.h"
#include "pcl/point_types.h"
#include "pcl/visualization/pcl_visualizer.h"
using namespace pcl;

#include<QDebug>


QT_BEGIN_NAMESPACE
namespace Ui { class MainWindow; }
QT_END_NAMESPACE

class MainWindow : public QMainWindow
{
    Q_OBJECT

public:
    MainWindow(QWidget *parent = nullptr);
    ~MainWindow();

private slots:

    void on_pushButton_clicked();

    void on_pushButton_2_clicked();

    void on_pushButton_3_clicked();

private:
    Ui::MainWindow *ui;
    visualization::PCLVisualizer::Ptr viewer {Q_NULLPTR};
    QMap<QString,PointCloud<PointXYZ>::Ptr> cloudMap;

    // QWidget interface
protected:
    virtual void closeEvent(QCloseEvent *event) override;
};
#endif // MAINWINDOW_H
源文件
#include "mainwindow.h"
#include "ui_mainwindow.h"
#include <QFileDialog>

MainWindow::MainWindow(QWidget *parent)
    : QMainWindow(parent)
    , ui(new Ui::MainWindow)
{
    ui->setupUi(this);

    viewer.reset(new visualization::PCLVisualizer("3D viewer",false));
    ui->widget->SetRenderWindow(viewer->getRenderWindow());
    viewer->setupInteractor(ui->widget->GetInteractor(),ui->widget->GetRenderWindow());
    ui->widget->update();
}

MainWindow::~MainWindow()
{
    delete ui;
}


void MainWindow::on_pushButton_clicked()
{
    if(!cloudMap.contains("cloud")){


    PointCloud<PointXYZ>::Ptr cloud(new PointCloud<PointXYZ>);
    cloudMap["cloud"]=cloud;

        //设置点云数量
        cloud->points.resize(1000);

        //填充点云数据
        for(auto& i : cloud->points){//注意使用 auto& 要进行更改
            i.x = 1024*rand()/(RAND_MAX+1.0f);
            i.y = 1024*rand()/(RAND_MAX+1.0f);
            i.z = 1024*rand()/(RAND_MAX+1.0f);
        }
        viewer->addPointCloud(cloud);
        }

        viewer->updatePointCloud(cloudMap["cloud"]);
        viewer->resetCamera();
        //显示点云
        ui->widget->update();
}


void MainWindow::on_pushButton_2_clicked()
{
    if(!cloudMap.contains("rabbit")){


    PointCloud<PointXYZ>::Ptr rabbit(new PointCloud<PointXYZ>);
    cloudMap["rabbit"]=rabbit;

    QString selectFilePath = QFileDialog::getOpenFileName(this, QString("选择图像文件"), QString(""), QString("图像(*.pcd)"));
    if(selectFilePath.isEmpty())
    {
        return ;
    }
        if(io::loadPCDFile<PointXYZ>(selectFilePath.toStdString(),*rabbit)==-1){
            qDebug("read file error");
            return;
        }

        viewer->addPointCloud(rabbit,"rabbit");
        viewer->addText("this is a rabbit",100,100);
         }
        viewer->updatePointCloud(cloudMap["rabbit"]);
        viewer->resetCamera();
        ui->widget->update();

}


void MainWindow::closeEvent(QCloseEvent *event)
{
//    ui->widget->close();
}


void MainWindow::on_pushButton_3_clicked()
{

    vtkSmartPointer<vtkRenderer> pRenderer = vtkSmartPointer<vtkRenderer>::New();
    vtkSmartPointer<vtkImageViewer2> pImageViewer = vtkSmartPointer<vtkImageViewer2>::New();
    vtkSmartPointer<vtkJPEGReader> jpegReader =  vtkSmartPointer<vtkJPEGReader>::New();


    QString selectFilePath = QFileDialog::getOpenFileName(this, QString("选择图像文件"), QString(""), QString("图像(*.jpeg)"));
    if(selectFilePath.isEmpty())
    {
        return ;
    }

    jpegReader->SetFileName(selectFilePath.toStdString().c_str());
    jpegReader->Update();

    pImageViewer->SetInputData(jpegReader->GetOutput());
    pImageViewer->SetRenderWindow(ui->widget->GetRenderWindow());
    pImageViewer->SetRenderer(pRenderer);
    pRenderer->ResetCamera();
    ui->widget->GetRenderWindow()->Render();

}
5.同一窗口不同视图显示多张点云
#include <iostream>
#include <pcl/io/pcd_io.h>
#include <pcl/point_types.h>
#include <pcl/filters/filter_indices.h>
#include <pcl/point_cloud.h>
#include <pcl/visualization/pcl_visualizer.h>
using namespace std;

int main()
{

	//***************************read PCD file*****************************************
	//在一个视图下同时显示两张点云图像

	pcl::PointCloud<pcl::PointXYZ>::Ptr source(new pcl::PointCloud<pcl::PointXYZ>());
	pcl::PointCloud<pcl::PointXYZ>::Ptr source2(new pcl::PointCloud<pcl::PointXYZ>());
	//输入点云路径
	string  filename1 = "jiancelou.pcd";
	string filename2 = "jiancelou(4).pcd";
	pcl::io::loadPCDFile(filename1, *source);
	pcl::io::loadPCDFile(filename2, *source2);
	cout << "点云加载成功!" << endl;
	boost::shared_ptr< pcl::visualization::PCLVisualizer > viewer(new pcl::visualization::PCLVisualizer("3D Viewer"));
	viewer->initCameraParameters();


	//在一个视图里显示两张点云图
	int v1(0);
	viewer->createViewPort(0.0, 0.0, 1.0 / 2.0, 1.0, v1);
	viewer->setBackgroundColor(28, 28, 28, v1);
	viewer->addText("Radius:0.01", 10, 10, "v1 text", v1);
	pcl::visualization::PointCloudColorHandlerCustom<pcl::PointXYZ> source_color(source, 0, 0, 0);
	viewer->addPointCloud<pcl::PointXYZ>(source, source_color, "sample cloud1", v1);

	int v2(0);
	viewer->createViewPort(1.0 / 2.0, 0.0, 1.0, 1.0, v2);
	viewer->setBackgroundColor(28, 28, 28, v2);
	viewer->addText("Radius:0.1", 10, 10, "v2 text", v2);
	pcl::visualization::PointCloudColorHandlerCustom<pcl::PointXYZ> source_color2(source2, 0, 0, 0);
	viewer->addPointCloud<pcl::PointXYZ>(source2, source_color2, "sample cloud2", v2);

	viewer->setPointCloudRenderingProperties(pcl::visualization::PCL_VISUALIZER_POINT_SIZE, 3, "sample cloud1");
	viewer->setPointCloudRenderingProperties(pcl::visualization::PCL_VISUALIZER_POINT_SIZE, 3, "sample cloud2");

	viewer->addCoordinateSystem(1.0);
	viewer->spin();
	return 0;

}
并排并列显示
void MainWindow::on_pushButton_4_clicked()
{
QVector<PointCloud<PointXYZ>::Ptr> data;
QStringList selectFilePath = QFileDialog::getOpenFileNames(this, QString("选择图像文件"), QString(""), QString("图像(*.pcd)"));
if(selectFilePath.isEmpty()) {return ;}
viewer->removeAllPointClouds();
for(auto p : selectFilePath){
PointCloud<PointXYZ>::Ptr newcloud(new PointCloud<PointXYZ>);
io::loadPCDFile<PointXYZ>(p.toStdString(),*newcloud);
data.append(newcloud);
}
//并列显示
int cnt = data.size();
QVector<int> v(cnt);
for(int i=0;i<cnt;++i){
viewer->createViewPort(double(i)/cnt,0.0,double(i+1)/cnt,1.0,v[i]);
viewer->setBackgroundColor(0, 0, 10, v[i]);
viewer->addPointCloud(data[i],QString("asd%1").arg(i).toStdString(),v[i]);
}
viewer->resetCamera();
viewer->addCoordinateSystem(1.0);
ui->widget->update();
}
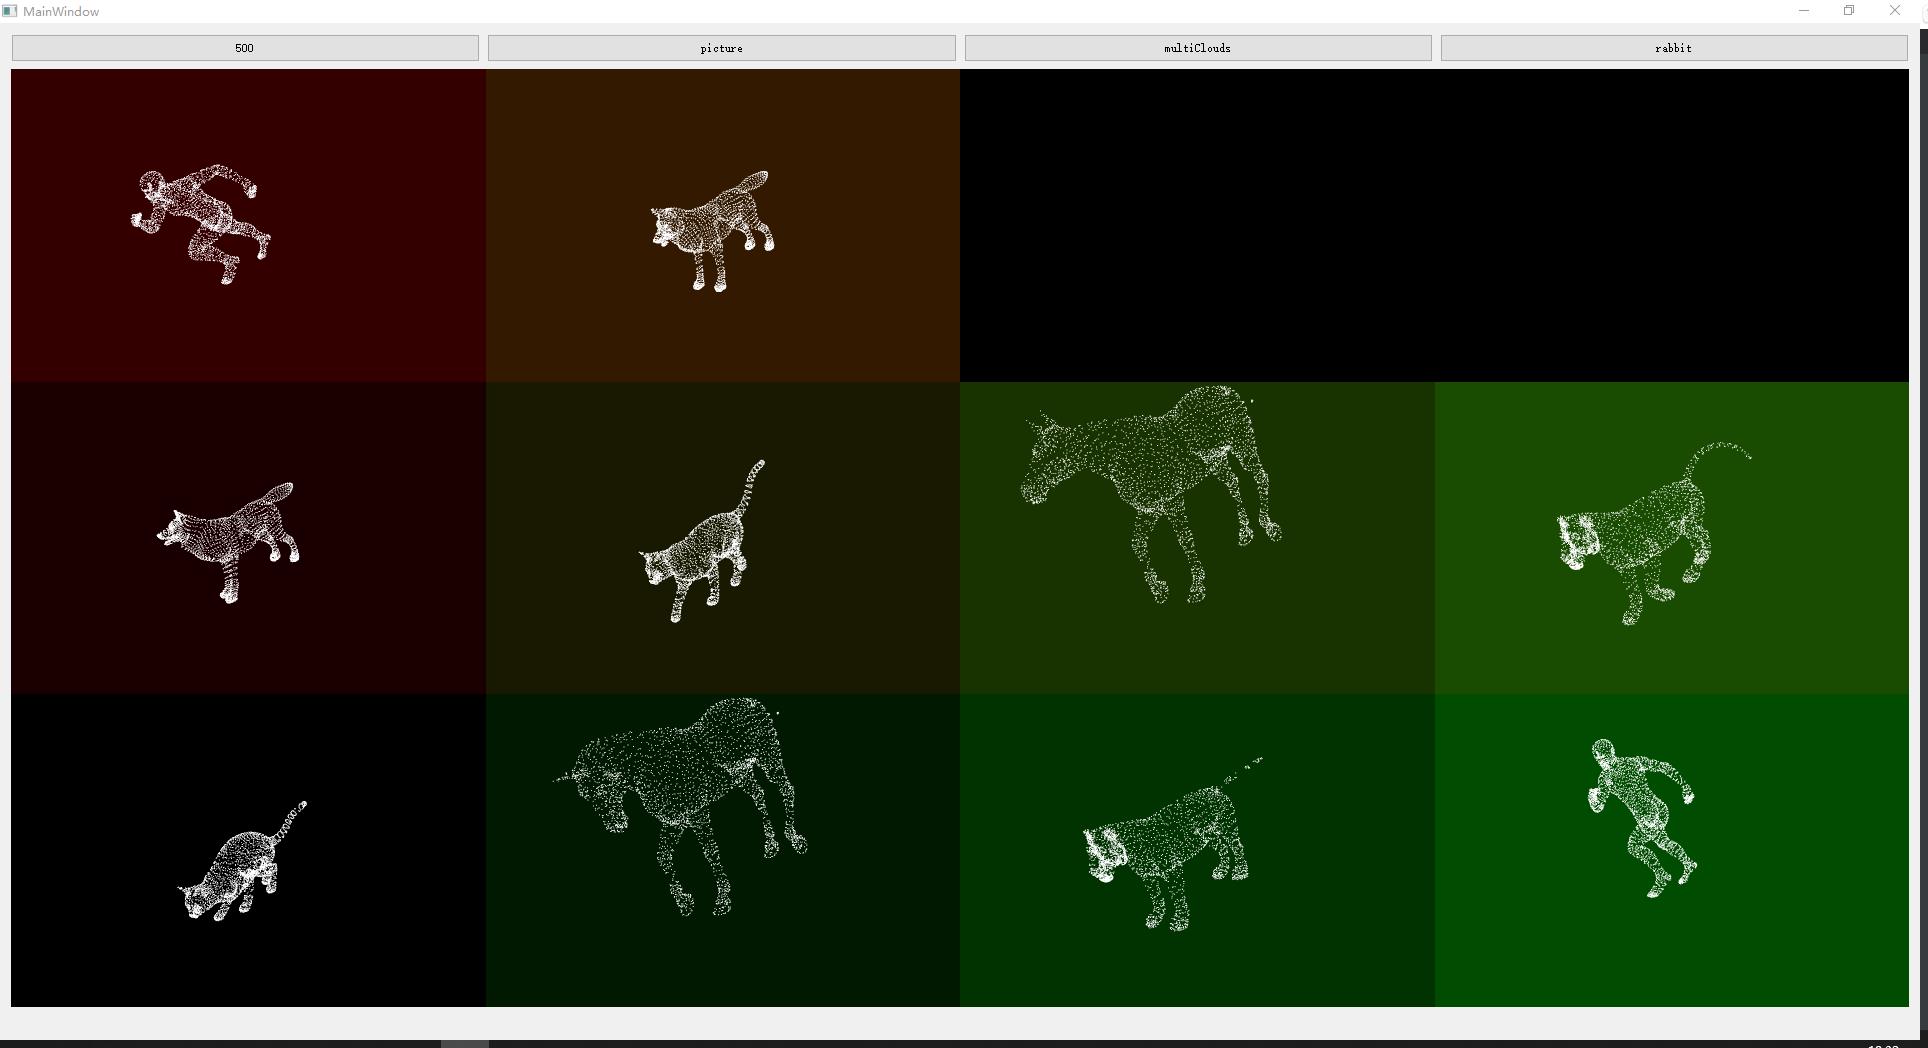
//并排并列显示 代替并列显示
//计算列数和行数
int col=0,row=0;
qreal s = qSqrt(cnt);
qreal sf = qFloor(s);
qreal d = s-sf;
if(d>=0.5){
col=row=sf+1;
}else if(d<0.5&&d>0){
row = sf;
col = row+1;
}else if(d==0){
col=row=sf;
}
qDebug()<<col<<" "<<row;
QVector<int> v(col*row);
int c=0;
//优先扫描列
for(int j=0;j<row && c<cnt;++j)
for(int i=0;i<col && c<cnt;++i)
{
viewer->createViewPort(double(i)/col,double(j)/row,double(i+1)/col,double(j+1)/row,v[c]);
viewer->setBackgroundColor(double(j)/cnt, double(i)/cnt, 0, v[c]);
viewer->addPointCloud(data[c],QString("asd%1%2").arg(j).arg(i).toStdString(),v[c]);
c++;
}
以上是关于qt+pcl点云库的主要内容,如果未能解决你的问题,请参考以下文章