实现multibandblend
Posted GreenOpen专注图像处理
tags:
篇首语:本文由小常识网(cha138.com)小编为大家整理,主要介绍了实现multibandblend相关的知识,希望对你有一定的参考价值。
multibandblend是目前图像融和方面比较好的方法。原始论文为《a multivesolution spline with application to image mosaics 》,可以用百度学术找到。原始论文中采用的方法是直接对带拼接的两个图片进行拉普拉斯金字塔分解,而后一半对一半进行融合。国人也有许多改进,比如“首先采用拉普拉斯分辨率金字塔结构,将输入的图像分解成一系列不同频率上的图像,而后在每个频段上面进行加权平均,把这些不同频率上的图像最后合并一个图像”。这个说法来源于下面这篇论文,根据其他获得的一些知识,应该是可行的。
在opencv内部已经实现了multibandblend,但是耦合度比较高,想拿出来单独研究要对代码有深入理解;网络上面也有这样的实现,这个下文提及[]。为了深入理解并运用,还是要自己实现,再复用别人的代码

一、首先实现laplacian金字塔的分解和重建
#include "stdafx.h"
#include <iostream>
#include <vector>
#include <opencv2/core/core.hpp>
#include <opencv2/imgproc/imgproc.hpp>
#include <opencv2/highgui/highgui.hpp>
#include <opencv2/features2d/features2d.hpp>
#include <opencv2/calib3d/calib3d.hpp>
using namespace std;
using namespace cv;
int _tmain(int argc, _TCHAR* argv[])
{
Mat src = imread("Lena.jpg");
src.convertTo(src,CV_32F,1.0/255);
imshow("src",src);
Mat src2= src.clone();
Mat dst;
Mat lastmat;
vector<Mat> vecMats;
Mat tmp;
for (int i=0;i<4;i++)
{
pyrDown(src2,src2);
pyrUp(src2,tmp);
resize(tmp,tmp,src.size());
tmp = src - tmp;
vecMats.push_back(tmp);
src = src2;
}
lastmat = src;
//重建
for (int i=3;i>=0;i--)
{
pyrUp(lastmat,lastmat);
resize(lastmat,lastmat,vecMats[i].size());
lastmat = lastmat + vecMats[i];
}
imshow("dst",lastmat);
waitKey();
return 0;
}

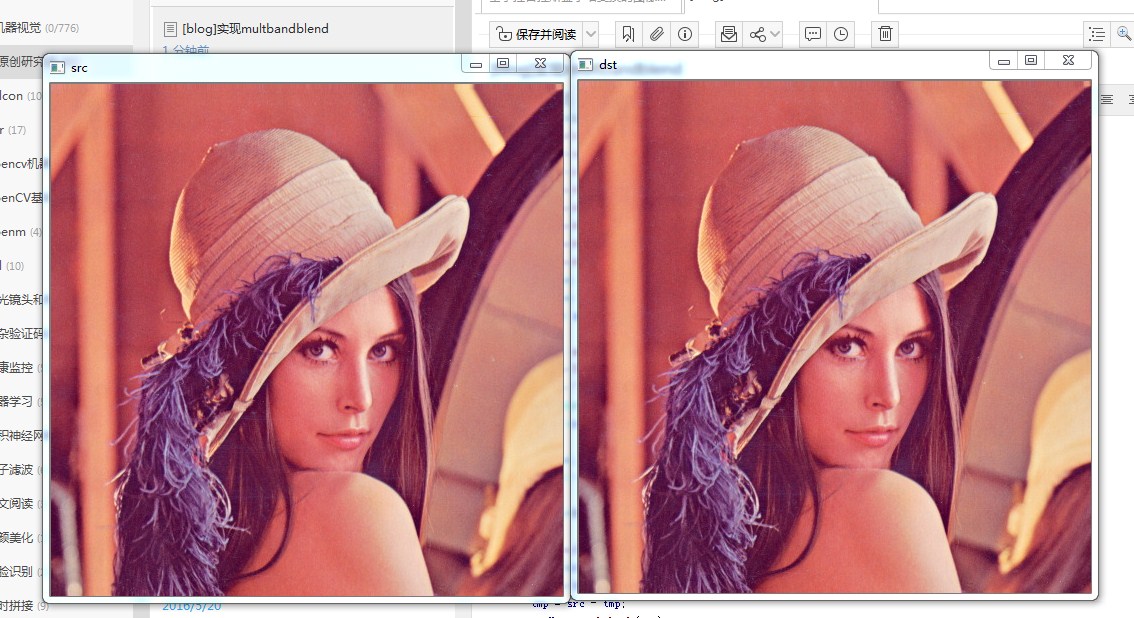
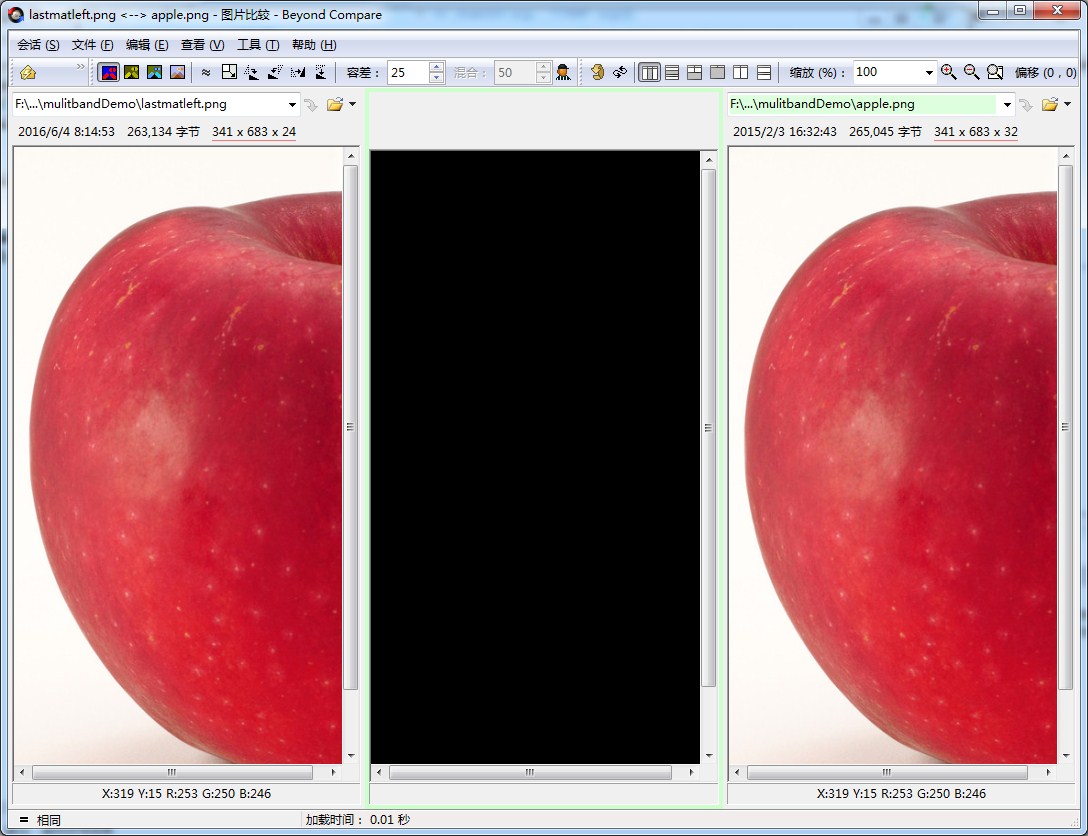
使用工具比对也是完全一样的

二、实现每个金字塔层面的linearblend融合
#include "stdafx.h"
#include <iostream>
#include <vector>
#include <opencv2/core/core.hpp>
#include <opencv2/imgproc/imgproc.hpp>
#include <opencv2/highgui/highgui.hpp>
#include <opencv2/features2d/features2d.hpp>
#include <opencv2/calib3d/calib3d.hpp>
using namespace std;
using namespace cv;
int _tmain(int argc, _TCHAR* argv[])
{
Mat srcLeft = imread("apple.png");
Mat srcRight= imread("orange.png");
srcLeft.convertTo(srcLeft,CV_32F,1.0/255);
srcRight.convertTo(srcRight,CV_32F,1.0/255);
Mat rawLeft = srcLeft.clone();
Mat rawRight=srcRight.clone();
imshow("srcRight",srcRight);
imshow("srcLeft",srcLeft);
Mat srcLeft2= srcLeft.clone();
Mat srcRight2=srcRight.clone();
Mat lastmatLeft; Mat lastmatRight;
vector<Mat> vecMatsLeft; vector<Mat> vecMatsRight;
Mat tmp;
for (int i=0;i<4;i++)
{
pyrDown(srcLeft2,srcLeft2);
pyrUp(srcLeft2,tmp);
resize(tmp,tmp,srcLeft.size());
tmp = srcLeft - tmp;
vecMatsLeft.push_back(tmp);
srcLeft = srcLeft2;
}
lastmatLeft = srcLeft;
for (int i=0;i<4;i++)
{
pyrDown(srcRight2,srcRight2);
pyrUp(srcRight2,tmp);
resize(tmp,tmp,srcRight.size());
tmp = srcRight - tmp;
vecMatsRight.push_back(tmp);
srcRight = srcRight2;
}
lastmatRight = srcRight;
//每一层都要对准并融合
int ioffset =vecMatsLeft[0].cols - 100;//这里-100 的操作是linearblend的小技巧
int istep = 1;
double dblend = 0.0;
vector<Mat> vecMatResult;//保存结果
Mat tmpResult;
Mat roi;
for (int i=0;i<4;i++)
{
//对准
tmpResult = Mat::zeros(vecMatsLeft[i].rows,vecMatsLeft[i].cols*2,vecMatsLeft[i].type());
roi = tmpResult(Rect(ioffset,0,vecMatsLeft[i].cols,vecMatsLeft[i].rows));
vecMatsRight[i].copyTo(roi);
roi = tmpResult(Rect(0,0,vecMatsLeft[i].cols,vecMatsLeft[i].rows));
vecMatsLeft[i].copyTo(roi);
//融合
for (int j = 0;j<(100/istep);j++)
{
tmpResult.col(ioffset + j)= tmpResult.col(ioffset+j)*(1-dblend) + vecMatsRight[i].col(j)*dblend;
dblend = dblend +0.01*istep;
}
//结尾
dblend = 0.0;
ioffset = ioffset/2;
istep = istep*2;
vecMatResult.push_back(tmpResult);
}
Mat latmatresult = Mat::zeros(lastmatLeft.rows,lastmatLeft.cols*2,lastmatLeft.type());
roi = latmatresult(Rect(0,0,lastmatLeft.cols,lastmatLeft.rows));
lastmatLeft.copyTo(roi);
roi = latmatresult(Rect(ioffset,0,lastmatLeft.cols,lastmatLeft.rows));
lastmatRight.copyTo(roi);
for (int j=0;j<(100/istep);j++)
{
latmatresult.col(ioffset + j)= latmatresult.col(ioffset+j)*(1-dblend) + lastmatRight.col(j)*dblend;
dblend = dblend +0.01*istep;
}
//重构
for (int i=3;i>=0;i--)
{
pyrUp(lastmatLeft,lastmatLeft);
resize(lastmatLeft,lastmatLeft,vecMatsLeft[i].size());
lastmatLeft = lastmatLeft + vecMatsLeft[i];
}
for (int i=3;i>=0;i--)
{
pyrUp(lastmatRight,lastmatRight);
resize(lastmatRight,lastmatRight,vecMatsRight[i].size());
lastmatRight = lastmatRight + vecMatsRight[i];
}
for (int i=3;i>=0;i--)
{
pyrUp(latmatresult,latmatresult);
resize(latmatresult,latmatresult,vecMatResult[i].size());
latmatresult = latmatresult + vecMatResult[i];
}
imshow("lastmatLeft",lastmatLeft);
lastmatLeft.convertTo(lastmatLeft,CV_8U,255);
imwrite("lastmatleft.png",lastmatLeft);
imshow("lastmatRight",lastmatRight);
imshow("multibandblend",latmatresult);
waitKey();
return 0;
}
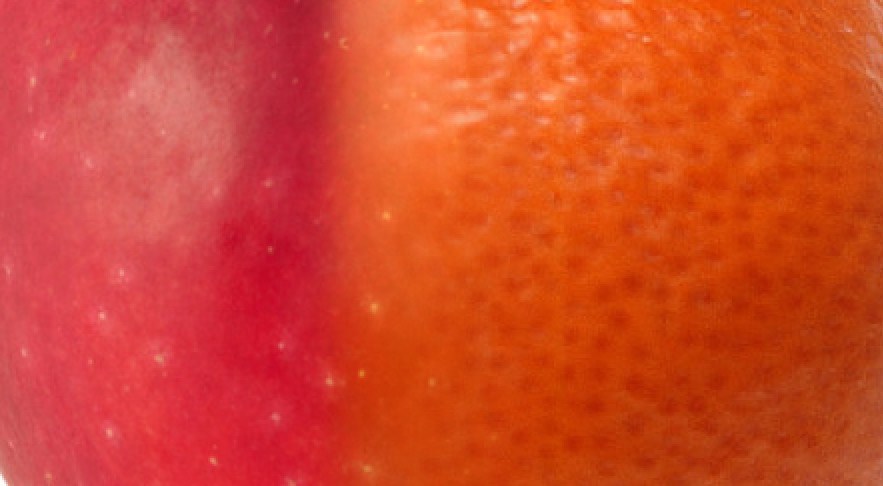
观看细节,可以看到过渡的地方一点都不违和,苹果上面的白色小斑点都过渡了过来。这个结果应该是非常接近论文上面的要求了。

三、改造现有的图像拼接程序,并且运用于图像拼接
//使用Multiblend进行图像融合
#include "stdafx.h"
#include <iostream>
#include <vector>
#include <opencv2/core/core.hpp>
#include <opencv2/imgproc/imgproc.hpp>
#include <opencv2/highgui/highgui.hpp>
#include <opencv2/features2d/features2d.hpp>
#include <opencv2/calib3d/calib3d.hpp>
#include "matcher.h"
using namespace cv;
int main()
{
// Read input images 这里的命名最好为imageleft和imageright
cv::Mat image1= cv::imread("Univ4.jpg",1);
cv::Mat image2= cv::imread("Univ5.jpg",1);
if (!image1.data || !image2.data)
return 0;
// Prepare the matcher
RobustMatcher rmatcher;
rmatcher.setConfidenceLevel(0.98);
rmatcher.setMinDistanceToEpipolar(1.0);
rmatcher.setRatio(0.65f);
cv::Ptr<cv::FeatureDetector> pfd= new cv::SurfFeatureDetector(10);
rmatcher.setFeatureDetector(pfd);
// Match the two images
std::vector<cv::DMatch> matches;