Centos7 安装Mysql8.0
Posted BasicLab基础架构实验室
tags:
篇首语:本文由小常识网(cha138.com)小编为大家整理,主要介绍了Centos7 安装Mysql8.0相关的知识,希望对你有一定的参考价值。
1、到指定目录下下载安装包
[root@VM-0-14-centos ~]# cd /usr/local/src
2、下载mysql8
[root@VM-0-14-centos src]# wget https://dev.mysql.com/get/Downloads/MySQL-8.0/mysql-8.0.20-linux-glibc2.12-x86_64.tar.xz
3、解压mysql8, 通过xz命令解压出tar包, 然后通过tar命令解压出文件夹
[root@VM-0-14-centos src]# xz -d mysql-8.0.20-linux-glibc2.12-x86_64.tar.xz[root@VM-0-14-centos src]# tar xvf mysql-8.0.20-linux-glibc2.12-x86_64.tar

4、将/usr/local/src下的mysql-8.0.20-linux-glibc2.12-x86_64文件夹内容移动到/usr/local/mysql下
[root@VM-0-14-centos src]# mkdir /usr/local/mysql[root@VM-0-14-centos src]# mv /usr/local/src/mysql-8.0.20-linux-glibc2.12-x86_64/*/usr/local/mysql[root@VM-0-14-centos src]# cd /usr/local/mysql
5、创建用户组及用户和密码
[root@VM-0-14-centos mysql]# groupadd mysql[root@VM-0-14-centos mysql]# useradd -g mysql mysql
6、授权用户
[root@VM-0-14-centos mysql]# chown -R mysql.mysql /usr/local/mysql
7、编辑my.cnf文件
[root@VM-0-14-centos mysql]# vim /etc/my.cnf按大写 i 进入修改模式 然后将下面的文本复制进去
[mysqld]user=rootdatadir=/usr/local/mysql/databasedir=/usr/local/mysqlport=3306max_connections=200max_connect_errors=10character-set-server=utf8default-storage-engine=INNODBdefault_authentication_plugin=mysql_native_passwordlower_case_table_names=1group_concat_max_len=102400[mysql]default-character-set=utf8[client]port=3306default-character-set=utf8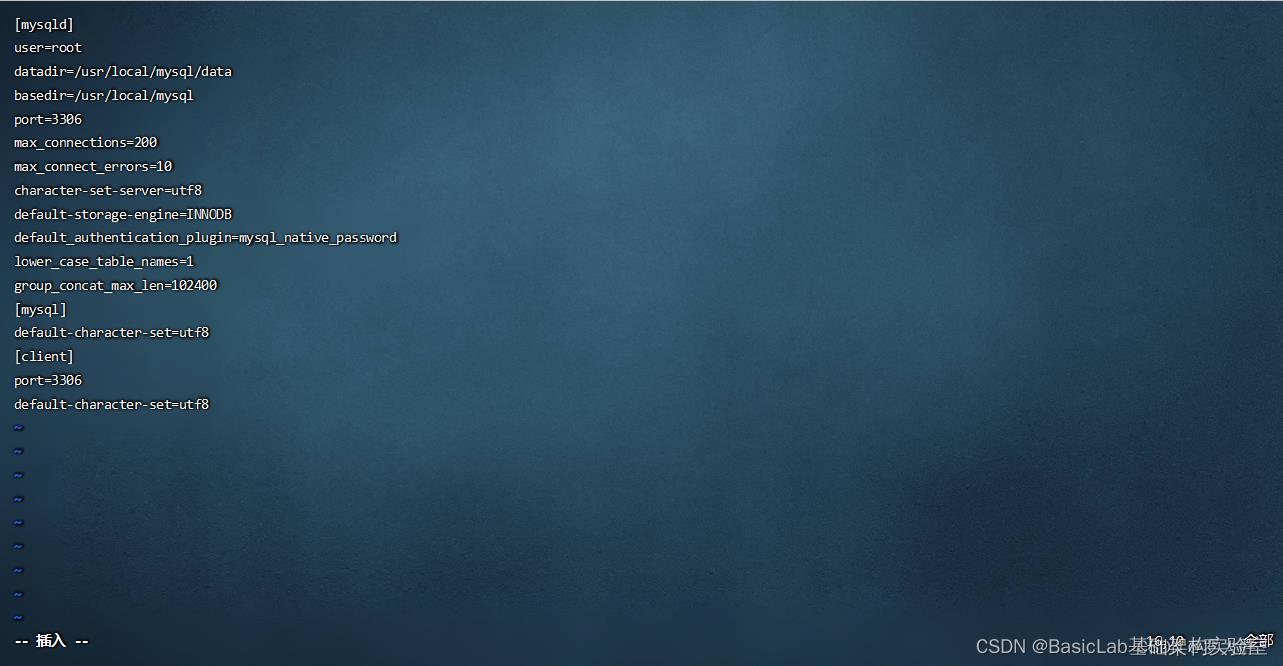
复制进去后按esc退出修改模式,然后按 shift+: 然后输入wq保存文件
8、进入到bin目录下
[root@VM-0-14-centos mysql]# cd bin
9、初始化基础信息,最后一行后面会有个随机的初始密码保存下来一会登录要用(如果忘记了就删掉data重新初始化)
[root@VM-0-14-centos bin]# ./mysqld --initialize如果提示 :./mysqld: error while loading shared libraries: libnuma.so.1: cannot open shared object file: No such file or directory

就执行下下面这个再执行初始化
[root@VM-0-14-centos bin]# yum install -y libaio[root@VM-0-14-centos bin]# yum -y install numactl
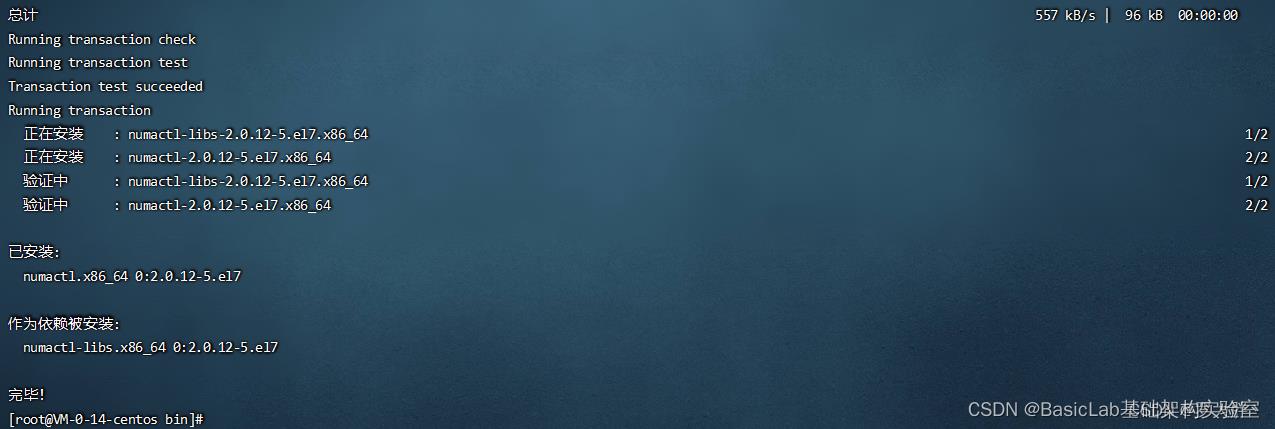
[root@VM-0-14-centos bin]# ./mysqld --initialize
记录日志最末尾位置root@localhost:后的字符串,此字符串为mysql管理员临时登录密码
10、添加mysqld服务到系统
先返回到mysql目录
[root@VM-0-14-centos bin]# cd ..
[root@VM-0-14-centos mysql]# cp -a ./support-files/mysql.server /etc/init.d/mysql
11、授权以及添加服务
[root@VM-0-14-centos mysql]# chmod +x /etc/init.d/mysql[root@VM-0-14-centos mysql]# chkconfig --add mysql
12、启动mysql
[root@VM-0-14-centos mysql]# service mysql start
13、将mysql添加到命令服务
[root@VM-0-14-centos mysql]# ln -s /usr/local/mysql/bin/mysql /usr/bin
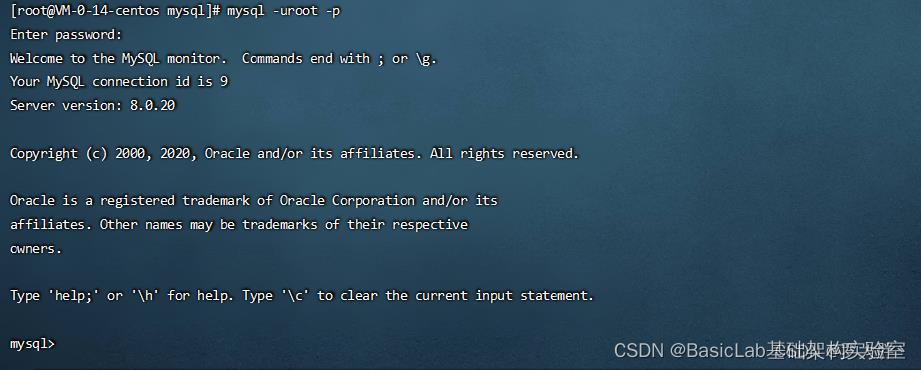
14、登录mysql
[root@VM-0-14-centos mysql]# mysql -uroot -p如果出现 mysql: error while loading shared libraries: libtinfo.so.5: cannot open shared object file: No such file or directory
cd /usr/local/mysql/binldd mysql
sudo ln -s /usr/lib64/libtinfo.so.6.1/usr/lib64/libtinfo.so.515、输入刚刚初始化时生成的密码
16、更改root用户密码, 注意语句后的; 执行语句忘记写了 可以补个空的;回车也可以将语句执行
mysql> ALTER USER 'root'@'localhost' IDENTIFIED WITH mysql_native_password BY'你的密码';
mysql> flush privileges;
17、更改root连接权限
mysql>use mysql;mysql> update user set host='%' where user ='root';mysql> flush privileges;
18、exit; 退出mysql,现在就可以通过连接工具登录root账户进行远程连接了

至此,mysql8.0.20版本的数据库安装,已经完成。系统为CentOS Linux release 7.8.2003 (Core)
以上是关于Centos7 安装Mysql8.0的主要内容,如果未能解决你的问题,请参考以下文章