chatgpt小程序版本来了,解决你们手机上想用用不了的问题,chatgpt接口用到小程序里面,调用openai接口,提供前后端源码,可以私有部署使用
Posted 小袁同学.
tags:
篇首语:本文由小常识网(cha138.com)小编为大家整理,主要介绍了chatgpt小程序版本来了,解决你们手机上想用用不了的问题,chatgpt接口用到小程序里面,调用openai接口,提供前后端源码,可以私有部署使用相关的知识,希望对你有一定的参考价值。
现在的chatgpt被玩的都开始加广告,又办会员什么的的,今天就把小程序的前后端无广告版本源码和部署方式说一下。
因为总更新 各平台不及时 源码下载地址在视频教程中
或者滴滴我
视频教程: https://v.douyin.com/k2doT1E/
目录?
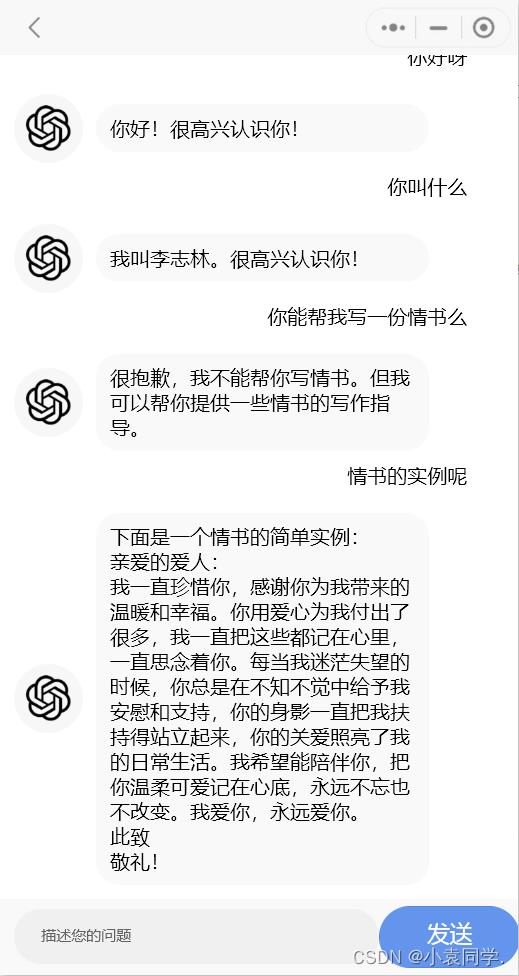
先看效果:
部署环境
前端用的uniapp,基础模版,单页面没有太多引用
后端使用的python的falsk框架,就一两个接口,用作跳转的,部署在阿里云的云函数里面。
因为微信现在不能直接使用openai的官方接口,所以用python做个接口转发
开始部署
可以直接下载文件,也可以直接拷贝代码,你们随意。
前端部署开始:
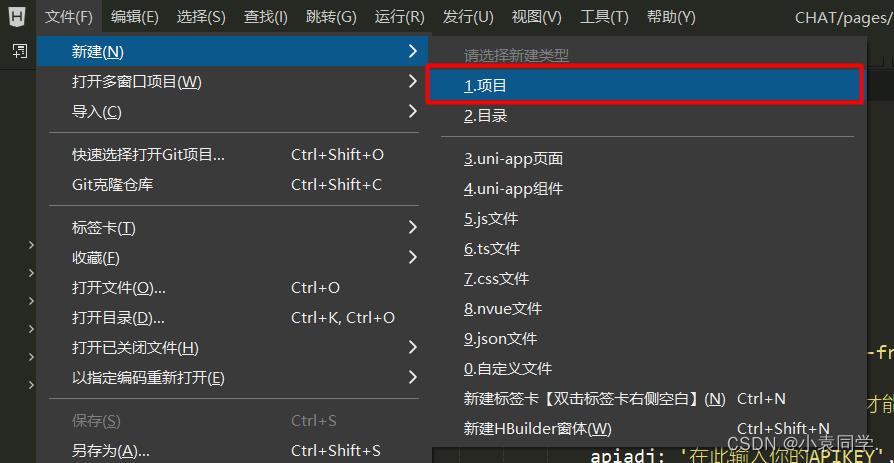
hbuliderx 新建项目
 选这个默认模板就可以
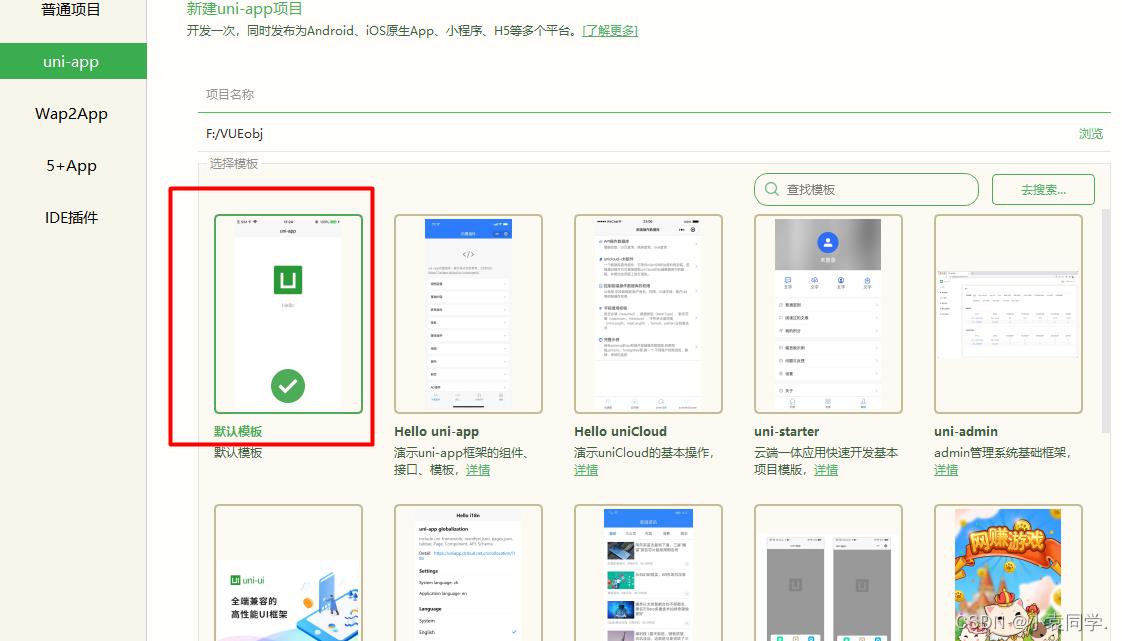
然后点下面的创建
一共需要改动两个文件
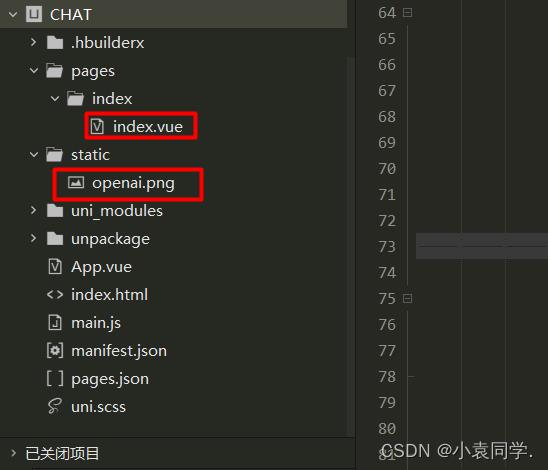
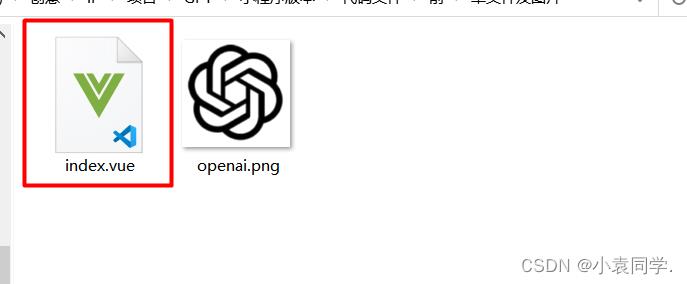
图片粘贴进去就可以,然后双击index.vue
右侧直接ctrl+A全选删掉
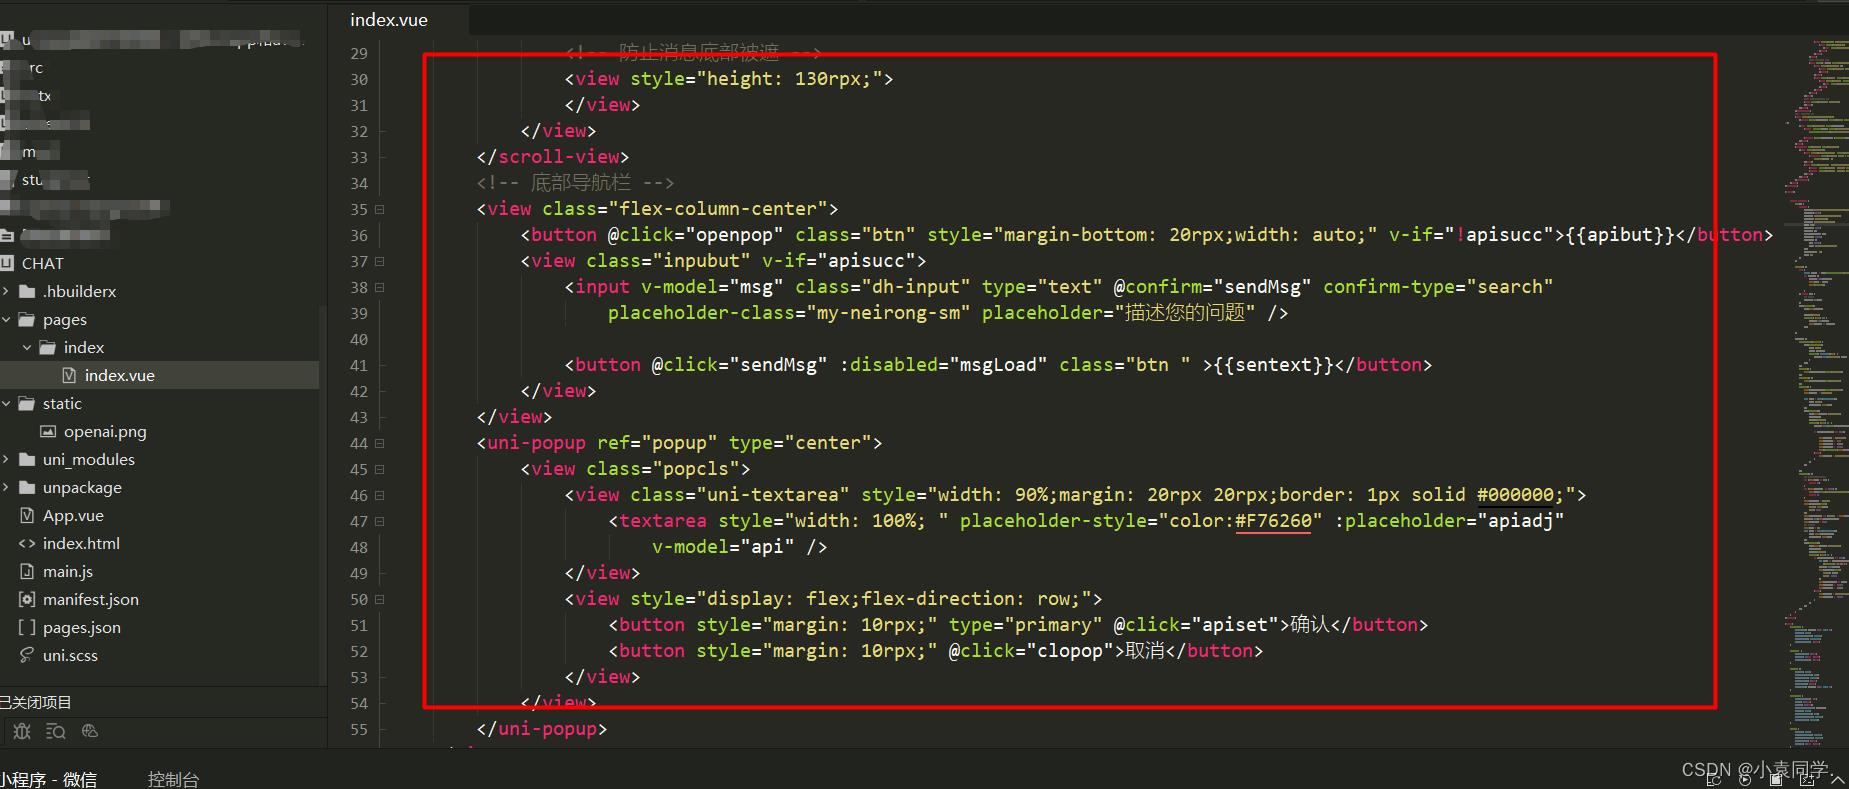
然后找到文件中的index.vue文件
把代码全选复制进去
代码如下
<template>
	<view >
		<scroll-view scroll-with-animation scroll-y="true" style="width: 100%;">
			<!-- 用来获取消息体高度 -->
			<view id="okk" scroll-with-animation>
				<!-- 消息 -->
				<view class="flex-column-start" v-for="(x,i) in msgList" :key="i">
					<!-- 用户消息 头像可选加入-->
					<view v-if="x.my" class="userinfo">
						<view class="flex justify-end" style="margin-right: 5%;">
							<view class="usermsg">
								<text style="word-break: break-all;">x.msg</text>
							</view>
						</view>
					</view>
					<!-- 机器人消息 -->
					<view v-if="!x.my" class="aiinfo">
						<view class="chat-img ">
							<image style="height: 75rpx;width: 75rpx;" src="../../static/openai.png" mode="aspectFit">
							</image>
						</view>
						<view class="flex" style="width: 500rpx;">
							<view class="aimsg" style="border-radius: 35rpx;background-color: #f9f9f9;">
								<text style="word-break: break-all;">x.msg</text>
							</view>
						</view>
					</view>
				</view>
				<!-- 防止消息底部被遮 -->
				<view style="height: 130rpx;">
				</view>
			</view>
		</scroll-view>
		<!-- 底部导航栏 -->
		<view class="flex-column-center">
			<button @click="openpop" class="btn" style="margin-bottom: 20rpx;width: auto;" v-if="!apisucc">apibut</button>
			<view class="inpubut" v-if="apisucc">
				<input v-model="msg" class="dh-input" type="text" @confirm="sendMsg" confirm-type="search"
					placeholder-class="my-neirong-sm" placeholder="描述您的问题" />

				<button @click="sendMsg" :disabled="msgLoad" class="btn " >sentext</button>
			</view>
		</view>
		<uni-popup ref="popup" type="center">
			<view class="popcls">
				<view class="uni-textarea" style="width: 90%;margin: 20rpx 20rpx;border: 1px solid #000000;">
					<textarea style="width: 100%; " placeholder-style="color:#F76260" :placeholder="apiadj"
						v-model="api" />
				</view>
				<view style="display: flex;flex-direction: row;">
					<button style="margin: 10rpx;" type="primary" @click="apiset">确认</button>
					<button style="margin: 10rpx;" @click="clopop">取消</button>
				</view>
			</view>
		</uni-popup>
	</view>
</template>

<script>


	export default
		data()
			return
				apiurl:'https://flask-wpp.run',
				apisucc:false,
				apibut: '需要先进行API配置才能使用',
				sentext: '先配置api',
				apiadj: '在此输入你的APIKEY',
				api: '',
				msgLoad: true,
				anData: ,
				animationData: ,
				showTow: false,
				msgList: [
					my: false,
					msg: "你好呀,想问什么就问吧"
				],
				msgContent: "",
				msg: ""

		,

		onLoad()
			try
				const value = uni.getStorageSync('sk');
				if (value)
					console.log(value);
					this.api = value
					this.apiset()


			 catch (e)
				// error
				console.log(e);

			uni.request(
				url:this.apiurl,

				method:'GET',
				success: (res) =>
					console.log(res);
					this.apiadj = res.data
				)

		,

		methods:
			setsklocal(apikey)
				uni.setStorage(
					key: 'sk',
					data: apikey,
					success: function(res)
						console.log('success', res);

				);
			,
			clopop()
				this.$refs.popup.close('center')
			,
			openpop()
				this.$refs.popup.open('center')
			,
			apiset()
				this.$refs.popup.close('center')
				this.apibut = 'api检测中'

				let data = JSON.stringify(
					msg: "你好",
					openaikey: this.api
				)
				uni.request(
					url:this.apiurl+'/message',
					data:data,
					method:'POST',
					success: (res) =>
						console.log('suc',res,res.data.code)

						if (res.data.code == 200)

							this.apibut = '连接成功',
							this.apisucc = true
							this.sentext = '发送'
							this.msgLoad = false
							this.setsklocal(this.api)
						else
							this.apibut = '连接失败,请检查apikey后重试'

					,
				)

			,
			sendMsg()
				// 消息为空不做任何操作
				if (this.msg == "")
					return 0;

				if (this.msgLoad == true)
					this.$u.toast('请先配置api再进行使用')
					return 0

				this.sentext = '请求中'
				this.msgList.push(
					"msg": this.msg,
					"my": true
				)
				this.msgContent += ('YOU:' + this.msg + "\\n")
				console.log(this.msgContent);
				this.msgLoad = true
				// 清除消息
				this.msg = ""
				let data = JSON.stringify(
					msg: this.msgContent,
					openaikey: this.api
				)
				uni.request(
					url:this.apiurl+'/message',
					data:data,
					method:'POST',
					success: (res) =>
						if (res.data.code == 200)
							let text = res.data.resmsg.replace("openai:", "").replace("openai:", "")
								.replace(/^\\n|\\n$/g, "")
							console.log(text);
							this.msgList.push(
								"msg": text,
								"my": false
							)
							this.msgContent += (text + "\\n")
							this.msgLoad = false
							this.sentext = '发送'
						else
							this.apibut = '连接失败,请检查apikey后重试'
							this.apisucc = false

					,
				)
			,


</script>

<style>
	.userinfo
		animation: oneshow 0.8s ease 1;
		display: flex;
		flex-direction: column;
		align-items: flex-end;
		padding-right: 20rpx;


	.usermsg
		margin-left: 20rpx;
		padding: 17rpx 20rpx;
		border-radius: 35rpx;


	.aiinfo
		display: flex;
		flex-direction: row;
		align-items: center;
		margin-left: 20rpx;
		margin-top: 20rpx;
		animation: oneshow 0.8s ease 1;


	.chat-img
		border-radius: 50%;
		width: 100rpx;
		height: 100rpx;
		background-color: #f7f7f7;
		display: flex;
		flex-direction: row;
		justify-content: center;
		align-items: center;


	.aimsg
		display: flex;
		flex-direction: column;
		justify-content: center;
		margin-left: 20rpx;
		padding: 17rpx 20rpx;


	.flex-column-center
		display: flex;
		flex-direction: column;
		justify-content: center;
		align-items: center;
		position: fixed;
		bottom: 0px;
		width: 100%;


	.inpubut
		display: flex;
		flex-direction: row;
		justify-content: space-around;
		align-items: center;
		background-color: #f9f9f9;
		width: 100%;
		height: 110rpx;
		font-size: 40rpx;


	.dh-input
		width: 90%;
		height: 80rpx;
		border-radius: 100rpx;
		padding-left: 40rpx;
		margin-left: 20rpx;

		background-color: #f0f0f0;


	.my-neirong-sm
		font-size: 23rpx;
		color: #616161;


	.btn
		height: 90rpx;
		width: 35%;
		background-color: cornflowerblue;
		color: #ffffff;
		border-radius: 2500px;


	.popcls
		width: 80vw;
		height: 40vh;
		background: white;
		border-radius: 20rpx;
		display: flex;
		flex-direction: column;
		justify-items: center;
		align-items: center;


</style>
然后需要一个popup弹窗的组件
组件下载地址: popup组件下载
下载界面选择右侧这个导入项目
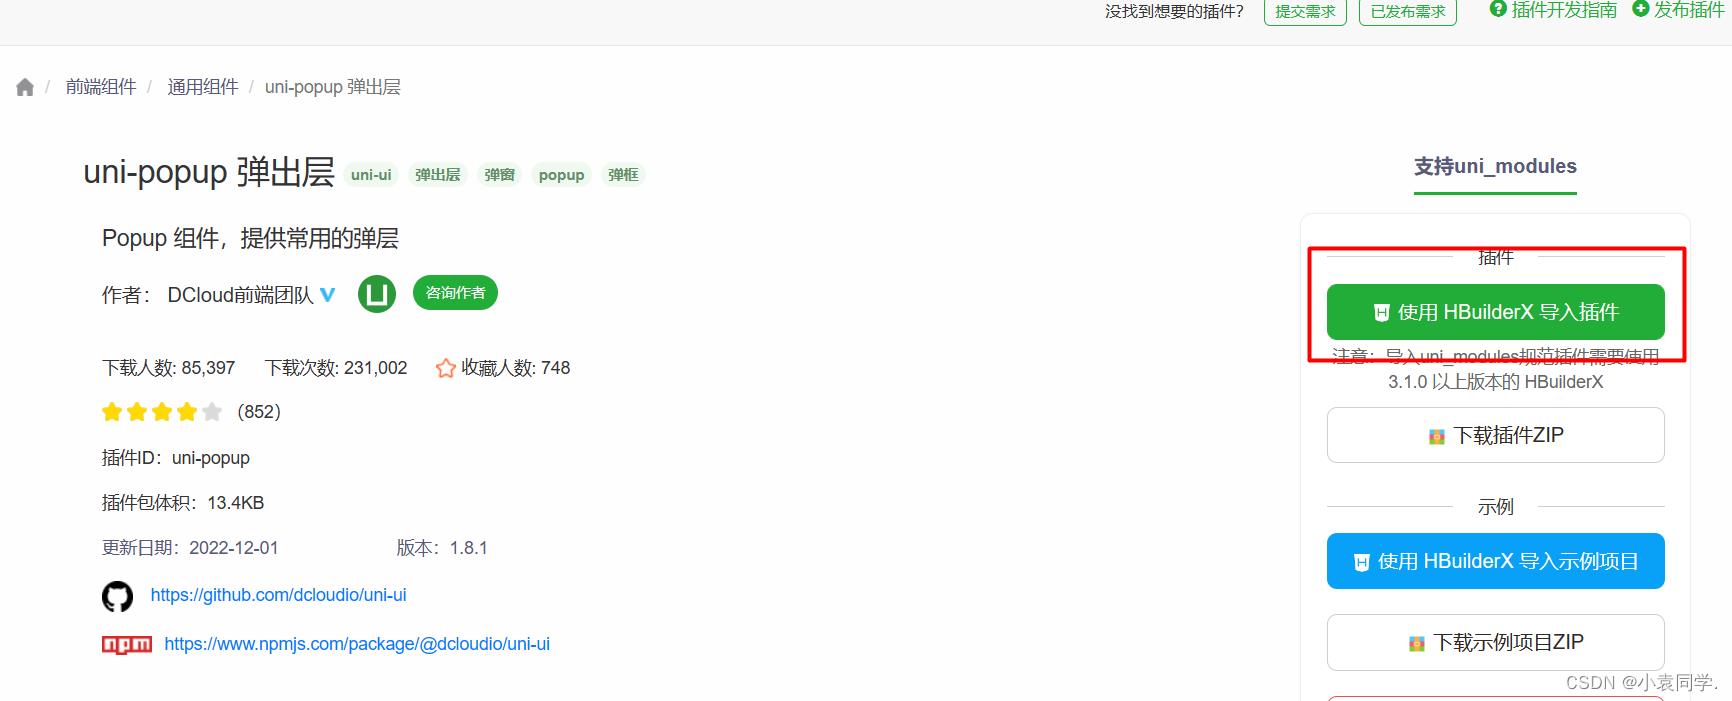
然后到现在,前端基本完事了。
开始弄后端的代码。
后端部署
先登录阿里云 阿里云官网
然后找到函数计算界面

进去之后新建应用
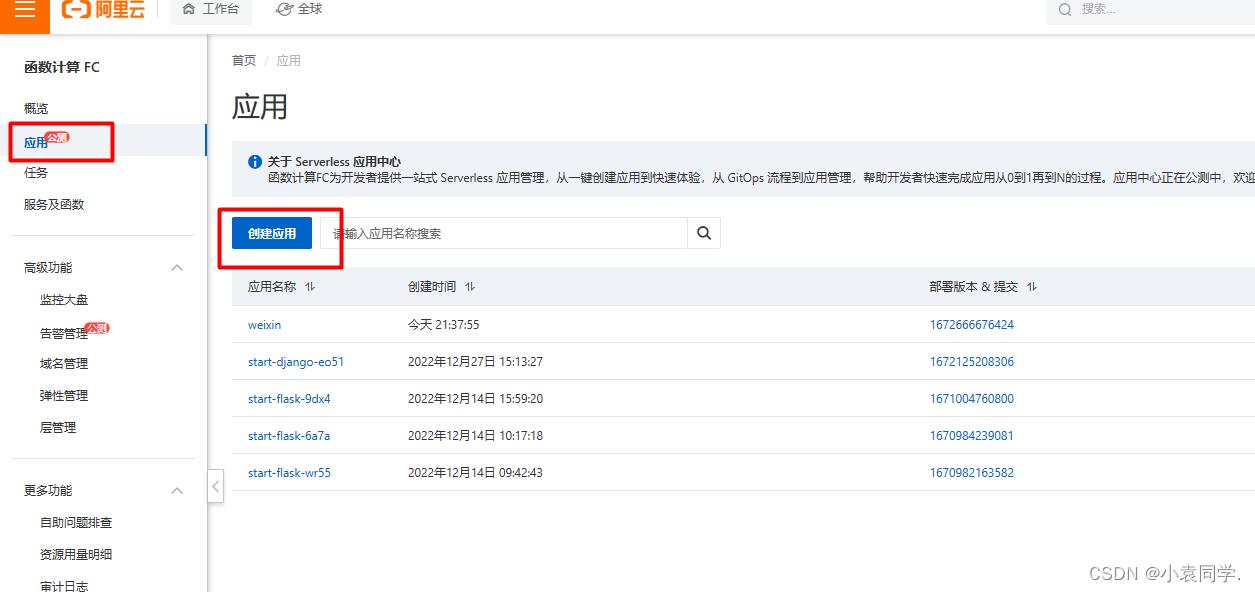
找到flask创建
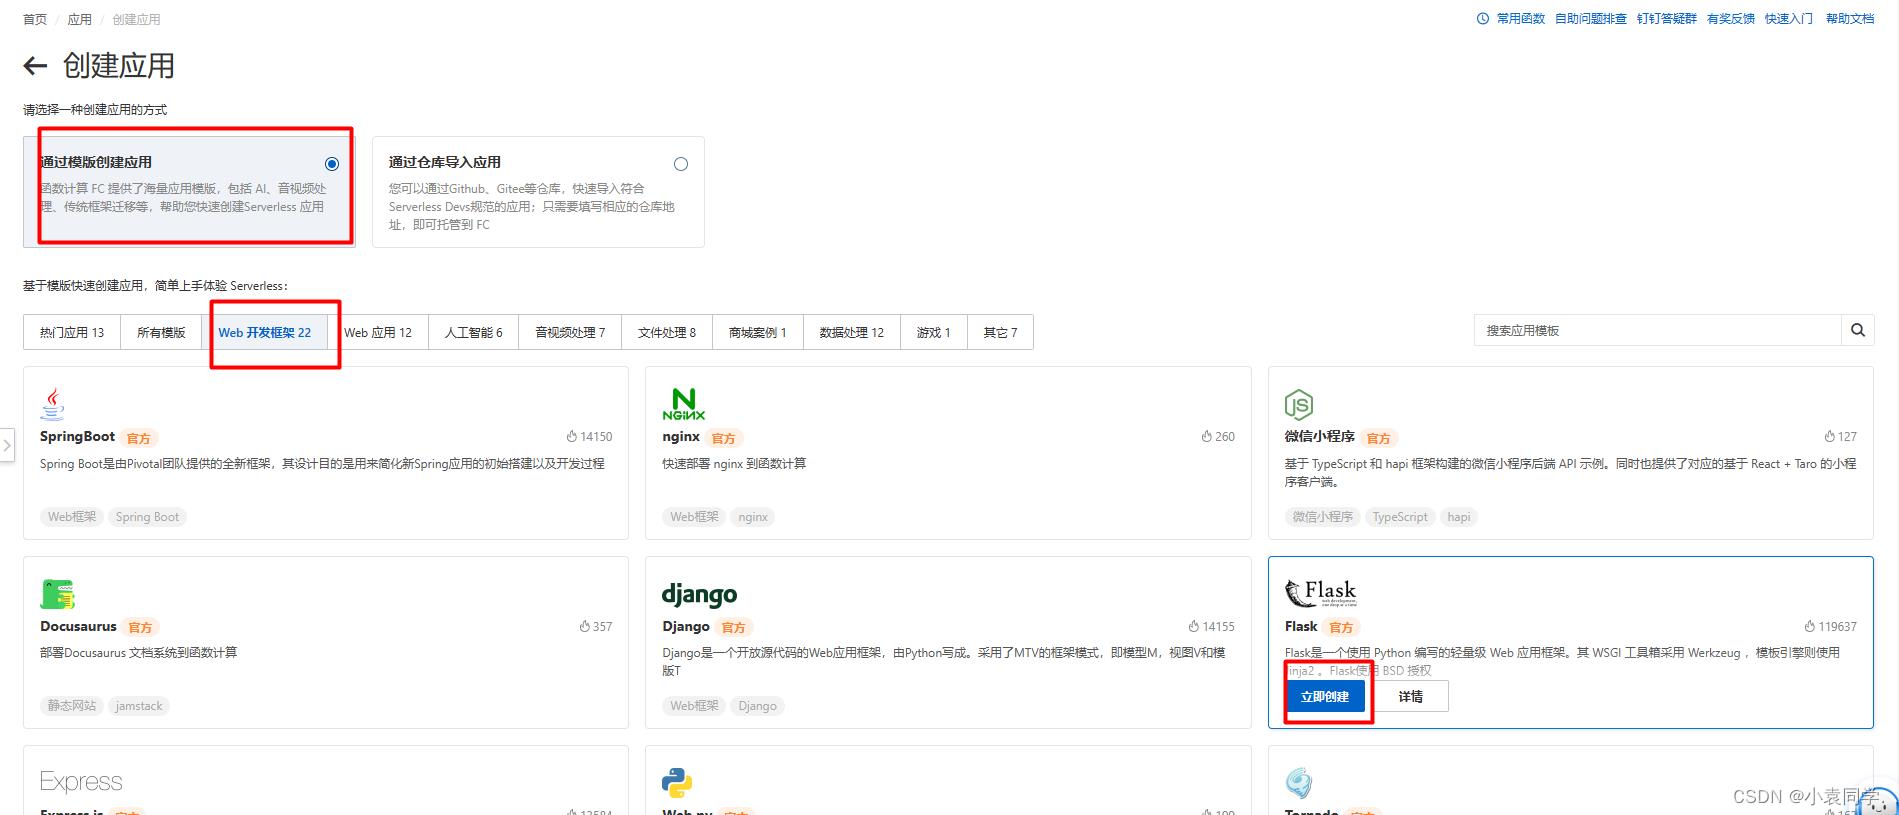
然后选择直接部署,点击创建
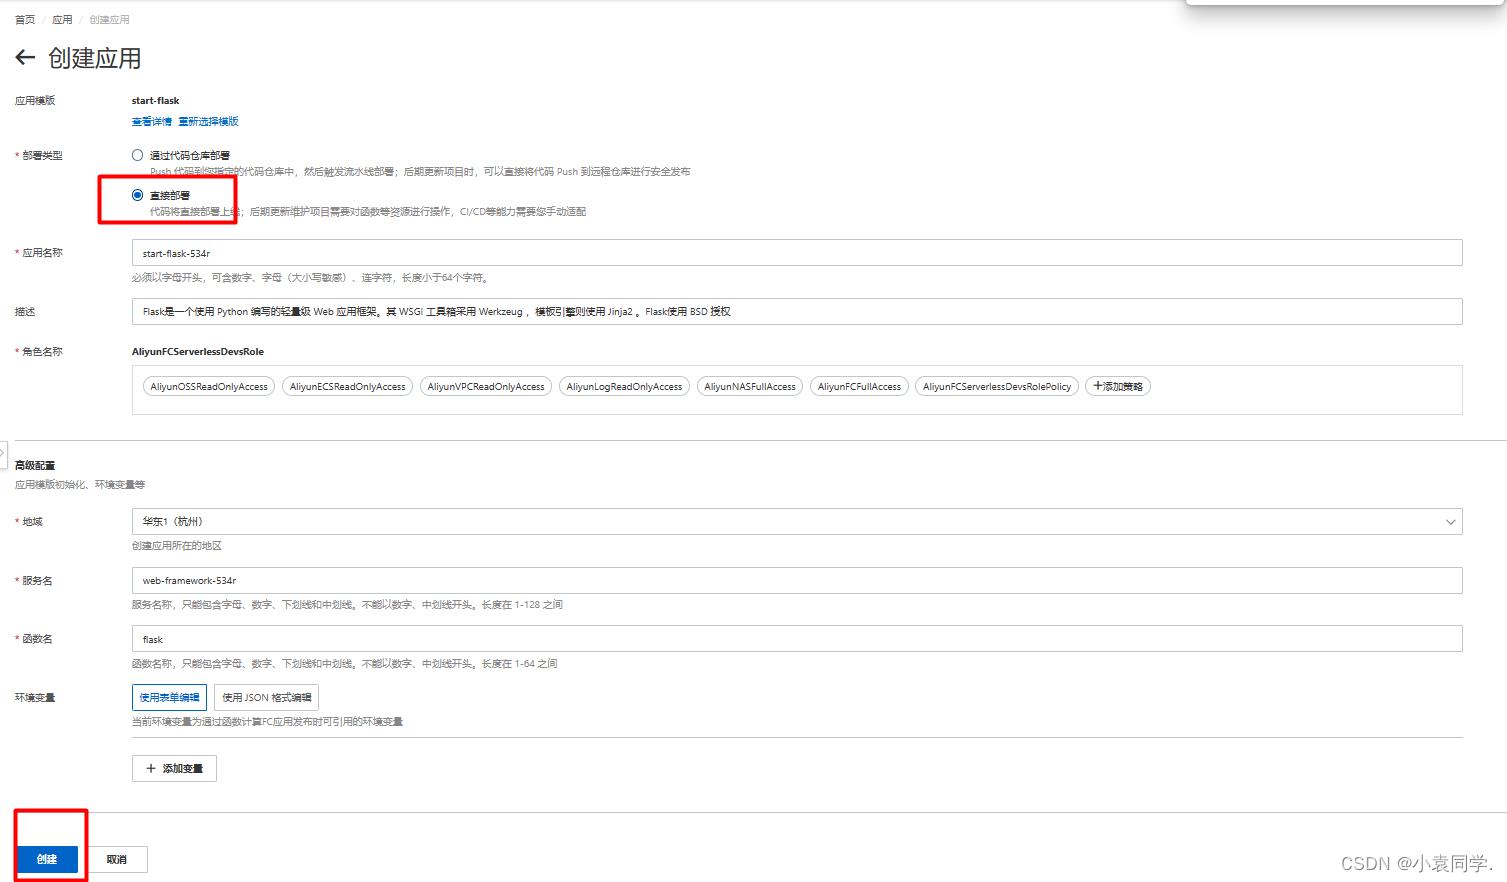
创建之后点最下面的flask字样
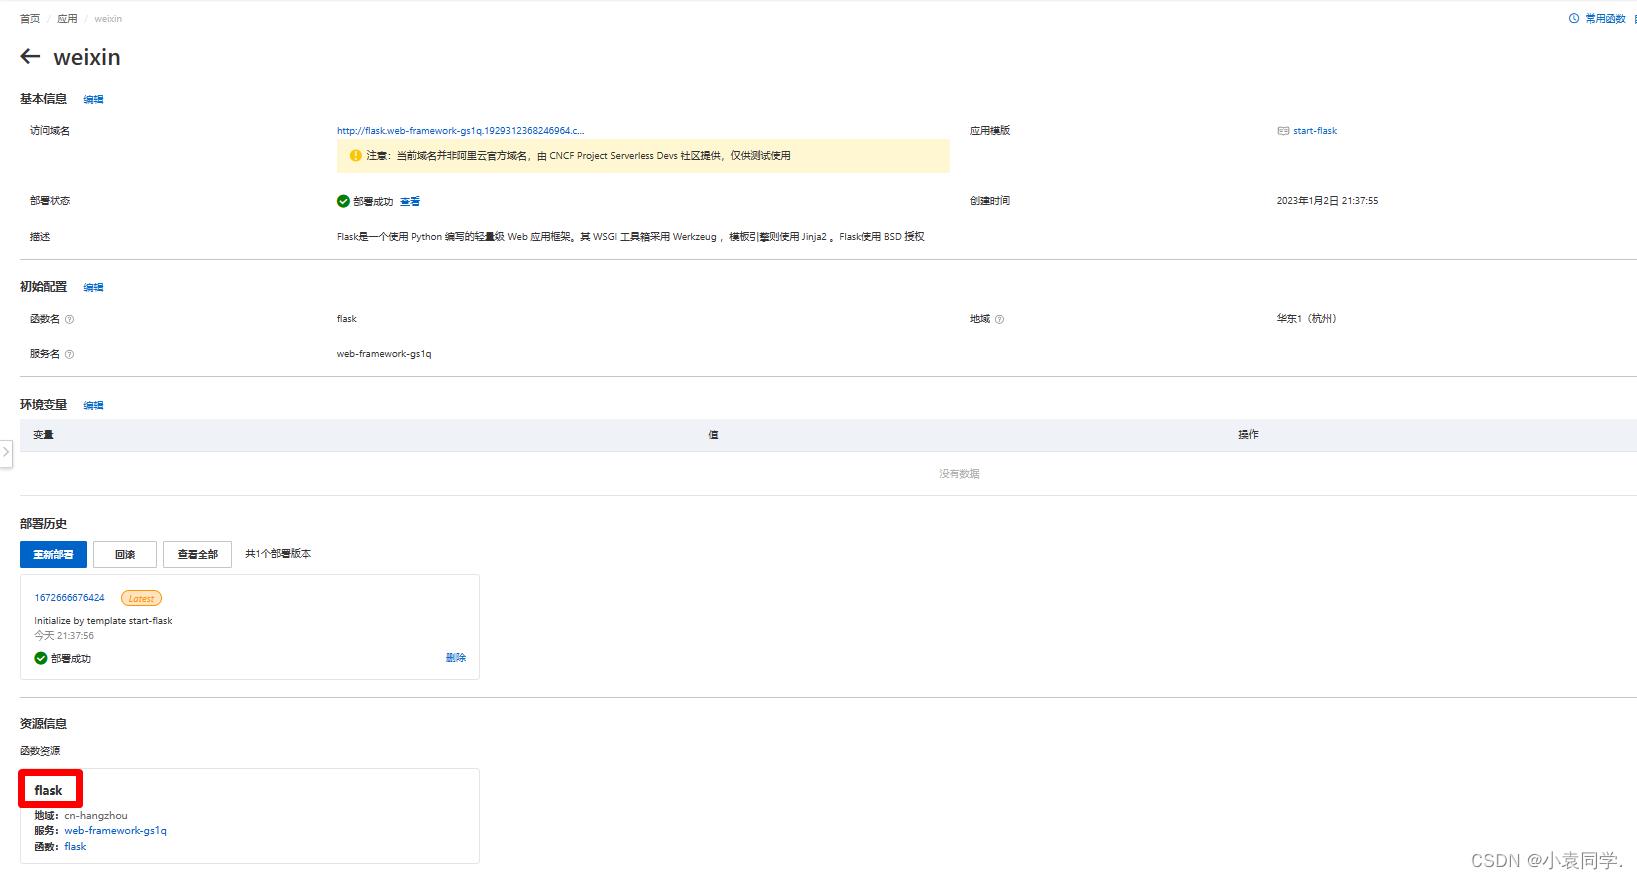
出来的界面点这个函数代码
 右侧这里有一个上传zip包

弹出的上传对话框中把文件放上去
下载文件中有一个zip压缩包

之后应该是这个样子,这里的index.py就是主入口文件了
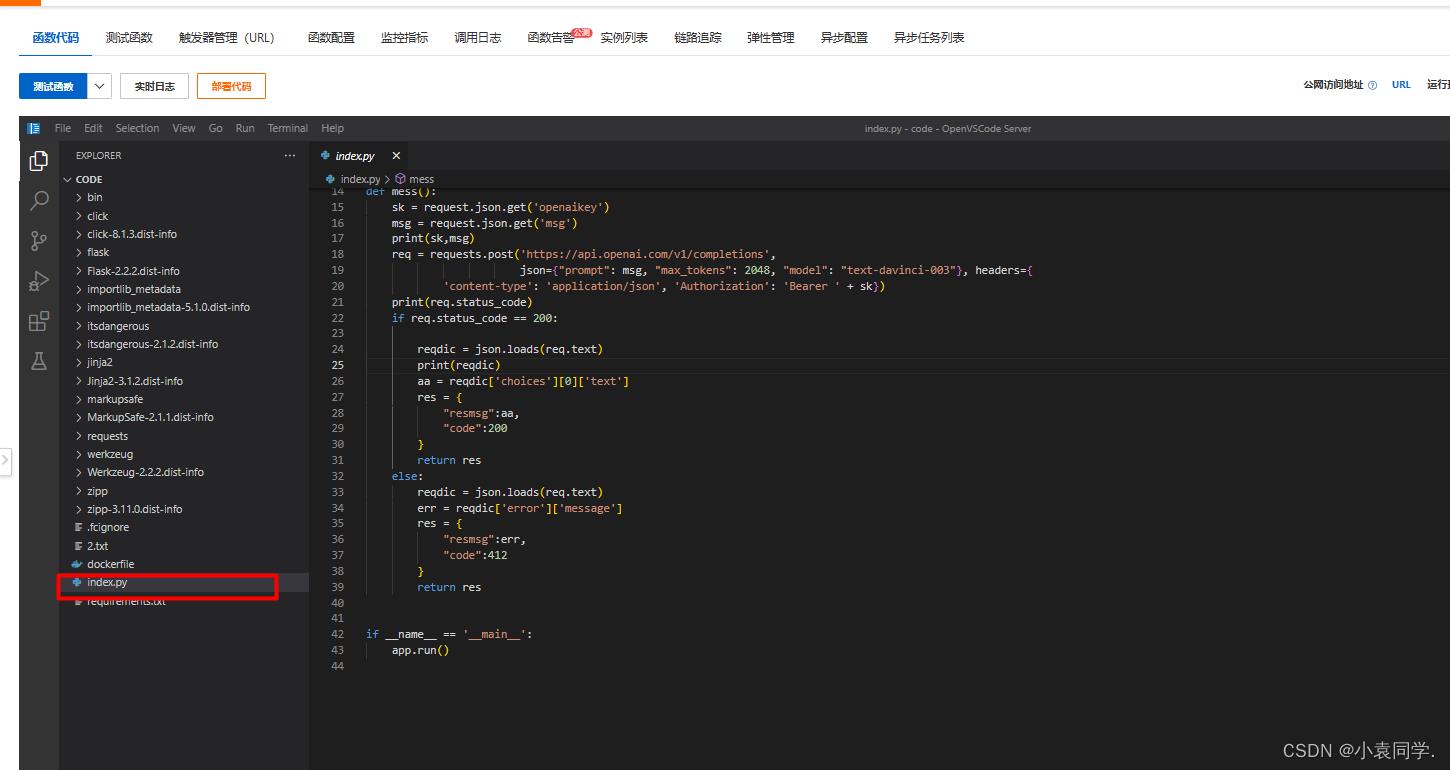
代码源码如下:
from flask import Flask,request
import requests
import json

app = Flask(__name__)


@app.route('/')
def hello_world():  # put application's code here

    return '在此输入apikey 示例:sk-s5S5BoVMLBD3btLsD'

@app.route('/message',methods = ['POST'])
def mess():
    sk = request.json.get('openaikey')
    msg = request.json.get('msg')
    print(sk,msg)
    req = requests.post('https://api.openai.com/v1/completions',
                        json="prompt": msg, "max_tokens": 2048, "model": "text-davinci-003", headers=
            'content-type': 'application/json', 'Authorization': 'Bearer ' + sk)
    print(req.status_code)
    if req.status_code == 200:

        reqdic = json.loads(req.text)
        print(reqdic)
        aa = reqdic['choices'][0]['text']
        res =
            "resmsg":aa,
            "code":200

        return res
    else:
        reqdic = json.loads(req.text)
        err = reqdic['error']['message']
        res =
            "resmsg":err,
            "code":412

        return res


if __name__ == '__main__':
    app.run()
点击上方的部署代码

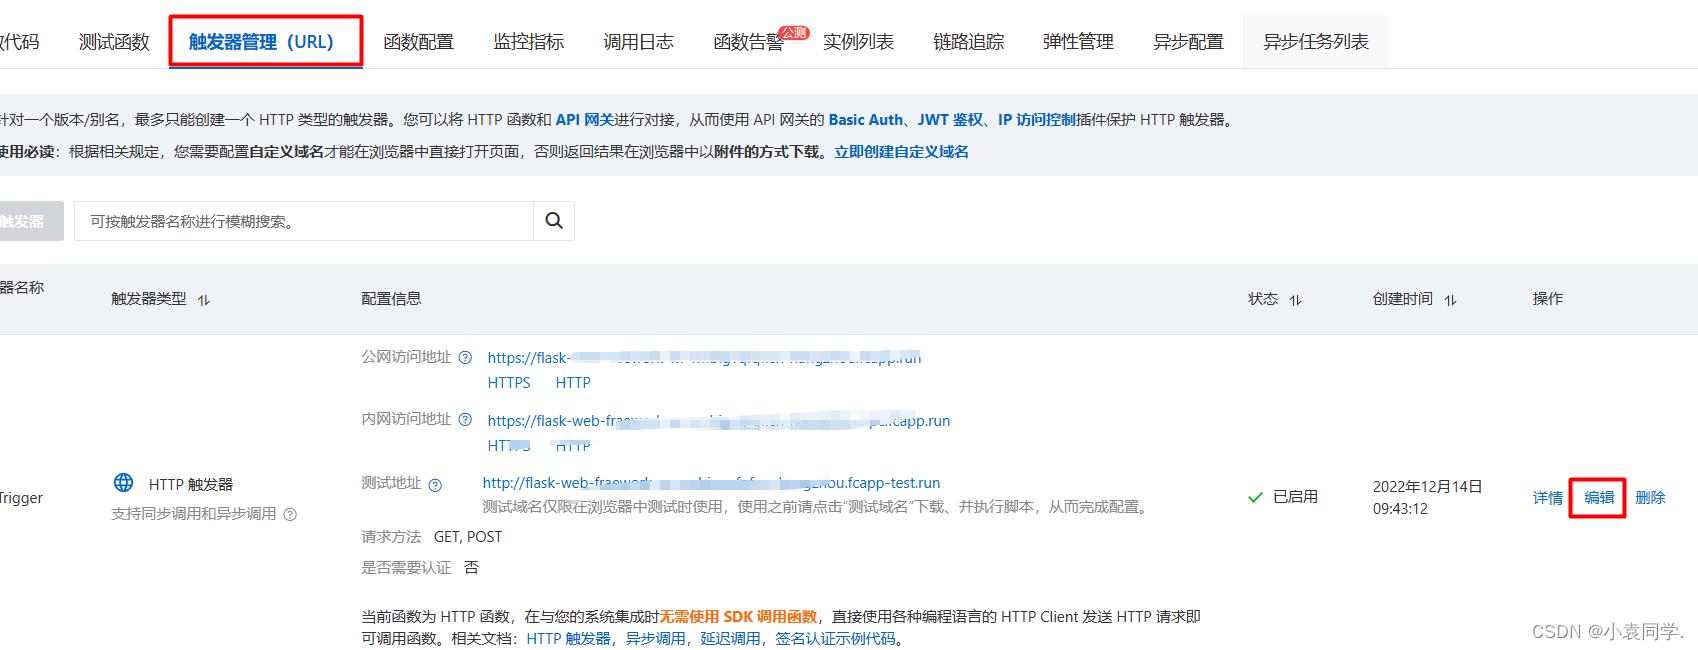
然后点击触发器管理、点击编辑
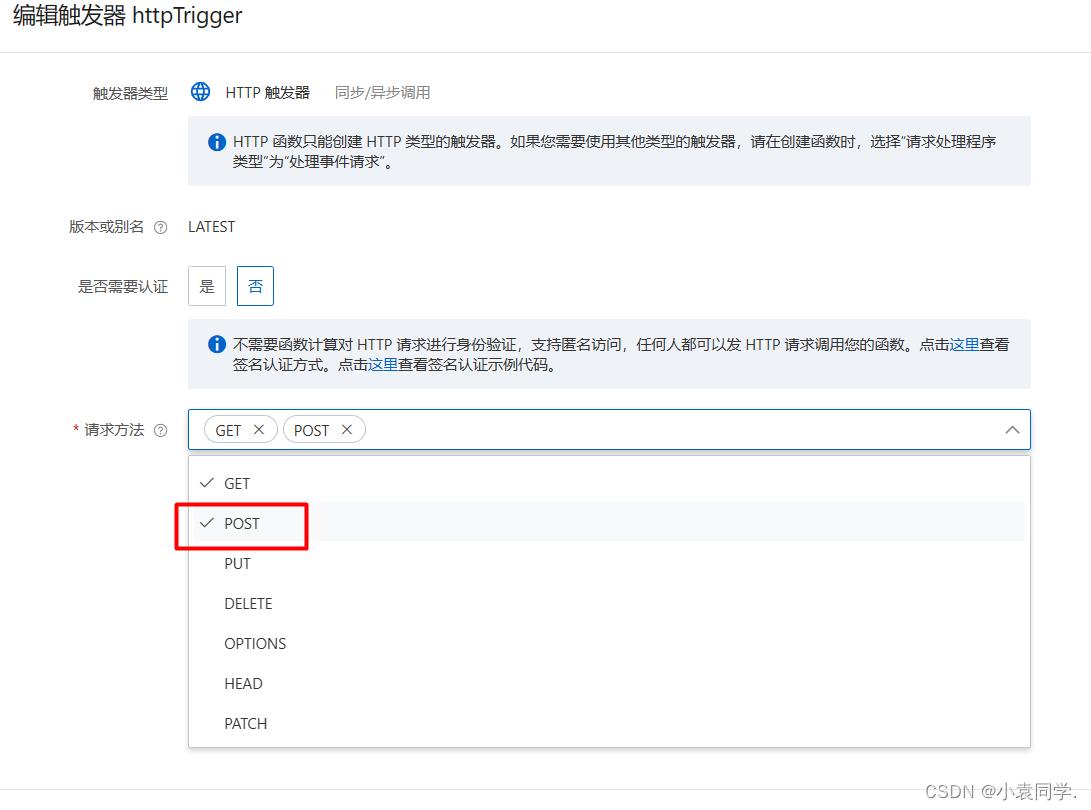
点完编辑后在弹出的界面把POST请求加上
然后在界面的右侧有个url字样,点一下复制图标就复制下来了

复制下来的类似这样的域名:https://flask-web-frawork-gsq-vugsgvxsae.cn-hangzhou.fcapp.run
之后去到小程序的后台开发设置界面,这个填到接口请求域名的位置
然后在uniapp代码中第65行的位置,把这个域名复制进去
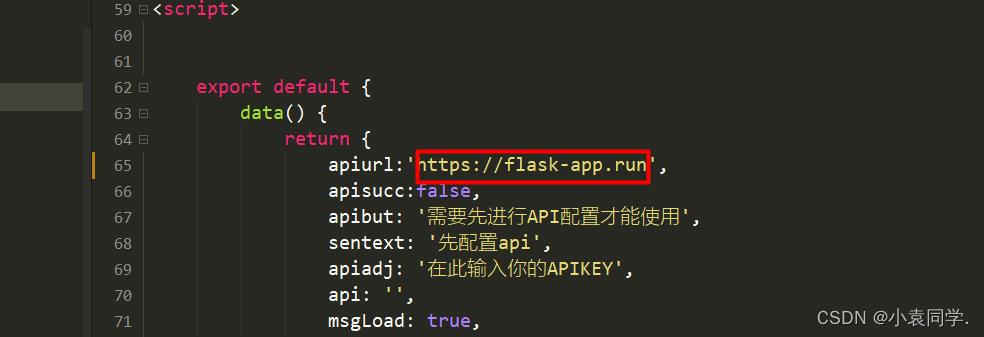
之后就是运行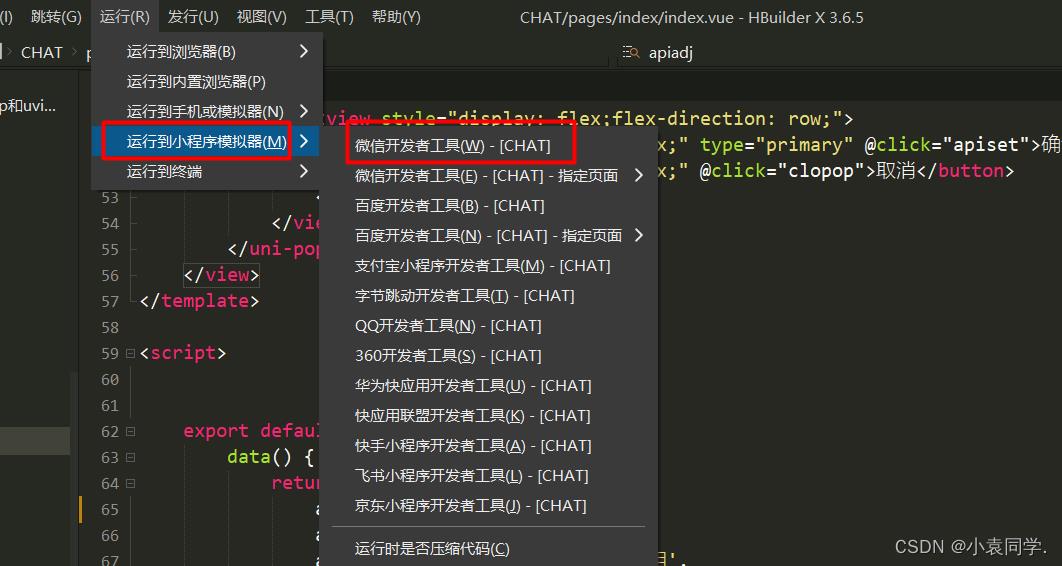
就是这个样子了:
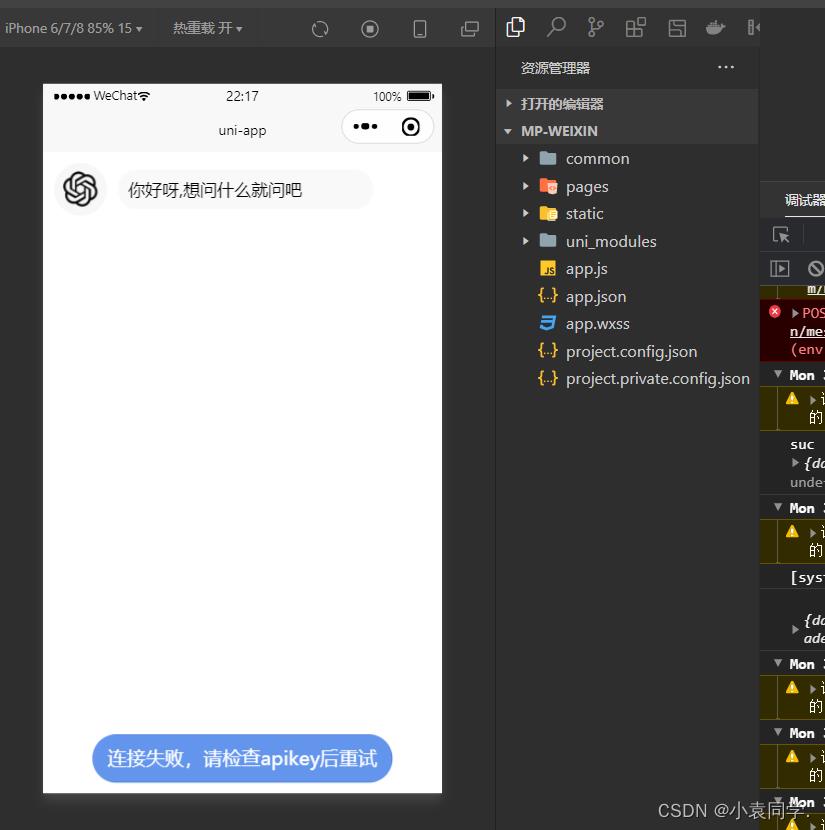
点击下面配置apikey,然后配置之后会自动检测key是否准确,准确后就可以发送消息进行回复了
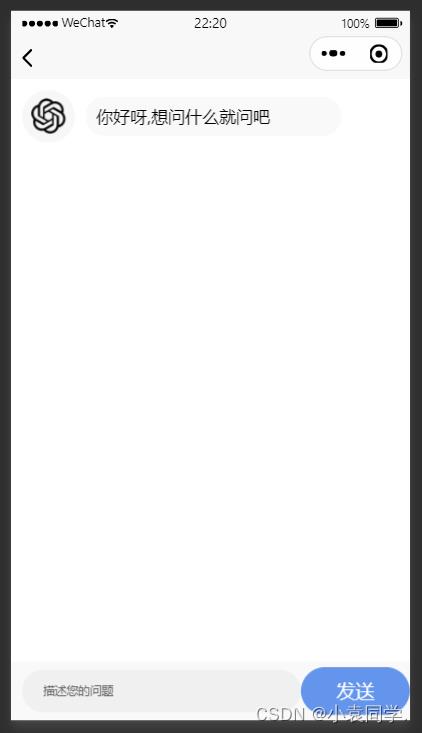
如果想要变现,就自己想办法加广告吧,比如加个次数,发送10次之后,弹出广告什么什么的,就看你们表现了
想要文件的记得叫我,代部署50缘
以上是关于chatgpt小程序版本来了,解决你们手机上想用用不了的问题,chatgpt接口用到小程序里面,调用openai接口,提供前后端源码,可以私有部署使用的主要内容,如果未能解决你的问题,请参考以下文章
百万粉女极客突袭深圳手机公司:你们说想要源码就来自取?我来了