python-matplotlib函数
Posted hellobigorange
tags:
篇首语:本文由小常识网(cha138.com)小编为大家整理,主要介绍了python-matplotlib函数相关的知识,希望对你有一定的参考价值。
文章目录
图像跳出显示
File | Settings | Tools | Python Scientific | Show plots in toolwindow
显示中文
from matplotlib import pyplot as plt
plt.rcParams[‘font.family’] = [‘sans-serif’]
plt.rcParams[‘font.sans-serif’] = [‘SimHei’]
绘图
1、 散点图
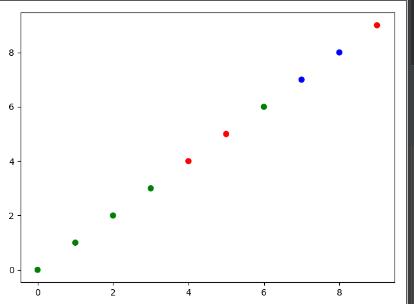
机器学习同时画多个类别的散点图
# 绘制散点图,s是点的面积,marker是点的形状,alpha是点的透明度
import matplotlib.pyplot as plt
import matplotlib as mpl
import numpy as np
#样本特征
x=np.arange(10)
# 样本的类别
y=[0,0,0,0,1,1,0,2,2,1]
color_dark = mpl.colors.ListedColormap(['g', 'r', 'b'])
plt.scatter(x,x,c=y,cmp=color_dark)
plt.show()
2. 直线
# 绘制散点图,lw线宽,linestyle线型
import matplotlib.pyplot as plt
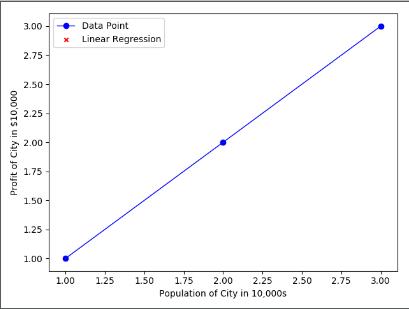
a=[1,2,3]
b=[1,2,3]
plt.figure(0)
plt.scatter(a,b,c='red',marker='x',s=20) # 绘制散点图
plt.plot(a,b,'b-',lw=1,linestyle='-',marker='o')  #绘制直线图
plt.xlabel('Population of City in 10,000s',fontsize=10) # X轴
plt.ylabel('Profit of City in $10,000',fontsize=10) # Y轴
plt.legend(['Data Point','Linear Regression']) # 曲线的标签
plt.show()
3. 网格图
# 绘制网格图
import numpy as np
import matplotlib.pyplot as plt
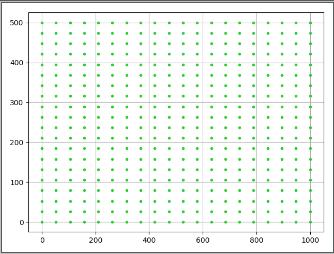
x = np.linspace(0,1000,20)  #区间(0,1000)分为20份
y = np.linspace(0,500,20)    #区间(0,500)分为20份
X,Y = np.meshgrid(x, y)
plt.plot(X, Y,
         color='limegreen',  # 设置颜色为limegreen
         marker='.',  # 设置点类型为圆点
         linestyle='')  # 设置线型为空,也即没有线连接点
plt.grid(True)
plt.show()
4. 3D图
# 绘制3D图
import numpy as np
import matplotlib.pyplot as plt
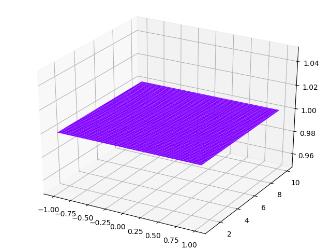
x = np.linspace(-1,1,100) # x轴范围
y = np.linspace(1,10,100) # y轴范围点
a, b = np.meshgrid(x, y) # 生成X-O-Y平面
J = np.ones(a.shape) # 在每一个网格点上的对应的z轴的取值
figure = plt.figure(1) # 创建一幅图
fp = Axes3D(figure) # 定义为3D图
fp.plot_surface(a,b,J,cmap='rainbow')
plt.show()
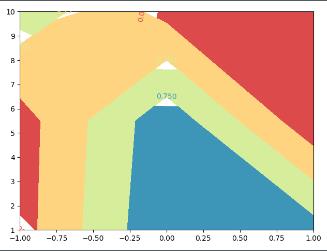
5. 等高线图
# 绘制等高线图
import matplotlib.pyplot as plt
x = np.linspace(-1,1,3) # x轴范围
y = np.linspace(1,10,3) # y轴范围点
a, b = np.meshgrid(x, y) # 生成X-O-Y平面
J =  np.random.random(a.shape) # 在每一个网格点上的对应的z轴的取值,也就是高度
a=plt.contourf(a, b, J, 3, cmap=plt.cm.Spectral) # 绘制等高线图
plt.clabel(a, inline=True, fontsize=10) #加上等高线的高度
plt.show()
6. animation动画
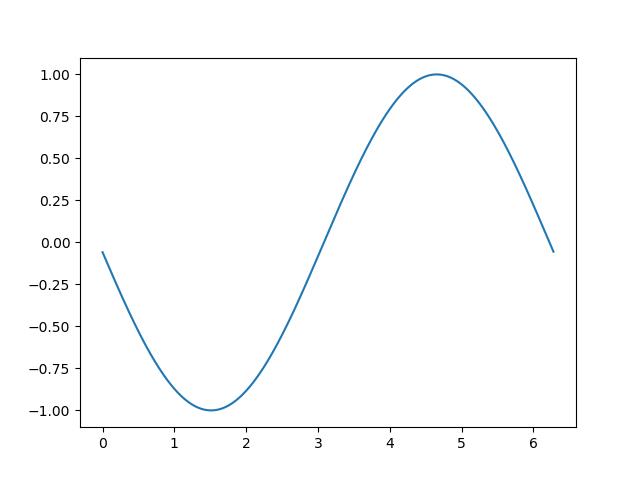
# 绘制等高线图
import numpy as np
import matplotlib.pyplot as plt
from matplotlib import animation


fig, ax = plt.subplots()

x = np.arange(0, 2*np.pi, 0.01)
line, = ax.plot(x, np.sin(x))


# 动画变化保持y变化,x不变
def animate(i):
    line.set_ydata(np.sin(x+i/10))
    return line,


# 最开始的一帧动画
def init():
    line.set_ydata(np.sin(x))
    return line,


# frames帧,时间点,循环周期,init_func最开始的动画,blit更新所有点or变化的点
ani = animation.FuncAnimation(fig=fig, func=animate, frames=100, init_func=init, interval=20, blit=False)
plt.show()
print('RUN off')
7. 条形图
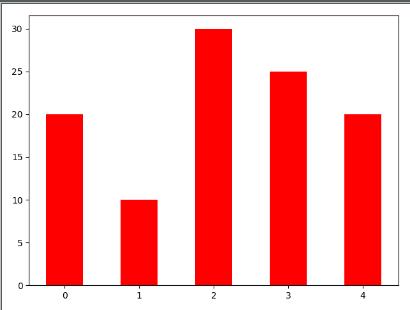
# 条形图,x横轴,height纵轴,width柱状图宽度
index=np.arange(5)
h=[20,10,30,25,20]
plt.bar(x=index,height=h,color='r',width=0.5)
plt.show()
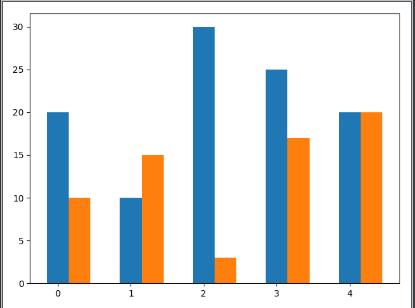
# 并列柱状图
index=np.arange(5)
BJ=[20,10,30,25,20]
TJ=[10,15,3,17,20]
bar_width=0.3
plt.bar(x=index,height=BJ,width=bar_width)
plt.bar(x=index+bar_width,height=TJ,width=bar_width)
plt.show()
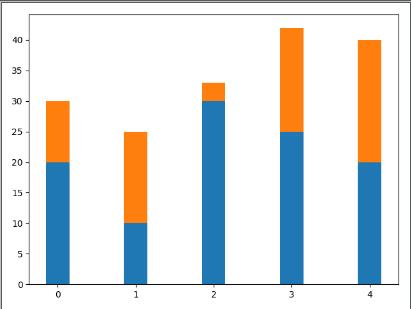
# 层叠柱状图
index=np.arange(5)
BJ=[20,10,30,25,20]
TJ=[10,15,3,17,20]
bar_width=0.3
plt.bar(x=index,height=BJ,width=bar_width)
plt.bar(x=index,height=TJ,width=bar_width,bottom=BJ)
plt.show()
8. 直方图
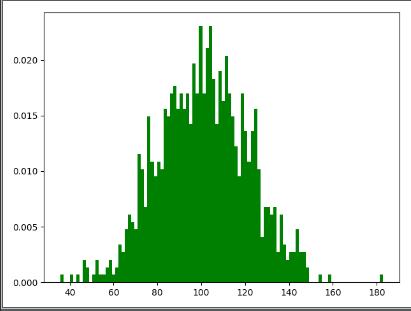
# z直方图,落在不同区间的点的个数·	概率分布直方图
import numpy as np
import matplotlib.pyplot as plt
# normed是否要进行标准化,若为True则纵坐标为出现的频率,否则纵坐标为个数
mu=100
sigma=20
x=mu+sigma*np.random.randn(1000)
plt.hist(x,bins=100,color='g')
plt.show()
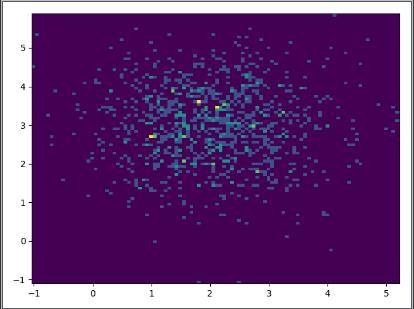
# 2D直方图,越亮,频率越高,双变量联合概率分布
x=np.random.randn(1000)+2
y=np.random.randn(1000)+3
plt.hist2d(x,y,bins=100)
plt.show()
9. 饼状图
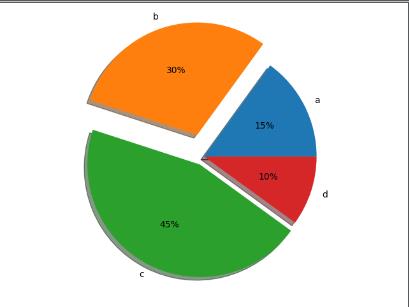
# 饼图,explode突出显示,autopct="%.0f%%饼里加占比
labels='a','b','c','d'
fracs=[15,30,45,10]
explode=[0,0.2,0.08,0]
plt.pie(labels=labels,x=fracs,autopct="%.0f%%",explode=explode,shadow=True)
plt.show()
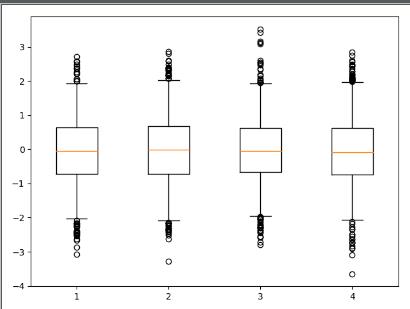
10. 箱形图
显示数据的分散情况
显示上边缘、上四分位数、中位数、下四分位数、下边缘、异常值
# whis越大直线越长,反之越短
data=np.random.normal(size=(1000,4),loc=0,scale=1)
plt.boxplot(data,whis=1)
plt.show()
补充:样式字符串:'颜色点形线型'。如'cx--' 'go:'等
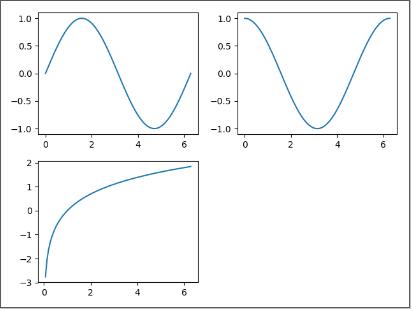
11、面向对象绘图——绘制子图
import numpy as np
import matplotlib.pyplot as plt

x = np.linspace(0, 2 * np.pi, 100)

# 生成绘图对象
fig = plt.figure()
# 生成坐标轴对象
# 绘制子图,2行2列第一个位置
ax = fig.add_subplot(221)
ax.plot(x, np.sin(x))
# 绘制子图,2行2列第2个位置
ax = fig.add_subplot(222)
ax.plot(x, np.cos(x))
# 绘制子图,2行2列第3个位置
ax = fig.add_subplot(223)
ax.plot(x, np.log(x))
plt.show()
12、生成多张图
import numpy as np
import matplotlib.pyplot as plt

x = np.linspace(0, 2 * np.pi, 100)

# 生成绘图对象
fig = plt.figure()
# 生成坐标轴对象
# 绘制子图,2行2列第一个位置
ax = fig.add_subplot(111)
ax.plot(x, np.sin(x))

# 生成绘图对象
fig2= plt.figure()
# 生成坐标轴对象
# 绘制子图,2行2列第一个位置
ax2 = fig2.add_subplot(111)
ax2.plot(x, np.cos(x))

plt.show()
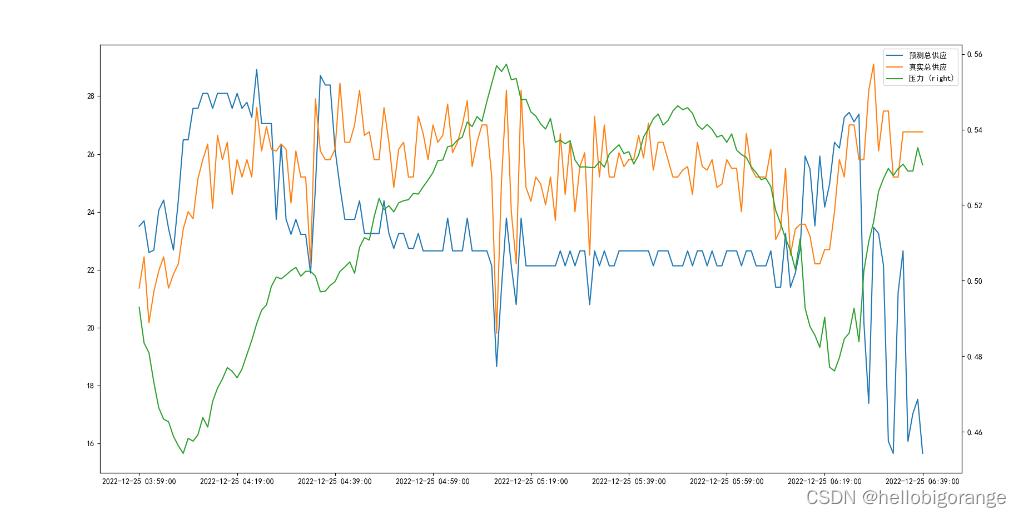
13、显示两条y轴
pandas 绘制双y轴
    import matplotlib.pyplot as plt

    plt.rcParams['font.sans-serif'] = ['SimHei']
    plt.rcParams['axes.unicode_minus'] = False
    plt.figure(figsize=(20, 10))
    tmp[['预测总供应', '真实总供应']].plot()
    tmp['压力'].plot(figsize=(20, 10), secondary_y=True,legend=True)
    plt.show()
matplotlib绘制双y轴
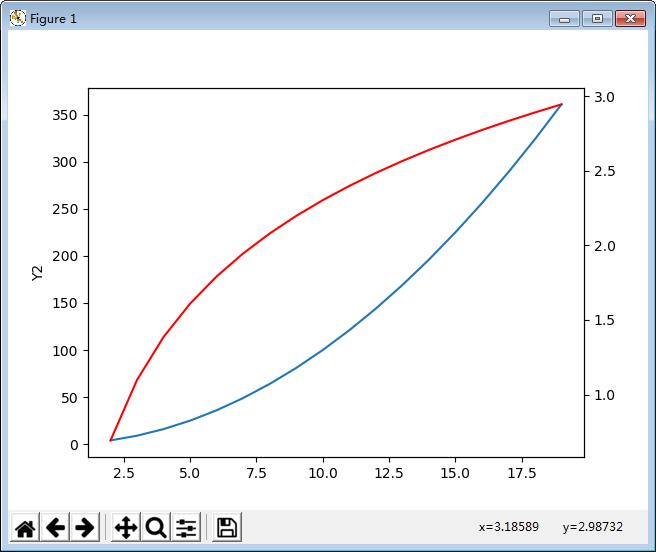
import numpy as np
import matplotlib.pyplot as plt

x = np.arange(2,20,1)
y_1=x**2
y_2=np.log(x)
# 生成绘图对象
fig = plt.figure()
# 生成坐标轴对象
ax = fig.add_subplot(111)
ax.plot(x, y_1)
#
ax.set_ylabel('Y1')

#添加一条新的坐标轴
ax2=ax.twinx()
ax2.plot(x, y_2,'r')
plt.show()
ax.set_ylabel('Y2')
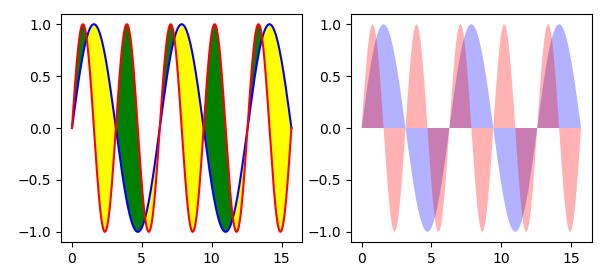
14、区域填充
import numpy as np
import matplotlib.pyplot as plt

x = np.linspace(0,5*np.pi,1000)
y_1=np.sin(x)
y_2=np.sin(2*x)
# 生成绘图对象
fig = plt.figure()
# 生成坐标轴对象
"""第一种填充方法,plt.fill_between,可填充两条曲线的交集"""
ax = fig.add_subplot(121)
ax.plot(x,y_1,'b')
ax.plot(x,y_2,'r')
# y1在y2上面,交集填充为黄色
plt.fill_between(x,y_1,y_2,where=y_1>y_2,facecolor='yellow')
# y1在y2下面,交集填充为绿色
plt.fill_between(x,y_1,y_2,where=y_1<y_2,facecolor='g')

"""第二种填充方法plt.fill"""
ax2 = fig.add_subplot(122)
plt.fill(x,y_1,'b',alpha=0.3)
plt.fill(x,y_2,'r',alpha=0.3)

plt.show()
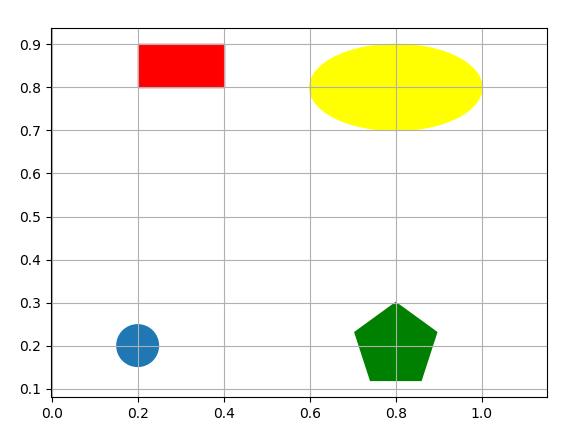
15. 绘制形状
import numpy as np
import matplotlib.pyplot as plt
import matplotlib.patches as mpatches

fig, ax = plt.subplots()
# 圆心坐标
xy1 = np.array([0.2, 0.2])
# 长方形左下角点的坐标
xy2 = np.array([0.2, 0.8])
# 正多边型,圆心坐标
xy3 = np.array([0.8, 0.2])
# 椭圆圆心
xy4 = np.array([0.8, 0.8])
# 绘制圆,圆心,半径
circle = mpatches.Circle(xy1, 0.05)
ax.add_patch(circle)
# 绘制长方形,左下角的点,长宽
rect = mpatches.Rectangle(xy2, 0.2, 0.1, color='r')
ax.add_patch(rect)

# 绘制多边形,圆心,几条边,边到圆心的长度
polygon = mpatches.RegularPolygon(xy3, 5, 0.1, color='g')
ax.add_patch(polygon)
# 绘制椭圆,圆心,长轴,短轴
ellipse = mpatches.Ellipse(xy4, 0.4, 0.2, color='yellow')
ax.add_patch(ellipse)
plt.grid(True)
plt.axis('equal')
plt.show()
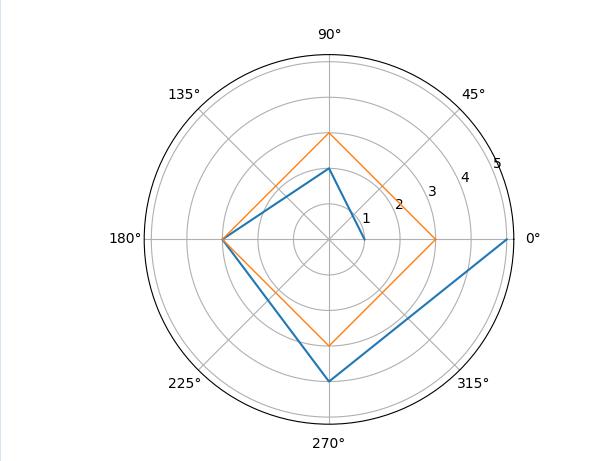
16、极坐标图
# 绘制极坐标图
import numpy as np
import matplotlib.pyplot as plt

#极坐标需要半径和角度
r=np.arange(1,6,1)
theta=[0,np.pi/2,np.pi,3*np.pi/2,2*np.pi]
r1=np.ones(5)*3
#投影方式为极坐标
ax=plt.subplot(111,projection='polar')
ax.plot(theta,r,linewidth=1.5)
ax.plot(theta,r1,linewidth=1)
plt.show()
其他设置
| 实现功能 | 函数 |
|---|---|
| 显示网格 | plt.grid(True,color=‘g’,linewidth=‘0.5’,linestyle=‘–’) |
| 坐标轴设置 | plt.xlabel(‘Population of City in 10,000s’,fontsize=10) # X轴 ;plt.ylabel(‘Profit of City in $10,000’,fontsize=10) # Y轴 |
| 图例设置 | plt.legend([‘Data Point’,‘Linear Regression’]) # 曲线的标签 |
| 坐标轴范围 | (x从(-5,5),y从(20,60));plt.axis([-5,5,20,60]); plt.xlim([-5,5]);plt.xlim(xmin=-5) |
| 调整坐标轴刻度(x轴有5个刻度) | plt.locator_params(‘x’,nbins=5) |
| 绘制箭头 | "this is the bottom"箭头的文字注释,xy头的坐标,xytext尾的坐标,也是text的起始坐标,arrowprops=箭头属性 ; plt.annotate(“this is the bottom”,xy=(0,0),xytext=0,100),arrowprops=dict(facecolor=‘r’,frac=1,headwidth=30,width=10)) |
| 绘制文字,前两个参数为x,y起始文字坐标 | plt.text(0,200,‘x**2’) |
| 数学公式 | ‘$x^2$’ |
| 图形美化 | plt.style.use(‘ggplot’) |
| 查看图形美化样式的选项 | print(plt.style.available) |
| 显示中文 | plt.rcParams[‘font.family’] = [‘sans-serif’] plt.rcParams[‘font.sans-serif’] = [‘SimHei’] |
以上是关于python-matplotlib函数的主要内容,如果未能解决你的问题,请参考以下文章