漫水填充算法填充图案 (C++)
Posted liyuanbhu
tags:
篇首语:本文由小常识网(cha138.com)小编为大家整理,主要介绍了漫水填充算法填充图案 (C++)相关的知识,希望对你有一定的参考价值。
漫水填充算法填充图案
我曾经有一篇博客讲解了基础的漫水填充算法。那篇博客里只是填充了单一的颜色。最近有人问我能否填充图案、或者纹理。能填充颜色自然也能填充图案的。这里就简单的讲讲我的实现方法。
我原来那篇博客里是一行一行填充的,导致代码显得有点复杂。其实可以只填充一个点的周边最邻近点。重复这个操作就能填满一个区域。为了实现填充,我们先搞几个辅助函数。
一个点的邻近点有两种定义,分别为 4 邻近点和 8 邻近点。4邻近点只考虑上下左右。8邻近点还包括四个角上。
下面的代码用来获得4邻近点或者8邻近点。如果 type == 8 则是 8 邻近点,其他都默认是 4 邻近点。
inline static void computeRoundPoints(QPoint roundPoint[8], QPoint center, int type) //type == 4 或 8

    roundPoint[0] = center + QPoint(0, -1);  // 4  0  5
    roundPoint[1] = center + QPoint(-1, 0);  // 1  x  2
    roundPoint[2] = center + QPoint(1, 0);   // 6  3  7
    roundPoint[3] = center + QPoint(0, 1);
    if(type == 8)

        roundPoint[4] = center + QPoint(-1, -1);
        roundPoint[5] = center + QPoint(1, -1);
        roundPoint[6] = center + QPoint(-1, 1);
        roundPoint[7] = center + QPoint(1, 1);
另外,我们的代码只考虑了 32 位彩色图像。为了获得访问图像中的像素方便,专门写了一个辅助函数。
inline static QRgb ** linePointer(QImage &image)

    int rows = image.height();
    QRgb **lines = new QRgb * [rows];
    for(int row = 0; row < rows; row++)

        lines[row] = (QRgb *)image.scanLine(row);

    return lines;
直接写填充图案的代码有点难度。我们可以先写一个填充固定颜色的函数。之后再扩充这个代码。下面是填充固定颜色的代码。
bool fillColor(QImage &image, QPoint seedPoint, QRgb fillColor, int type)

    if(image.isNull() || image.depth() != 32)

        return false;

    QRect rect = image.rect();
    if(!rect.contains(seedPoint))

        qDebug() << "Seed position is out of range!";
        qDebug() << "----image.size() is " << image.size();
        qDebug() << "----seedPoint is " << seedPoint;
        return false;

    QRgb seedColor = image.pixel(seedPoint);
    if(seedColor == fillColor)

        return true;// 如果颜色相同就不需要填充,而且也不能填充,否则会导致死循环。

    QStack<QPoint> stack;
    stack.push(seedPoint);

    QRgb **lines = linePointer(image);
    while(!stack.isEmpty())

        QPoint p = stack.pop();
        int row = p.y();
        int col = p.x();
        lines[row][col] = fillColor;

        QPoint roundPoint[8];
        computeRoundPoints(roundPoint, p, type);

        for(int i = 0; i < type; i++)

            row = roundPoint[i].y();
            col = roundPoint[i].x();
            if(rect.contains(roundPoint[i]) && lines[row][col] == seedColor)

                lines[row][col] = fillColor;//重要:提前填充可以避免这个像素被多次压栈到 stack。速度提升至少三倍。
                stack.push(roundPoint[i]);


    delete[] lines;
    return true;
这个函数看着挺长的。但是实际核心的部分就是 while 循环里的那几行。我们可以把 while 循环单独拉出来。
从 stack 中取出一个点,把这个点填上颜色,然后判断邻近点有没有也是满足填充条件的点,有的话也填充上,并且存入 stack。这些点之所以还要存入 stack 是因为我们除了填充之外,还需要判断这些点的邻近点。只要放到 stack 中了,这些点就有机会取出来判断它的邻近点。
    while(!stack.isEmpty())

        QPoint p = stack.pop();
        int row = p.y();
        int col = p.x();
        lines[row][col] = fillColor;

        QPoint roundPoint[8];
        computeRoundPoints(roundPoint, p, type);

        for(int i = 0; i < type; i++)

            row = roundPoint[i].y();
            col = roundPoint[i].x();
            if(rect.contains(roundPoint[i]) && lines[row][col] == seedColor)

                lines[row][col] = fillColor;//重要:提前填充可以避免这个像素被多次压栈到 stack。速度提升至少三倍。
                stack.push(roundPoint[i]);
填充图案和这个的基本思路是一样的。只不过在填充时我们要根据当前左边点计算一下需要填入什么颜色。另外被填充的图案中可有有些区域的颜色与我们要填充的区域的颜色一致。这时这些区域再填充后还是满足填充条件,会重复不停的填充,导致死循环。
解决这个死循环问题我的办法是复制一份原始图像,在复制的图像中填充单色,在目标图像中填充图案。所有的判断操作都在复制的图像上进行。因为复制的图像填充的颜色和原始的颜色不同,所以就不会有死循环问题。
bool fillTexture(QImage &image, QPoint seedPoint, QImage & texture, int type) //type == 4 或 8

    if(image.isNull() || texture.isNull() || image.depth() != 32 || texture.depth() != 32)

        return false;

    QRect rect = image.rect();
    if(!rect.contains(seedPoint))

        qDebug() << "Seed position is out of range!";
        qDebug() << "----image.size() is " << image.size();
        qDebug() << "----seedPoint is " << seedPoint;
        return false;

    QRgb seedColor = image.pixel(seedPoint);
    QRgb fillColor = qRgb(255, 0, 0);
    if(qRed(seedColor) > 128)

        fillColor = qRgb(0, 0, 0); //只要保证 fillColor 和 seedColor 不相同就行。这个颜色就是随便选的,也可以选别的颜色。


    QImage imageClone = image.copy();//在这个图像上填充单一颜色,原始图像上填充 Texture
    QRgb **orgImgLines = linePointer(image);
    QRgb **tempImgLines = linePointer(imageClone);
    QRgb **textureLines = linePointer(texture);

    int textureWidth = texture.width();
    int textureHeight = texture.height();

    QStack<QPoint> stack;
    stack.push(seedPoint);
    while(!stack.isEmpty())

        QPoint p = stack.pop();
        int row = p.y();
        int col = p.x();
        tempImgLines[row][col] = fillColor;
        orgImgLines[row][col] = textureLines[row % textureHeight][col % textureWidth];

        QPoint roundPoint[8];
        computeRoundPoints(roundPoint, p, type);

        for(int i = 0; i < type; i++)

            row = roundPoint[i].y();
            col = roundPoint[i].x();
            if(rect.contains(roundPoint[i]) && tempImgLines[row][col] == seedColor)

                tempImgLines[row][col] = fillColor;//重要:提前填充可以避免这个像素被多次压栈到 stack。速度提升至少三倍。
                orgImgLines[row][col] = textureLines[row % textureHeight][col % textureWidth];
                stack.push(roundPoint[i]);


    delete[] orgImgLines;
    delete[] tempImgLines;
    delete[] textureLines;
    return true;
填充图案的那句代码是这样的:
orgImgLines[row][col] = textureLines[row % textureHeight][col % textureWidth];
因为填充的图形长宽一般会比原始图像小。所以这里用了个取余操作。相当于把填充图像平铺满待填充区域。这里还可以做一些平移操作。用来控制填充图像的位置。不过我这个只是示例代码,就没加这些功能。
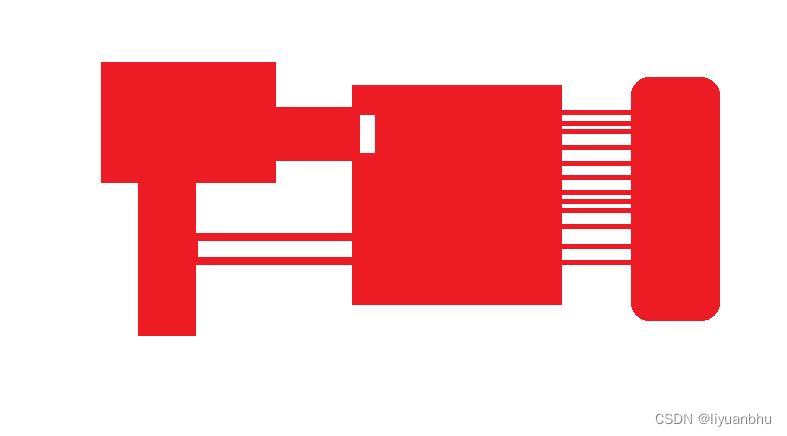
下面给个填充的效果图。首先是原始的图像。我自己随便画了一个。图案中有些比较负责的联通区域。

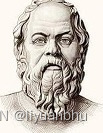
然后是要填充的图像。随便在网上找了个苏格拉底的头像。

最后是填充后的效果,将原始图像红色的区域全都填充上头像。

可以看到填充的结果是正确的。在我的电脑上,填充速度也还可以,大概30-40ms 可以完成全部的填充计算。
以上是关于漫水填充算法填充图案 (C++)的主要内容,如果未能解决你的问题,请参考以下文章