ElasticSearch--1
Posted 琪哥在这儿呢
tags:
篇首语:本文由小常识网(cha138.com)小编为大家整理,主要介绍了ElasticSearch--1相关的知识,希望对你有一定的参考价值。
第一章 ElasticSearch 概念
1-1 ElasticSearch 概念
The Elastic Stack, 包括 Elasticsearch、 Kibana、 Beats 和 Logstash(也称为 ELK Stack)。能够安全可靠地获取任何来源、任何格式的数据,然后实时地对数据进行搜索、分析和可视化。
Elaticsearch,简称为 ES, ES 是一个开源的高扩展的分布式全文搜索引擎, 是整个 ElasticStack 技术栈的核心。
它可以近乎实时的存储、检索数据;本身扩展性很好,可以扩展到上百台服务器,处理 PB 级别的数据。
1-2 全文搜索引擎
Google,百度类的网站搜索,它们都是根据网页中的关键字生成索引,我们在搜索的时候输入关键字,它们会将该关键字即索引匹配到的所有网页返回;还有常见的项目中应用日志的搜索等等。对于这些非结构化的数据文本,关系型数据库搜索不是能很好的支持。
这里说到的全文搜索引擎指的是目前广泛应用的主流搜索引擎。它的工作原理是计算机索引程序通过扫描文章中的每一个词,对每一个词建立一个索引,指明该词在文章中出现的次数和位置,当用户查询时,检索程序就根据事先建立的索引进行查找,并将查找的结果反馈给用户的检索方式。这个过程类似于通过字典中的检索字表查字的过程。
1-3 ElasticSearch 应用实例
GitHub、维基百科、百度、新浪、阿里
第二章 ElasticSearch 入门
2-1 官方地址
Windows 版的 Elasticsearch 压缩包,解压即安装完毕,解压后的 Elasticsearch 的目录结构如下 :
目录 | 含义 |
bin | 可执行脚本目录 |
config | 配置目录 |
jdk | 内置 JDK 目录 |
lib | 类库 |
logs | 日志目录 |
modules | 模块目录 |
plugins | 插件目录 |
解压后,进入 bin 文件目录,点击 elasticsearch.bat 文件启动 ES 服务 。
注意: 9300 端口为 Elasticsearch 集群间组件的通信端口, 9200 端口为浏览器访问的 http协议 RESTful 端口。
打开浏览器,输入地址: http://localhost:9200,测试返回结果,返回结果如下:
  "name" : "琪哥",
  "cluster_name" : "elasticsearch",
  "cluster_uuid" : "8nGKx-9LTLywpqUKvDDGng",
  "version" :
    "number" : "7.8.0",
    "build_flavor" : "default",
    "build_type" : "zip",
    "build_hash" : "757314695644ea9a1dc2fecd26d1a43856725e65",
    "build_date" : "2020-06-14T19:35:50.234439Z",
    "build_snapshot" : false,
    "lucene_version" : "8.5.1",
    "minimum_wire_compatibility_version" : "6.8.0",
    "minimum_index_compatibility_version" : "6.0.0-beta1"
  ,
  "tagline" : "You Know, for Search"
2-2 ElasticSearch与mysql类比
Elasticsearch 是面向文档型数据库,一条数据在这里就是一个文档。 为了方便大家理解,我们将 Elasticsearch 里存储文档数据和关系型数据库 MySQL 存储数据的概念进行一个类比

ES 里的 Index 可以看做一个库,而 Types 相当于表, Documents 则相当于表的行。这里 Types 的概念已经被逐渐弱化, Elasticsearch 6.X 中,一个 index 下已经只能包含一个type, Elasticsearch 7.X 中, Type 的概念已经被删除了。
2-3 HTTP索引
2-3-1 创建索引
对比关系型数据库,创建索引就等同于创建数据库。
在 Postman 中,向 ES 服务器发 PUT 请求 : http://127.0.0.1:9200/shopping
请求后,服务器返回响应:
    "acknowledged": true,//响应结果
    "shards_acknowledged": true,//分片结果
    "index": "shopping"//索引名称
如果重复发 PUT 请求 : http://127.0.0.1:9200/shopping 添加索引,会返回错误信息 :
    "error":
        "root_cause": [

                "type": "resource_already_exists_exception",
                "reason": "index [shopping/J0WlEhh4R7aDrfIc3AkwWQ] already exists",
                "index_uuid": "J0WlEhh4R7aDrfIc3AkwWQ",
                "index": "shopping"

        ],
        "type": "resource_already_exists_exception",
        "reason": "index [shopping/J0WlEhh4R7aDrfIc3AkwWQ] already exists",
        "index_uuid": "J0WlEhh4R7aDrfIc3AkwWQ",
        "index": "shopping"
    ,
    "status": 400
2-3-2 查看所有索引
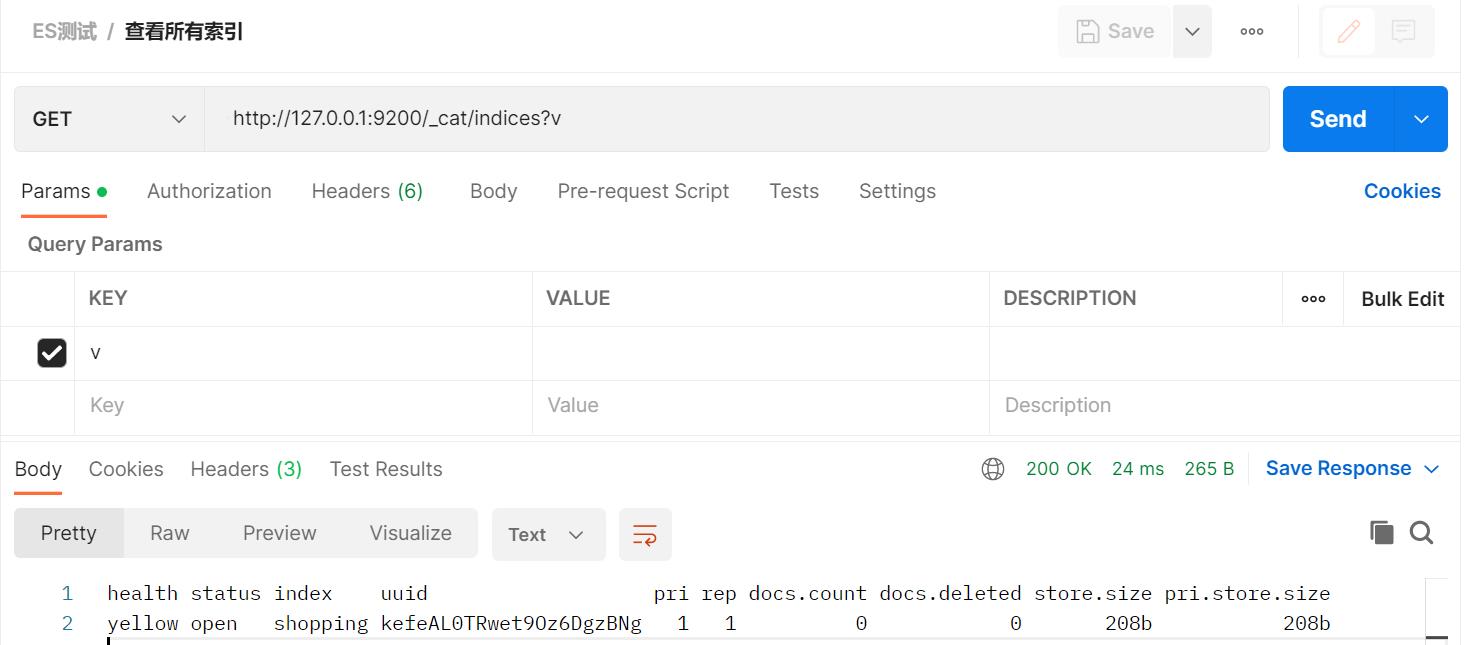
在 Postman 中,向 ES 服务器发 GET 请求 :http://127.0.0.1:9200/_cat/indices?v 这里 _cat 表示查看的意思, indices 表示索引,与MySQL 中的 show tables 意思一致
服务器响应结果如下 :
health status index    uuid                   pri rep docs.count docs.deleted store.size pri.store.size
yellow open   shopping J0WlEhh4R7aDrfIc3AkwWQ   1   1          0            0       208b           208b
表头 | 含义 |
health | 当前服务器健康状态: green(集群完整) yellow(单点正常、集群不完整) red(单点不正常) |
status | 索引打开、关闭状态 |
index | 索引名 |
uuid | 索引统一编号 |
pri | 主分片数量 |
rep | 副本数量 |
docs.count | 可用文档数量 |
docs.deleted | 文档删除状态(逻辑删除) |
store.size | 主分片和副分片整体占空间大小 |
pri.store.size | 主分片占空间大小 |
postman示例图:
2-3-3 查看单个索引
在 Postman 中,向 ES 服务器发 GET 请求 : http://127.0.0.1:9200/shopping
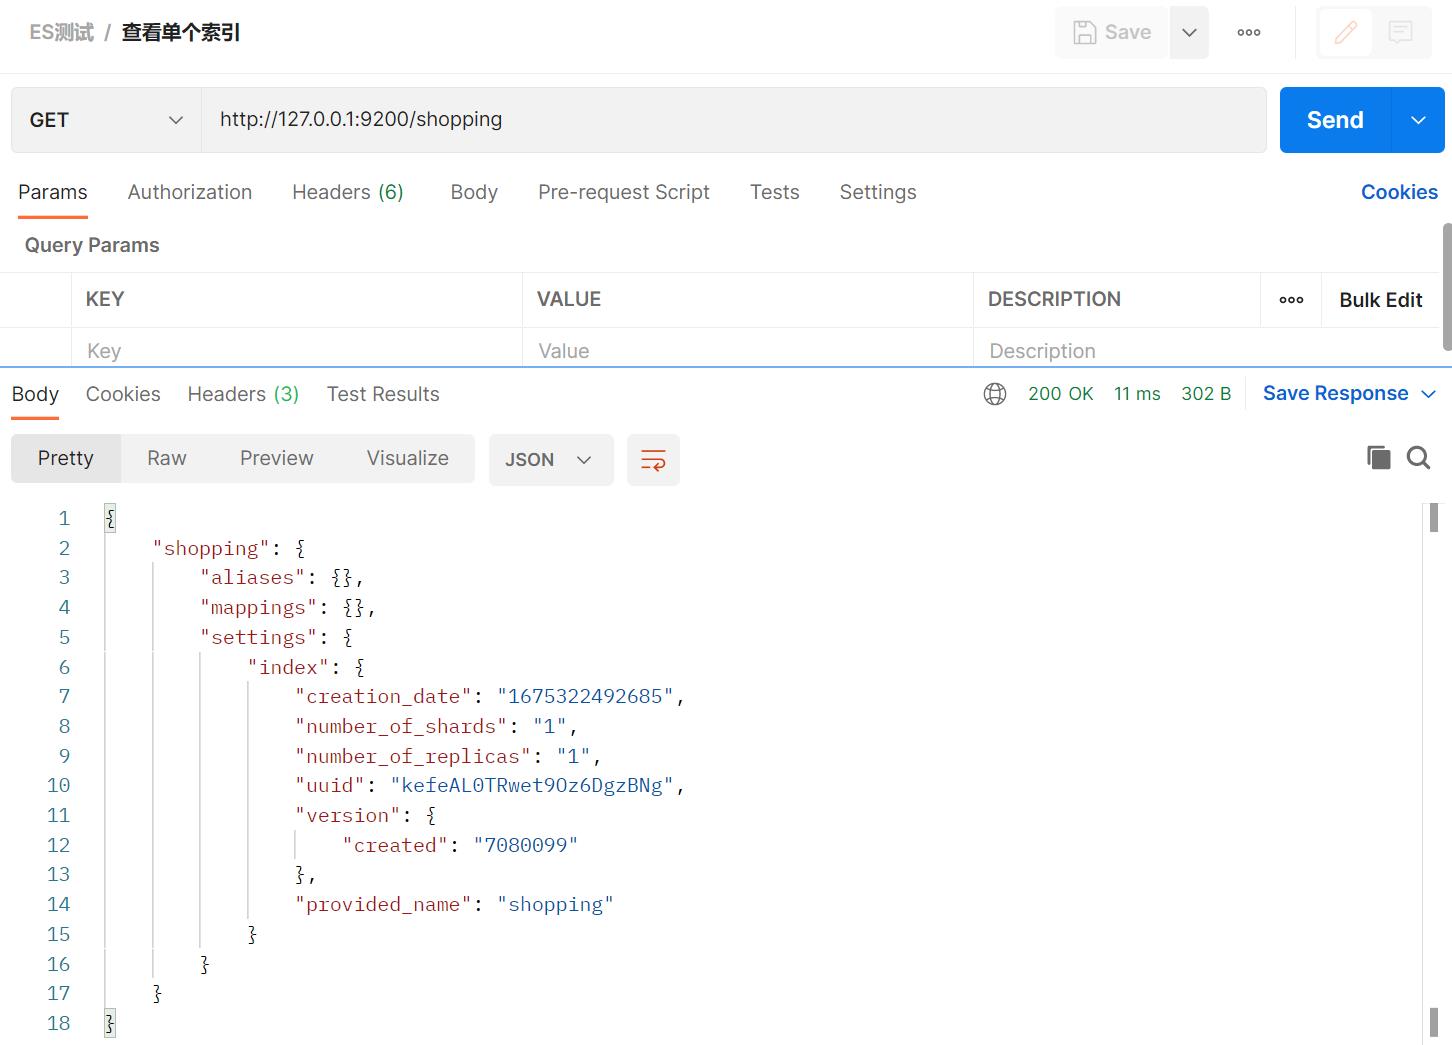
返回结果如下:
    "shopping":
        "aliases": ,
        "mappings": ,
        "settings":
            "index":
                "creation_date": "1675322492685",
                "number_of_shards": "1",
                "number_of_replicas": "1",
                "uuid": "kefeAL0TRwet9Oz6DgzBNg",
                "version":
                    "created": "7080099"
                ,
                "provided_name": "shopping"
2-3-4 删除索引
在 Postman 中,向 ES 服务器发 DELETE 请求 : http://127.0.0.1:9200/shopping
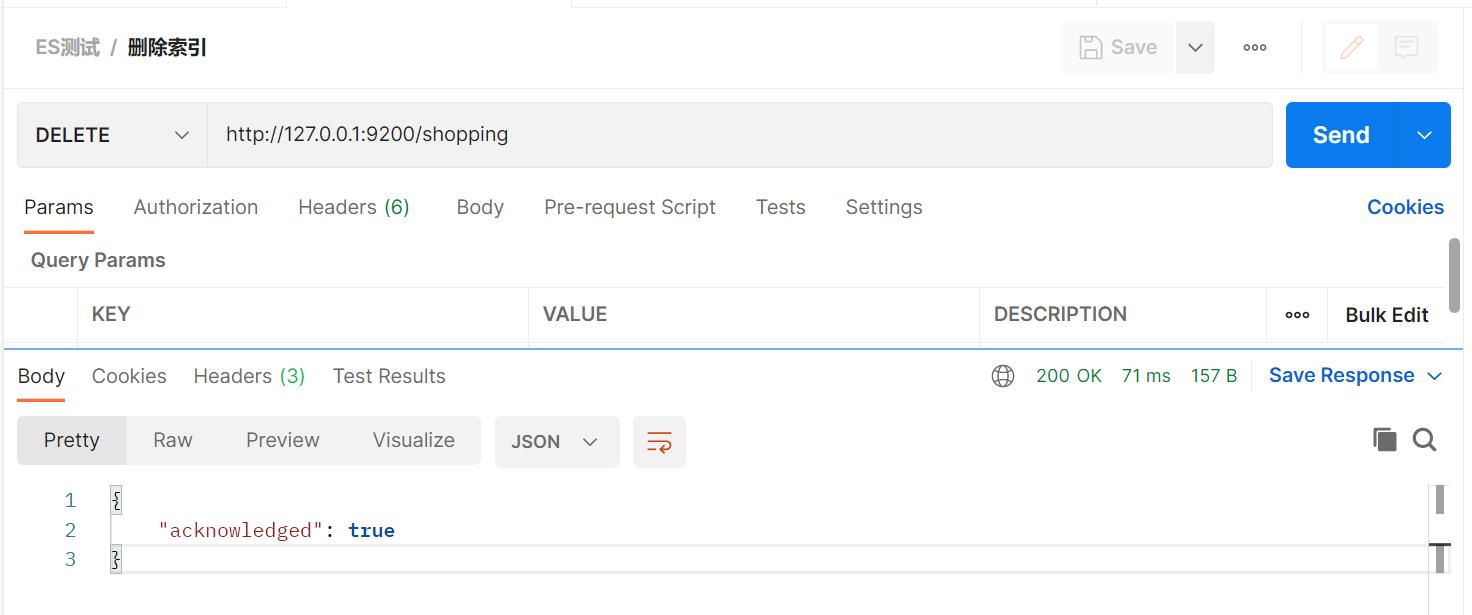
再次查看所有索引,GET http://127.0.0.1:9200/_cat/indices?v,返回结果如下:
health status index uuid pri rep docs.count docs.deleted store.size pri.store.size删除成功。
2-4 HTTP文档
2-4-1 创建索引
假设索引已经创建好了,接下来我们来创建文档,并添加数据。这里的文档可以类比为关系型数据库中的表数据,添加的数据格式为 JSON 格式
在 Postman 中,向 ES 服务器发 POST 请求 : http://127.0.0.1:9200/shopping/_doc
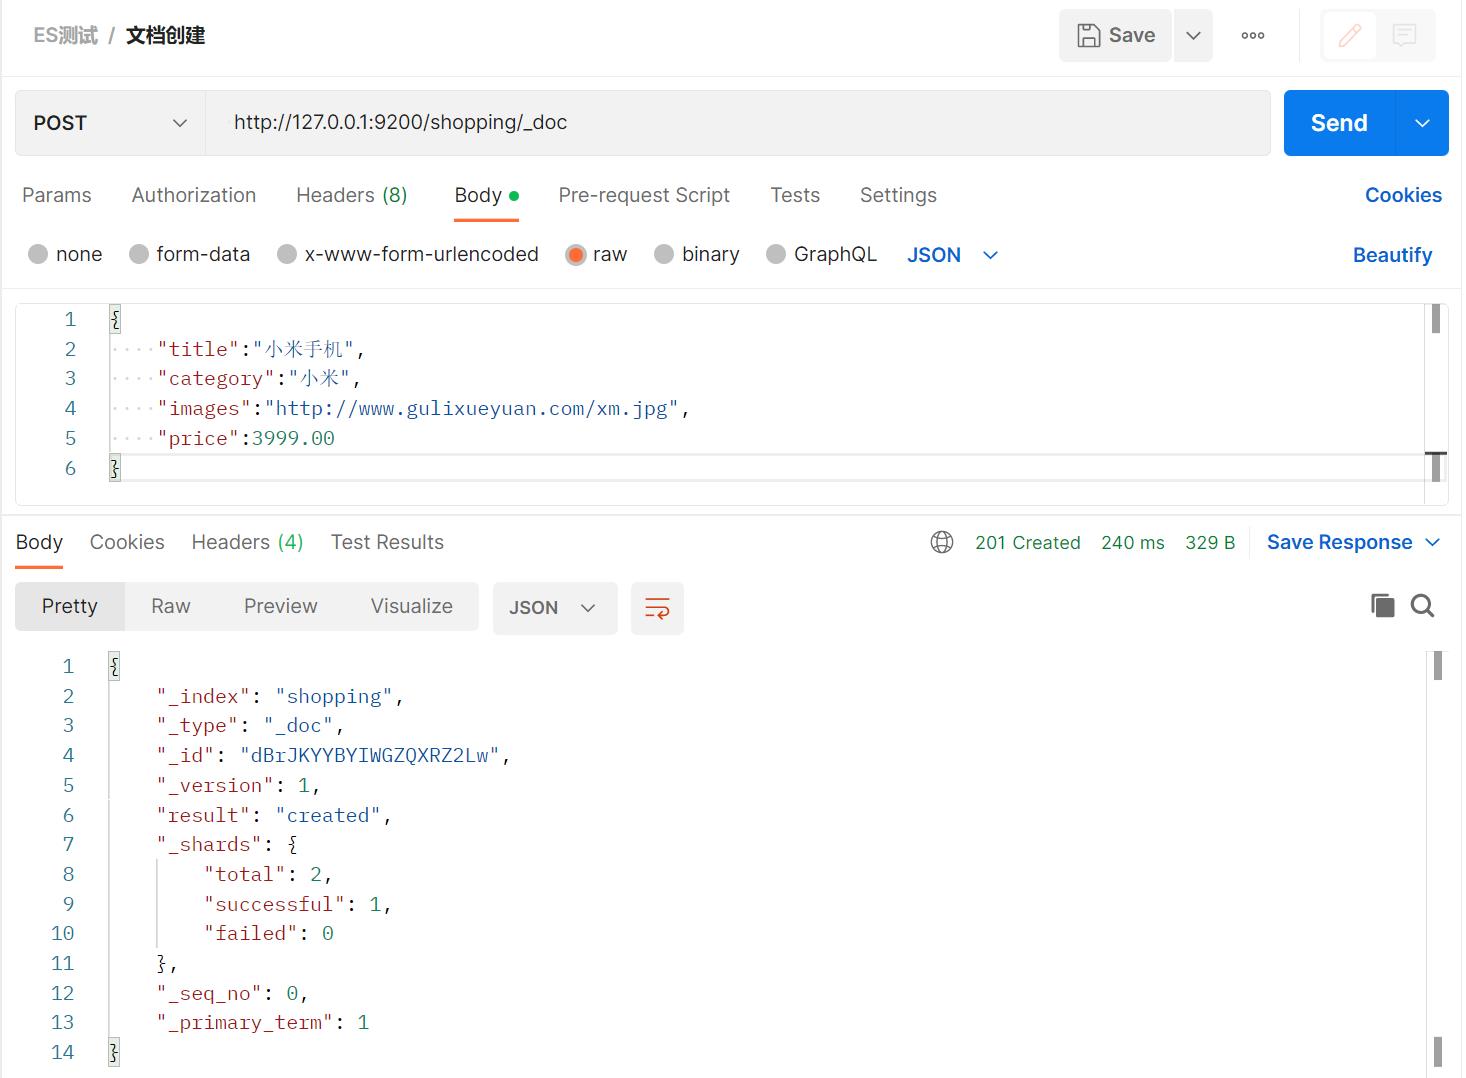
注意未标明唯一标识时候必须为POST请求
返回结果:
    "_index": "shopping",//索引
    "_type": "_doc",//类型-文档
    "_id": "ANQqsHgBaKNfVnMbhZYU",//唯一标识,可以类比为 MySQL 中的主键,随机生成
    "_version": 1,//版本
    "result": "created",//结果,这里的 create 表示创建成功
    "_shards": //
        "total": 2,//分片 - 总数
        "successful": 1,//分片 - 总数
        "failed": 0//分片 - 总数
    ,
    "_seq_no": 0,
    "_primary_term": 1
上面的数据创建后,由于没有指定数据唯一性标识(ID),默认情况下, ES 服务器会随机生成一个。
如果想要自定义唯一性标识,需要在创建时指定: http://127.0.0.1:9200/shopping/_doc/doc_1
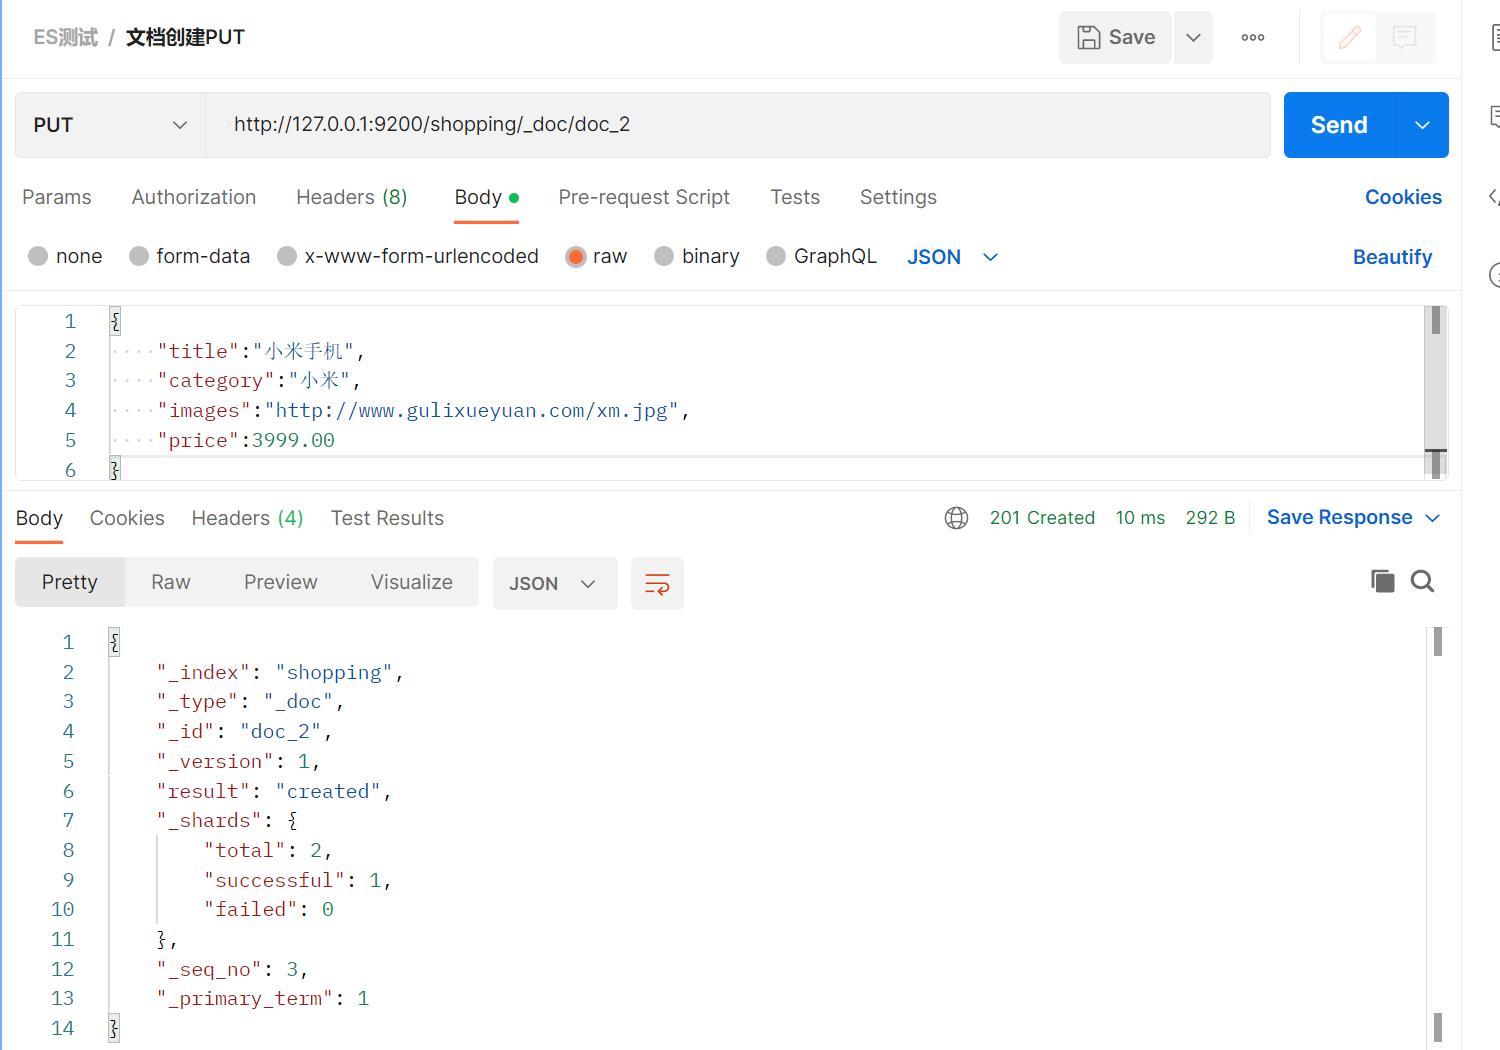
请求标明唯一标识后请求方式可为POST可为PUT
2-4-2 查询单个索引
查看文档时,需要指明文档的唯一性标识,类似于 MySQL 中数据的主键查询
在 Postman 中,向 ES 服务器发 GET 请求 : http://127.0.0.1:9200/shopping/_doc/1 。
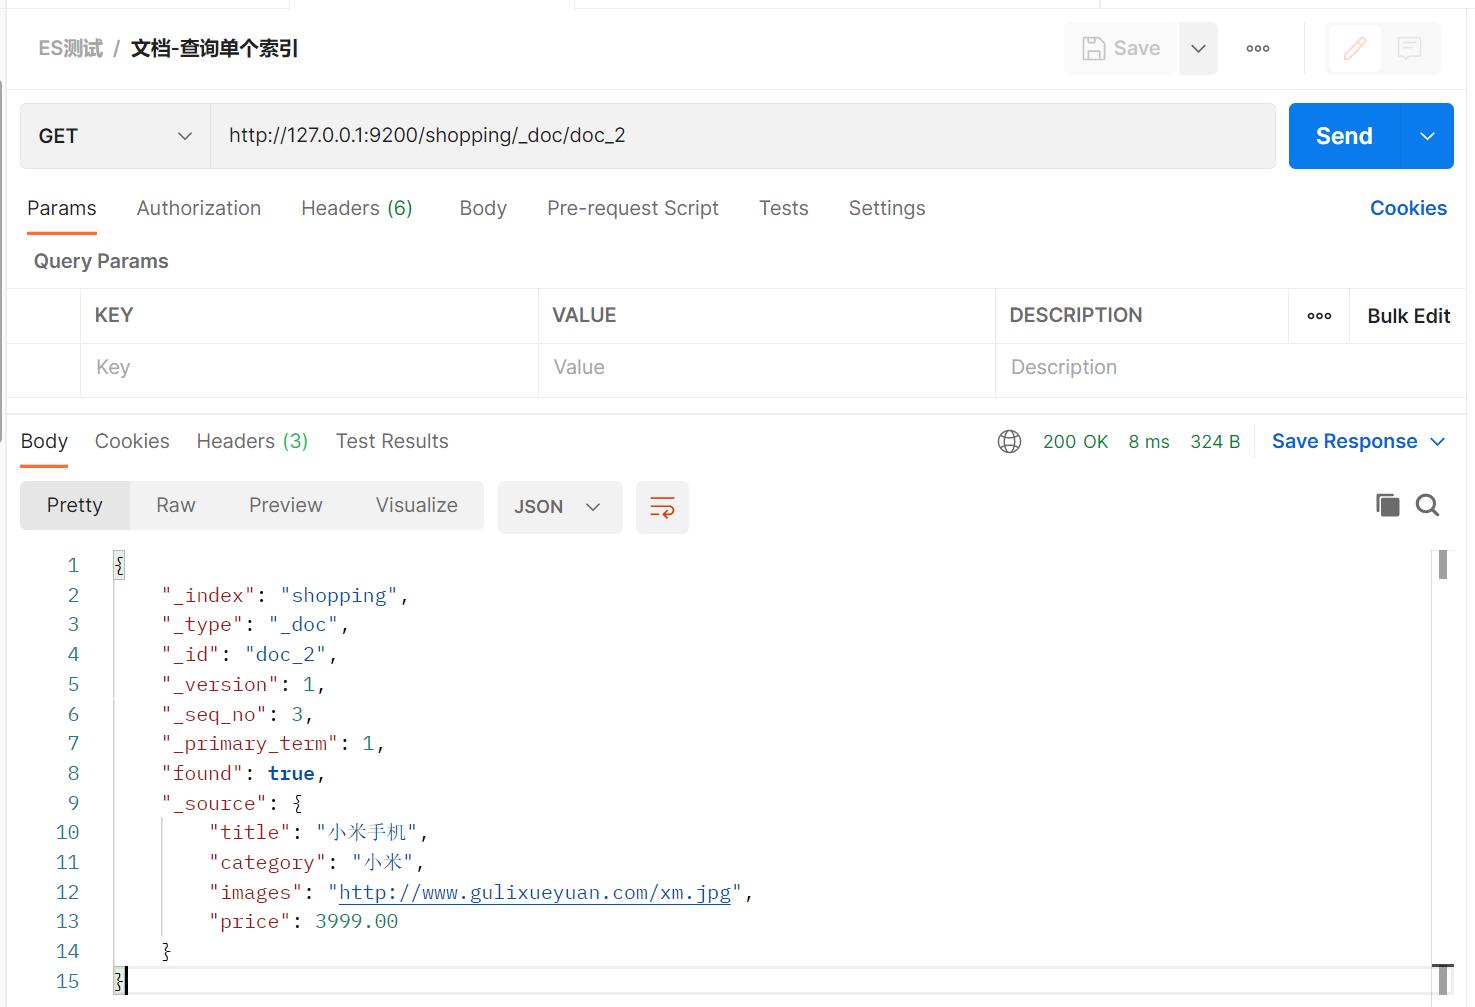
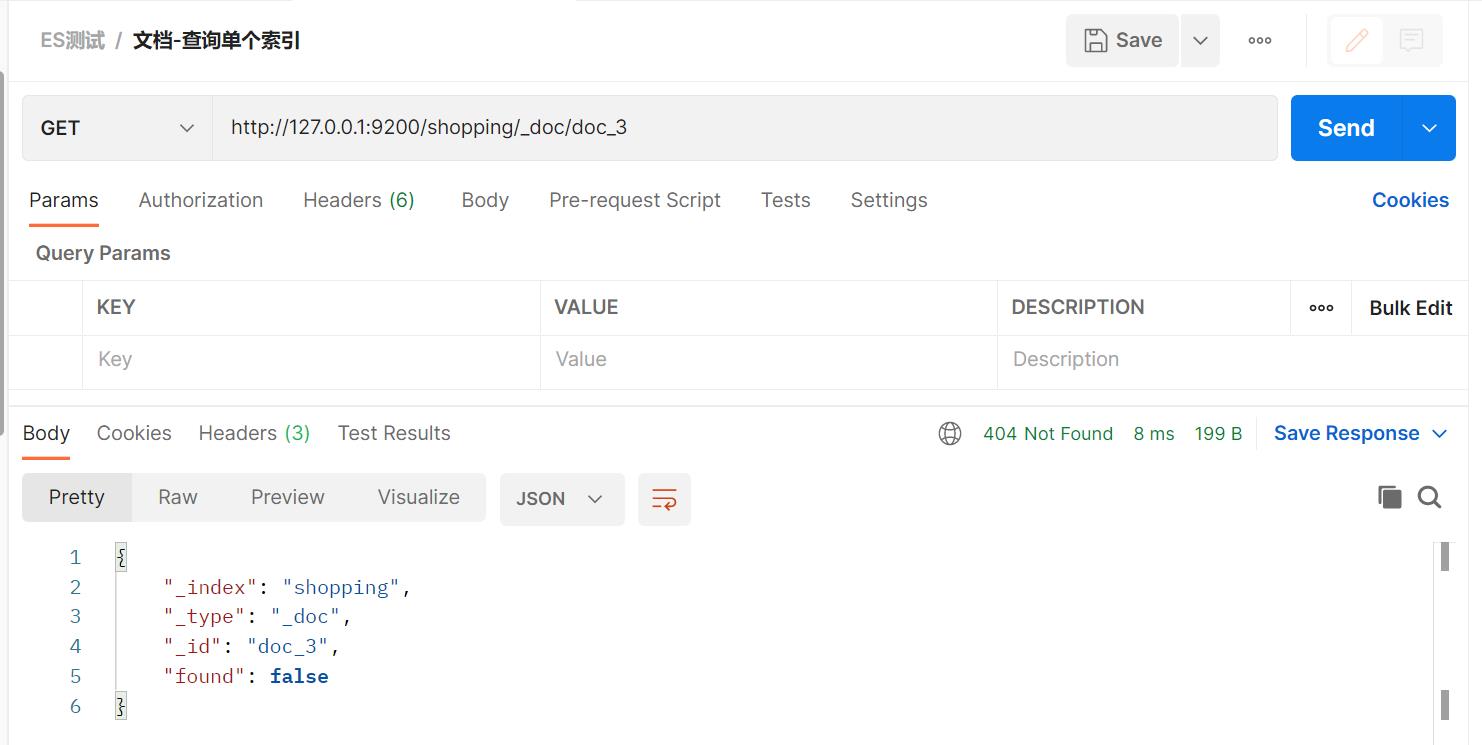
查找不存在的内容时,返回结果如下:
2-4-3 查询所有索引
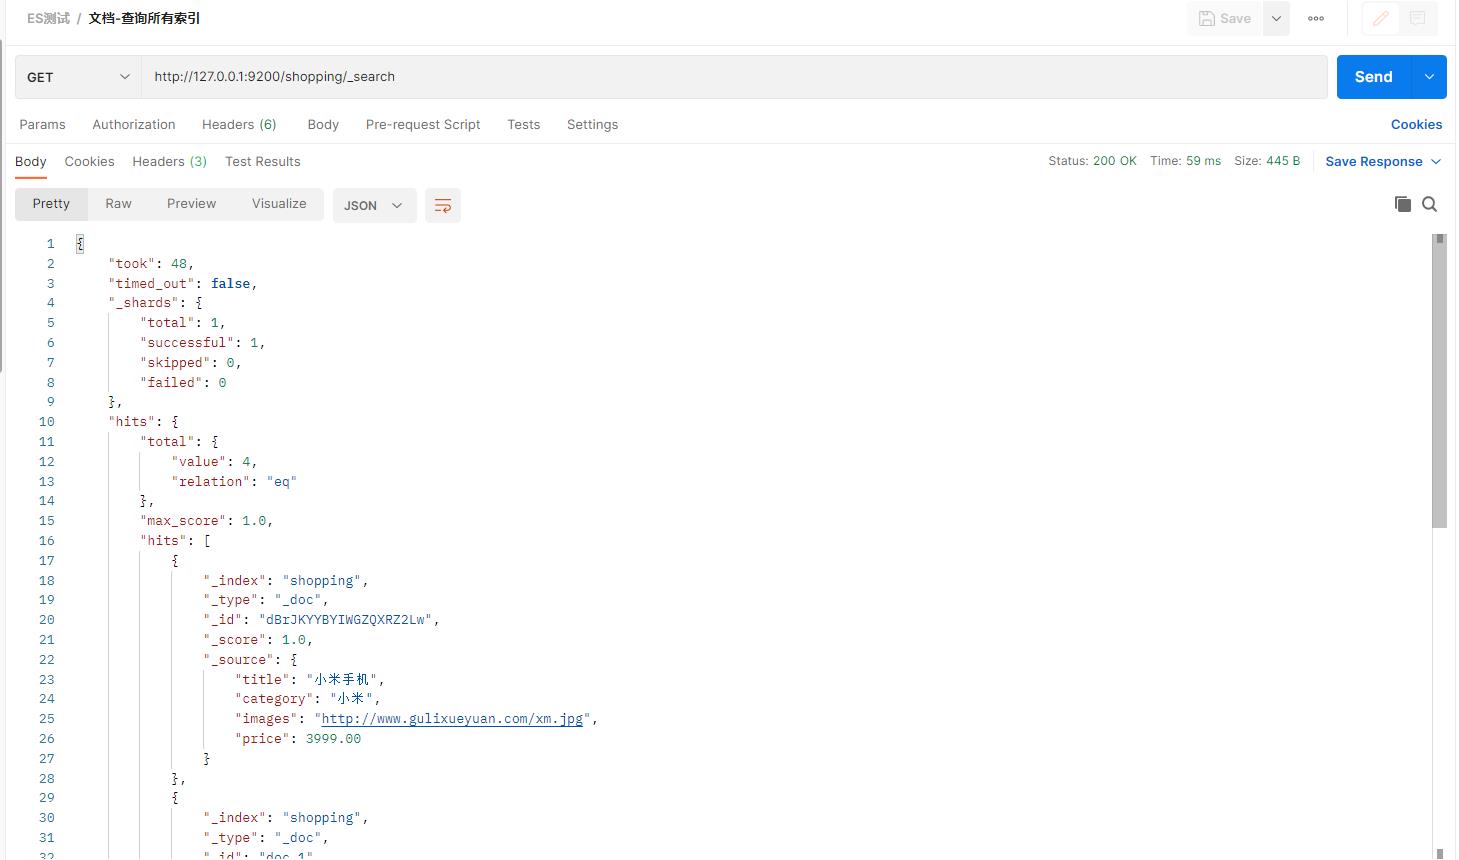
查看索引下所有数据,向 ES 服务器发 GET 请求 : http://127.0.0.1:9200/shopping/_search。
2-4-4 修改索引
全量修改
和新增文档一样,输入相同的 URL 地址请求,如果请求体变化,会将原有的数据内容覆盖
在 Postman 中,向 ES 服务器发 POST 请求 : http://127.0.0.1:9200/shopping/_doc/1
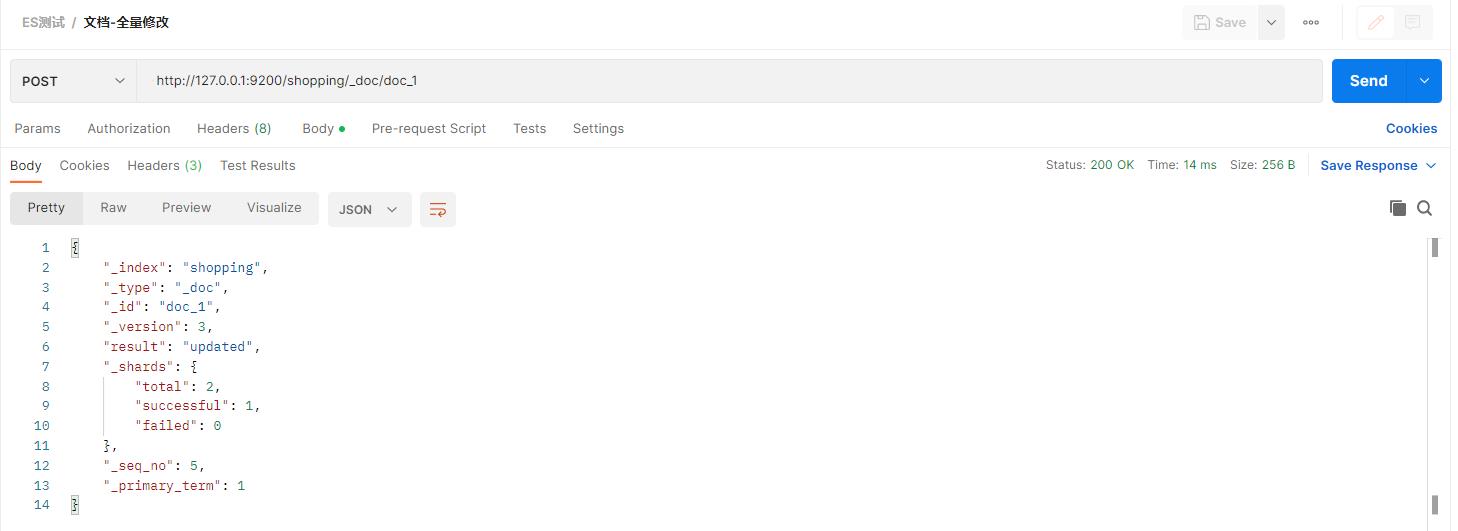
修改成功后响应结果:
    "_index": "shopping",
    "_type": "_doc",
    "_id": "1",
    "_version": 2,
    "result": "updated",//<-----------updated 表示数据被更新
    "_shards":
        "total": 2,
        "successful": 1,
        "failed": 0
    ,
    "_seq_no": 2,
    "_primary_term": 1
局部修改
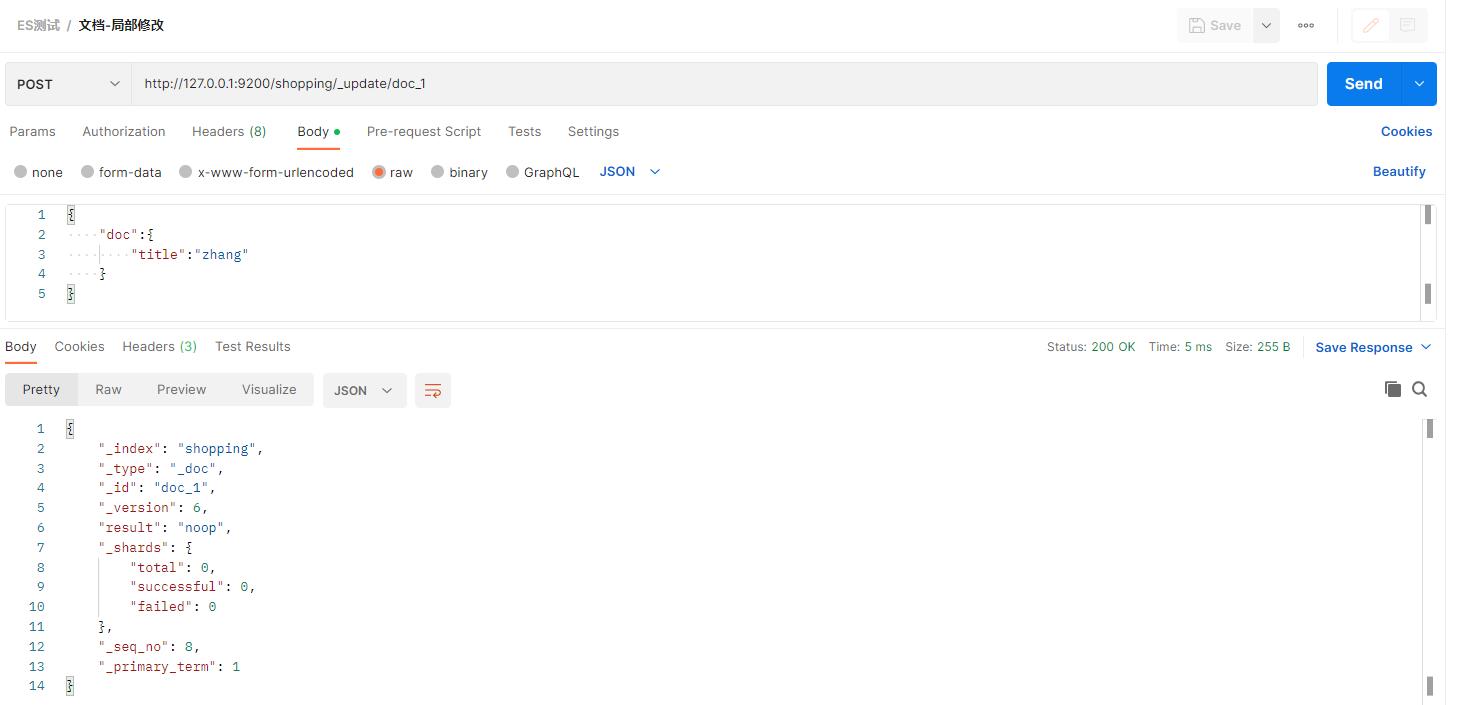
修改数据时,也可以只修改某一给条数据的局部信息
在 Postman 中,向 ES 服务器发 POST 请求 : http://127.0.0.1:9200/shopping/_update/1。
请求体JSON内容为:
    "doc":
        "title":"小米手机",
        "category":"小米"
2-4-5 删除索引
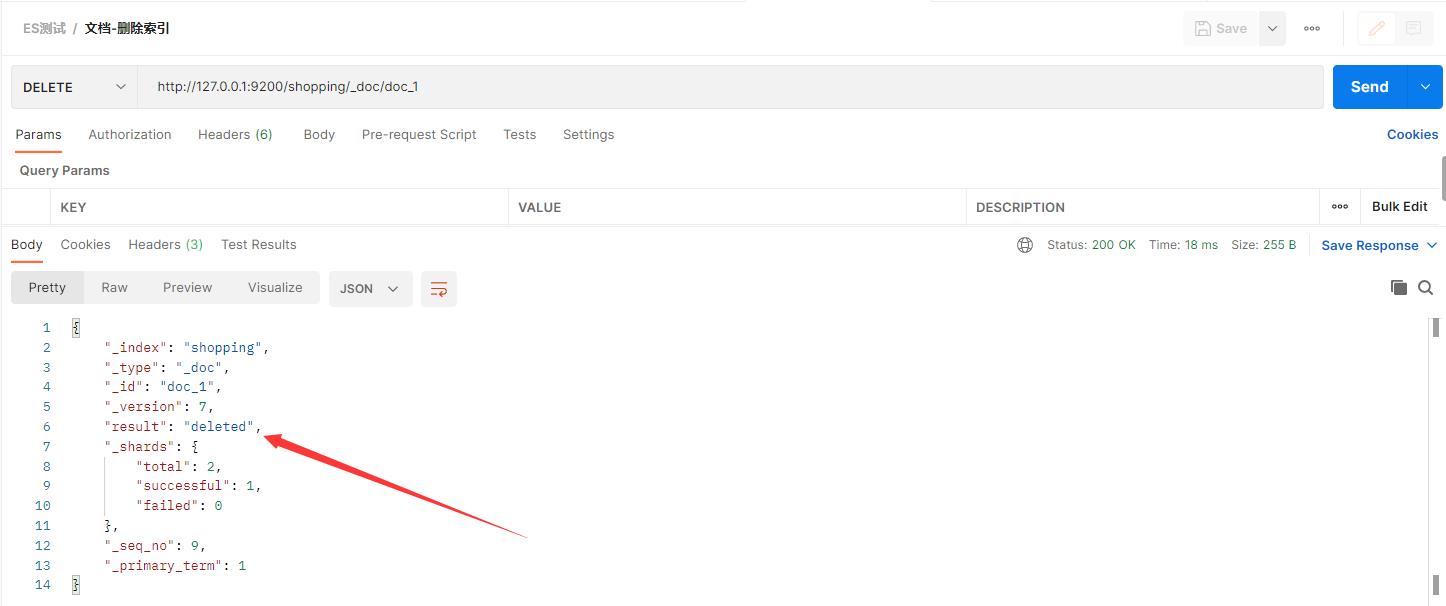
删除一个文档不会立即从磁盘上移除,它只是被标记成已删除(逻辑删除)。
在 Postman 中,向 ES 服务器发 DELETE 请求 : http://127.0.0.1:9200/shopping/_doc/1
2-4-6 高级查询
条件查询
查找category为小米的文档
URL带参查询
在 Postman 中,向 ES 服务器发 GET请求 : http://127.0.0.1:9200/shopping/_search?q=category:小米,返回结果如下:
    "took": 45,
    "timed_out": false,
    "_shards":
        "total": 1,
        "successful": 1,
        "skipped": 0,
        "failed": 0
    ,
    "hits":
        "total":
            "value": 1,
            "relation": "eq"
        ,
        "max_score": 2.4079456,
        "hits": [

                "_index": "shopping",
                "_type": "_doc",
                "_id": "doc_2",
                "_score": 2.4079456,
                "_source":
                    "title": "小米手机",
                    "category": "华为",
                    "images": "http://www.gulixueyuan.com/xm.jpg",
                    "price": 3999.0


        ]
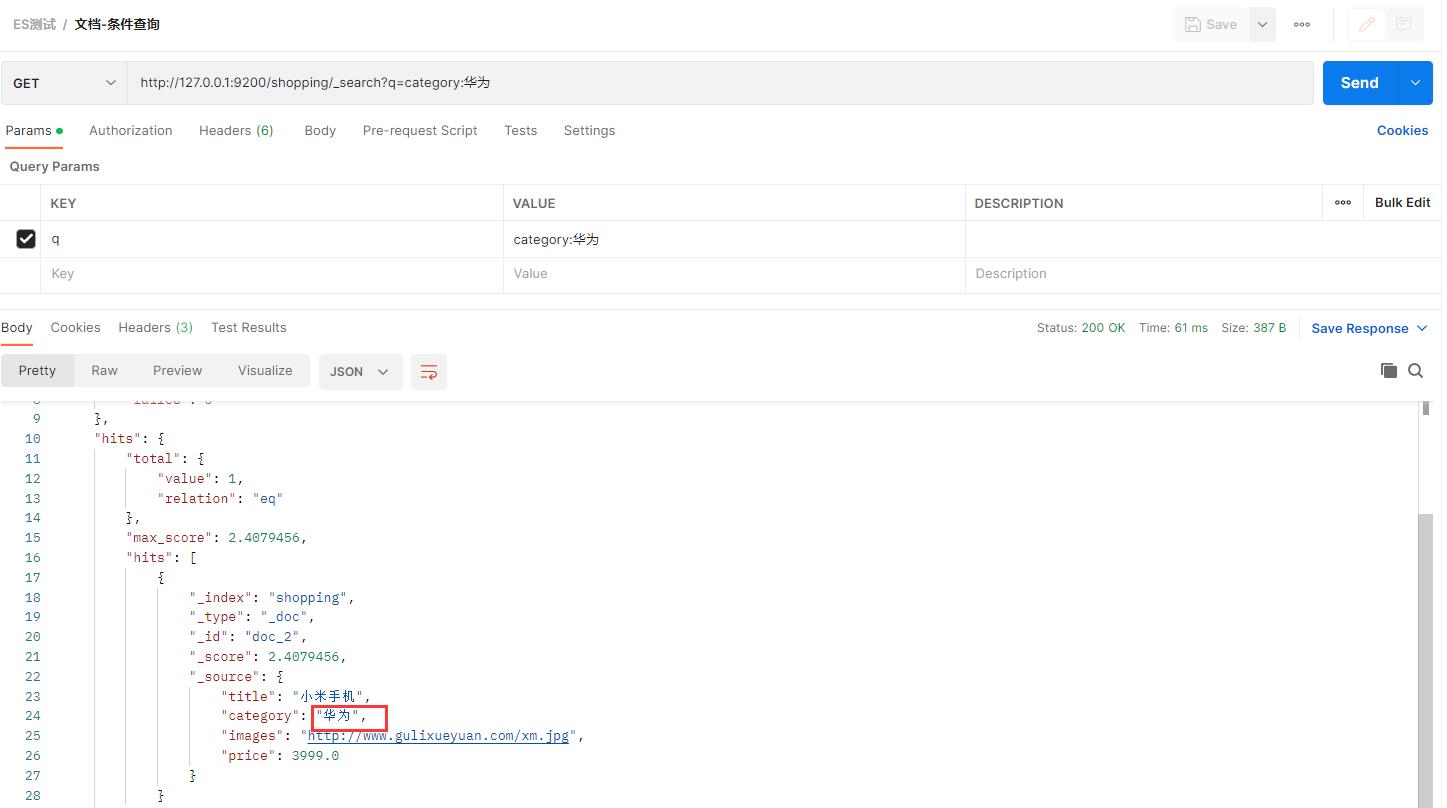
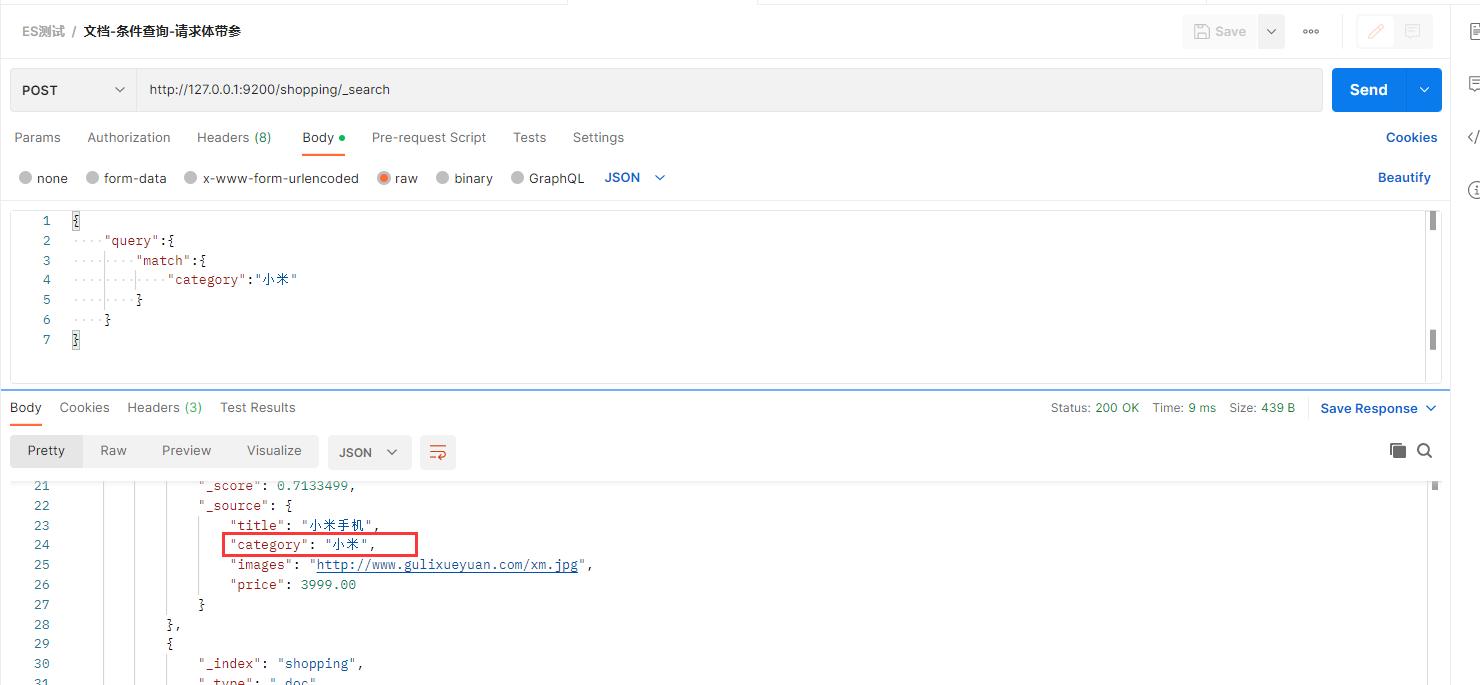
上述为URL带参数形式查询,这很容易让不善者心怀恶意,或者参数值出现中文会出现乱码情况。为了避免这些情况,我们可用使用带JSON请求体请求进行查询。
请求体带参查询
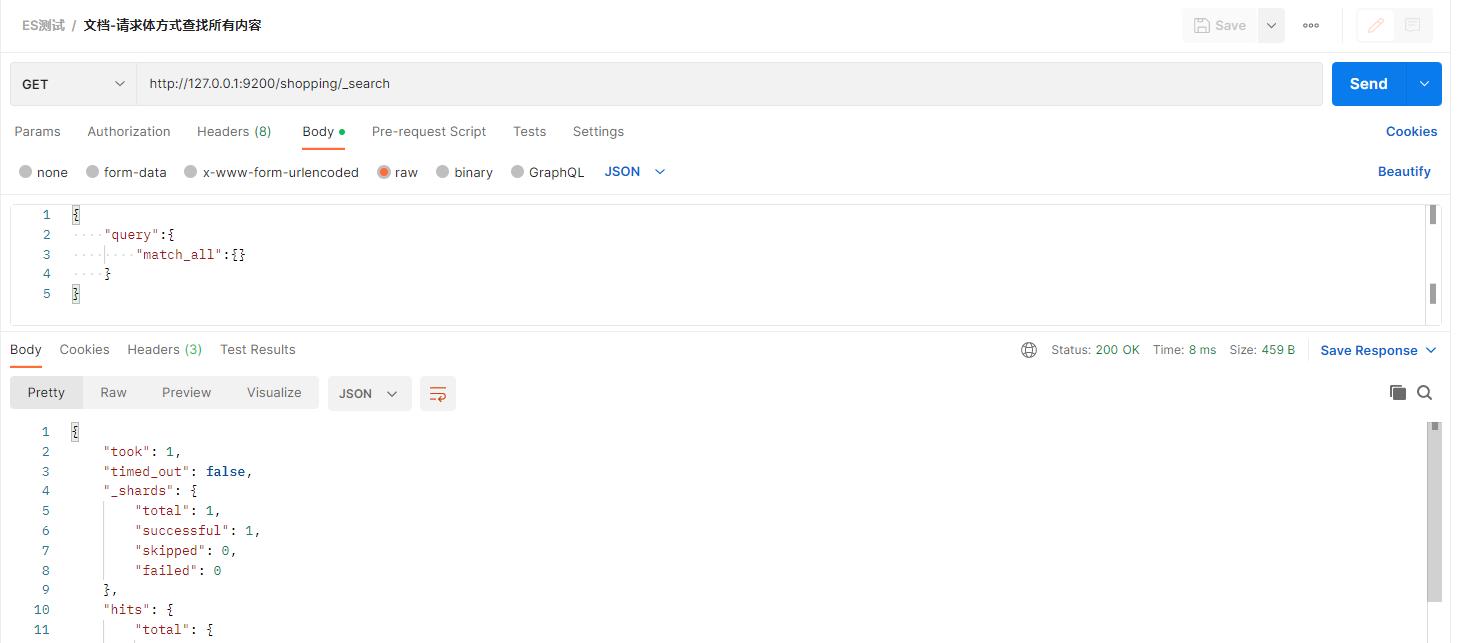
带请求体方式的查找所有内容
查找所有文档内容,也可以这样,在 Postman 中,向 ES 服务器发 GET请求 : http://127.0.0.1:9200/shopping/_search,附带JSON体如下:
    "query":
        "match_all":
    "took": 1,
    "timed_out": false,
    "_shards":
        "total": 1,
        "successful": 1,
        "skipped": 0,
        "failed": 0
    ,
    "hits":
        "total":
            "value": 3,
            "relation": "eq"
        ,
        "max_score": 1.0,
        "hits": [

                "_index": "shopping",
                "_type": "_doc",
                "_id": "dBrJKYYBYIWGZQXRZ2Lw",
                "_score": 1.0,
                "_source":
                    "title": "小米手机",
                    "category": "小米",
                    "images": "http://www.gulixueyuan.com/xm.jpg",
                    "price": 3999.00

            ,

                "_index": "shopping",
                "_type": "_doc",
                "_id": "dRrNKYYBYIWGZQXRNGLG",
                "_score": 1.0,
                "_source":
                    "title": "小米手机",
                    "category": "小米",
                    "images": "http://www.gulixueyuan.com/xm.jpg",
                    "price": 3999.00

            ,

                "_index": "shopping",
                "_type": "_doc",
                "_id": "doc_2",
                "_score": 1.0,
                "_source":
                    "title": "小米手机",
                    "category": "华为",
                    "images": "http://www.gulixueyuan.com/xm.jpg",
                    "price": 3999.0


        ]
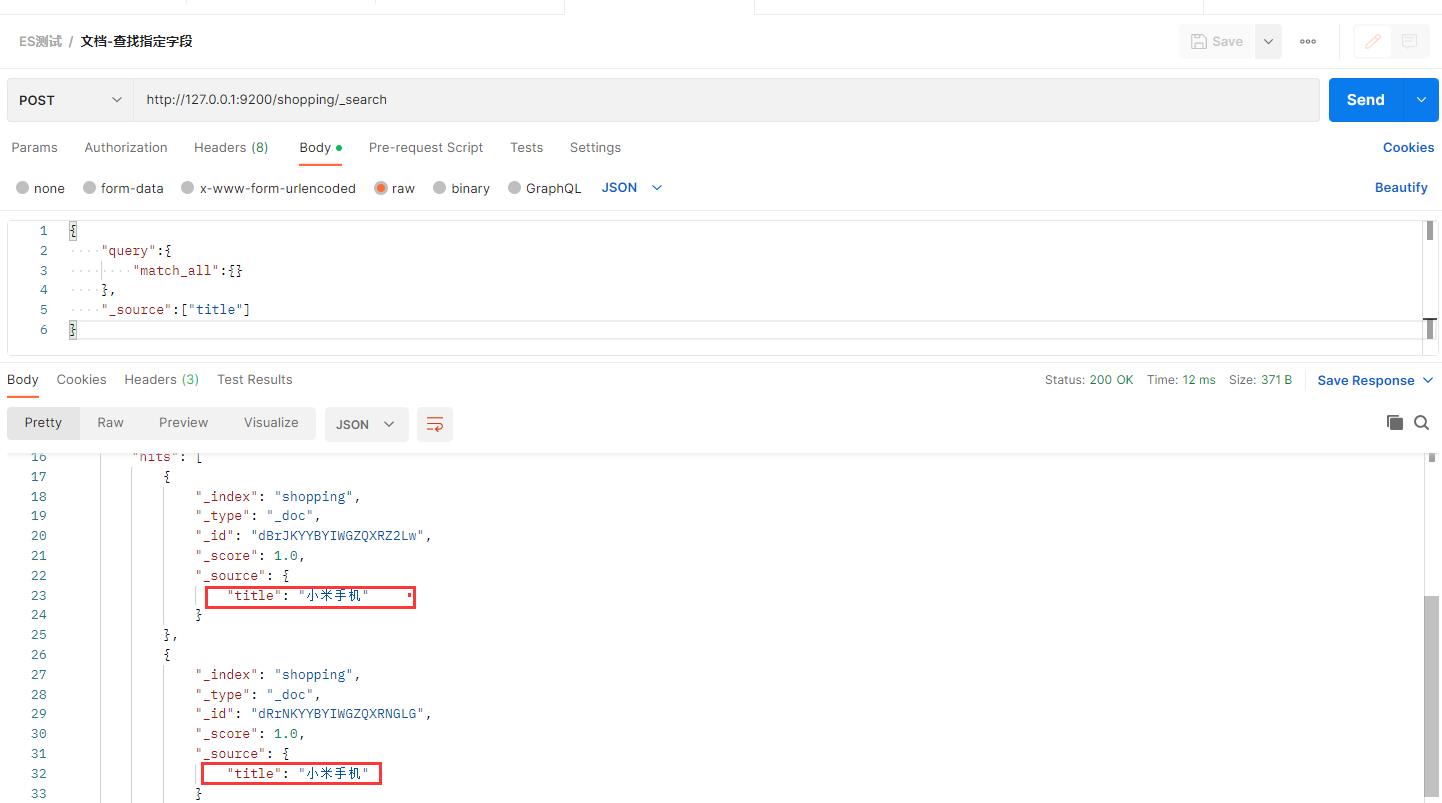
查询指定字段
如果你想查询指定字段,在 Postman 中,向 ES 服务器发 GET请求 : http://127.0.0.1:9200/shopping/_search,附带JSON体如下:
    "query":
        "match_all":
    ,
    "_source":["title"]
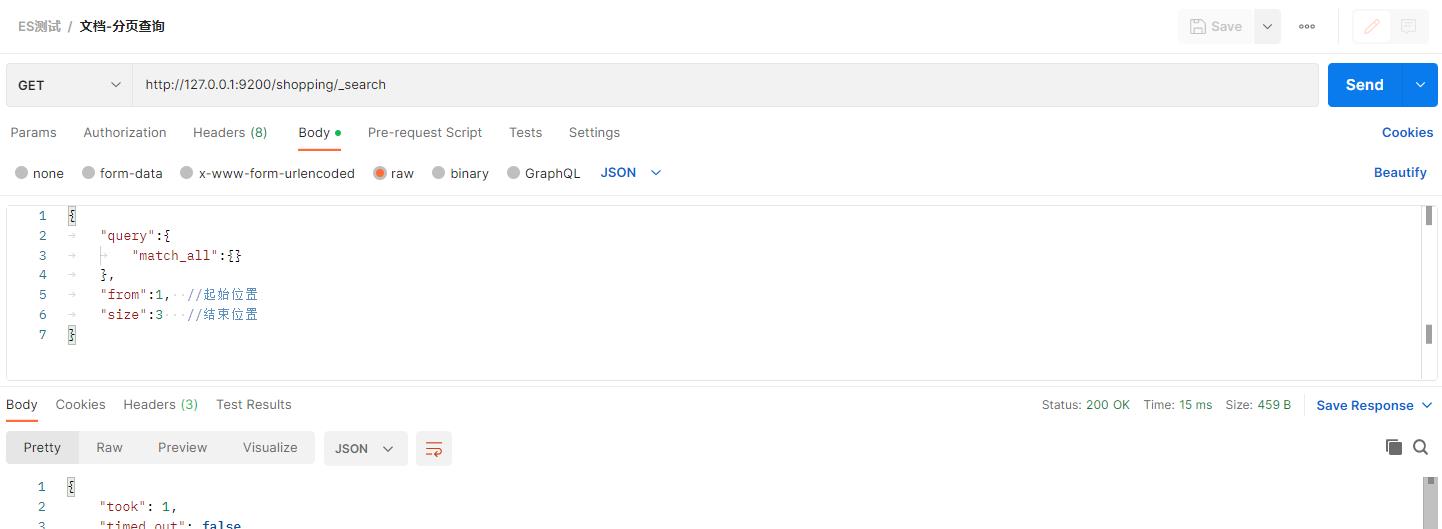
分页查询
在 Postman 中,向 ES 服务器发 GET请求 : http://127.0.0.1:9200/shopping/_search,附带JSON体如下:
    "query":
        "match_all":
    ,
    "from":1,  //起始位置
    "size":3   //结束位置
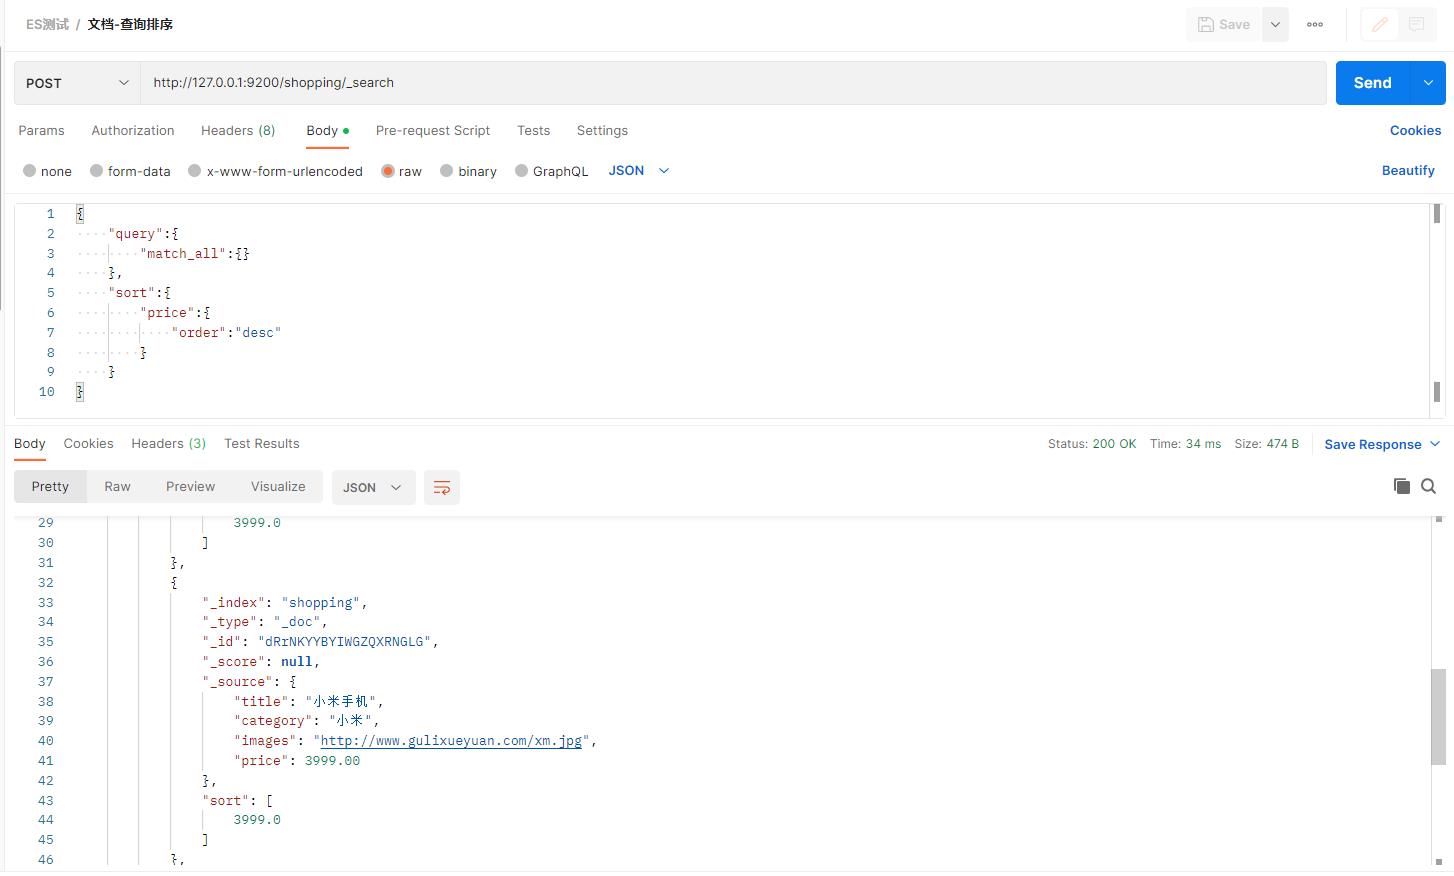
查询排序
如果你想通过排序查出价格最高的手机,在 Postman 中,向 ES 服务器发 GET请求 : http://127.0.0.1:9200/shopping/_search,附带JSON体如下:
    "query":
        "match_all":
    ,
    "sort":
        "price":
            "order":"desc"
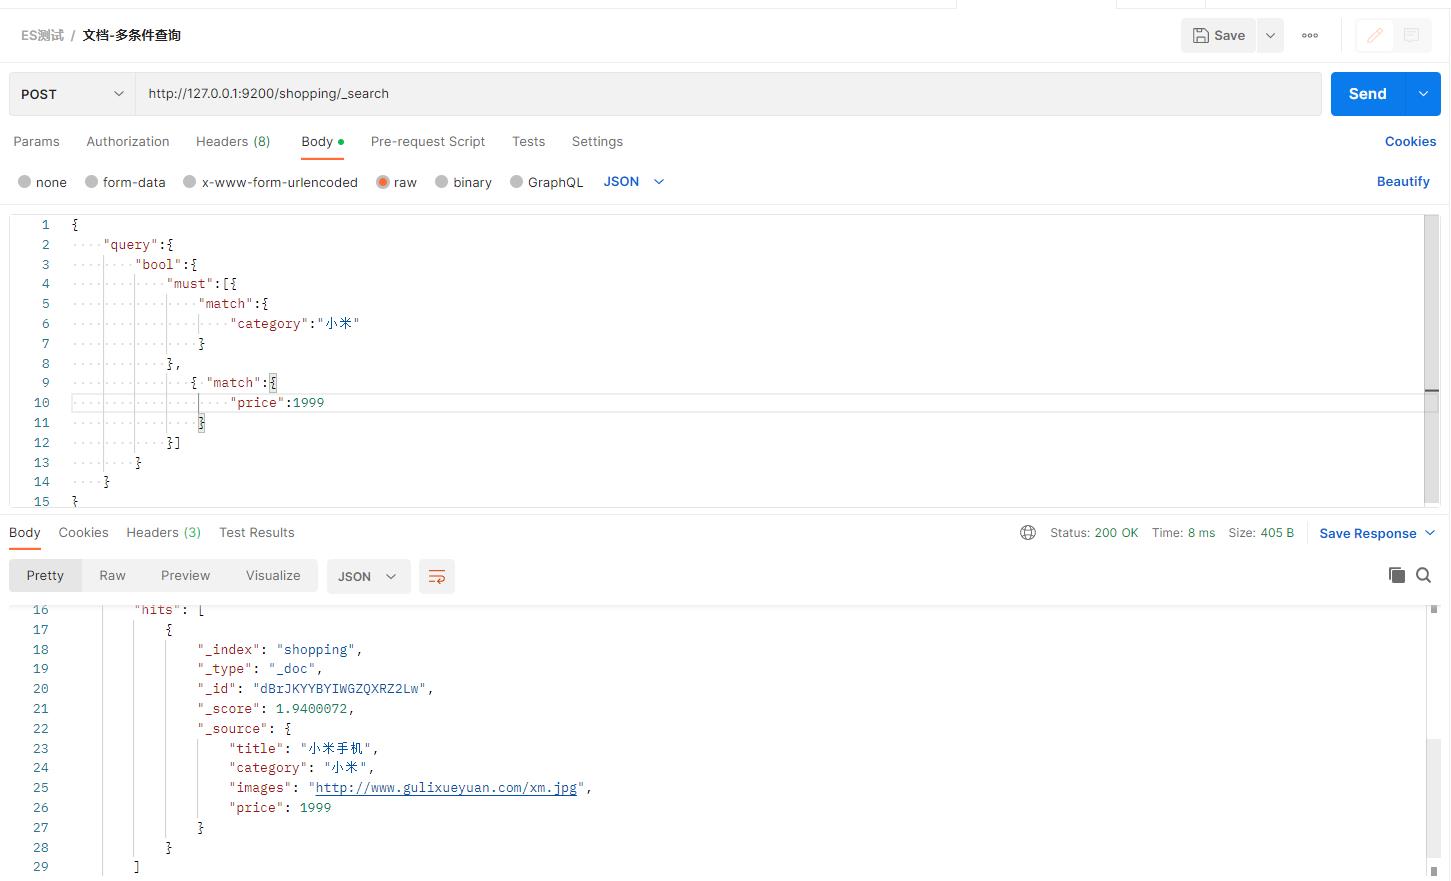
多条件查询
假设想找出小米牌子,价格为3999元的。(must相当于数据库的&&)
在 Postman 中,向 ES 服务器发 GET请求 : http://127.0.0.1:9200/shopping/_search,附带JSON体如下:
    "query":
        "bool":
            "must":[
                "match":
                    "category":"小米"

            ,
                "match":
                    "price":1999

            ]
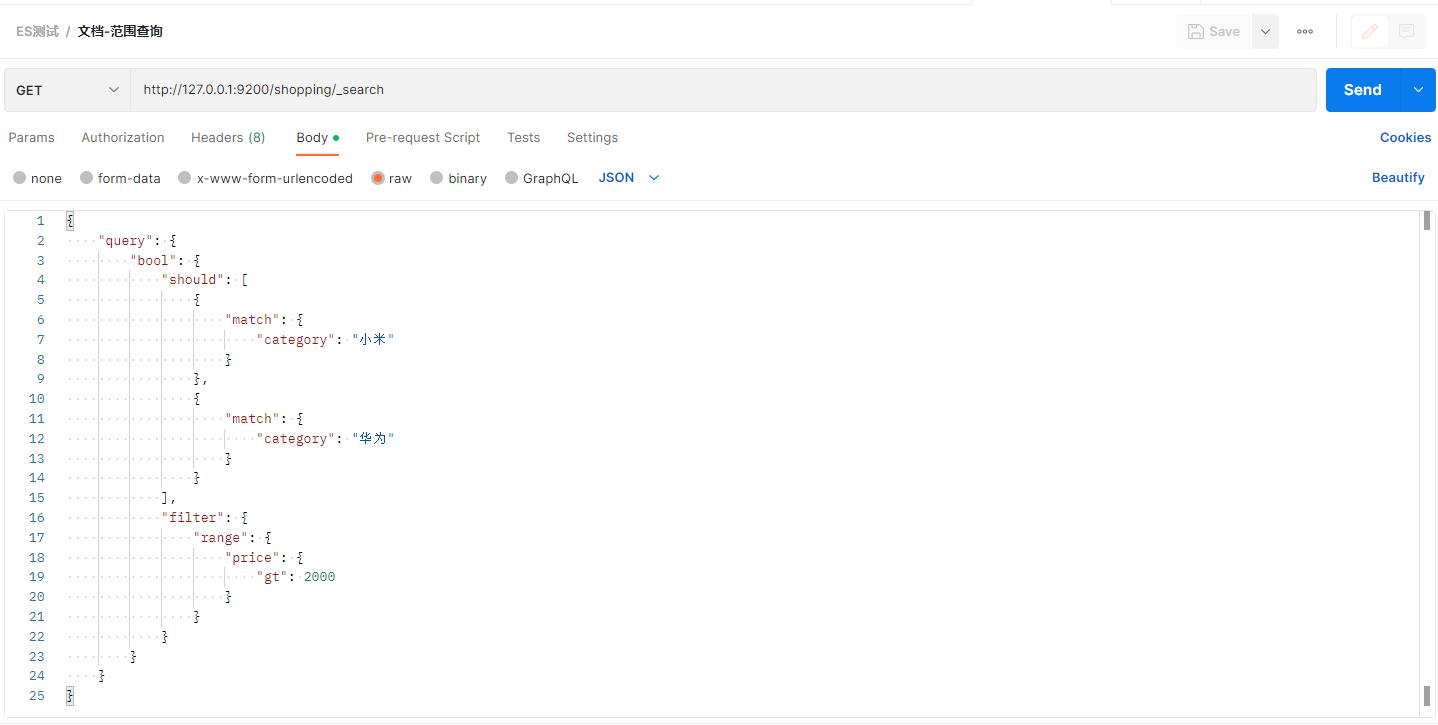
假设想找出小米和华为的牌子,并且价格大于2000的。(should相当于数据库的||)
在 Postman 中,向 ES 服务器发 GET请求 : http://127.0.0.1:9200/shopping/_search,附带JSON体如下:
    "query":
        "bool":
            "should":[
                "match":
                    "category":"小米"

            ,
                "match":
                    "category":"华为"

            ],
            "filter":
                "range":
                    "price":
                        "gt":2000
聚合查询
聚合允许使用者对 es 文档进行统计分析,类似与关系型数据库中的 group by,当然还有很多其他的聚合,例如取最大值max、平均值avg等等。
接下来按price字段进行分组:
在 Postman 中,向 ES 服务器发 GET请求 : http://127.0.0.1:9200/shopping/_search,附带JSON体如下:
    "aggs"://聚合操作
        "price_group"://名称,随意起名
            "terms"://分组
                "field":"price"//分组字段
    "took": 21,
    "timed_out": false,
    "_shards":
        "total": 1,
        "successful": 1,
        "skipped": 0,
        "failed": 0
    ,
    "hits":
        "total":
            "value": 3,
            "relation": "eq"
        ,
        "max_score": 1.0,
        "hits": [

                "_index": "shopping",
                "_type": "_doc",
                "_id": "dBrJKYYBYIWGZQXRZ2Lw",
                "_score": 1.0,
                "_source":
                    "title": "小米手机",
                    "category": "小米",
                    "images": "http://www.gulixueyuan.com/xm.jpg",
                    "price": 1999

            ,

                "_index": "shopping",
                "_type": "_doc",
                "_id": "doc_2",
                "_score": 1.0,
                "_source":
                    "title": "小米手机",
                    "category": "华为",
                    "images": "http://www.gulixueyuan.com/xm.jpg",
                    "price": 3999.0

            ,

                "_index": "shopping",
                "_type": "_doc",
                "_id": "dRrNKYYBYIWGZQXRNGLG",
                "_score": 1.0,
                "_source":
                    "title": "小米手机",
                    "category": "小米",
                    "images": "http://www.gulixueyuan.com/xm.jpg",
                    "price": 3999.00


        ]
    ,
    "aggregations":
        "price_group":
            "doc_count_error_upper_bound": 0,
            "sum_other_doc_count": 0,
            "buckets": [

                    "key": 3999.0,
                    "doc_count": 2
                ,

                    "key": 1999.0,
                    "doc_count": 1

            ]
上面返回结果会附带原始数据的。若不想要不附带原始数据的结果,在 Postman 中,向 ES 服务器发 GET请求 : http://127.0.0.1:9200/shopping/_search,附带JSON体如下:
    "aggs":
        "price_group":
            "terms":
                "field":"price"


    ,
    "size":0
    "took": 60,
    "timed_out": false,
    "_shards":
        "total": 1,
        "successful": 1,
        "skipped": 0,
        "failed": 0
    ,
    "hits":
        "total":
            "value": 6,
            "relation": "eq"
        ,
        "max_score": null,
        "hits": []
    ,
    "aggregations":
        "price_group":
            "doc_count_error_upper_bound": 0,
            "sum_other_doc_count": 0,
            "buckets": [

                    "key": 1999,
                    "doc_count": 5
                ,

                    "key": 3999,
                    "doc_count": 1

            ]
若想对所有手机价格求平均值。
在 Postman 中,向 ES 服务器发 GET请求 : http://127.0.0.1:9200/shopping/_search,附带JSON体如下:
    "aggs":
        "price_avg"://名称,随意起名
            "avg"://求平均
                "field":"price"


    ,
    "size":0
    "took": 14,
    "timed_out": false,
    "_shards":
        "total": 1,
        "successful": 1,
        "skipped": 0,
        "failed": 0
    ,
    "hits":
        "total":
            "value": 6,
            "relation": "eq"
        ,
        "max_score": null,
        "hits": []
    ,
    "aggregations":
        "price_avg":
            "value": 2332.3333333333335
2-4-7 映射关系
有了索引库,等于有了数据库中的 database。
接下来就需要建索引库(index)中的映射了,类似于数据库(database)中的表结构(table)。
创建数据库表需要设置字段名称,类型,长度,约束等;索引库也一样,需要知道这个类型下有哪些字段,每个字段有哪些约束信息,这就叫做映射(mapping)。
# PUT http://127.0.0.1:9200/user返回结果:
    "acknowledged": true,
    "shards_acknowledged": true,
    "index": "user"
创建映射
# PUT http://127.0.0.1:9200/user/_mapping


    "properties":
        "name":
            "type": "text",
            "index": true
        ,
        "sex":
            "type": "keyword",
            "index": true
        ,
        "tel":
            "type": "keyword",
            "index": false
返回结果如下:
"acknowledged": true
查询映射
#GET http://127.0.0.1:9200/user/_mapping返回结果如下:
    "user":
        "mappings":
            "properties":
                "name":
                    "type": "text"
                ,
                "sex":
                    "type": "keyword"
                ,
                "tel":
                    "type": "keyword",
                    "index": false
增加数据
#PUT http://127.0.0.1:9200/user/_create/1001

    "name":"小米",
    "sex":"男的",
    "tel":"1111"
返回结果如下:
    "_index": "user",
    "_type": "_doc",
    "_id": "1001",
    "_version": 1,
    "result": "created",
    "_shards":
        "total": 2,
        "successful": 1,
        "failed": 0
    ,
    "_seq_no": 0,
    "_primary_term": 1
查找name含有”小“数据:
#GET http://127.0.0.1:9200/user/_search

    "query":
        "match":
            "name":"小"
返回结果如下
    "took": 495,
    "timed_out": false,
    "_shards":
        "total": 1,
        "successful": 1,
        "skipped": 0,
        "failed": 0
    ,
    "hits":
        "total":
            "value": 1,
            "relation": "eq"
        ,
        "max_score": 0.2876821,
        "hits": [

                "_index": "user",
                "_type": "_doc",
                "_id": "1001",
                "_score": 0.2876821,
                "_source":
                    "name": "小米",
                    "sex": "男的",
                    "tel": "1111"


        ]
查找sex含有”男“数据:
#GET http://127.0.0.1:9200/user/_search

    "query":
        "match":
            "sex":"男"
返回结果如下:
    "took": 1,
    "timed_out": false,
    "_shards":
        "total": 1,
        "successful": 1,
        "skipped": 0,
        "failed": 0
    ,
    "hits":
        "total":
            "value": 0,
            "relation": "eq"
        ,
        "max_score": null,
        "hits": []
找不想要的结果,只因创建映射时"sex"的类型为"keyword"。
"sex"只能完全为”男的“,才能得出原数据。
#GET http://127.0.0.1:9200/user/_search

    "query":
        "match":
            "sex":"男的"
返回结果如下:
    "took": 2,
    "timed_out": false,
    "_shards":
        "total": 1,
        "successful": 1,
        "skipped": 0,
        "failed": 0
    ,
    "hits":
        "total":
            "value": 1,
            "relation": "eq"
        ,
        "max_score": 0.2876821,
        "hits": [

                "_index": "user",
                "_type": "_doc",
                "_id": "1001",
                "_score": 0.2876821,
                "_source":
                    "name": "小米",
                    "sex": "男的",
                    "tel": "1111"


        ]
查询电话
# GET http://127.0.0.1:9200/user/_search

    "query":
        "match":
            "tel":"11"
返回结果如下:
    "error":
        "root_cause": [

                "type": "query_shard_exception",
                "reason": "failed to create query: Cannot search on field [tel] since it is not indexed.",
                "index_uuid": "ivLnMfQKROS7Skb2MTFOew",
                "index": "user"

        ],
        "type": "search_phase_execution_exception",
        "reason": "all shards failed",
        "phase": "query",
        "grouped": true,
        "failed_shards": [

                "shard": 0,
                "index": "user",
                "node": "4P7dIRfXSbezE5JTiuylew",
                "reason":
                    "type": "query_shard_exception",
                    "reason": "failed to create query: Cannot search on field [tel] since it is not indexed.",
                    "index_uuid": "ivLnMfQKROS7Skb2MTFOew",
                    "index": "user",
                    "caused_by":
                        "type": "illegal_argument_exception",
                        "reason": "Cannot search on field [tel] since it is not indexed."


        ]
    ,
    "status": 400
报错只因创建映射时"tel"的"index"为false。
2-5 JavaAPI索引
2-5-1 环境准备
添加依赖:
<dependencies>
    <dependency>
        <groupId>org.elasticsearch</groupId>
        <artifactId>elasticsearch</artifactId>
        <version>7.8.0</version>
    </dependency>
    <!-- elasticsearch 的客户端 -->
    <dependency>
        <groupId>org.elasticsearch.client</groupId>
        <artifactId>elasticsearch-rest-high-level-client</artifactId>
        <version>7.8.0</version>
    </dependency>
    <!-- elasticsearch 依赖 2.x 的 log4j -->
    <dependency>
        <groupId>org.apache.logging.log4j</groupId>
        <artifactId>log4j-api</artifactId>
        <version>2.8.2</version>
    </dependency>
    <dependency>
        <groupId>org.apache.logging.log4j</groupId>
        <artifactId>log4j-core</artifactId>
        <version>2.8.2</version>
    </dependency>
    <dependency>
        <groupId>com.fasterxml.jackson.core</groupId>
        <artifactId>jackson-databind</artifactId>
        <version>2.9.9</version>
    </dependency>
    <!-- junit 单元测试 -->
    <dependency>
        <groupId>junit</groupId>
        <artifactId>junit</artifactId>
        <version>4.12</version>
    </dependency>
</dependencies>
HelloElasticsearch
import java.io.IOException;

import org.apache.http.HttpHost;
import org.elasticsearch.client.RestClient;
import org.elasticsearch.client.RestHighLevelClient;

public class HelloElasticsearch

    public static void main(String[] args) throws IOException
        // 创建客户端对象
        RestHighLevelClient client = new RestHighLevelClient(
                RestClient.builder(new HttpHost("localhost", 9200, "http")));
//        ...
        System.out.println(client);

        // 关闭客户端连接
        client.close();
2-5-2 创建索引
import org.apache.http.HttpHost;
import org.elasticsearch.action.admin.indices.create.CreateIndexRequest;
import org.elasticsearch.action.admin.indices.create.CreateIndexResponse;
import org.elasticsearch.client.RequestOptions;
import org.elasticsearch.client.RestClient;
import org.elasticsearch.client.RestHighLevelClient;

import java.io.IOException;

public class CreateIndex

    public static void main(String[] args) throws IOException
        // 创建客户端对象
        RestHighLevelClient client = new RestHighLevelClient(
                RestClient.builder(new HttpHost("localhost", 9200, "http")));

        // 创建索引 - 请求对象
        CreateIndexRequest request = new CreateIndexRequest("user2");
        // 发送请求,获取响应
        CreateIndexResponse response = client.indices().create(request,
                RequestOptions.DEFAULT);
        boolean acknowledged = response.isAcknowledged();
        // 响应状态
        System.out.println("操作状态 = " + acknowledged);

        // 关闭客户端连接
        client.close();


后台打印:
四月 09, 2021 2:12:08 下午 org.elasticsearch.client.RestClient logResponse
警告: request [PUT http://localhost:9200/user2?master_timeout=30s&include_type_name=true&timeout=30s] returned 1 warnings: [299 Elasticsearch-7.8.0-757314695644ea9a1dc2fecd26d1a43856725e65 "[types removal] Using include_type_name in create index requests is deprecated. The parameter will be removed in the next major version."]
操作状态 = true

Process finished with exit code 0
2-5-2 查询索引
import org.apache.http.HttpHost;

import org.elasticsearch.client.RequestOptions;
import org.elasticsearch.client.RestClient;
import org.elasticsearch.client.RestHighLevelClient;
import org.elasticsearch.client.indices.GetIndexRequest;
import org.elasticsearch.client.indices.GetIndexResponse;

import java.io.IOException;

public class SearchIndex
    public static void main(String[] args) throws IOException
        // 创建客户端对象
        RestHighLevelClient client = new RestHighLevelClient(
                RestClient.builder(new HttpHost("localhost", 9200, "http")));

        // 查询索引 - 请求对象
        GetIndexRequest request = new GetIndexRequest("user2");
        // 发送请求,获取响应
        GetIndexResponse response = client.indices().get(request,
                RequestOptions.DEFAULT);

        System.out.println("aliases:"+response.getAliases());
        System.out.println("mappings:"+response.getMappings());
        System.out.println("settings:"+response.getSettings());

        client.close();


后台打印:
aliases:user2=[]
mappings:user2=org.elasticsearch.cluster.metadata.MappingMetadata@ad700514
settings:user2="index.creation_date":"1617948726976","index.number_of_replicas":"1","index.number_of_shards":"1","index.provided_name":"user2","index.uuid":"UGZ1ntcySnK6hWyP2qoVpQ","index.version.created":"7080099"

Process finished with exit code 0
2-5-3 删除索引
import org.apache.http.HttpHost;
import org.elasticsearch.action.admin.indices.delete.DeleteIndexRequest;
import org.elasticsearch.action.support.master.AcknowledgedResponse;
import org.elasticsearch.client.RequestOptions;
import org.elasticsearch.client.RestClient;
import org.elasticsearch.client.RestHighLevelClient;

import java.io.IOException;

public class DeleteIndex
    public static void main(String[] args) throws IOException
        RestHighLevelClient client = new RestHighLevelClient(
                RestClient.builder(new HttpHost("localhost", 9200, "http")));
        // 删除索引 - 请求对象
        DeleteIndexRequest request = new DeleteIndexRequest("user2");
        // 发送请求,获取响应
        AcknowledgedResponse response = client.indices().delete(request,RequestOptions.DEFAULT);
        // 操作结果
        System.out.println("操作结果 : " + response.isAcknowledged());
        client.close();


后台打印:
操作结果 : true
Process finished with exit code 0
2-6 JavaAPI 文档
上文由于频繁使用以下连接Elasticsearch和关闭它的代码,于是个人对它进行重构。
重构后的代码:
import org.elasticsearch.client.RestHighLevelClient;

public interface ElasticsearchTask

    void doSomething(RestHighLevelClient client) throws Exception;
public class ConnectElasticsearch

    public static void connect(ElasticsearchTask task)
        // 创建客户端对象
        RestHighLevelClient client = new RestHighLevelClient(
                RestClient.builder(new HttpHost("localhost", 9200, "http")));
        try
            task.doSomething(client);
            // 关闭客户端连接
            client.close();
         catch (Exception e)
            e.printStackTrace();
接下来,如果想让Elasticsearch完成一些操作,就编写一个lambda式即可。
public class SomeClass

    public static void main(String[] args)
        ConnectElasticsearch.connect(client ->
            //do something
        );
2-6-1 创建索引
import com.fasterxml.jackson.databind.ObjectMapper;
import com.lun.elasticsearch.hello.ConnectElasticsearch;
import com.lun.elasticsearch.model.User;
import org.elasticsearch.action.index.IndexRequest;
import org.elasticsearch.action.index.IndexResponse;
import org.elasticsearch.client.RequestOptions;
import org.elasticsearch.common.xcontent.XContentType;

public class InsertDoc

    public static void main(String[] args)
        ConnectElasticsearch.connect(client ->
            // 新增文档 - 请求对象
            IndexRequest request = new IndexRequest();
            // 设置索引及唯一性标识
            request.index("user").id("1001");

            // 创建数据对象
            User user = new User();
            user.setName("zhangsan");
            user.setAge(30);
            user.setSex("男");

            ObjectMapper objectMapper = new ObjectMapper();
            String productJson = objectMapper.writeValueAsString(user);
            // 添加文档数据,数据格式为 JSON 格式
            request.source(productJson, XContentType.JSON);
            // 客户端发送请求,获取响应对象
            IndexResponse response = client.index(request, RequestOptions.DEFAULT);
            3.打印结果信息
            System.out.println("_index:" + response.getIndex());
            System.out.println("_id:" + response.getId());
            System.out.println("_result:" + response.getResult());
        );


后台打印:
_index:user
_id:1001
_result:UPDATED
2-6-2 修改索引
import com.lun.elasticsearch.hello.ConnectElasticsearch;
import org.elasticsearch.action.update.UpdateRequest;
import org.elasticsearch.action.update.UpdateResponse;
import org.elasticsearch.client.RequestOptions;
import org.elasticsearch.common.xcontent.XContentType;

public class UpdateDoc

    public static void main(String[] args)
        ConnectElasticsearch.connect(client ->
            // 修改文档 - 请求对象
            UpdateRequest request = new UpdateRequest();
            // 配置修改参数
            request.index("user").id("1001");
            // 设置请求体,对数据进行修改
            request.doc(XContentType.JSON, "sex", "女");
            // 客户端发送请求,获取响应对象
            UpdateResponse response = client.update(request, RequestOptions.DEFAULT);
            System.out.println("_index:" + response.getIndex());
            System.out.println("_id:" + response.getId());
            System.out.println("_result:" + response.getResult());
        );


后台打印:
_index:user
_id:1001
_result:UPDATED
2-6-3 查询索引
import com.lun.elasticsearch.hello.ConnectElasticsearch;
import org.elasticsearch.action.get.GetRequest;
import org.elasticsearch.action.get.GetResponse;
import org.elasticsearch.client.RequestOptions;

public class GetDoc

    public static void main(String[] args)
        ConnectElasticsearch.connect(client ->
            //1.创建请求对象
            GetRequest request = new GetRequest().index("user").id("1001");
            //2.客户端发送请求,获取响应对象
            GetResponse response = client.get(request, RequestOptions.DEFAULT);
            3.打印结果信息
            System.out.println("_index:" + response.getIndex());
            System.out.println("_type:" + response.getType());
            System.out.println("_id:" + response.getId());
            System.out.println("source:" + response.getSourceAsString());
        );


后台打印:
_index:user
_type:_doc
_id:1001
source:"name":"zhangsan","age":30,"sex":"男"
2-6-4 删除索引
import com.lun.elasticsearch.hello.ConnectElasticsearch;
import org.elasticsearch.action.delete.DeleteRequest;
import org.elasticsearch.action.delete.DeleteResponse;
import org.elasticsearch.client.RequestOptions;

public class DeleteDoc
    public static void main(String[] args)
        ConnectElasticsearch.connect(client ->
            //创建请求对象
            DeleteRequest request = new DeleteRequest().index("user").id("1001");
            //客户端发送请求,获取响应对象
            DeleteResponse response = client.delete(request, RequestOptions.DEFAULT);
            //打印信息
            System.out.println(response.toString());
        );


后台打印:
DeleteResponse[index=user,type=_doc,id=1001,version=16,result=deleted,shards=ShardInfototal=2, successful=1, failures=[]]
2-6-5 批量新增
import com.lun.elasticsearch.hello.ConnectElasticsearch;
import org.elasticsearch.action.bulk.BulkRequest;
import org.elasticsearch.action.bulk.BulkResponse;
import org.elasticsearch.action.index.IndexRequest;
import org.elasticsearch.client.RequestOptions;
import org.elasticsearch.common.xcontent.XContentType;
public class BatchInsertDoc
public static void main(String[] args)
ConnectElasticsearch.connect(client ->
//创建批量新增请求对象
BulkRequest request = new BulkRequest();
request.add(new
IndexRequest().index("user").id("1001").source(XContentType.JSON, "name",
"zhangsan"));
request.add(new
IndexRequest().index("user").id("1002").source(XContentType.JSON, "name",
"lisi"));
request.add(new
IndexRequest().index("user").id("1003").source(XContentType.JSON, "name",
"wangwu"));
//客户端发送请求,获取响应对象
BulkResponse responses = client.bulk(request, RequestOptions.DEFAULT);
//打印结果信息
System.out.println("took:" + responses.getTook());
System.out.println("items:" + responses.getItems());
);
后台打以上是关于ElasticSearch--1的主要内容,如果未能解决你的问题,请参考以下文章