使用Redis存储Nginx+Tomcat负载均衡集群的Session

Posted to.to

tags:

篇首语:本文由小常识网(cha138.com)小编为大家整理,主要介绍了使用Redis存储Nginx+Tomcat负载均衡集群的Session相关的知识,希望对你有一定的参考价值。

环境:Cent OS 7.0(虚拟机环境)、nginx 1.9.8、Redis 3.2.1

一、背景

在使用Nginx+Tomcat实现负载均衡的时候,由于Nginx对不同的请求分发到某一个Tomcat,Tomcat在运行的时候分别是不同的容器里,因为会出现session不同步或者丢失的问题。

二、Nginx安装与配置

1、Nginx安装

网上的资源对于安装Nginx的介绍比较多,例如最简单的为:

1) 获取nginx,在http://nginx.org/download/上可以获取当前最新的版本下载,例如:

wget http://nginx.org/download/nginx-1.9.8.tar.gz2)解压缩tar -xvf nginx-1.9.8.tar.gz包。

(3)进入解压缩目录,执行./configure --prefix=/usr/local/nginx-1.9.8 将Nginx安装到/usr/local/nginx-1.9.8目录下

(4)make & make install
 
  • 1
  • 2
  • 3
  • 4
  • 5
  • 6
  • 7
  • 8
  • 9
  • 10
  • 1
  • 2
  • 3
  • 4
  • 5
  • 6
  • 7
  • 8
  • 9
  • 10

安装的过程会将Nginx安装到/usr/local/nginx-1.9.8目录下,启动Nginx测试是否可以正常启动。

2、修改Nginx配置多Tomcat服务器

2.1、修改conf/nginx.conf文件,在server标签上边添加upstream如下:

 upstream mynginxserver {
    #weigth参数表示权值,权值越高被分配到的几率越大
    #本机上的Squid开启3128端口
        server 127.0.0.1:8080 weight=1;
        server 127.0.0.1:8060 weight=1;
    }

 
  • 1
  • 2
  • 3
  • 4
  • 5
  • 6
  • 7
  • 1
  • 2
  • 3
  • 4
  • 5
  • 6
  • 7

这里指定了本机下的两个Tomcat实例,端口分别为8080,8060,权重都为1,后边配置Tomcat实例,mynginxserver这个是自己随意命名的,下边要用到

2.2、配置server标签;

 server {
        listen       80;
        server_name  192.168.1.149;

        #charset koi8-r;

        #access_log  logs/host.access.log  main;

        location / {
           # root   html;
           # index  index.html index.htm;
           proxy_pass http://mynginxserver;
        }


        error_page   500 502 503 504  /50x.html;
        location = /50x.html {
            root   html;
        }

 
  • 1
  • 2
  • 3
  • 4
  • 5
  • 6
  • 7
  • 8
  • 9
  • 10
  • 11
  • 12
  • 13
  • 14
  • 15
  • 16
  • 17
  • 18
  • 19
  • 20
  • 1
  • 2
  • 3
  • 4
  • 5
  • 6
  • 7
  • 8
  • 9
  • 10
  • 11
  • 12
  • 13
  • 14
  • 15
  • 16
  • 17
  • 18
  • 19
  • 20

2.3、配置之后的完整内容如下(1.9.8版本删去了注释后的配置内容):

worker_processes  1;

events {
    worker_connections  1024;
}

http {
    include       mime.types;
    default_type  application/octet-stream;

    sendfile        on;

    keepalive_timeout  65;

    upstream mynginxserver {
        server 127.0.0.1:8080 weight=1;
        server 127.0.0.1:8060 weight=1;
    }

    server {
        listen       80;
        server_name  192.168.1.149;

        location / {
           proxy_pass http://mynginxserver; 
        }

        error_page   500 502 503 504  /50x.html;
        location = /50x.html {
            root   html;
        }
    }
}

 
  • 1
  • 2
  • 3
  • 4
  • 5
  • 6
  • 7
  • 8
  • 9
  • 10
  • 11
  • 12
  • 13
  • 14
  • 15
  • 16
  • 17
  • 18
  • 19
  • 20
  • 21
  • 22
  • 23
  • 24
  • 25
  • 26
  • 27
  • 28
  • 29
  • 30
  • 31
  • 32
  • 33
  • 34
  • 1
  • 2
  • 3
  • 4
  • 5
  • 6
  • 7
  • 8
  • 9
  • 10
  • 11
  • 12
  • 13
  • 14
  • 15
  • 16
  • 17
  • 18
  • 19
  • 20
  • 21
  • 22
  • 23
  • 24
  • 25
  • 26
  • 27
  • 28
  • 29
  • 30
  • 31
  • 32
  • 33
  • 34

2.4、具体的配置项和配置项的具体意义请参考 
https://www.nginx.com/resources/wiki/start/topics/examples/full/

三、Tomcat多实例的配置

1、解压apache-tomcat-7.0.67.zip 得到apache-tomcat-7.0.67

[root@localhost www]# unzip apache-tomcat-7.0.67.zip

 
  • 1
  • 2
  • 1
  • 2

2、将apache-tomcat-7.0.67重命名为tomcat1

[root@localhost www]# mv apache-tomcat-7.0.67 tomcat1

 
  • 1
  • 2
  • 1
  • 2

重复1、2过程得到tomcat1和tomcat2如下所示:

这里写图片描述

3、修改Tomcat1的端口为8080和部署项目文件

编辑tomcat下的conf/server.xml,修改端口号为8080,

自己写的用于测试Nginx反向代理的web项目war包下载地址:http://download.csdn.net/detail/u010870518/9585683

下载好之后将解压之后的编译好的项目文件放到tomcat1/webapps/ROOT/目录下:

这里写图片描述

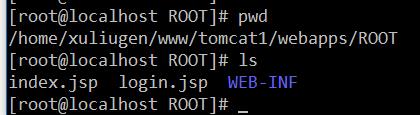
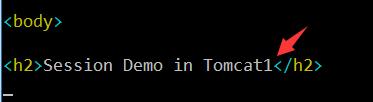
修改index.jsp和login.jsp文件分别标识为具体的Tomcat容器

这里写图片描述

4、修改Tomcat2的端口为8060和部署项目文件

编辑tomcat下的conf/server.xml,修改端口号为8060,然后和上述3中的一样,下载war内容,放在tomcat2/webapps/ROOT/下,修改index.jsp和login.jsp用于标识具体的Tomcat容器

5、分别启动tomcat1和tomcat2

6、重启Nginx服务,访问IP地址:192.168.1.149:80(这个是访问的虚拟机IP地址)

7、观看效果

这里写图片描述

这里写图片描述

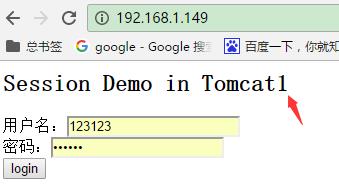
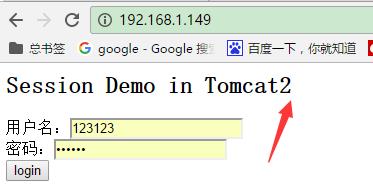
可以看出,Nginx已经进行了请求分发,转发到具体的某一个Tomcat

四、Redis的安装与配置

由于篇幅过长,请参考本人写的:http://blog.csdn.net/xlgen157387/article/details/52022793

五、tomcat-redis-session-manager开源项目的使用

1、开源项目地址:https://github.com/jcoleman/tomcat-redis-session-manager

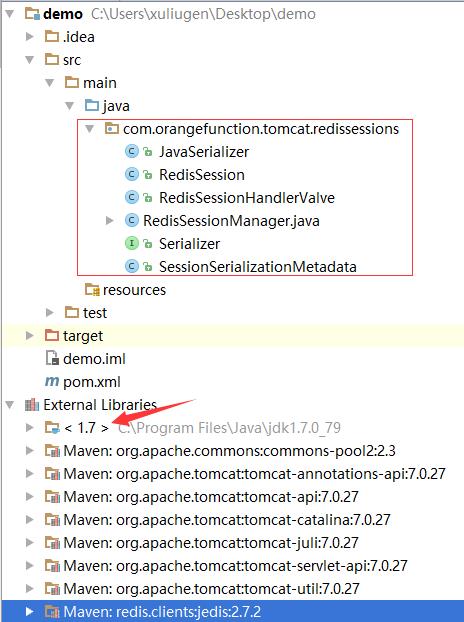
2、下载代码之后需要进行重新编译,生成所需要的jar,任意创建maven项目,将src下的代码拷贝到具体位置,如下:

这里写图片描述

maven的pom.xml文件如下:

<?xml version="1.0" encoding="UTF-8"?>
<project xmlns="http://maven.apache.org/POM/4.0.0"
         xmlns:xsi="http://www.w3.org/2001/XMLSchema-instance"
         xsi:schemaLocation="http://maven.apache.org/POM/4.0.0 http://maven.apache.org/xsd/maven-4.0.0.xsd">
    <modelVersion>4.0.0</modelVersion>

    <groupId>com.ufind.session</groupId>
    <artifactId>tomcat-redis-session</artifactId>
    <version>1.0-SNAPSHOT</version>

    <dependencies>
        <dependency>
            <groupId>org.apache.tomcat</groupId>
            <artifactId>tomcat-catalina</artifactId>
            <version>7.0.27</version>
        </dependency>
        <dependency>
            <groupId>redis.clients</groupId>
            <artifactId>jedis</artifactId>
            <version>2.7.2</version>
        </dependency>
    </dependencies>

    <build>
        <plugins>
            <plugin>
                <groupId>org.apache.maven.plugins</groupId>
                <artifactId>maven-compiler-plugin</artifactId>
                <version>3.0</version>
                <configuration>
                    <source>1.7</source>
                    <target>1.7</target>
                    <encoding>UTF-8</encoding>
                </configuration>
            </plugin>
        </plugins>
    </build>

</project>
 
  • 1
  • 2
  • 3
  • 4
  • 5
  • 6
  • 7
  • 8
  • 9
  • 10
  • 11
  • 12
  • 13
  • 14
  • 15
  • 16
  • 17
  • 18
  • 19
  • 20
  • 21
  • 22
  • 23
  • 24
  • 25
  • 26
  • 27
  • 28
  • 29
  • 30
  • 31
  • 32
  • 33
  • 34
  • 35
  • 36
  • 37
  • 38
  • 39
  • 1
  • 2
  • 3
  • 4
  • 5
  • 6
  • 7
  • 8
  • 9
  • 10
  • 11
  • 12
  • 13
  • 14
  • 15
  • 16
  • 17
  • 18
  • 19
  • 20
  • 21
  • 22
  • 23
  • 24
  • 25
  • 26
  • 27
  • 28
  • 29
  • 30
  • 31
  • 32
  • 33
  • 34
  • 35
  • 36
  • 37
  • 38
  • 39

3、然后打开terminal,执行mvn clean 和mvn install 将编译好的代码打包为:tomcat-redis-session-1.0-SNAPSHOT.jar

4、将tomcat-redis-session-1.0-SNAPSHOT.jar、jedis-2.7.2.jar、commons-pool2-2.0.jar 三个jar包分别放在tomcat1和tomcat2实例下的lib目录下。

免费下载这三个jar:http://download.csdn.net/detail/u010870518/9585716

5、修改tomcat实例下conf/contex.xml文件

<?xml version='1.0' encoding='utf-8'?>  
<Context>  
    <WatchedResource>WEB-INF/web.xml</WatchedResource>  

    <!-- tomcat-redis-session共享配置 -->  
    <Valve className="com.orangefunction.tomcat.redissessions.RedisSessionHandlerValve" />  
        <Manager className="com.orangefunction.tomcat.redissessions.RedisSessionManager"  
         host="192.168.1.149"   
         port="6379"   
         database="0"   
         maxInactiveInterval="60" />  

</Context>  
 
  • 1
  • 2
  • 3
  • 4
  • 5
  • 6
  • 7
  • 8
  • 9
  • 10
  • 11
  • 12
  • 13
  • 1
  • 2
  • 3
  • 4
  • 5
  • 6
  • 7
  • 8
  • 9
  • 10
  • 11
  • 12
  • 13

如果Redis配置了访问权限,请添加密码为:

<?xml version='1.0' encoding='utf-8'?>  
<使用Redis存储Nginx+Tomcat负载均衡集群的Session

使用Redis存储Nginx+Tomcat负载均衡集群的Session

使用Redis存储Nginx+Tomcat负载均衡集群的Session (笔记)

Nginx+Tomcat+Redis实现负载均衡会话保持

逐步把Nginx及Redis引入项目组之负载均衡技术调研初版总结

逐步把Nginx及Redis引入项目组之负载均衡技术调研初版总结