在Linux x86_64环境下编译memcached
Posted 范景锋
tags:
篇首语:本文由小常识网(cha138.com)小编为大家整理,主要介绍了在Linux x86_64环境下编译memcached相关的知识,希望对你有一定的参考价值。
Memcached 是一个高性能的分布式内存对象缓存系统,用于动态Web应用以减轻数据库负载。它通过在内存中缓存数据和对象来减少读取数据库的次数,从而提供动态、数据库驱动网站的速度。Memcached基于一个存储键/值对的hashmap。其守护进程(daemon )是用C写的,但是客户端可以用任何语言来编写,并通过memcached协议与守护进程通信。但是它并不提供冗余(例如,复制其hashmap条目);当某个服务器S停止运行或崩溃了,所有存放在S上的键/值对都将丢失。
说简单一点memcached就是维护着一个位于内存中的大map。它利用RAM的随机访问优势(内存的读写速度要比磁盘的读写速度快得多,前者是后者的10的6次方倍),将某个对象通过特定的索引值存储,当需要这个对象的时候通过这个索引值可以立即找出来。索引值在整个内存缓冲系统中是唯一的,也同时对应唯一的一个对象。这样在涉及查询数据的操作时加入这样一种机制即可起到加快访问速度的效果。
闲话少叙,下面介绍memcached在Linux x86_64环境中的编译过程。
工作机器各项参数如下:
CPU:Intel Xeon 5110
内存:DDR2 1G*4
主机型号:ProLiant DL140 G3
操作系统:Red Hat Enterprise Linux Server release 5.4 x86_64版
内核版本:2.6.18
gcc版本:4.1.2
g++版本:4.1.2
1.下载memcached源码包
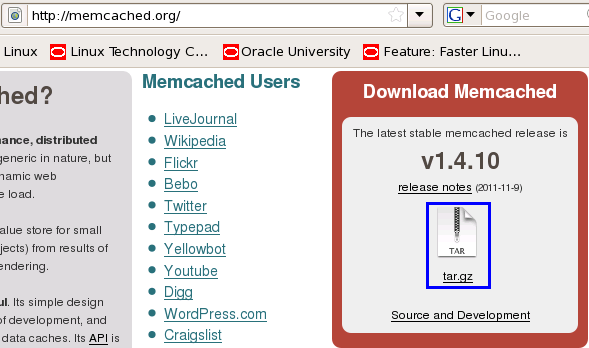
访问memcached官方网站http://memcached.org可以下载到最新最稳定版本的memcached源码包

下载完成后将其解压
- [[email protected] ~]# cd Download
- [[email protected] Download]# ll
- total 312
- -rw-r--r-- 1 root root 311926 Nov 20 16:51 memcached-1.4.10.tar.gz
- [[email protected] Download]# tar -xf memcached-1.4.10.tar.gz
- [[email protected] Download]# ll
- total 316
- drwxr-xr-x 6 1000 1000 4096 Nov 10 08:32 memcached-1.4.10
- -rw-r--r-- 1 root root 311926 Nov 20 16:51 memcached-1.4.10.tar.gz
[[email protected] ~]# cd Download
[[email protected] Download]# ll
total 312
-rw-r--r-- 1 root root 311926 Nov 20 16:51 memcached-1.4.10.tar.gz
[[email protected] Download]# tar -xf memcached-1.4.10.tar.gz
[[email protected] Download]# ll
total 316
drwxr-xr-x 6 1000 1000   4096 Nov 10 08:32 memcached-1.4.10
-rw-r--r-- 1 root root 311926 Nov 20 16:51 memcached-1.4.10.tar.gz
2.尝试配置memcached编译
进入memcached解压后的目录后,执行./configure命令来检测当前系统环境并生成makefile
- [[email protected] Download]# cd memcached-1.4.10
- [[email protected] memcached-1.4.10]# ./configure
[[email protected] Download]# cd memcached-1.4.10
[[email protected] memcached-1.4.10]# ./configure
如果在执行之后发现最后一行有如下提示表明缺少libevent库:
- checking for libevent directory... configure: error: libevent is required. You can get it from http://www.monkey.org/~provos/libevent/
- If it‘s already installed, specify its path using --with-libevent=/dir/
- [[email protected] memcached-1.4.10]#
checking for libevent directory... configure: error: libevent is required.  You can get it from http://www.monkey.org/~provos/libevent/

      If it‘s already installed, specify its path using --with-libevent=/dir/

[[email protected] memcached-1.4.10]#
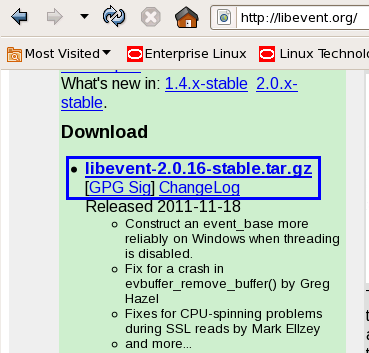
这是在编译memcached过程中经常遇到的问题(memcached基于libevent的事件处理机制。libevent是个程序库,它将Linux的epoll、BSD类操作系统的kqueue等事件处理功能封装成统一的接口。即使服务器的连接数增加,也能发挥时间复杂度O(1)的性能。 memcached使用这个libevent库,因此能在Linux、BSD、Solaris等操作系统上发挥其高性能。)。这时就要安装libevent库了。在libevent官方网站http://libevent.org中可以下载到最新最稳定版源代码:

同样需要解压并进入解压后的源码包目录:
- [[email protected] Download]# ll
- total 1140
- -rw-r--r-- 1 root root 837650 Nov 20 17:16 libevent-2.0.16-stable.tar.gz
- drwxr-xr-x 6 1000 1000 4096 Nov 20 17:03 memcached-1.4.10
- -rw-r--r-- 1 root root 311926 Nov 20 16:51 memcached-1.4.10.tar.gz
- [[email protected] Download]# tar -xf libevent-2.0.16-stable.tar.gz
- [[email protected] Download]# cd libevent-2.0.16-stable
[[email protected] Download]# ll
total 1140
-rw-r--r-- 1 root root 837650 Nov 20 17:16 libevent-2.0.16-stable.tar.gz
drwxr-xr-x 6 1000 1000   4096 Nov 20 17:03 memcached-1.4.10
-rw-r--r-- 1 root root 311926 Nov 20 16:51 memcached-1.4.10.tar.gz
[[email protected] Download]# tar -xf libevent-2.0.16-stable.tar.gz
[[email protected] Download]# cd libevent-2.0.16-stable
接下来要配置libevent库的编译了。这里的配置需要注意添加--prefix参数,这个参数要指定编译完成后,如果安装此库,库安装到哪里。默认值是/usr/local。如果保持默认值,会将库安装到/usr/local/lib目录中。多数Linux发行版默认的加载库路径都不包含此路径。为了避免麻烦,这里指定--prefix=/usr。这样编译后安装就会安装到/usr/lib目录中了。这个目录是多数Linux发行版默认的加载库路径。
执行配置脚本:
- [[email protected] libevent-2.0.16-stable]# ./configure --prefix=/usr
[[email protected] libevent-2.0.16-stable]# ./configure --prefix=/usr
如果你在配置时忘了加这个参数,不要紧,后面还有解决办法,接着往下看。
配置好之后就可以编译了:
- [[email protected] libevent-2.0.16-stable]# make
[[email protected] libevent-2.0.16-stable]# make
编译好之后就是用root权限安装:
- [[email protected] libevent-2.0.16-stable]# sudo make install
[[email protected] libevent-2.0.16-stable]# sudo make install
3.正式编译memcached
刚刚介绍的是遇到了一个小麻烦时的解决办法,现在已经不存在libevent库缺失的问题了,如果你遇到了libevent库缺失的问题,此时需要回到memcached源码包目录,再次执行一次编译配置脚本:
- [[email protected] memcached-1.4.10]# ./configure
[[email protected] memcached-1.4.10]# ./configure
不添加参数直接执行编译配置脚本,在安装时将自动安装到/usr/local/bin目录中。如果要更改安装位置,可以添加参数--prefix。例如--prefix=/usr/local/memcached,则安装时将安装到/usr/local/memcached/bin中。
检查没问题,可以开始编译了:
- [[email protected] memcached-1.4.10]# make
[[email protected] memcached-1.4.10]# make
编译完成后进行安装
- [[email protected] memcached-1.4.10]# sudo make install
[[email protected] memcached-1.4.10]# sudo make install
然后去看一看是否已经安装(memcached默认安装目录为/usr/local/bin)。转到memcached目录,然后启动memcached加参数-h显示帮助。帮助第一行即当前memcached版本:
- [[email protected] memcached-1.4.10]# cd /usr/local/bin/
- [[email protected] bin]# sudo ./memcached -h
- ./memcached: error while loading shared libraries: libevent-2.0.so.5: cannot open shared object file: No such file or directory
- [[email protected] bin]#
[[email protected] memcached-1.4.10]# cd /usr/local/bin/
[[email protected] bin]# sudo ./memcached -h
./memcached: error while loading shared libraries: libevent-2.0.so.5: cannot open shared object file: No such file or directory
[[email protected] bin]#
如果之前的libevent编译时加了--prefix=/usr参数,此时执行应该是正常的,会显示帮助信息。我刚才编译libevent库的时候故意没有加此参数,因此memcached到这一步的时候就会出现上面的问题——无法加载共享库libevent-2.0.so.5。如果你也遇到了这样的问题,接着往下看:
在多数linux发行版中,程序启动后静态加载的库默认查找路径为/lib(64位系统还有/lib64)和/usr/lib(64位系统中还有/usr/lib64),而目前我们编译的libevent库安装路径不在这些默认库加载路径中,因此需要配置库加载路径:
先通过ldd命令看一看memcached都需要加载哪些库:
- [[email protected] bin]# ldd memcached
- libevent-2.0.so.5 => not found
- librt.so.1 => /lib64/librt.so.1 (0x0000003714400000)
- libpthread.so.0 => /lib64/libpthread.so.0 (0x0000003712800000)
- libc.so.6 => /lib64/libc.so.6 (0x0000003711c00000)
- /lib64/ld-linux-x86-64.so.2 (0x0000003711800000)
- [[email protected] bin]#
[[email protected] bin]# ldd memcached
        libevent-2.0.so.5 => not found
        librt.so.1 => /lib64/librt.so.1 (0x0000003714400000)
        libpthread.so.0 => /lib64/libpthread.so.0 (0x0000003712800000)
        libc.so.6 => /lib64/libc.so.6 (0x0000003711c00000)
        /lib64/ld-linux-x86-64.so.2 (0x0000003711800000)
[[email protected] bin]#
此时看到结果第一行:libevent-2.0.so.5 => not found,正是缺少的库,该库无法找到。
那这个库在哪里呢?我们来问一下系统:
- [[email protected] bin]# whereis libevent-2.0.so.5
- libevent-2.0.so: /usr/local/lib/libevent-2.0.so.5
- [[email protected] bin]#
[[email protected] bin]# whereis libevent-2.0.so.5
libevent-2.0.so: /usr/local/lib/libevent-2.0.so.5
[[email protected] bin]#
它告诉我们,libevent-2.0.so.5库存放在/usr/local/lib目录中。因此我们把这个目录加入到系统默认的库加载路径中。这里要修改系统环境变量$LD_LIBRARY_PATH。
先看一下当前$LD_LIBRARY_PATH的值:
- [[email protected] bin]# echo $LD_LIBRARY_PATH
- [[email protected] bin]#
[[email protected] bin]# echo $LD_LIBRARY_PATH

[[email protected] bin]#
当前值为空,说明目前库加载路径还是上文提到的/lib(64位系统还有/lib64)和/usr/lib(64位系统中还有/usr/lib64)。接下来使用root权限修改/etc/profile文件,在文件末尾追加一行:
export LD_LIBRARY_PATH=/usr/local/lib:$LD_LIBRARY_PATH
然后保存,更新一下系统配置:
- [[email protected] bin]# source /etc/profile
[[email protected] bin]# source /etc/profile
再查看一下默认加载库路径:
- [[email protected] ~]# cd /etc/
- [[email protected] etc]# source profile
- [[email protected] etc]# echo $LD_LIBRARY_PATH
- /usr/local/lib:
- [[email protected] etc]#
[[email protected] ~]# cd /etc/
[[email protected] etc]# source profile
[[email protected] etc]# echo $LD_LIBRARY_PATH
/usr/local/lib:
[[email protected] etc]#
libevent库所在的目录已经添到了系统默认库加载路径中了,再次使用ldd命令查看memcached是否能够完全加载所需的库:
- [[email protected] etc]# cd /usr/local/bin/
- [[email protected] bin]# ls
- dialyzer erl escript memcached run_test typer
- epmd erlc event_rpcgen.py run_erl to_erl
- [[email protected] bin]# ldd memcached
- libevent-2.0.so.5 => /usr/local/lib/libevent-2.0.so.5 (0x00002b52aedd1000)
- librt.so.1 => /lib64/librt.so.1 (0x0000003714400000)
- libpthread.so.0 => /lib64/libpthread.so.0 (0x0000003712800000)
- libc.so.6 => /lib64/libc.so.6 (0x0000003711c00000)
- /lib64/ld-linux-x86-64.so.2 (0x0000003711800000)
- [[email protected] bin]#
[[email protected] etc]# cd /usr/local/bin/
[[email protected] bin]# ls
dialyzer  erl   escript          memcached  run_test  typer
epmd      erlc  event_rpcgen.py  run_erl    to_erl
[[email protected] bin]# ldd memcached
        libevent-2.0.so.5 => /usr/local/lib/libevent-2.0.so.5 (0x00002b52aedd1000)
        librt.so.1 => /lib64/librt.so.1 (0x0000003714400000)
        libpthread.so.0 => /lib64/libpthread.so.0 (0x0000003712800000)
        libc.so.6 => /lib64/libc.so.6 (0x0000003711c00000)
        /lib64/ld-linux-x86-64.so.2 (0x0000003711800000)
[[email protected] bin]#
已经都能找到了,看一下版本信息:
- [[email protected] bin]# ./memcached -h
- memcached 1.4.10
- -p <num> TCP port number to listen on (default: 11211)
- -U <num> UDP port number to listen on (default: 11211, 0 is off)
[[email protected] bin]# ./memcached -h
memcached 1.4.10
-p <num>      TCP port number to listen on (default: 11211)
-U <num>      UDP port number to listen on (default: 11211, 0 is off)
已经没有问题了。
至此memcached的编译安装完成。
近期我还要写一些关于memcached的配置文章,敬请关注!
参考资料:
在CentOS 5.6上编译安装Memcached ,http://whxhz.iteye.com/blog/1117118
error while loading shared libraries: libevent-2.0.so.5解决办法,http://blog.sina.com.cn/s/blog_6d09b5750100vqow.html
以上是关于在Linux x86_64环境下编译memcached的主要内容,如果未能解决你的问题,请参考以下文章

