Webpack实现多页面打包
Posted aiguangyuan
tags:
篇首语:本文由小常识网(cha138.com)小编为大家整理,主要介绍了Webpack实现多页面打包相关的知识,希望对你有一定的参考价值。
1. 多页面应用(MPA)概念
单页面在开发时会把所有的业务放在一个大的入口里面去,不同的子业务还是同一个URL地址,只不过后面的hash会有所不同。
多页面相对于单页面的区别在于,项目发布上线以后,有多个入口文件,每一次页面跳转的时候,后台服务器都会返回一个新的html文档,这种类型的网站也就是多页面网站,也叫多页应用。
多页面有什么优势呢?主要有以下两点:
1. 多个页面之间是解耦的,利于维护;
2. 多页面对SEO更加友好;
2. 多页面打包基本思路
多页面打包的基本思路在于,每个页面对应一个entry,每个页面对应一个html-webpack-plugin,但这种方式每次在新增或删除页面时需要修改webpack配置,相当麻烦。

3. 多页面打包通用方案
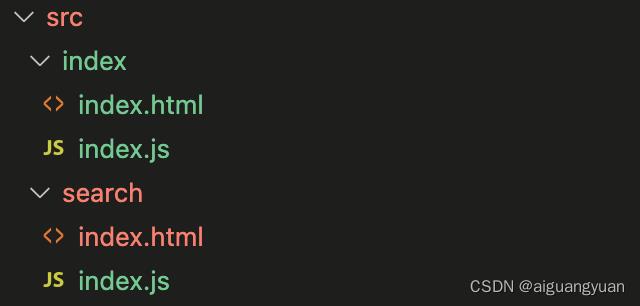
1. 多个页面的文件名统一取名index,通过不同的文件夹来区分;
2. 动态获取 entry 和设置 html-webpack-plugin 数量;
4. 多页面打包实现
4.1. 安装插件;
npm i glob -D4.2. 配置Webpack文件;
'use strict';
// 引入插件
const glob = require('glob');
const path = require('path');
const webpack = require('webpack');

// 页面打包插件
const HtmlWebpackPlugin = require('html-webpack-plugin');
// 自动清理插件
const CleanWebpackPlugin = require('clean-webpack-plugin');
// 优化控制台输出
const FriendlyErrorsWebpackPlugin = require('friendly-errors-webpack-plugin');

// 动态计算多页面打包
const setMPA = () =>
    const entry = ;
    const htmlWebpackPlugins = [];
    // 获取本地按规则修改好的文件
    const entryFiles = glob.sync(path.join(__dirname, './src/*/index.js'));

    Object.keys(entryFiles).map((index) =>

        const entryFile = entryFiles[index];

        // 'my-project/src/index/index.js'

        const match = entryFile.match(/src\\/(.*)\\/index\\.js/);
        // 获取页面文件名
        const pageName = match && match[1];

        entry[pageName] = entryFile;
        // 根据本地定义的页面文件数量来定义htmlWebpackPlugin
        htmlWebpackPlugins.push(
            new HtmlWebpackPlugin(
                template: path.join(__dirname, `src/$pageName/index.html`),
                filename: `$pageName.html`,
                chunks: [pageName],
                inject: true,
                minify:
                    html5: true,
                    collapseWhitespace: true,
                    preserveLineBreaks: false,
                    minifyCSS: true,
                    minifyJS: true,
                    removeComments: false

            )
        );
    );

    return
        entry,
        htmlWebpackPlugins


const  entry, htmlWebpackPlugins  = setMPA();

module.exports =
    // 入口文件
    entry: entry,
    // 输出文件
    output:
        path: path.join(__dirname, 'dist'),
        filename: '[name].js'
    ,
    // 开发模式
    mode: 'development',
    module:
        rules: [

                test: /.js$/,
                use: 'babel-loader'
            ,

                test: /.css$/,
                use: [
                    'style-loader',
                    'css-loader'
                ]
            ,

                test: /.less$/,
                use: [
                    'style-loader',
                    'css-loader',
                    'less-loader'
                ]
            ,

                test: /.(png|jpg|gif|jpeg)$/,
                use: [

                        loader: 'url-loader',
                        options:
                            limit: 10240


                ]
            ,

                test: /.(woff|woff2|eot|ttf|otf)$/,
                use: 'file-loader'

        ]
    ,
    plugins: [
        // 热更新插件
        new webpack.HotModuleReplacementPlugin(),
        // 自动清理插件
        new CleanWebpackPlugin(),
        // 简化打包控制台输出
        new FriendlyErrorsWebpackPlugin()

    ].concat(htmlWebpackPlugins),

    // 热更新相关配置
    devServer:
        // 基本目录
        contentBase: './dist',
        // 热更新
        hot: true,
        // 只输出报错
        stats: 'errors-only'
    ,
    devtool: 'cheap-source-map'
;
以上是关于Webpack实现多页面打包的主要内容,如果未能解决你的问题,请参考以下文章