AutoGluon GPU 版本 安装配置教程
Posted 叶庭云
tags:
篇首语:本文由小常识网(cha138.com)小编为大家整理,主要介绍了AutoGluon GPU 版本 安装配置教程相关的知识,希望对你有一定的参考价值。
CSDN 叶庭云:https://yetingyun.blog.csdn.net/
官方文档:https://auto.gluon.ai/stable/index.html
新建一个干净的虚拟环境,先装上 PyTorch:
conda create -n myenv python=3.8 cudatoolkit=11.0 -y
conda activate myenv

pip3 install "torch>=1.0,<1.11+cu110" -f https://download.pytorch.org/whl/cu110/torch_stable.html
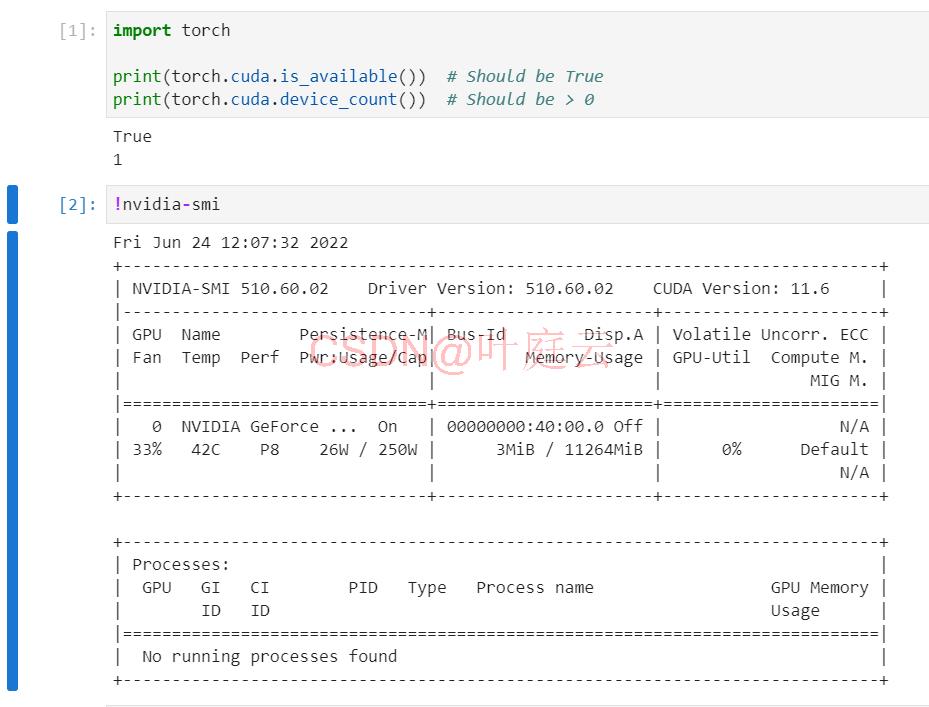
查看 torch 是否成功安装,然后查看 GPU 是否可用:
pip3 install -U pip
pip3 install -U setuptools wheel

pip3 install autogluon -i http://pypi.douban.com/simple --trusted-host pypi.douban.com
等待一会儿就装好了,结果如下。为了能够使用 GPU 加速(主要是 LightGBM 和 MXNet 要配置 GPU 版本):
# 默认安装可能会改变原有的PyTorch环境    重新安装一下
conda install pytorch==1.7.0 torchvision==0.8.1 cudatoolkit=11.0 -c pytorch

conda install pytorch==1.8.1 torchvision==0.9.1 cudatoolkit=11.1 -c pytorch
pip3 uninstall lightgbm -y
pip3 install lightgbm --install-option=--gpu

git clone --recursive https://github.com/microsoft/LightGBM
cd LightGBM
mkdir build
cd build
cmake -DUSE_GPU=1 ..
# if you have installed NVIDIA CUDA to a customized location, you should specify paths to OpenCL headers and library like the following:
# cmake -DUSE_GPU=1 -DOpenCL_LIBRARY=/usr/local/cuda/lib64/libOpenCL.so -DOpenCL_INCLUDE_DIR=/usr/local/cuda/include/ ..
make -j$(nproc)
cd ..

sudo apt-get -y install python-pip
sudo -H pip install setuptools numpy scipy scikit-learn -U
cd python-package/
sudo python setup.py install --precompile
cd ..

pip install 'mxnet-cu110<2.0.0'
from autogluon.tabular import TabularDataset, TabularPredictor

train_data = TabularDataset('./customer/train.csv').drop(columns=["客户ID"])
test_data = TabularDataset('./customer/test.csv').drop(columns=["客户ID"])

metric = 'roc_auc'
excluded_model_types = ['KNN', 'XT']
predictor = TabularPredictor(label='是否流失',
                             eval_metric=metric).fit(train_data=train_data,
                                              		 excluded_model_types=excluded_model_types,
                                              		 time_limit=3600,
                                              		 ag_args_fit='num_gpus': 1
                                              	     )

predictions = predictor.predict_proba(test_data)
# 查看集成的单模型的表现
predictor.leaderboard(test_data, silent=True)

predictor.feature_importance(train_data)            # 特征重要性
以上是关于AutoGluon GPU 版本 安装配置教程的主要内容,如果未能解决你的问题,请参考以下文章