华南农业大学Linux课程综合实验——用JavaPHPGoNodejs语言,实现从MySQL读取内容并显示在浏览器上
Posted 夜中听雪
tags:
篇首语:本文由小常识网(cha138.com)小编为大家整理,主要介绍了华南农业大学Linux课程综合实验——用JavaPHPGoNodejs语言,实现从MySQL读取内容并显示在浏览器上相关的知识,希望对你有一定的参考价值。
文章目录
开始前的准备工作
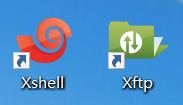
1、安装Xshell和Xftp
2、购买/试用/学生免费领取 阿里云服务器
服务器购买:云服务器ECS_云主机_服务器托管_弹性计算-阿里云
云产品试用:阿里云试用中心_云服务器试用_企业试用场景_开发者云产品试用
学生的学习与优惠:开发者成长计划
3、服务器初始配置
点击右上角的控制台->点击云服务器 ECS->点击实例ID。
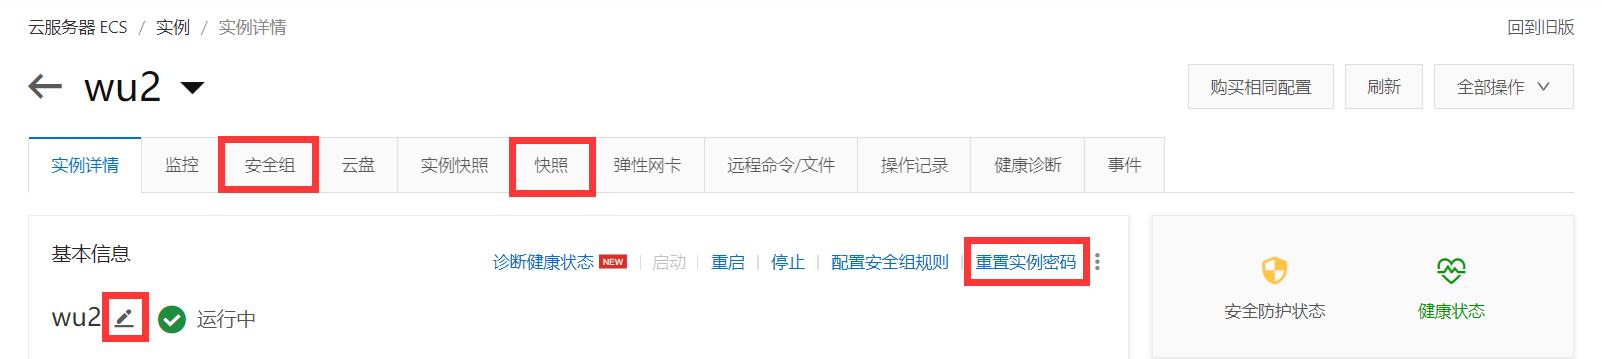
1、创建快照
点击快照->点击创建快照。
2、修改实例名称
可改可不改。实例名称改为wu2,那么远程连接时有[root@wu2 ~]#。
3、重置服务器密码,然后用Xshell远程连接服务器
点击重置实例密码来设置服务器密码->在Xshell中通过账号(root)密码(你刚刚重置的实例密码)进行远程登录服务器。
因为阿里云上重置实例密码,它对密码的格式有要求,你重置的密码你可能记不住,那么可以在用重置的密码通过Xshell远程登录服务器后,通过passwd命令重置密码,此时对密码没有格式要求,可以写你能记住的密码,之后通过账号(root)密码(你刚刚用passwd重置的密码)进行远程登录服务器。
[root@wu2 ~]# passwd
Changing password for user root.
New password:
Retype new password:
passwd: all authentication tokens updated successfully.
Xshell中可以通过 文件->属性->外观 来设置XShell中显示的字号,我设置为14。
开始部署服务器
1、mysql的安装和配置 + nginx的安装
(1) MySQL的安装(rpm安装)和配置
1、rpm安装MySQL并修改MySQL密码
下载MySQL的rpm包:MySQL :: Download MySQL Yum Repository

点击No thanks, just start my download.,将mysql80-community-release-el7-3.noarch.rpm下载到本地电脑上。
下载后,用Xftp将其上传到服务器的/opt/school_linux_final_test/java下。
[root@wu2 ~]# yum install -y /opt/school_linux_final_test/java/mysql80-community-release-el7-3.noarch.rpm
[root@wu2 ~]# yum list mysql*
[root@wu2 ~]# yum install -y mysql-community-server.x86_64
[root@wu2 ~]# systemctl start mysqld
[root@wu2 ~]# systemctl status mysqld	# 确保mysql已经启动
[root@wu2 ~]# mysql -V	# 查看mysql版本
mysql  Ver 8.0.25 for Linux on x86_64 (MySQL Community Server - GPL)
[root@wu2 ~]# grep 'password' /var/log/mysqld.log	# 查看mysql初始密码
2021-05-31T07:49:15.049572Z 6 [Note] [MY-010454] [Server] A temporary password is generated for root@localhost: h9fif6176K>!
[root@wu2 ~]# mysql -u root -p
Enter password: 							# 密码是前面grep命令查出的密码:h9fif6176K>!
Welcome to the MySQL monitor.  Commands end with ; or \\g.
Your MySQL connection id is 8
Server version: 8.0.25
。。。

mysql> alter user root@localhost identified by 'a1b2c3';	# 修改密码。密码太简单,会报错,如下。
ERROR 1819 (HY000): Your password does not satisfy the current policy requirements

mysql> alter user root@localhost identified by 'Nowcoder_123';		# 修改密码,这里密码必须有大写字母,有数字,有特殊符号。
Query OK, 0 rows affected (0.01 sec)

mysql> exit
Bye
[root@wu2 ~]# mysql -u root -pNowcoder_123
mysql: [Warning] Using a password on the command line interface can be insecure.
Welcome to the MySQL monitor.  Commands end with ; or \\g.
Your MySQL connection id is 9
Server version: 8.0.25 MySQL Community Server - GPL
。。。
2、在服务器的MySQL里执行如下sql语句:
CREATE DATABASE `linux_test`CHARACTER SET utf8 COLLATE utf8_general_ci;
USE `linux_test`;
CREATE TABLE `linux_test`.`student`( `id` INT(11) NOT NULL AUTO_INCREMENT, `student_id` VARCHAR(50), `student_name` VARCHAR(50), PRIMARY KEY (`id`) ) ENGINE=INNODB CHARSET=utf8 COLLATE=utf8_general_ci;
INSERT INTO `linux_test`.`student` (`id`, `student_id`, `student_name`) VALUES (NULL, '2018xxxxxxxx', 'xxx');
INSERT INTO `linux_test`.`student` (`student_id`, `student_name`) VALUES ('1111', '其他学生');
(2) Nginx的安装(yum安装)
1、yum安装Nginx
[root@wu2 ~]# yum list nginx*
Loaded plugins: fastestmirror
Loading mirror speeds from cached hostfile
Available Packages
nginx.x86_64                                                            1:1.16.1-3.el7                                      epel
。。。
[root@wu2 ~]# yum install -y nginx.x86_64
[root@wu2 ~]# vim /etc/nginx/nginx.conf	# `/etc/nginx/nginx.conf`是nginx的配置文件
2、配置Nginx
[root@wu2 ~]# vim /etc/nginx/nginx.conf

    location /index.java
            proxy_pass   http://127.0.0.1:8080/;


	location ~ \\.php$
        	root   /usr/share/nginx/html;
	        fastcgi_pass   127.0.0.1:9000;  #php-fpm默认的端口是9000
	        fastcgi_index  index.php;
        	fastcgi_param  SCRIPT_FILENAME  $document_root$fastcgi_script_name;
	        include        fastcgi_params;


	location ~ \\.go$
		proxy_pass   http://127.0.0.1:8000;

	location ~ \\.js$
		proxy_pass   http://127.0.0.1:8001;


[root@wu2 ~]# service nginx restart
这里先列一下nginx的配置,在用四种语言:Java、PHP、Go、Nodejs,实现对应语言的程序后,可以通过下方网址来访问对应的程序。
| 语言 | 标准网址 | 其他网址 |
|---|---|---|
| Java | http://120.79.212.4/index.java | http://120.79.212.4:8080/ |
| PHP | http://120.79.212.4/index.php | |
| Go | http://120.79.212.4/index.go | http://120.79.212.4:8000/ 。 http://120.79.212.4/xxx.go |
| Nodejs | http://120.79.212.4/index.js | http://120.79.212.4:8001/ 。 http://120.79.212.4/xxx.js |
2、开启 阿里云安全组 和 服务器防火墙 的端口
要开启的端口有:
| 端口 | 描述 |
|---|---|
| 80 | HTTP、Nginx。 |
| 8000 | 我的测试端口,测试Go。 |
| 8001 | 我的测试端口,测试Nodejs。 |
| 8080 | Tocmat。测试Java。 |
| 9000 | 没有用到。php-fpm,PHP。 |
开启阿里云安全组的端口,可视化界面开启,举例如下:

开启服务器防火墙的端口:
[root@wu2 ~]# systemctl status firewalld	# 查看防火墙状态
[root@wu2 ~]# service firewalld start		# 开启防火墙
[root@wu2 ~]# firewall-cmd --zone=public --add-port=80/tcp --permanent
[root@wu2 ~]# firewall-cmd --zone=public --add-port=8000/tcp --permanent
[root@wu2 ~]# firewall-cmd --zone=public --add-port=8001/tcp --permanent
[root@wu2 ~]# firewall-cmd --zone=public --add-port=8080/tcp --permanent
[root@wu2 ~]# firewall-cmd --zone=public --add-port=9000/tcp --permanent
[root@wu2 ~]# service firewalld restart		# 开放端口、移除端口后,都要重启防火墙才生效
[root@wu2 ~]# firewall-cmd --list-ports		# 查看开放了哪些端口
小知识:Linux防火墙基本命令。
# 查看防火墙状态
systemctl status firewalld

# 开启、重启、关闭 防火墙
# 开启
service firewalld start
# 重启
service firewalld restart
# 关闭
service firewalld stop

# 查看防火墙规则
firewall-cmd --list-all		# 查看全部信息
firewall-cmd --list-ports	# 只看端口信息

# 查询端口是否开放
firewall-cmd --query-port=8080/tcp

# 开放端口、移除端口后,都要重启防火墙才生效
# 开放端口
firewall-cmd --zone=public --add-port=8080/tcp --permanent
# 移除端口
firewall-cmd  --zone=public --remove-port=8080/tcp --permanent

# 命令含义:
firwall-cmd	# 是Linux提供的操作firewall的一个工具
--zone # 作用域
--add-port=8080/tcp	# 添加端口,格式为:端口/通讯协议
--permanent	# 永久生效,没有此参数重启后失效
下面使用4种语言实现从MySQL数据库中读取数据到浏览器中显示。
1、Java
1、压缩包安装Tomcat
下载Tomcat的tar.gz压缩包Apache Tomcat® - Apache Tomcat 9 Software Downloads
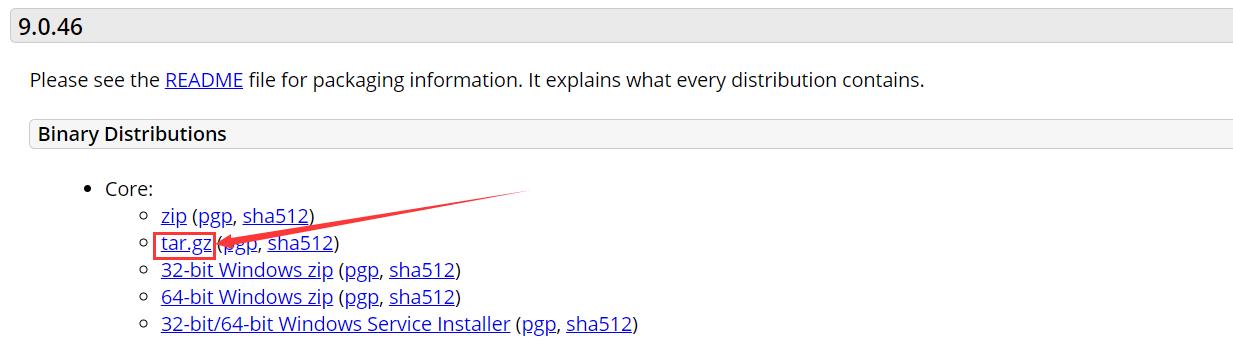
把apache-tomcat-9.0.46.tar.gz上传到服务器的/opt/school_linux_final_test/java目录下。
[root@wu2 ~]# tar -zxvf /opt/school_linux_final_test/java/apache-tomcat-9.0.46.tar.gz -C /opt/school_linux_final_test/java/
[root@wu2 ~]# vim /etc/profile		# 在最后追加
export PATH=$PATH:/opt/school_linux_final_test/java/apache-tomcat-9.0.46/bin
[root@wu2 ~]# source /etc/profile	# 让配置文件/etc/profile生效
2、rpm安装java1.8
Java SE Development Kit 8 - Downloads

下载需要登录Oracle官网,即需要账号密码,下面是网上找的账号及密码,亲测有效。
Oracle Account:2696671285@qq.com
Oracle Password:Oracle123
把jdk-8u291-linux-x64.rpm上传到服务器的/opt/school_linux_final_test/java目录下。
[root@wu2 ~]# rpm -qa | grep jdk	# 检查是否原先安装过jdk
jdk1.8-1.8.0_291-fcs.x86_64
[root@wu2 ~]# rpm -e --nodeps jdk1.8-1.8.0_291-fcs.x86_64	# 可以卸载掉原先的jdk
[root@wu2 ~]# rpm -ivh /opt/school_linux_final_test/java/jdk-8u291-linux-x64.rpm 	# rpm安装jdk
[root@wu2 ~]# java -version	# 安装成功
java version "1.8.0_291"
Java(TM) SE Runtime Environment (build 1.8.0_291-b10)
Java HotSpot(TM) 64-Bit Server VM (build 25.291-b10, mixed mode)

[root@wu2 ~]# vim /etc/profile		# 在最后追加
JAVA_HOME=/usr/java/jdk1.8.0_291-amd64
CLASSPATH=%JAVA_HOME%/lib:%JAVA_HOME%/jre/lib
PATH=$PATH:$JAVA_HOME/bin:$JAVA_HOME/jre/bin
export PATH CLASSPATH JAVA_HOME
[root@wu2 ~]# source /etc/profile	# 让配置文件/etc/profile生效
3、在本地(Windows电脑上)用IDEA开发一个能实现从MySQL读取内容并显示在浏览器上的项目
pom.xml
<?xml version="1.0" encoding="UTF-8"?>
<project xmlns="http://maven.apache.org/POM/4.0.0" xmlns:xsi="http://www.w3.org/2001/XMLSchema-instance"
         xsi:schemaLocation="http://maven.apache.org/POM/4.0.0 https://maven.apache.org/xsd/maven-4.0.0.xsd">
    <modelVersion>4.0.0</modelVersion>
    <parent>
        <groupId>org.springframework.boot</groupId>
        <artifactId>spring-boot-starter-parent</artifactId>
        <version>2.5.0</version>
        <relativePath/> <!-- lookup parent from repository -->
    </parent>
    <groupId>com.example</groupId>
    <artifactId>demo</artifactId>
    <version>0.0.1-SNAPSHOT</version>
    <name>demo</name>
    <description>Demo project for Spring Boot</description>

    <properties>
        <java.version>1.8</java.version>
    </properties>
    <dependencies>
        <dependency>
            <groupId>org.springframework.boot</groupId>
            <artifactId>spring-boot-starter-web</artifactId>
        </dependency>

        <dependency>
            <groupId>org.springframework.boot</groupId>
            <artifactId>spring-boot-starter-test</artifactId>
            <scope>test</scope>
        </dependency>

        <dependency>
            <groupId>mysql</groupId>
            <artifactId>mysql-connector-java</artifactId>
        </dependency>
        <dependency>
            <groupId>org.mybatis.spring.boot</groupId>
            <artifactId>mybatis-spring-boot-starter</artifactId>
            <version>2.1.0</version>
        </dependency>
        <dependency>
            <groupId>com.alibaba</groupId>
            <artifactId>fastjson</artifactId>
            <version>1.2.58</version>
        </dependency>
    </dependencies>

    <build>
        <plugins>
            <plugin>
                <groupId>org.springframework.boot</groupId>
                <artifactId>spring-boot-maven-plugin</artifactId>
            </plugin>
        </plugins>
    </build>

</project>
application.properties
# ServerProperties
server.port=8080

# ThymeleafProperties
spring.thymeleaf.cache=true

# DataSourceProperties
spring.datasource.driver-class-name=com.mysql.cj.jdbc.Driver
spring.datasource.url=jdbc:mysql://localhost:3306/linux_test?characterEncoding=utf-8&useSSL=false&serverTimezone=Hongkong
spring.datasource.username=root
spring.datasource.password=a1b2c3
spring.datasource.type=com.zaxxer.hikari.HikariDataSource
spring.datasource.hikari.maximum-pool-size=15
spring.datasource.hikari.minimum-idle=5
spring.datasource.hikari.idle-timeout=30000

# MybatisProperties
mybatis.mapper-locations=classpath:mapper/*.xml
mybatis.type-aliases-package=com.example.entity
mybatis.configuration.useGeneratedKeys=true
mybatis.configuration.mapUnderscoreToCamelCase=true
Student.java
public class Student
    private Integer id;
    private String studentId;
    private String studentName;

	//get和set方法
StudentMapper.java
@Mapper
@Repository
public interface StudentMapper
    List<Student> selectStudents();
student-mapper.xml
<?xml version="1.0" encoding="UTF-8" ?>
<!DOCTYPE mapper
        PUBLIC "-//mybatis.org//DTD Mapper 3.0//EN"
        "http://mybatis.org/dtd/mybatis-3-mapper.dtd">
<mapper namespace="com.example.dao.StudentMapper">

    <sql id="selectFields">
        id, student_id,student_name
    </sql>

    <select id="selectStudents" resultType="Student">
        select <include refid="selectFields"></include>
        from student
    </select>

</mapper>
StudentService.java
@Service
public class StudentService

    @Autowired
    private StudentMapper studentMapper;

    public List<Student> selectStudents()
        return studentMapper.selectStudents();
StudentController.java
@Controller
public class StudentController

    @Autowired
    private StudentService studentService;

    @RequestMapping(path = "/", method = RequestMethod.GET)
    //@ResponseBody
    public void /*List<Student>*/ selectStudents(HttpServletResponse response)
        //return studentService.selectStudents();
        //使用注释掉的代码会产生问题:@ResponseBody返回JSON数据,360安全浏览器弹出下载页面_夜中听雪的博客-CSDN博客  https://blog.csdn.net/wpw2000/article/details/117430507?spm=1001.2014.3001.5502
        response.setContentType("text/html;charset=utf-8");
        try (
                PrintWriter writer = response.getWriter();
        )
            writer.write(JSON.toJSONString(studentService.selectStudents()));
         catch (IOException e)
            e.printStackTrace();
DemoApplication.java
@SpringBootApplication
public class DemoApplication

    public static void main(String[] args)
        SpringApplication.run(DemoApplication.class, args);
4、把本地(Windows电脑上)可以访问的SpringBoot项目部署到服务器的Tomcat上
1、修改application.properties
# DataSourceProperties	# 因为访问的是你自己电脑上的mysql->服务器的mysql,可能两个mysql你设置的用户名密码不一致。
# 如:Windows电脑的MySQL密码:a1b2c3。Linux服务器上的MySQL密码:Nowcoder_123。
spring.datasource.username=root
spring.datasource.password=Nowcoder_123
2、修改pom.xml,增加<packaging>和<finalName>两行
	<name>community</name>
	<description>nowcoder community</description>
	<packaging>war</packaging>

	<build>
		<finalName>ROOT</finalName>
		<plugins>
			<plugin>
				<groupId>org.springframework.boot</groupId>
				<artifactId>spring-boot-maven-plugin</artifactId>
			</plugin>
		</plugins>
	</build>
3、增加一个类:CommunityServletInitializer
package com.example;

import org.springframework.boot.builder.SpringApplicationBuilder;
import org.springframework.boot.web.servlet.support.SpringBootServletInitializer;

public class CommunityServletInitializer extends SpringBootServletInitializer

    //tomcat访问该方法作为入口来运行该项目
    @Override
    protected SpringApplicationBuilder configure(SpringApplicationBuilder builder)
        return builder.sources(DemoApplication.class); //这里指出该项目的main方法所在的类
4、用maven把项目编译并且打包

5、shutdown.sh关闭服务器tomcat,删除服务器tomcat的webapp目录下的所有文件。把本地项目目录的target目录下的ROOT.war文件上传到服务器tomcat的webapp目录下。startup.sh开启服务器tomcat。
6、此时,可以使用http://120.79.212.4:8080/访问项目。
5、配置Nginx
[root@wu2 ~]# vim /etc/nginx/nginx.conf	# 增加下方内容
        location /index.java
        		# 注意:下方的端口号后要加"/",不然会404,因为程序的Controller里是`path = "/"`。
                proxy_pass   http://127.0.0.1:8080/;


[root@wu2 ~]# service nginx restart
此时,可以用 http://120.79.212.4/index.java 访问网页。

遇到的问题和解决方法
1、
问题:Windows上访问都没有问题,但部署到服务器后,@ResponseBody返回JSON数据,chrome浏览器显示网页,但360安全浏览器弹出下载页面。
解决方法:不使用@ResponseBody注解,而是通过response.getWriter()直接往浏览器写入JSON数据。
具体可以看我的这篇博客:@ResponseBody返回JSON数据,360安全浏览器弹出下载页面_夜中听雪的博客-CSDN博客
2、
问题:nginx的配置问题,无法通过http://120.79.212.4/index.java访问到Java。
解决方法:端口号后要加"/",像这样:proxy_pass http://127.0.0.1:8080/;。不然会404,因为程序的Controller里是path = "/"。
2、PHP
1、PHP 的 安装、配置、启动
[root@wu2 ~]# cd /opt/school_linux_final_test/php
[root@wu2 php]# wget https://www.php.net/distributions/php-7.4.5.tar.gz
[root@wu2 php]# yum install -y gcc gcc-c++ make zlib zlib-devel pcre pcre-devel libjpeg libjpeg-devel libpng libpng-devel freetype freetype-devel libxml2 libxml2-devel glibc glibc-devel glib2 glib2-devel bzip2 bzip2-devel ncurses ncurses-devel curl curl-devel e2fsprogs e2fsprogs-devel krb5 krb5-devel openssl openssl-devel openldap openldap-devel nss_ldap openldap-clients openldap-servers libsqlite3x-devel oniguruma-devel
[root@wu2 php]# tar -zxvf php-7.4.5.tar.gz
[root@wu2 php]# cd php-7.4.5
[root@wu2 php-7.4.5]# ./configure --prefix=/usr/local/php --with-config-file-path=/usr/local/php --enable-mbstring --enable-ftp --enable-gd --with-mysqli=mysqlnd --with-pdo-mysql=mysqlnd --without-pear --disable-phar --enable-sockets --with-zlib --with-xmlrpc --enable-fpm --enable-xml --enable-sockets --with-zlib --with-iconv --enable-soap --enable-pcntl --enable-cli --with-curl
[root@wu2 php-7.4.5]# make
[root@wu2 php-7.4.5]# make install
[root@wu2 php-7.4.5]# cp php.ini-production /usr/local/php/php.ini
[root@wu2 php-7.4.5]# vim /usr/local/php/php.ini
display_errors = On	# Off改为On。设置让PHP错误信息打印在页面上。

[root@wu2 php-7.4.5]# cp sapi/fpm/init.d.php-fpm /etc/init.d/php-fpm
[root@wu2 php-7.4.5]# ll /etc/init.d/php-fpm
-rw-r--r-- 1 root root 2401 Jun  6 20:27 /etc/init.d/php-fpm
[root@wu2 php-7.4.5]# chmod +x /etc/init.d/php-fpm

[root@wu2 php-7.4.5]# cd /usr/local/php/etc
[root@wu2 etc]# cp php-fpm.conf.default php-fpm.conf
[root@wu2 etc]# vi php-fpm.conf
# 去掉 ";pid = run/php-fpm.pid" 前面的分号

[root@wu2 etc]# cd php-fpm.d
[root@wu2 php-fpm.d]# cp www.conf.default www.conf
[root@wu2 php-fpm.d]# vi www.conf	# 修改user和group为php。
user = php
group = php

[root@wu2 php-fpm.d]# groupadd php
[root@wu2 php-fpm.d]# useradd -r -g php php
[root@wu2 php-fpm.d]# chkconfig php-fpm on	# 设置开启启动

[root@wu2 ~]# /etc/init.d/php-fpm start
Starting php-fpm  done
[root@wu2 ~]# ps -ef |grep php
root     25243     1  0 23:35 ?        00:00:00 php-fpm: master process (/usr/local/php/etc/php-fpm.conf)
php      25244 25243  0 23:35 ?        00:00:00 php-fpm: pool www
php      25245 25243  0 23:35 ?        00:00:00 php-fpm: pool www
root     25250 25051  0 23:35 pts/0    00:00:00 grep --color=auto php
2、配置Nginx,测试访问PHP
配置前,ip、ip/index.html、ip/index.php 都是访问不到页面的。
[root@wu2 ~]# vim /usr/share/nginx/html/index.php	# 写入如下内容
<?php
    phpinfo();
?>

[root@wu2 ~]# vim /etc/nginx/nginx.conf	# 添加的两部分内容被"# my start"和"# my end"框了起来。
        location /
# my start
                root /usr/share/nginx/html;
                index index.php;
# my end


# my start
        location ~ \\.php$
                #root           html;
                root   /usr/share/nginx/html;
                fastcgi_pass   127.0.0.1:9000;  #php-fpm默认的端口是9000
                fastcgi_index  index.php;
                fastcgi_param  SCRIPT_FILENAME  $document_root$fastcgi_script_name;
                include        fastcgi_params;

# my end

[root@wu2 ~]# service nginx restart
Redirecting to /bin/systemctl restart nginx.service
配置后,ip/index.php 可以访问到下方页面。

配置后,ip、ip/index.html 可以访问到下方页面。

3、用PHP语言,实现从MySQL读取内容并显示在浏览器上
[root@wu2 ~]# vim /usr/share/nginx/html/index.php # 删除原先内容,改为以下内容。
<?php
$mysql_server_name = '127.0.0.1'; // ip
$mysql_username = 'root';         // username
$mysql_password = 'Nowcoder_123'; // password
$mysql_database = 'linux_test';   // database

$conn=mysqli_connect($mysql_server_name,$mysql_username,$mysql_password,$mysql_database); //连接数据库
if ($conn -> connect_errno)
    printf("Connect failed: %s\\n", $conn->connect_error);
    exit();

//查询
$sql = "select * from student";
$query = $conn->query($sql);

//设置客户端响应头。不设也是显示网页。
//header('Content-Type:text/html;charset=utf-8');

echo "这是PHP实现的页面";
//构造表头
echo "<table border='1'><tr>";
echo "<th>id</th>";
echo "<th>学号</th>";
echo "<th>姓名</th>";
echo "</tr>";
//遍历输出
while($row = $query->fetch_array())
	echo "<tr>";
    echo "<td>".$row以上是关于华南农业大学Linux课程综合实验——用JavaPHPGoNodejs语言,实现从MySQL读取内容并显示在浏览器上的主要内容,如果未能解决你的问题,请参考以下文章