Android Studio基础ListView之SimpleAdapter
Posted 徐为波
tags:
篇首语:本文由小常识网(cha138.com)小编为大家整理,主要介绍了Android Studio基础ListView之SimpleAdapter相关的知识,希望对你有一定的参考价值。
android Studio基础ListView之SimpleAdapter
ListView、数据源(数组或集合)、单元格布局、数据适配器的关系图,当中数字1、2、3、4、5(代码调用)为五个步骤进行实现。
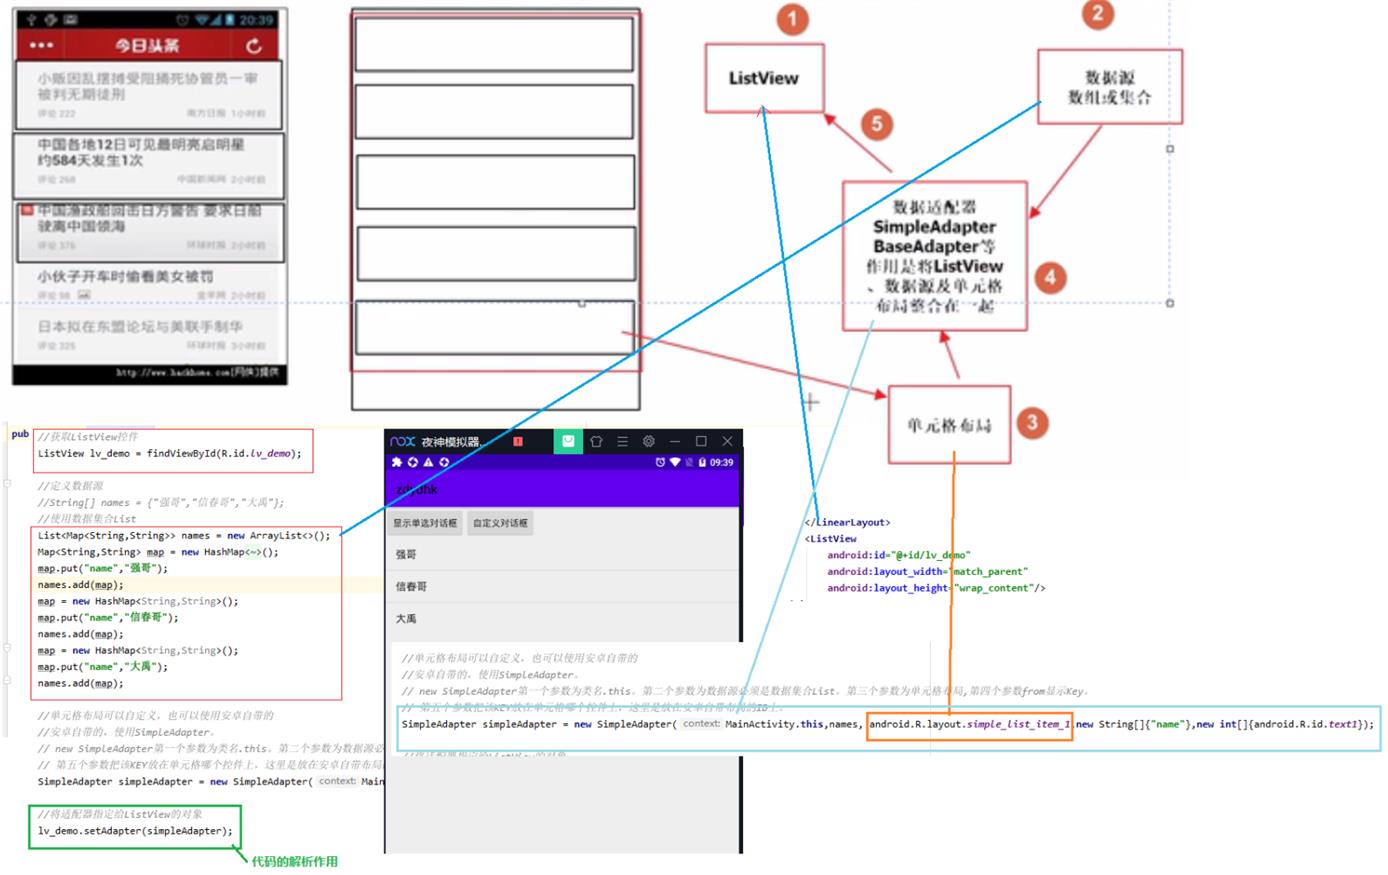
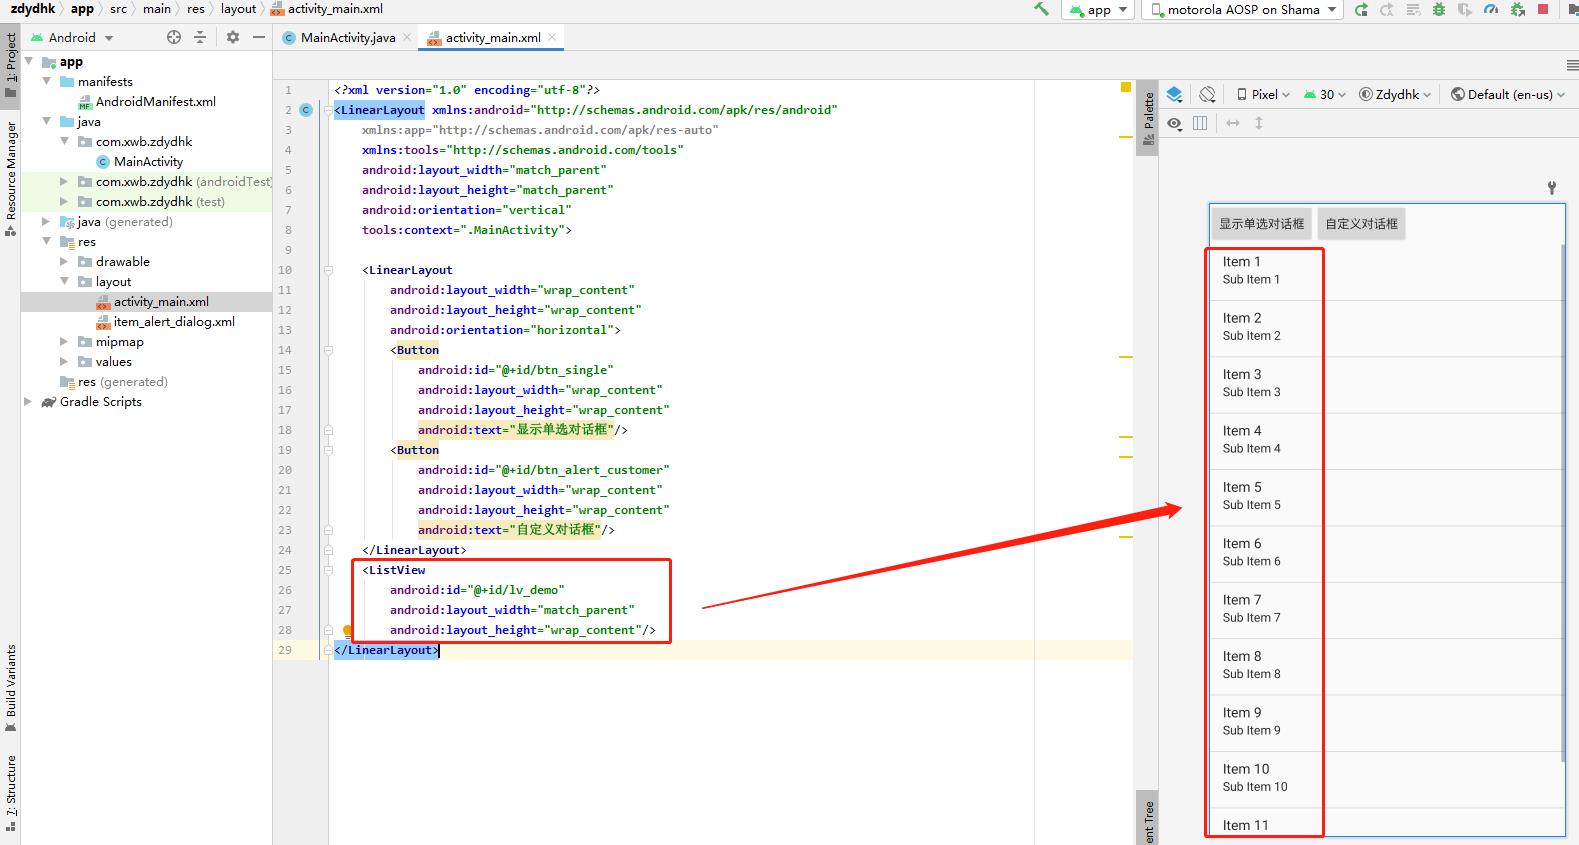
第一步:在布局xml中设置ListView
<?xml version="1.0" encoding="utf-8"?>
<LinearLayout xmlns:android="http://schemas.android.com/apk/res/android"
    xmlns:app="http://schemas.android.com/apk/res-auto"
    xmlns:tools="http://schemas.android.com/tools"
    android:layout_width="match_parent"
    android:layout_height="match_parent"
    android:orientation="vertical"
    tools:context=".MainActivity">

    <LinearLayout
        android:layout_width="wrap_content"
        android:layout_height="wrap_content"
        android:orientation="horizontal">
        <Button
            android:id="@+id/btn_single"
            android:layout_width="wrap_content"
            android:layout_height="wrap_content"
            android:text="显示单选对话框"/>
        <Button
            android:id="@+id/btn_alert_customer"
            android:layout_width="wrap_content"
            android:layout_height="wrap_content"
            android:text="自定义对话框"/>
    </LinearLayout>
    <ListView
        android:id="@+id/lv_demo"
        android:layout_width="match_parent"
        android:layout_height="wrap_content"/>
</LinearLayout>
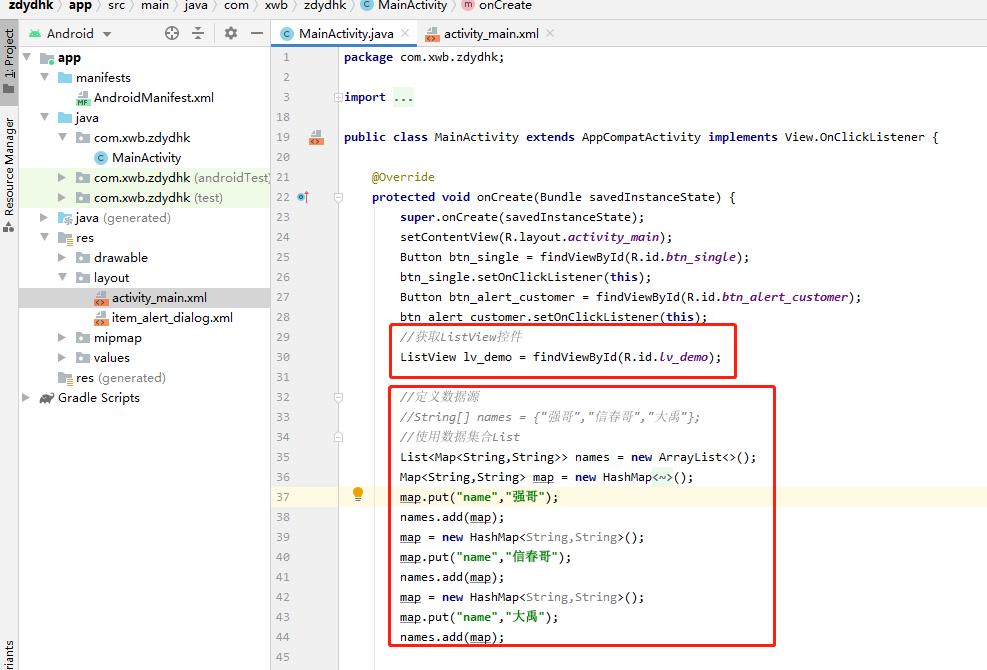
第二步:在MainActivity.java中绑定布局ListView,并设置数据源
第三步:调用安卓自带的单元格布局

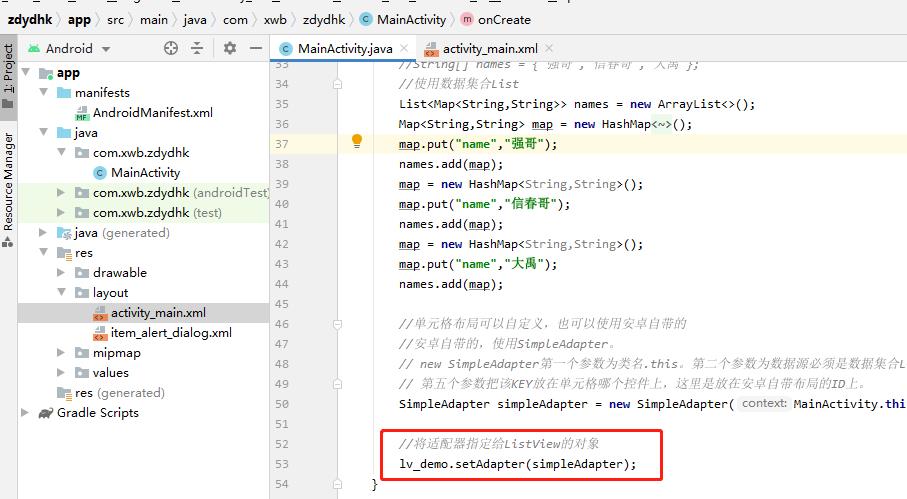
第四步:设置适配器

第五步:适配器调用ListView代码关系
package com.xwb.zdydhk;

import androidx.appcompat.app.AlertDialog;
import androidx.appcompat.app.AppCompatActivity;

import android.content.DialogInterface;
import android.os.Bundle;
import android.view.View;
import android.widget.Button;
import android.widget.ListView;
import android.widget.SimpleAdapter;
import android.widget.Toast;

import java.util.ArrayList;
import java.util.HashMap;
import java.util.List;
import java.util.Map;

public class MainActivity extends AppCompatActivity implements View.OnClickListener

    @Override
    protected void onCreate(Bundle savedInstanceState)
        super.onCreate(savedInstanceState);
        setContentView(R.layout.activity_main);
        Button btn_single = findViewById(R.id.btn_single);
        btn_single.setOnClickListener(this);
        Button btn_alert_customer = findViewById(R.id.btn_alert_customer);
        btn_alert_customer.setOnClickListener(this);
        //获取ListView控件
        ListView lv_demo = findViewById(R.id.lv_demo);

        //定义数据源
        //String[] names = "强哥","信春哥","大禹";
        //使用数据集合List
        List<Map<String,String>> names = new ArrayList<>();
        Map<String,String> map = new HashMap<String,String>();
        map.put("name","强哥");
        names.add(map);
        map = new HashMap<String,String>();
        map.put("name","信春哥");
        names.add(map);
        map = new HashMap<String,String>();
        map.put("name","大禹");
        names.add(map);

        //单元格布局可以自定义,也可以使用安卓自带的
        //安卓自带的,使用SimpleAdapter。
        // new SimpleAdapter第一个参数为类名.this。第二个参数为数据源必须是数据集合List。第三个参数为单元格布局,第四个参数from显示Key。
        // 第五个参数把该KEY放在单元格哪个控件上,这里是放在安卓自带布局的ID上。
        SimpleAdapter simpleAdapter = new SimpleAdapter(MainActivity.this,names, android.R.layout.simple_list_item_1,new String[]"name",new int[]android.R.id.text1);

        //将适配器指定给ListView的对象
        lv_demo.setAdapter(simpleAdapter);

    @Override
    public void onClick(View v)
        AlertDialog.Builder builder = new AlertDialog.Builder(this);
        switch (v.getId())
            case R.id.btn_single:
                builder.setTitle("单选对话框").setIcon(R.mipmap.ic_launcher).setSingleChoiceItems(new String[]"中国", "德国", "日本", 0, new DialogInterface.OnClickListener()
                    @Override
                    public void onClick(DialogInterface dialog, int which)
                        Toast.makeText(MainActivity.this,"选中的"+which,Toast.LENGTH_SHORT).show();

                );
                break;
            case R.id.btn_alert_customer:
                //setView(R.layout.item_alert_dialog)为自定义的对话框
                builder.setTitle("自定义对话框").setIcon(R.mipmap.ic_launcher).setView(R.layout.item_alert_dialog);
                break;

        AlertDialog ad = builder.create();
        ad.show();
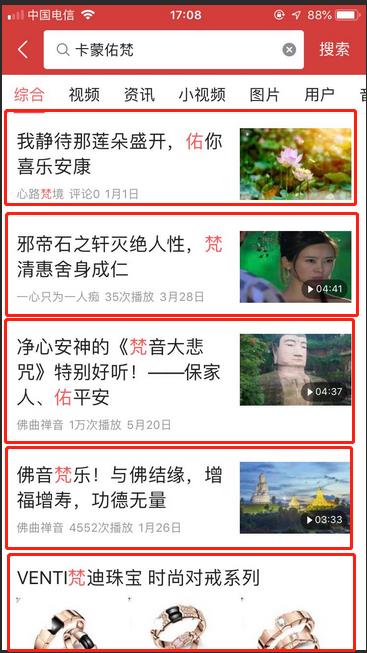
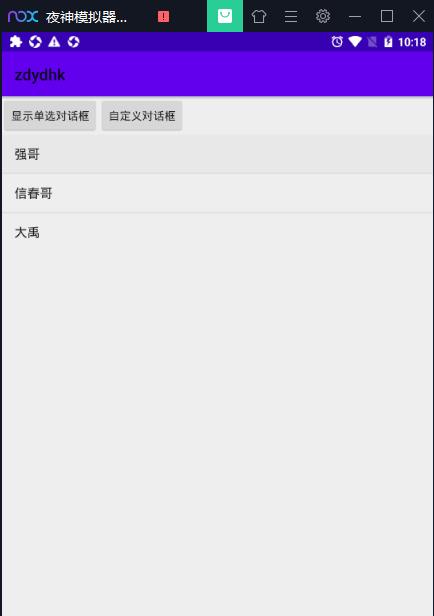
第六步:运行APP的效果,就像今日头条中各个新闻栏目一样的ListView展示
以上是关于Android Studio基础ListView之SimpleAdapter的主要内容,如果未能解决你的问题,请参考以下文章