vscodesftp同步修改代码
Posted BHY_
tags:
篇首语:本文由小常识网(cha138.com)小编为大家整理,主要介绍了vscodesftp同步修改代码相关的知识,希望对你有一定的参考价值。
1 安装SFTP

2 配置SFTP,使用Ctrl+Shift+P。输入sftp:config

将sftp.json文件内容修改为以下配置
    "host": "远程服务器IP地址",
    "port": 22,
    "username": "远程服务器登录名",
    "password": "远程服务器密码",
    "protocol": "sftp",
    "agent": null,
    "privateKeyPath": null,
    "passphrase": null,
    "passive": false,
    "interactiveAuth": true,
    "remotePath": "远程服务器路径,如(/usr/local/...)",
    "uploadOnSave": true,
    "syncMode": "update",
    "ignore": [
        "**/.vscode/**",
        "**/.git/**",
        "**/.DS_Store"
    ],
    "watcher":
        "files": "glob",
        "autoUpload": true,
        "autoDelete": true
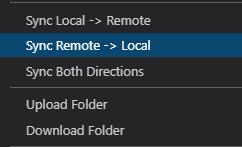
3 代码下载,在vscode的资源管理器【左上角】,右键选择同步到本地,注意软链接的文件是无法同步过来的

4 代码上传,由于config文件里配置了uploadOnSave,本地修改后自动完成上传
5 远程执行命令等操作,在vscode的sftp【左边栏目里】,然后右键open ssh in terminal,即可打开终端

6 代码差异比较,不论本地svn还是git仓,都可以通过其他工具进行比对代码修改情况(注意调节config文件的ignore属性)
以上是关于vscodesftp同步修改代码的主要内容,如果未能解决你的问题,请参考以下文章