jenkins常用构建触发器,SonarQube代码审查
Posted 水木,年華
tags:
篇首语:本文由小常识网(cha138.com)小编为大家整理,主要介绍了jenkins常用构建触发器,SonarQube代码审查相关的知识,希望对你有一定的参考价值。
Jenkins项目构建细节(1)-常用的构建触发器
Jenkins内置4种构建触发器:
①触发远程构建
②其他工程构建后触发(Build after other projects are build)
③定时构建(Build periodically)
④轮询SCM(Poll SCM)

触发远程构建

触发构建url:http://192.168.66.101:8888/job/web_demo_pipeline/build?token=6666
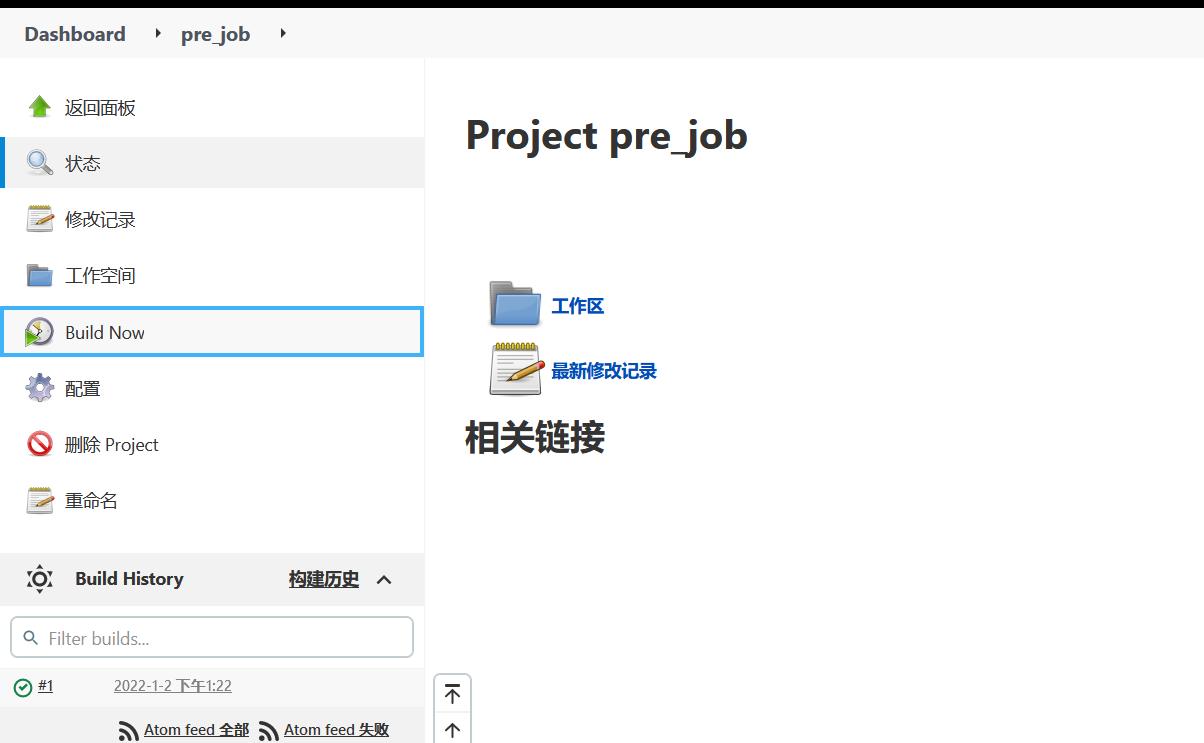
其他工程构建后触发
1)配置需要触发的工程
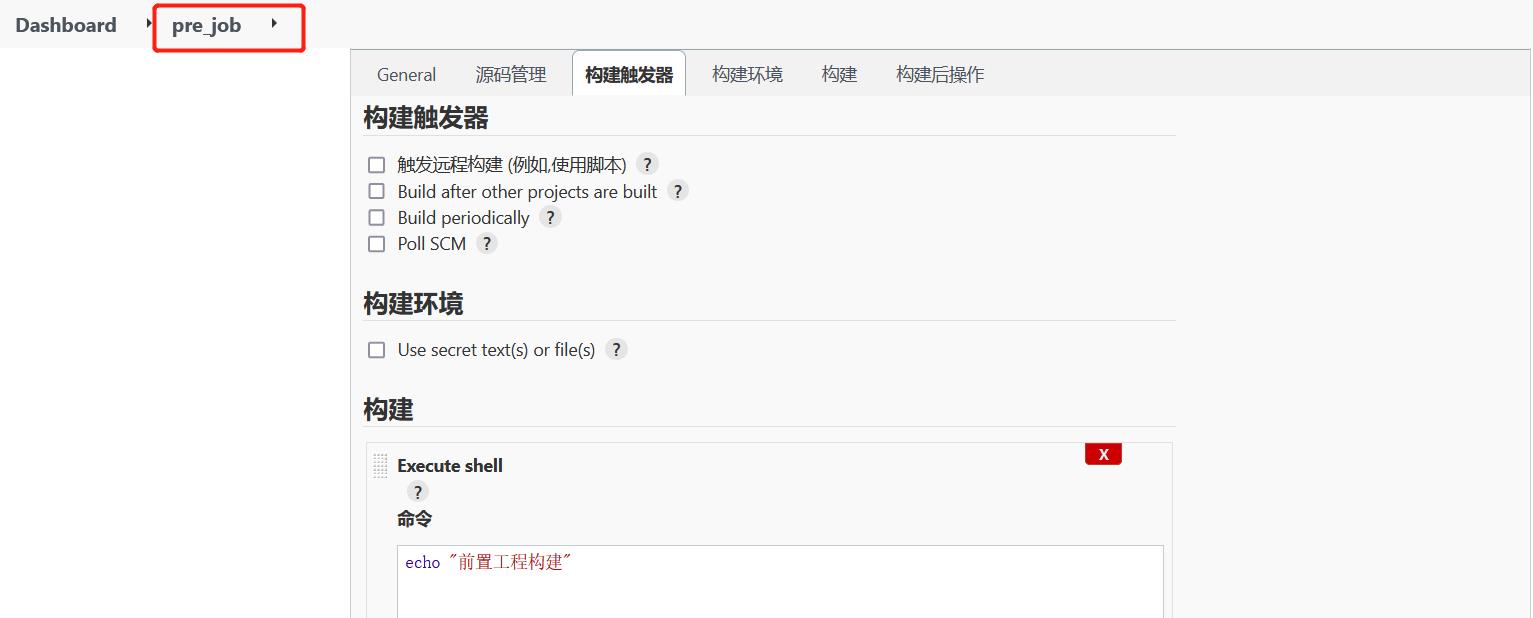
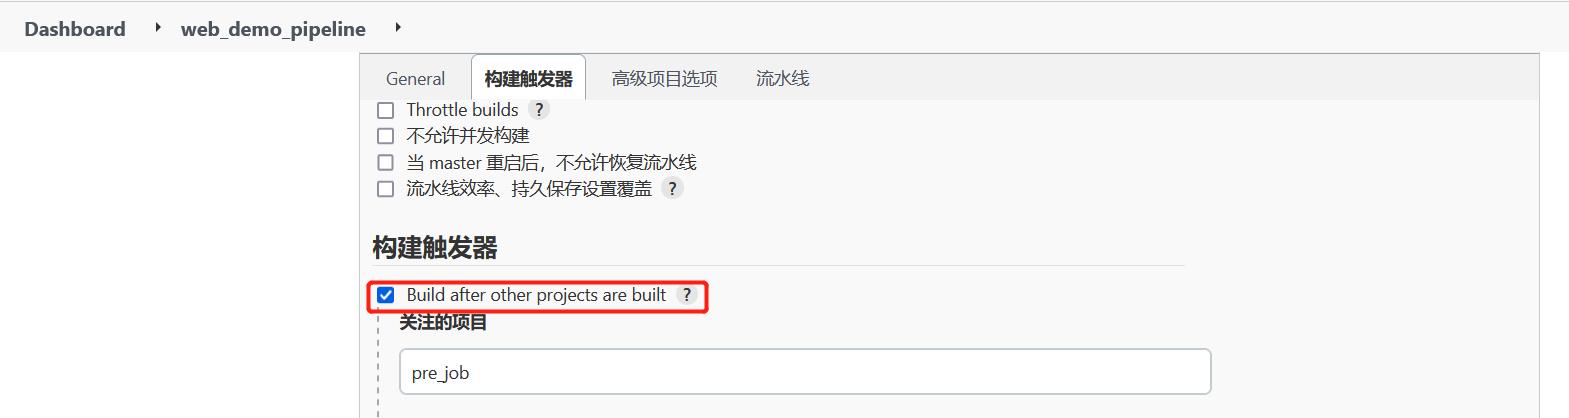
2)构建前置工程后,当前项目也随之构建。
定时构建
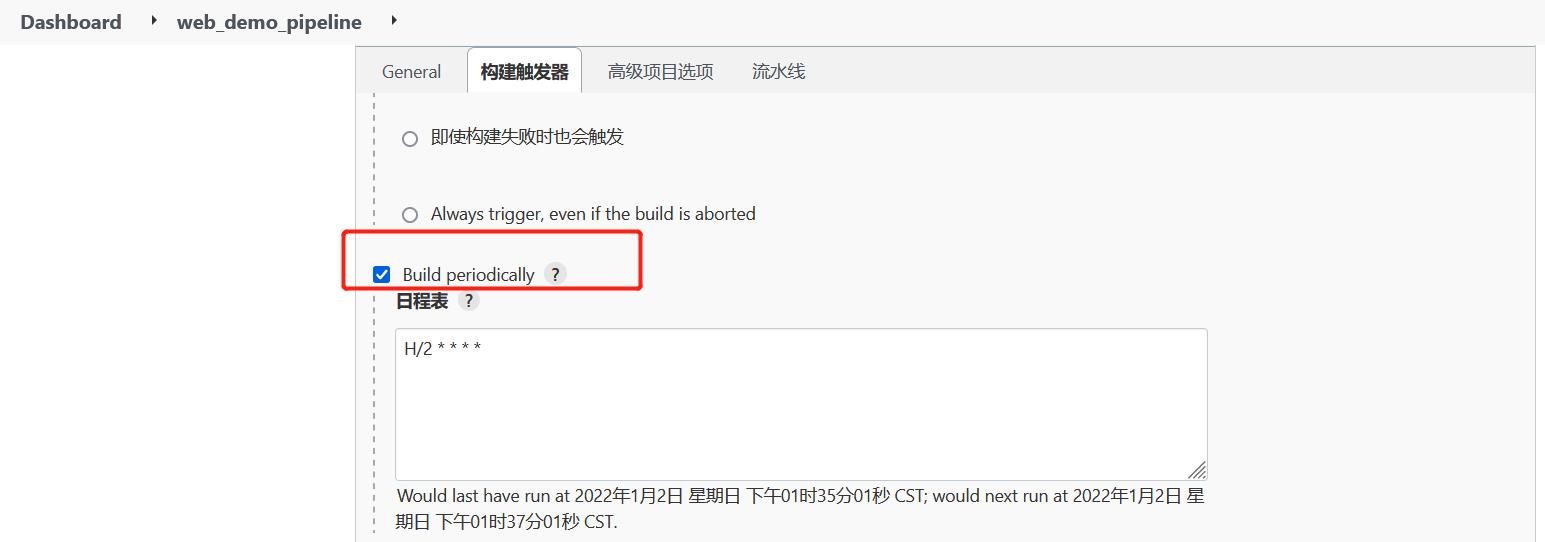
定时字符串从左往右分别为: 分 时 日 月 周
一些定时表达式的例子:
每30分钟构建一次:H代表形参 H/30 * * * * 10:02 10:32
每2个小时构建一次: H H/2 * * *
每天的8点,12点,22点,一天构建3次: (多个时间点中间用逗号隔开) 0 8,12,22 * * *
每天中午12点定时构建一次 H 12 * * *
每天下午18点定时构建一次 H 18 * * *
在每个小时的前半个小时内的每10分钟 H(0-29)/10 * * * *
每两小时一次,每个工作日上午9点到下午5点(也许是上午10:38,下午12:38,下午2:38,下午
4:38) H H(9-16)/2 * * 1-5
轮询SCM
轮询SCM,是指定时扫描本地代码仓库的代码是否有变更,如果代码有变更就触发项目构建。
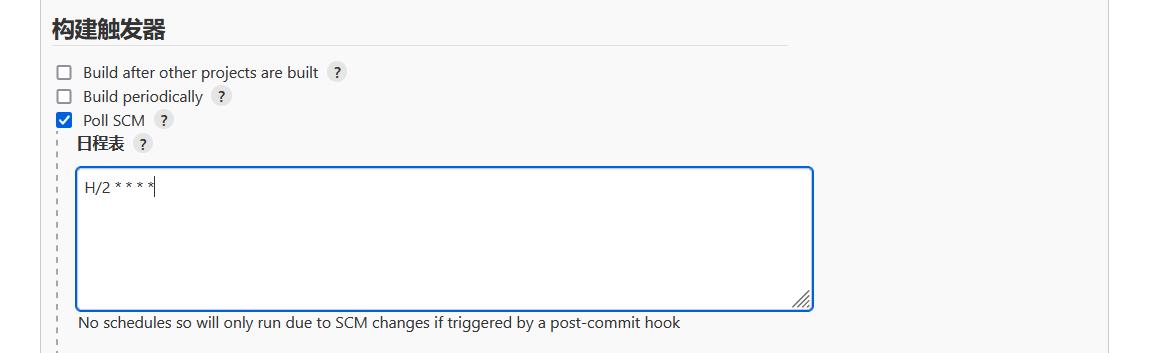
注意:这次构建触发器,Jenkins会定时扫描本地整个项目的代码,增大系统的开销,不建议使用。
Jenkins项目构建细节(2)-Git hook自动触发构建
刚才我们看到在Jenkins的内置构建触发器中,轮询SCM可以实现Gitlab代码更新,项目自动构建,但是
该方案的性能不佳。那有没有更好的方案呢? 有的。就是利用Gitlab的webhook实现代码push到仓
库,立即触发项目自动构建。

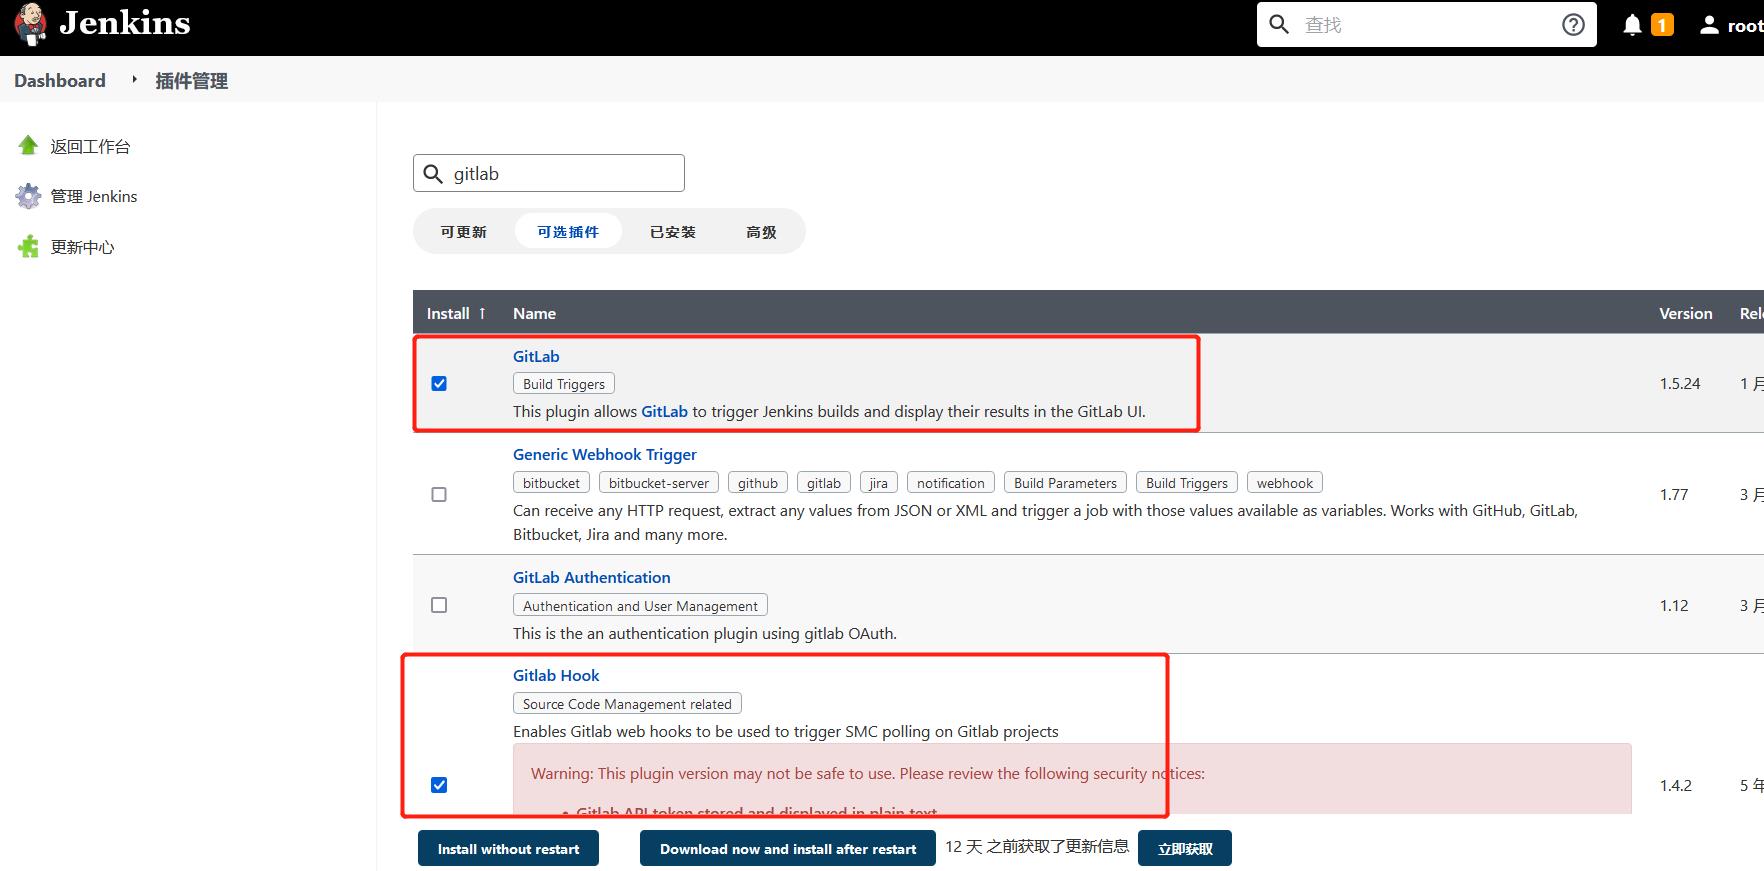
安装Gitlab Hook插件
需要安装两个插件:
Gitlab Hook和GitLab
Jenkins设置自动构建:
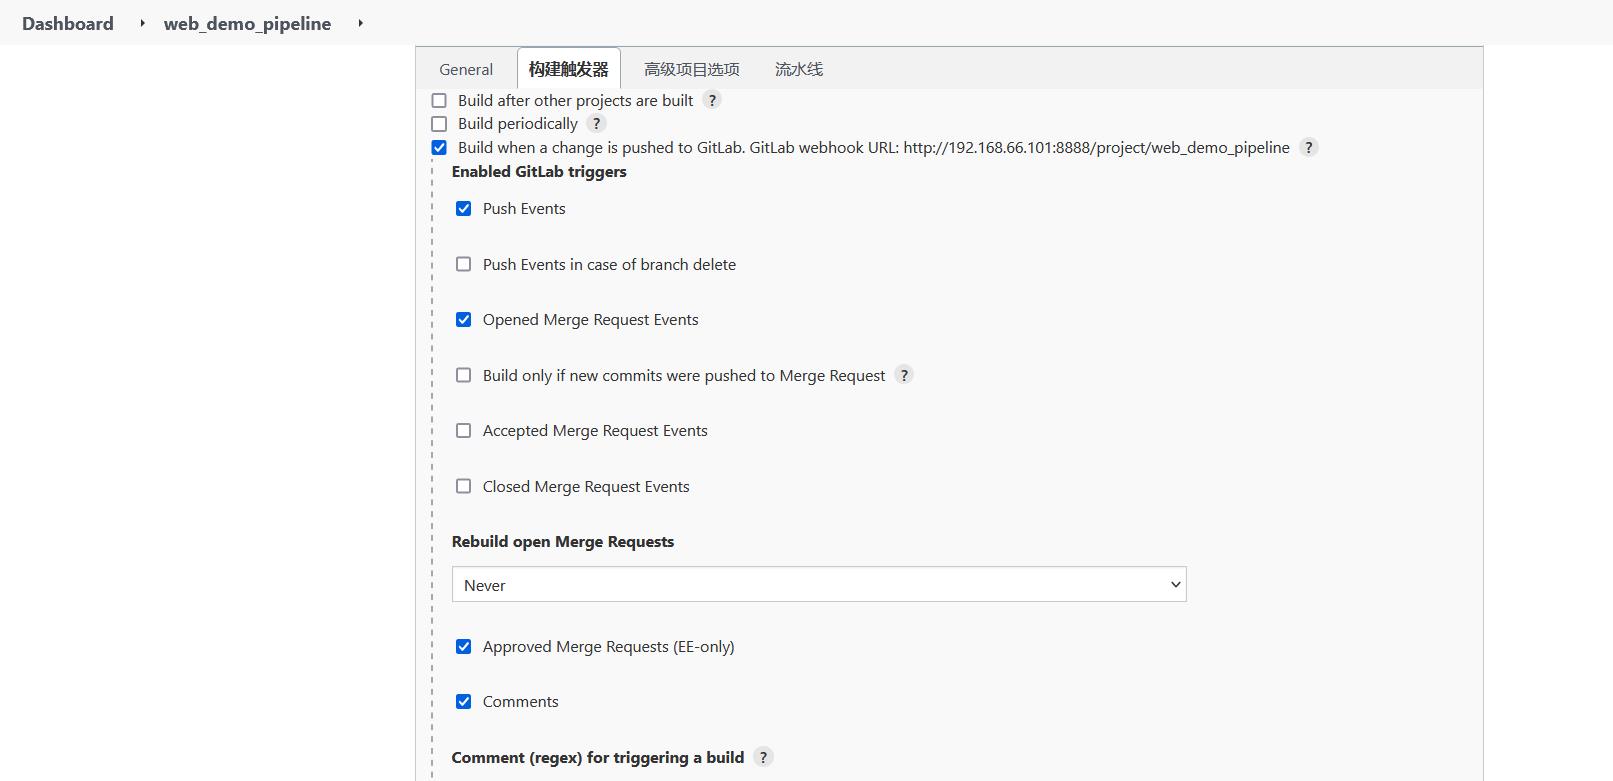
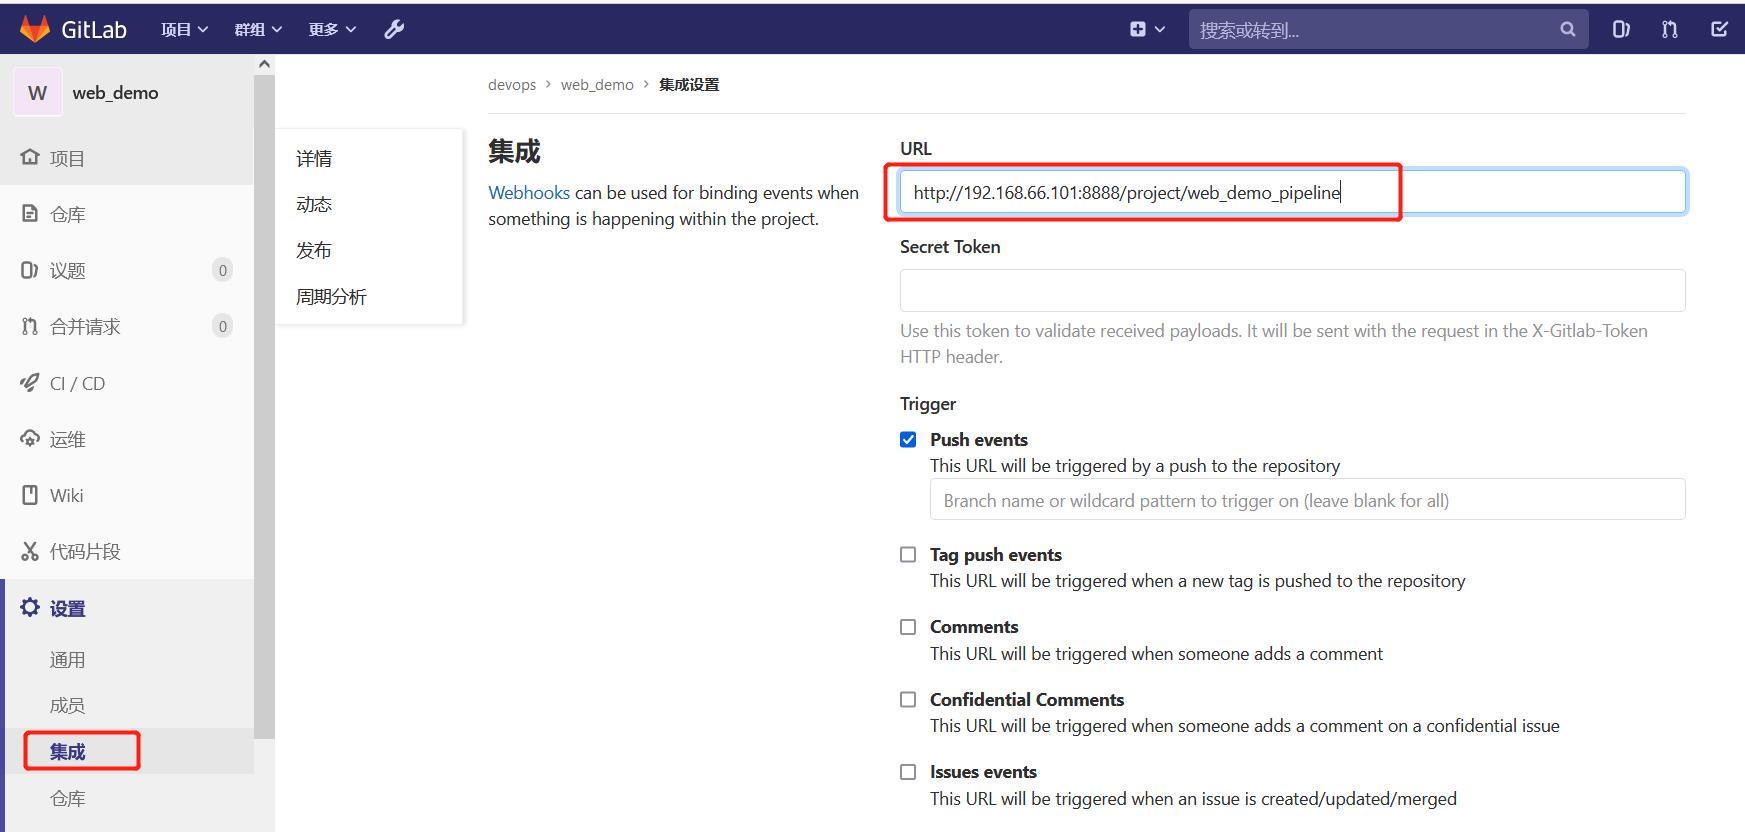
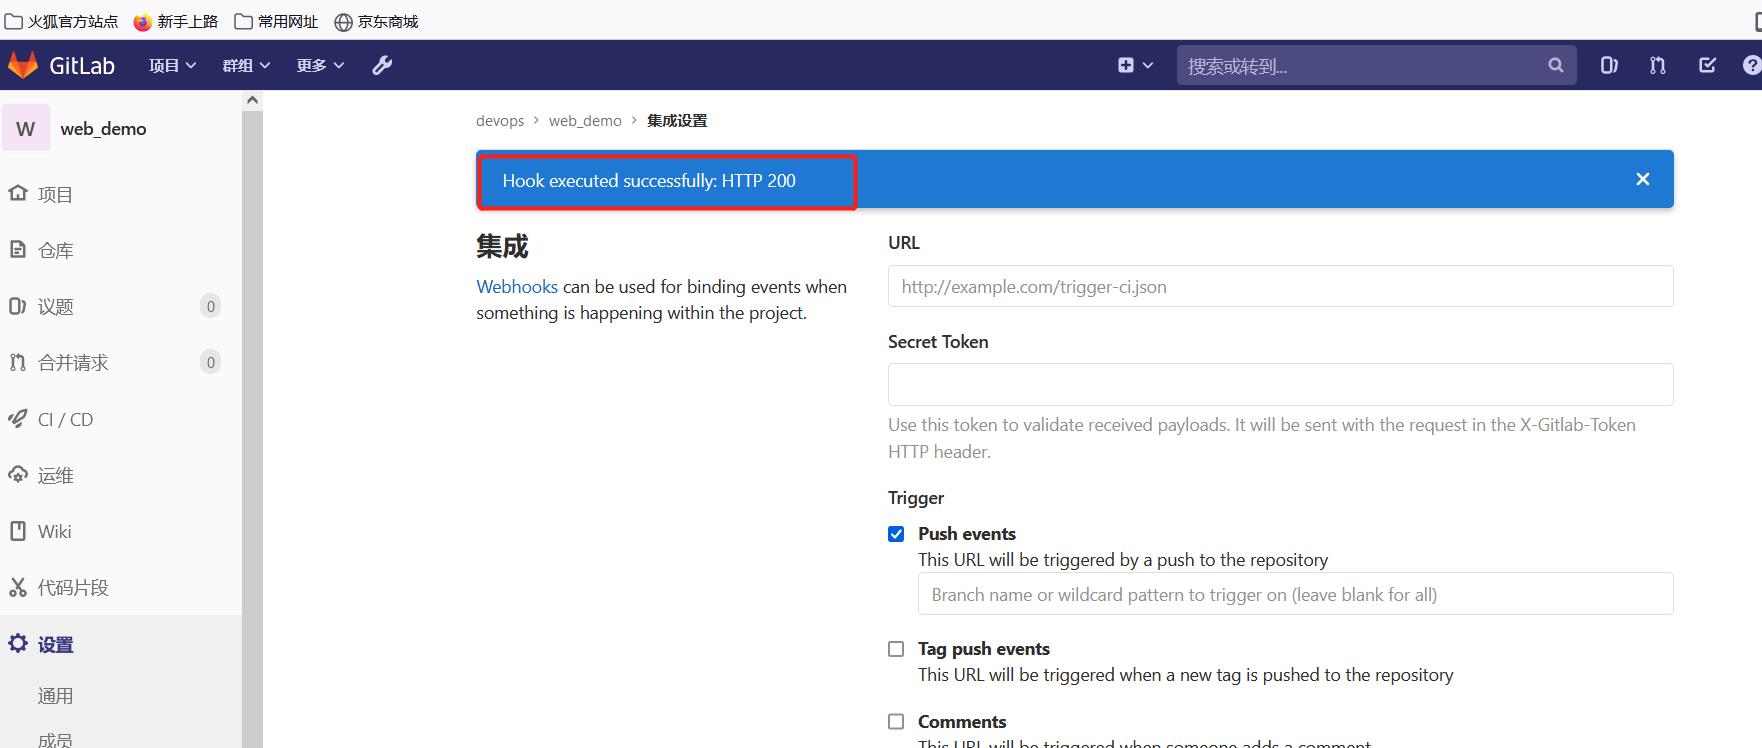
再把生成的webhook URL配置到Gitlab中。
Gitlab配置webhook
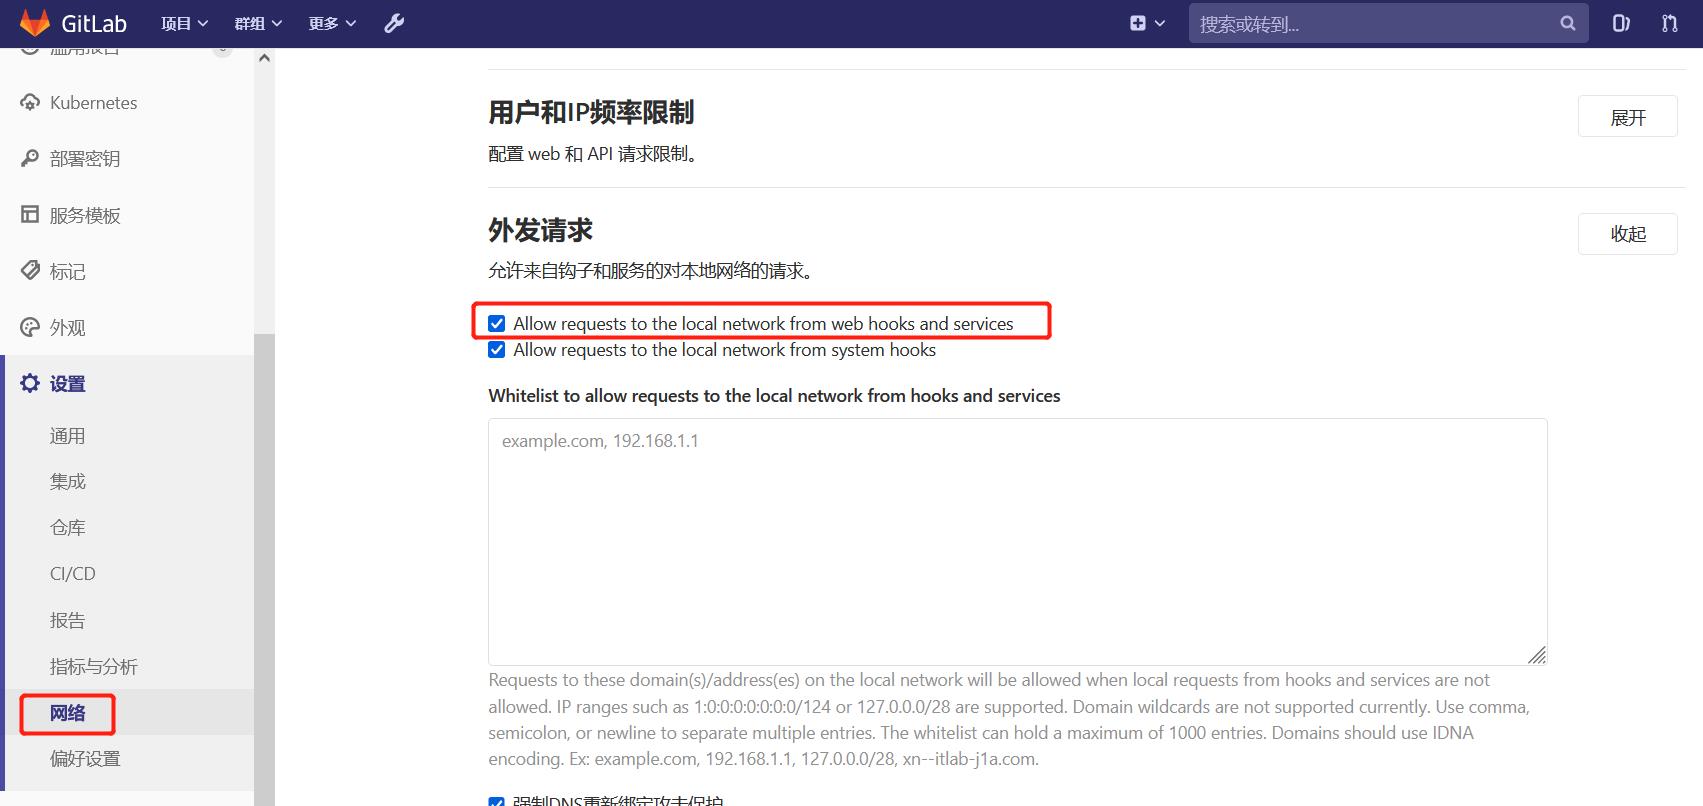
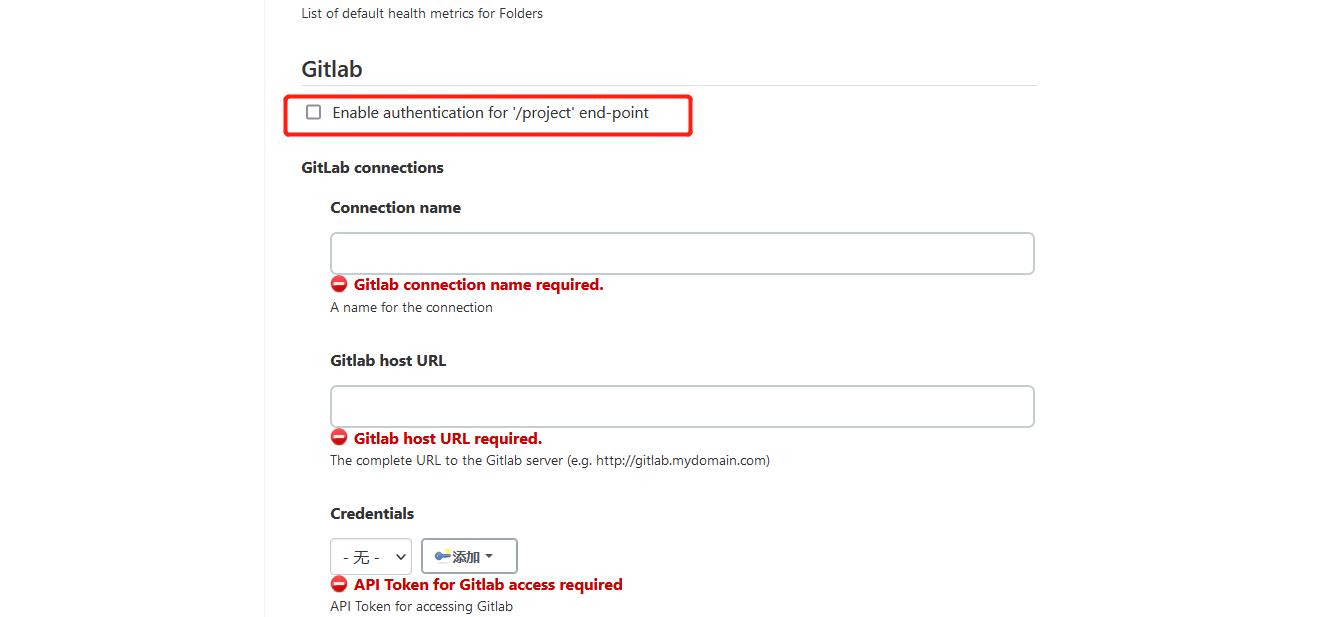
使用root账户登录到后台,点击Admin Area -> Settings -> Network
勾选"Allow requests to the local network from web hooks and services"
2)在项目添加webhook
点击项目->Settings->Integrations
以下设置必须完成,否则会报错!
Manage Jenkins->Configure System
测试成功
Jenkins项目构建细节(3)-Jenkins的参数化构建
有时在项目构建的过程中,我们需要根据用户的输入动态传入一些参数,从而影响整个构建结果,这时
我们可以使用参数化构建。
Jenkins支持非常丰富的参数类型
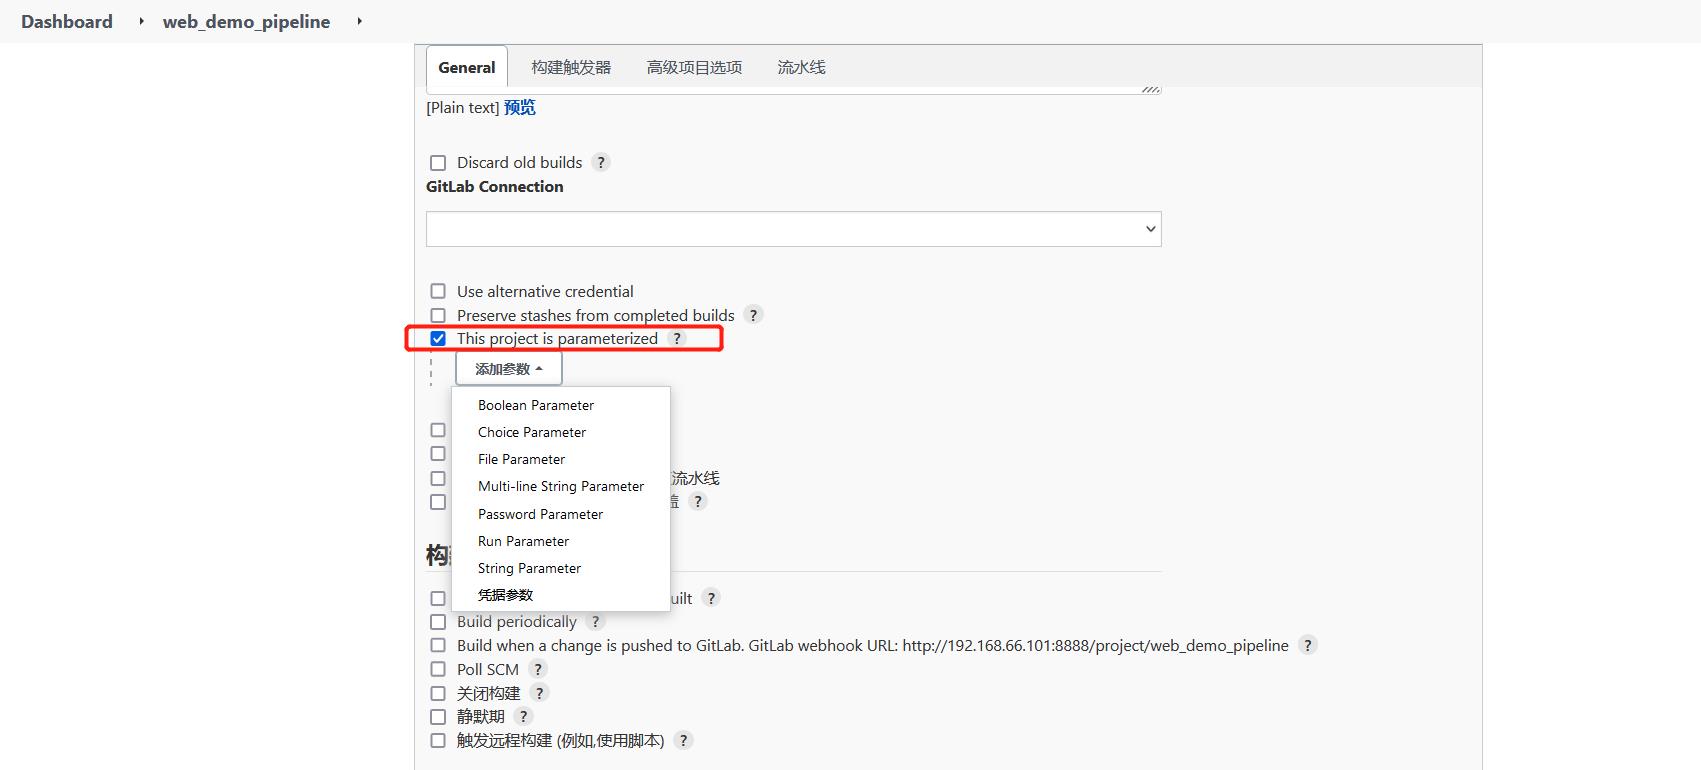
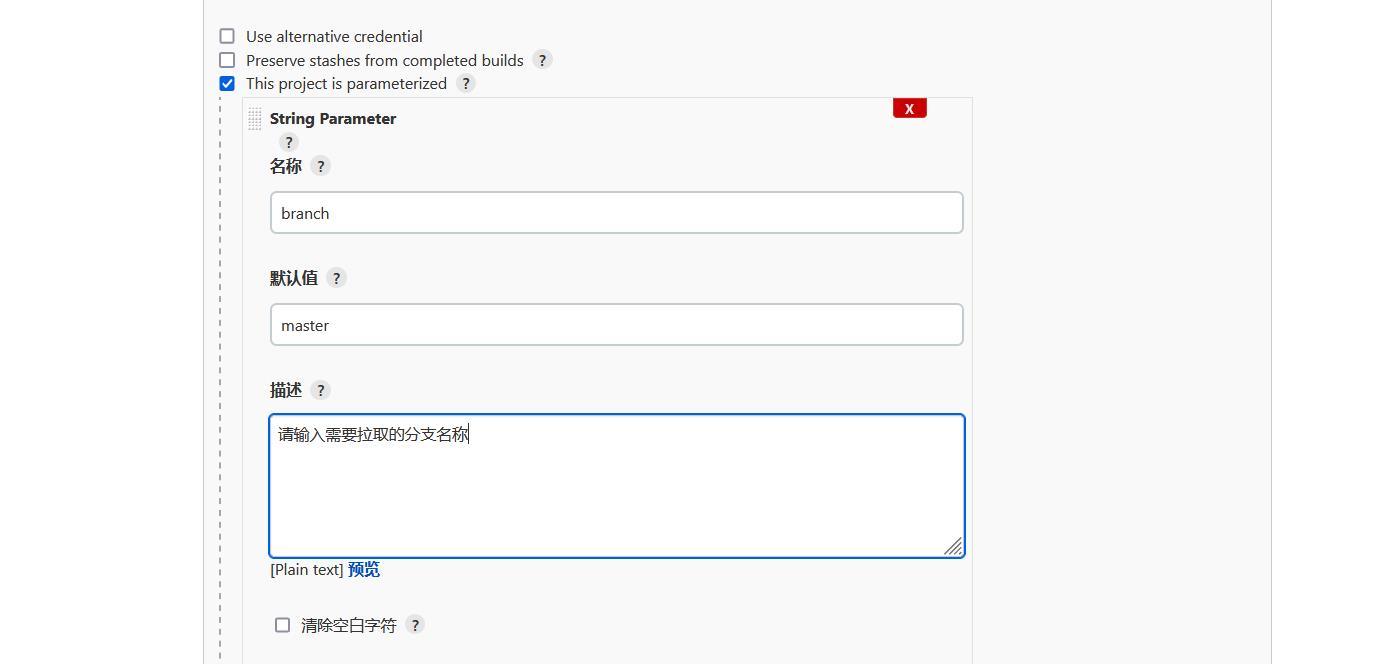
改动pipeline流水线代码

接下可以通过输入gitlab项目的分支名称来部署不同分支项目。

Jenkins+SonarQube代码审查 - 安装SonarQube
SonarQube是一个用于管理代码质量的开放平台,可以快速的定位代码中潜在的或者明显的错误。目前
支持java,C#,C/C++,Python,PL/SQL,Cobol,JavaScrip,Groovy等二十几种编程语言的代码质量管理与检
测。
官网:https://www.sonarqube.org/
环境要求

安装SonarQube
1)安装mysql
2)安装SonarQube
在MySQL创建sonar数据库

下载sonar压缩包:
https://www.sonarqube.org/downloads/
解压sonar,并设置权限
unzip sonarqube-6.7.4.zip 解压
mkdir /opt/sonar 创建目录
mv sonarqube-6.7.4/* /opt/sonar 移动文件
useradd sonar 创建sonar用户,必须sonar用于启动,否则报错
chown -R sonar. /opt/sonar 更改sonar目录及文件权限
修改sonar配置文件
vi /opt/sonarqube-6.7.4/conf/sonar.properties

启动sonar
cd /opt/sonarqube-6.7.4
su sonar ./bin/linux-x86-64/sonar.sh start 启动
su sonar ./bin/linux-x86-64/sonar.sh status 查看状态
su sonar ./bin/linux-x86-64/sonar.sh stop 停止
tail -f logs/sonar.logs 查看日志
访问sonar
http://192.168.66.101:9000

创建token

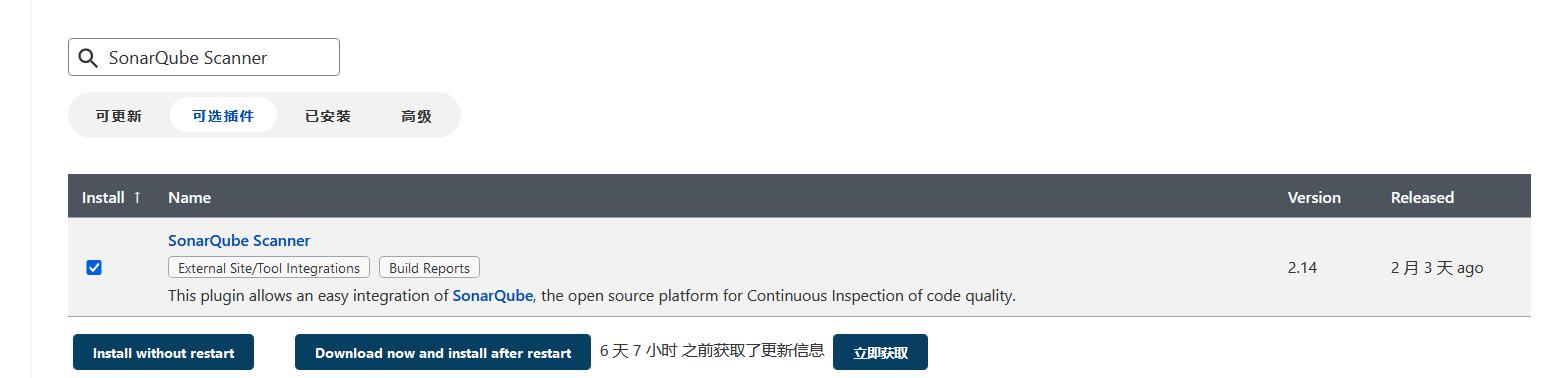
Jenkins+SonarQube代码审查(2) - 实现代码审查

安装SonarQube Scanner插件
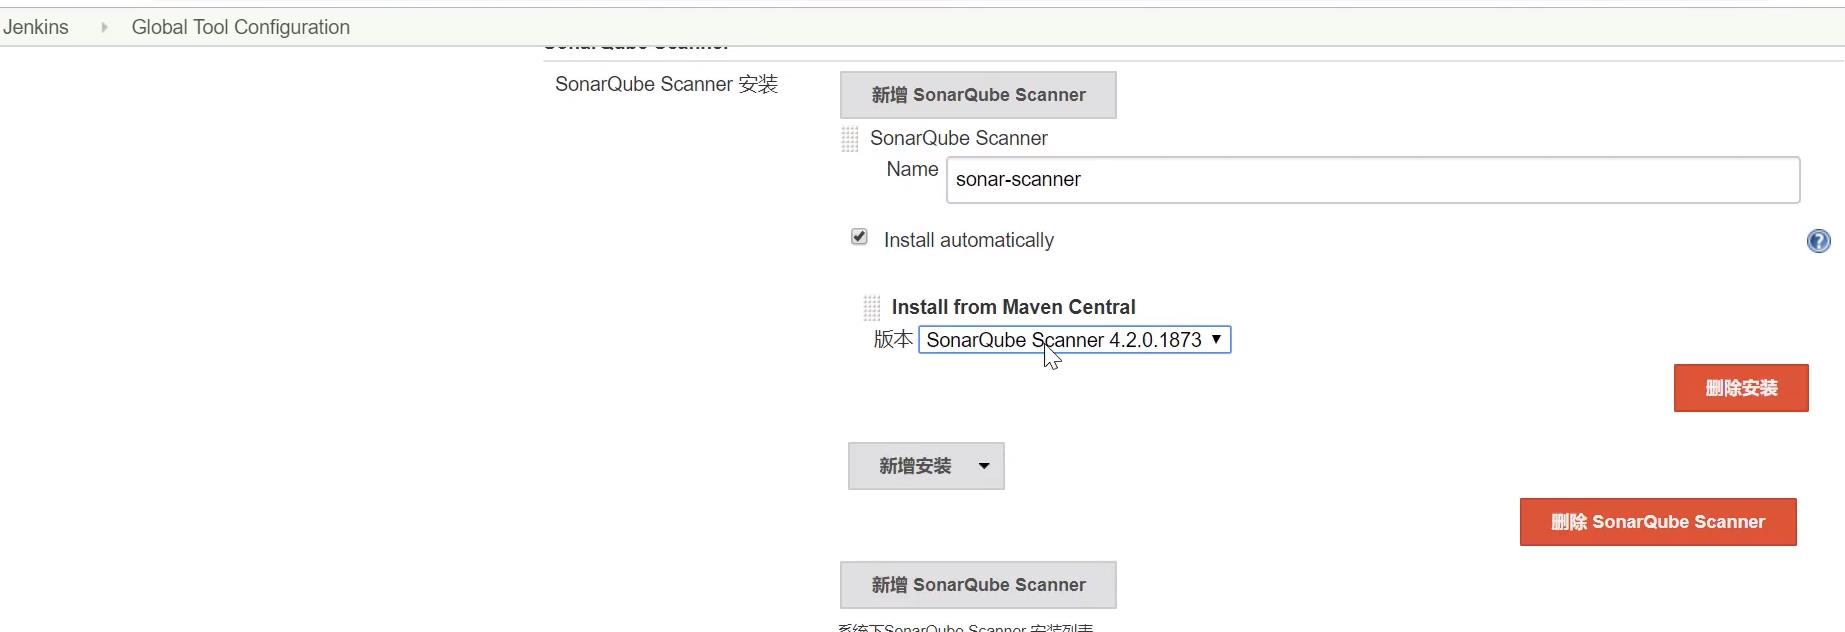
Jenkins安装SonarQube Scanner软件
Manage Jenkins->Global Tool Configuration
添加SonarQube凭证
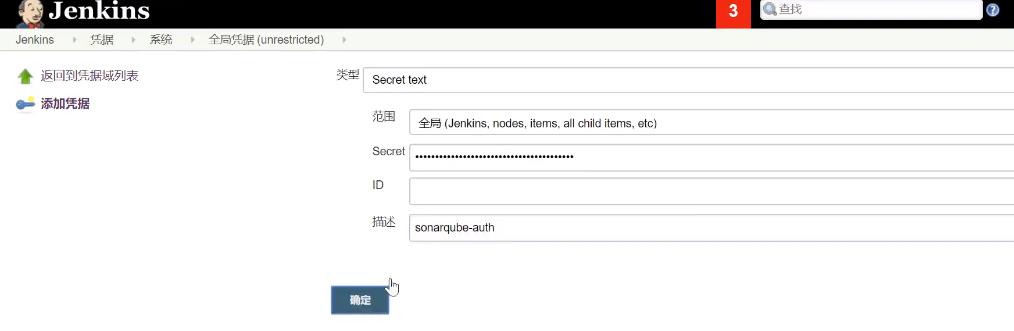
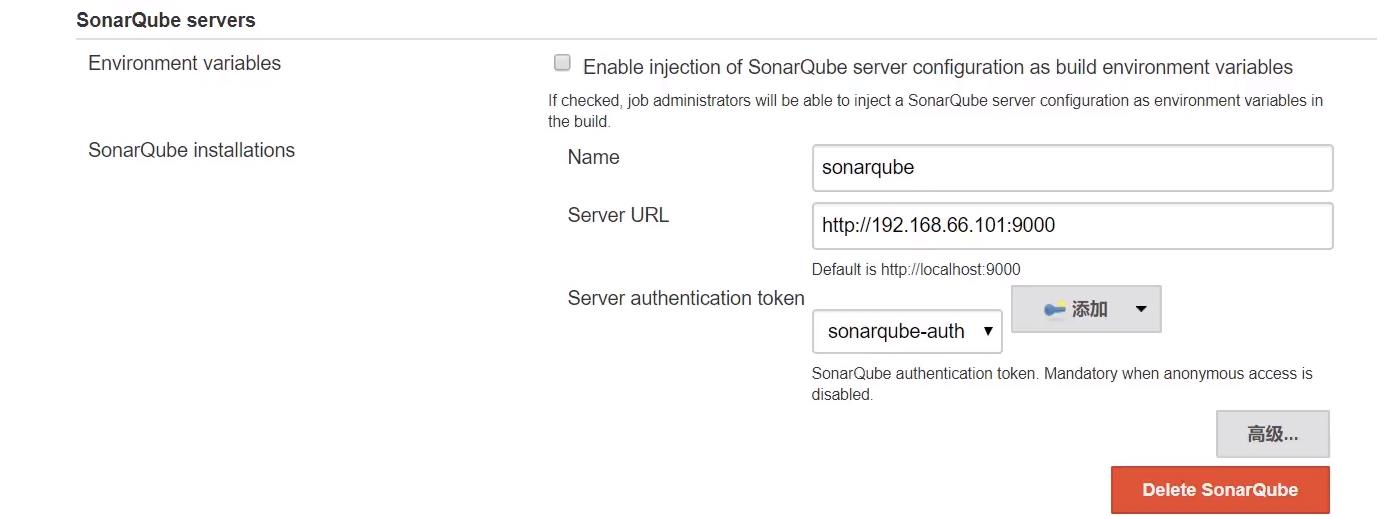
进行SonarQube配置
Manage Jenkins->Configure System->SonarQube servers
在项目添加SonaQube代码审查(非流水线项目)
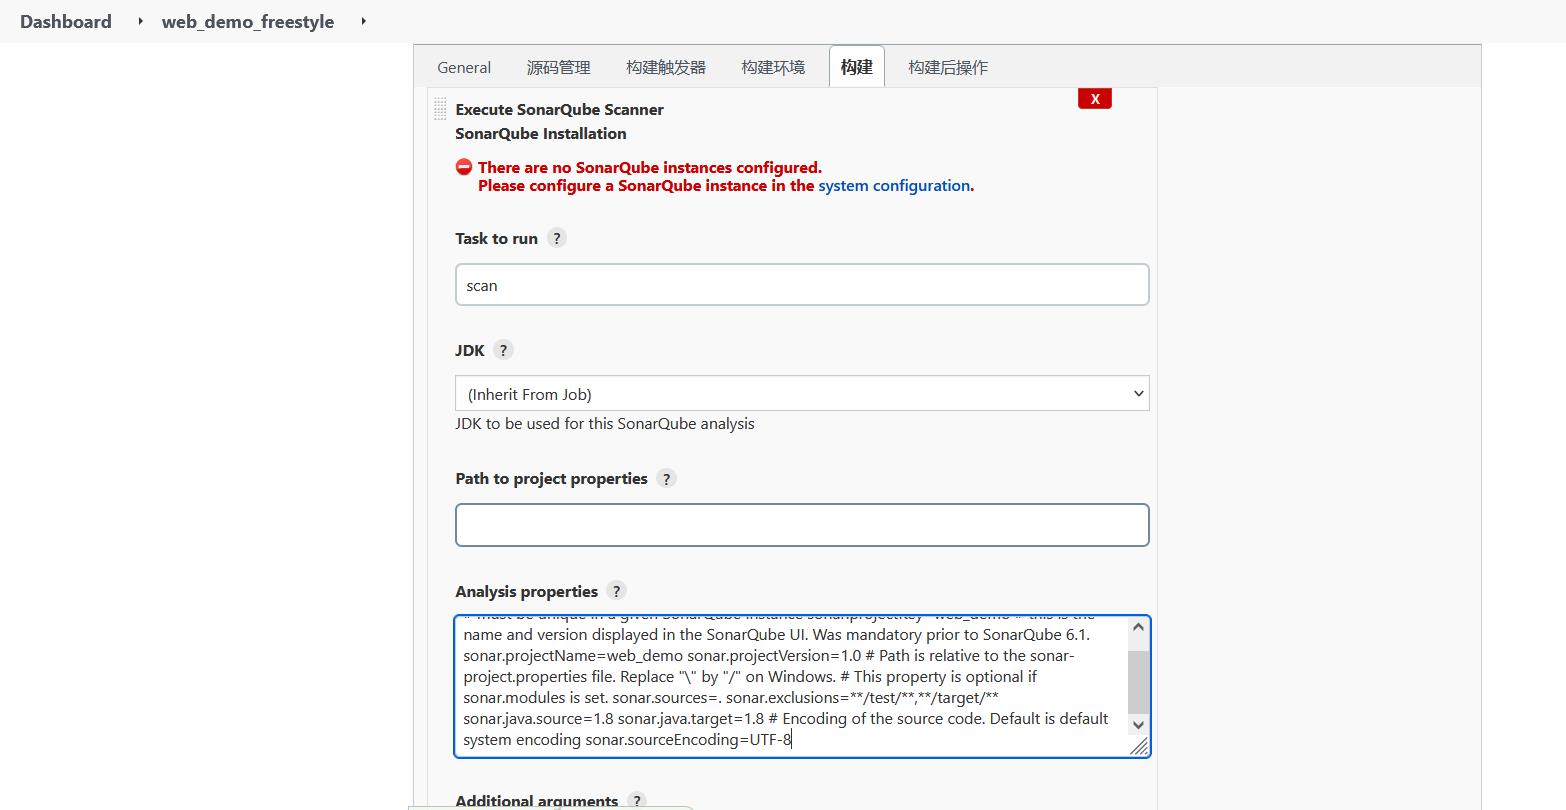
# must be unique in a given SonarQube instance
sonar.projectKey=web_demo
# this is the name and version displayed in the SonarQube UI. Was mandatory prior to SonarQube 6.1.
sonar.projectName=web_demo
sonar.projectVersion=1.0
# Path is relative to the sonar-project.properties file. Replace "\\" by "/" on Windows. # This property is optional if sonar.modules is set.
sonar.sources=.
sonar.exclusions=**/test/**,**/target/**
sonar.java.source=1.8 sonar.java.target=1.8
#Encoding of the source code. Default is default system encoding
sonar.sourceEncoding=UTF-8
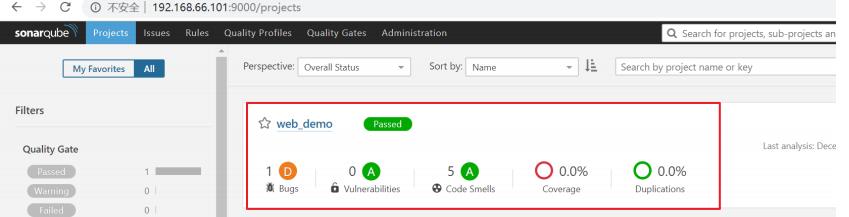
构建之后在,sonarQube UI界面可以审查到
在项目添加SonaQube代码审查(流水线项目)
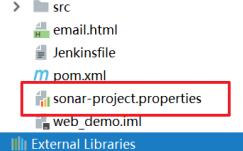
1)项目根目录下,创建sonar-project.properties文件
# must be unique in a given SonarQube instance
sonar.projectKey=web_demo
# this is the name and version displayed in the SonarQube UI. Was mandatory prior to SonarQube 6.1.
sonar.projectName=web_demo
sonar.projectVersion=1.0
# Path is relative to the sonar-project.properties file. Replace "\\" by "/" on Windows. # This property is optional if sonar.modules is set.
sonar.sources=.
sonar.exclusions=**/test/**,**/target/**
sonar.java.source=1.8
sonar.java.target=1.8
# Encoding of the source code. Default is default system encoding sonar.sourceEncoding=UTF-8
)修改Jenkinsfile,加入SonarQube代码审查阶段
pipeline
  agent any
  stages
        stage('拉取代码')
          steps
           checkout([$class: 'GitSCM', branches: [[name: '*/master']], doGenerateSubmoduleConfigurations: false, extensions: [], submoduleCfg: [], userRemoteConfigs: [[credentialsId: '68f2087f-a034-4d39-a9ff-1f776dd3dfa8', url: 'git@192.168.66.100:itheima_group/web_demo.git']]])


       stage('编译构建')
        steps
          sh label: '', script: 'mvn clean package'


      stage('SonarQube代码审查')
        steps
          script  scannerHome = tool 'sonarqube-scanner' withSonarQubeEnv('sonarqube6.7.4')  sh "$scannerHome/bin/sonar-scanner"


     stage('项目部署')
       steps  deploy adapters: [tomcat8(credentialsId: 'afc43e5e-4a4e-4de6-984f- b1d5a254e434', path: '', url: 'http://192.168.66.102:8080')], contextPath: null, war: 'target/*.war'


  post  always  emailext( subject: '构建通知:$PROJECT_NAME - Build # $BUILD_NUMBER - $BUILD_STATUS!', body: '$FILE,path="email.html"', to: '@1074122847qq.com'
     )
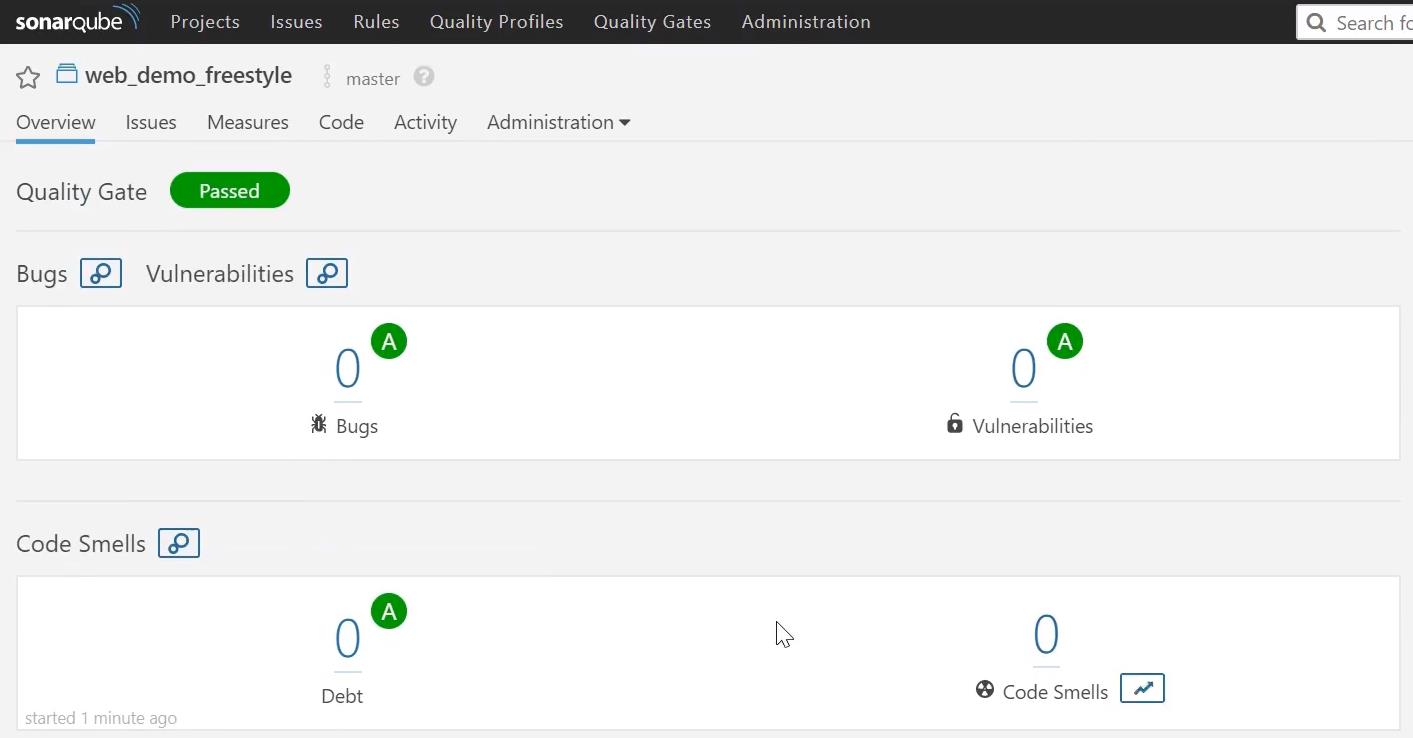
3)到SonarQube的UI界面查看审查结果
以上是关于jenkins常用构建触发器,SonarQube代码审查的主要内容,如果未能解决你的问题,请参考以下文章