一步两步带你实现Android沉浸式设计
Posted 花花young
tags:
篇首语:本文由小常识网(cha138.com)小编为大家整理,主要介绍了一步两步带你实现Android沉浸式设计相关的知识,希望对你有一定的参考价值。
前言
沉浸式不知道什么时候有了两种叫法,一种是沉浸式模式,一种是沉浸式状态栏,Google从android4.4开始,给我们开发者提供了一套透明的系统UI样式给状态栏和导航栏,这样完美的玩法简直和ios系统媲美了。
Part 1、沉浸式模式
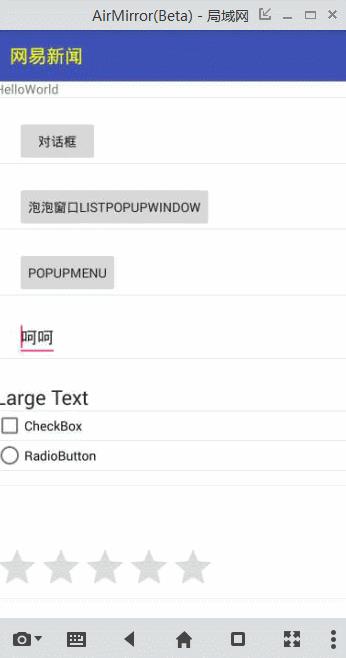
public void toggle(View view)
        int options = getWindow().getDecorView().getSystemUiVisibility();
        if (Build.VERSION.SDK_INT >= 14)
            options ^= View.SYSTEM_UI_FLAG_HIDE_NAVIGATION;//隐藏导航条

        if (Build.VERSION.SDK_INT >= 16)
            options ^= View.SYSTEM_UI_FLAG_FULLSCREEN;//隐藏系统栏

        if (Build.VERSION.SDK_INT >= 19)
            //这里有两种沉浸模式
            //SYSTEM_UI_FLAG_IMMERSIVE_STICKY 你在系统栏区域滑动使得系统栏显示为半透明,
            // 但是你的flag并没有被清除,监听没有被触发,这个系统栏会自动隐藏

            //SYSTEM_UI_FLAG_IMMERSIVE 你在系统栏区域滑动使得系统栏显示,将会保持可见的状态
            options ^= View.SYSTEM_UI_FLAG_IMMERSIVE_STICKY;

        getWindow().getDecorView().setSystemUiVisibility(options);
如果你想给单个设置,只需要按照下面的参数进行设置即可
getWindow().getDecorView().setSystemUiVisibility(
                View.SYSTEM_UI_FLAG_LAYOUT_STABLE  //稳定布局
                        | View.SYSTEM_UI_FLAG_LAYOUT_HIDE_NAVIGATION
                        | View.SYSTEM_UI_FLAG_LAYOUT_FULLSCREEN
                        | View.SYSTEM_UI_FLAG_HIDE_NAVIGATION //隐藏导航栏
                        | View.SYSTEM_UI_FLAG_FULLSCREEN //隐藏系统栏
                        | View.SYSTEM_UI_FLAG_IMMERSIVE);
Part 2、沉浸式状态栏
在Android5.0+自动实现了沉浸式的效果,状态栏的颜色跟随你在主题中的colorPrimaryDark属性,通过样式进行修改
<item name="android:statusBarColor">@color/system_bottom_nav_color</item> getWindow().setStatusBarColor(getResources().getColor(R.color.material_blue_grey_800)); <item name="android:windowTranslucentStatus">true</item>getWindow().addFlags(WindowManager.LayoutParams.FLAG_TRANSLUCENT_STATUS);似乎设置起来很简单,但是上面的两种会出现严重的bug,状态栏遮挡住了ToolBar

面对这样的情况我们快速想到的就是加上android:fitsSystemWindows="true",那么在哪层布局加呢?首先我们先来说一下这个属性的含义:设置布局时,是否考虑当前系统窗口的布局,如果为true就会调整整个系统窗口布局(包括状态栏的view)以适应你的布局,不妨我们尝试一下给ToolBar添加android:fitsSystemWindows="true"
效果~
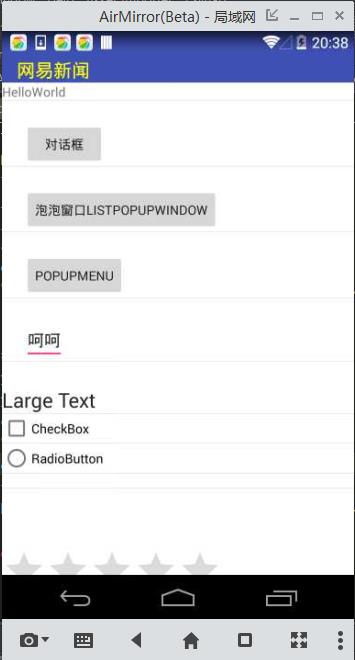
然而ToolBar向上移填充了状态栏部分,这也验证了android:fitsSystemWindows="true"只是让系统窗口布局去适应你设置的控件,针对上面这种效果提供了两种解决方案
1、<推荐>将android:fitsSystemWindows="true"放在最外层的容器,或者你也可以在代码中进行设置
ViewGroup contentView = (ViewGroup) findViewById(Window.ID_ANDROID_CONTENT);//得到屏幕不包括标题栏的区域
        View rootView = contentView.getChildAt(0);//得到xml的根布局
        if(rootView != null && Build.VERSION.SDK_INT >= 14)
            rootView.setFitsSystemWindows(true);
效果~
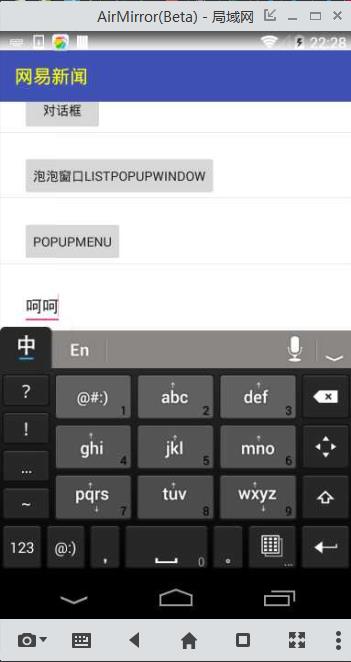
发现给布局最外层容器设置android:fitsSystemWindows="true" 可以达到状态栏透明,并且露出底色---android:windowBackground颜色,这时候需要直接将最外层容器(也可以修改-android:windowBackground颜色)设置成状态栏想要的颜色,下面剩下的布局再包裹一层正常的背景颜色。
效果~
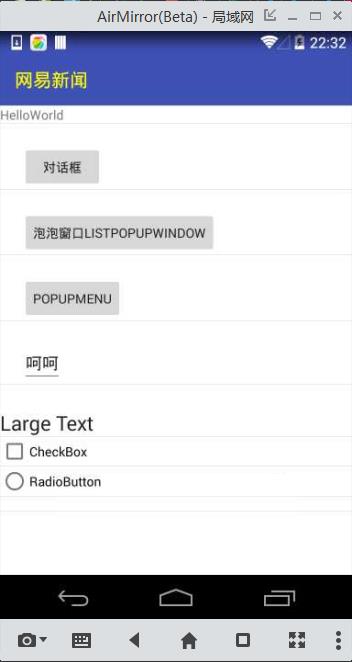
这种解决方案不仅可以解决了状态栏遮挡ToolBar的问题,还解决了ScrollView+EditText存在时ToolBar会被顶出去的问题
效果~
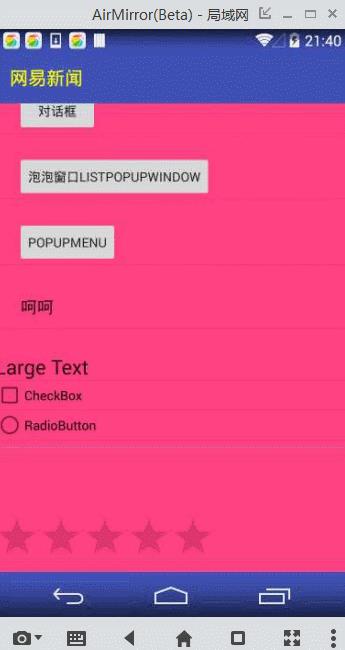
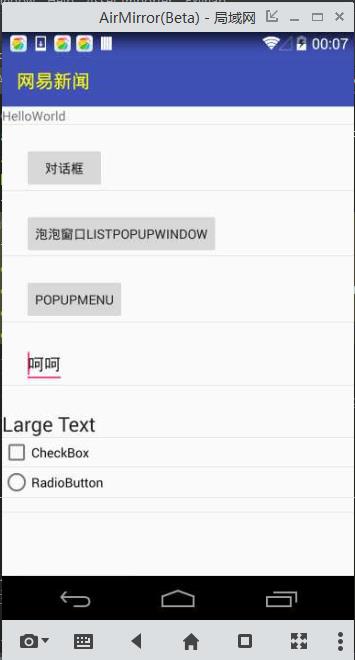
2、针对状态栏遮挡ToolBar的问题还有另外一种解决方案,就是去掉在ToolBar设置的fitsSystemWindows,增加ToolBar的高度并且为ToolBar设置padding,值得注意是此方案也没有解决ScrollView+EditText会将ToolBar推上去的问题
        //1.先设置toolbar的高度
        ViewGroup.LayoutParams params = mToolbar.getLayoutParams();
        int statusBarHeight = getStatusBarHeight(this);
        params.height += statusBarHeight ;
mToolbar.setLayoutParams(params ); //2.设置paddingTop,以达到状态栏不遮挡toolbar的内容。
mToolbar.setPadding(
mToolbar.getPaddingLeft(),
mToolbar.getPaddingTop()+getStatusBarHeight(this),
mToolbar.getPaddingRight(),
mToolbar.getPaddingBottom());通过查看android.R.dimen.status_bar_height文件知道需要通过反射来得到状态栏的高度
    public int getStatusBarHeight(Context context)
        int statusBarHeight = 0;
        try
            Class<?> clazz = Class.forName("com.android.internal.R$dimen");
            Object obj = clazz.newInstance();
            Field field = clazz.getField("status_bar_height");
            int temp = Integer.parseInt(field.get(obj).toString());
            statusBarHeight = context.getResources().getDimensionPixelSize(temp);
         catch (Exception e)
            e.printStackTrace();

        return statusBarHeight;
Part 3、沉浸式虚拟导航栏
在Android5.0+实现底部导航沉浸效果,style实现
<item name="android:navigationBarColor">@color/colorPrimary_pink</item>getWindow().setNavigationBarColor()<item name="android:windowTranslucentNavigation">true</item>代码实现
getWindow().addFlags(WindowManager.LayoutParams.FLAG_TRANSLUCENT_NAVIGATION); 
然而虚拟导航栏遮挡了内容,回头想想可能会想到这种情况和上面状态栏遮挡toolbar是一个问题,上面有两种解决方案但对于虚拟导航栏只能使用增加高度设置padding来解决,但是要如何去解决呢,底部的导航栏却不能像ToolBar一样能获得相应的View。这里我们可以做一个假象,让它下面有个设置为和底部虚拟导航栏高度一样的View并设置背景。开始搞~
1、在布局文件底部定义一个View
    <View
        android:id="@+id/navigationview"
        android:layout_width="match_parent"
        android:layout_height="0dp"
android:background="@color/colorPrimary"/> ViewGroup.LayoutParams pras = mNavigationbar.getLayoutParams();
int navigationBarHeight = getNavigationBarHeight(this);
pras.height += navigationBarHeight ;
mNavigationbar.setLayoutParams(pras);
private int getNavigationBarHeight(Context context)
int navigationbarBarHeight = 0;
try
Class<?> clazz = Class.forName("com.android.internal.R$dimen");
Object obj = clazz.newInstance();
Field field = clazz.getField("navigation_bar_height");
int temp = Integer.parseInt(field.get(obj).toString());
navigationbarBarHeight = context.getResources().getDimensionPixelSize(temp);
catch (Exception e)
e.printStackTrace();
return navigationbarBarHeight;
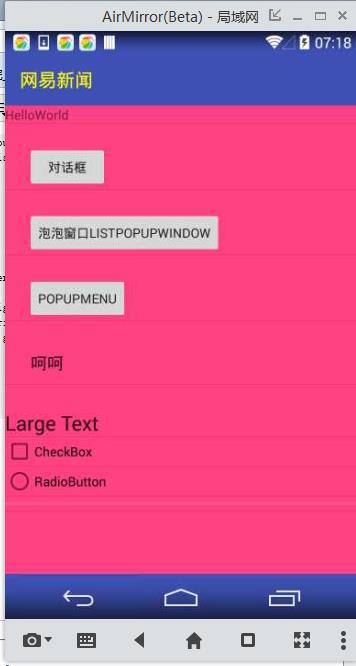
这样似乎已经解决了导航栏沉浸的效果,但还差点什么,那就是如何判断手机是否有虚拟导航栏或者是否开启了虚拟导航栏,这里说一种常用的思路就是通过判断屏幕的高度-内容的高度>0则存在虚拟导航栏。
	private static boolean hasNavigationBarShow(WindowManager wm)
		Display display = wm.getDefaultDisplay();
		DisplayMetrics outMetrics = new DisplayMetrics();
		//获取整个屏幕的高度
		display.getRealMetrics(outMetrics);
		int heightPixels = outMetrics.heightPixels;
		int widthPixels = outMetrics.widthPixels;
		//获取内容展示部分的高度
		outMetrics = new DisplayMetrics();
		display.getMetrics(outMetrics);
		int heightPixels2 = outMetrics.heightPixels;
		int widthPixels2 = outMetrics.widthPixels;
		int w = widthPixels-widthPixels2;
		int h = heightPixels-heightPixels2;
		return  w>0||h>0;//竖屏和横屏两种情况。
if(android.os.Build.VERSION.SDK_INT>=android.os.Build.VERSION_CODES.KITKAT
				&&android.os.Build.VERSION.SDK_INT<android.os.Build.VERSION_CODES.LOLLIPOP)
			if(toolbar!=null)
				LayoutParams params = toolbar.getLayoutParams();
				int statusBarHeight = getStatusBarHeight(this);
				params.height += statusBarHeight ;
				toolbar.setLayoutParams(params );
				toolbar.setPadding(
						toolbar.getPaddingLeft(),
						toolbar.getPaddingTop()+getStatusBarHeight(this),
						toolbar.getPaddingRight(),
						toolbar.getPaddingBottom());
				toolbar.setBackgroundColor(translucentPrimaryColor);

			if(bottomNavigationBar!=null)
				if(hasNavigationBarShow(getWindowManager()))
					LayoutParams p = bottomNavigationBar.getLayoutParams();
					p.height += getNavigationBarHeight(this);
					bottomNavigationBar.setLayoutParams(p);
					bottomNavigationBar.setBackgroundColor(translucentPrimaryColor);


		else if(android.os.Build.VERSION.SDK_INT>=android.os.Build.VERSION_CODES.LOLLIPOP)
			getWindow().setNavigationBarColor(translucentPrimaryColor);
			getWindow().setStatusBarColor(translucentPrimaryColor);
		else
			//<4.4的,不做处理
以上是关于一步两步带你实现Android沉浸式设计的主要内容,如果未能解决你的问题,请参考以下文章