uni-app微信公众号H5支付页面
Posted 小码张
tags:
篇首语:本文由小常识网(cha138.com)小编为大家整理,主要介绍了uni-app微信公众号H5支付页面相关的知识,希望对你有一定的参考价值。
准备工作
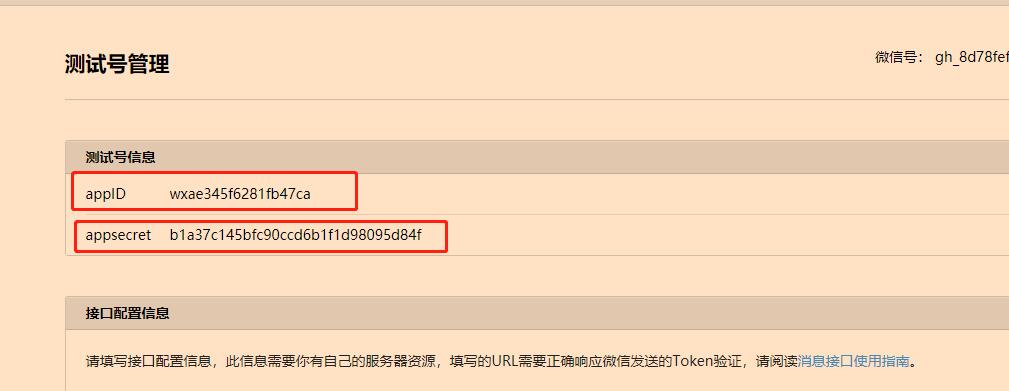
初始化公众平台测试账号系统。
地址: https://mp.weixin.qq.com/debug/cgi-bin/sandbox?t=sandbox/login
登录后,会得到一个测试公众号的相关信息。appID,appsecret。

添加授权域名》外网可访问域名或ip

创建H5项目
H5 页面集成 JSSDK 集成文档推荐使用NPM,快捷、省心
基础逻辑代码,openId为上页面传值,不在采用静默方式获取,忽略getCode()方法
<template>
	<view class="payv">
		<button class="pay" type="default" @click="makePay()">唤起支付</button>
	</view>
</template>

<script>
	var jweixin = require('jweixin-module');

	export default
		data()
			return
				orderId: '',
				rtData: ,
				openId: '',

		,
		methods:
			// 点击支付
			makePay: function()
				let that = this;
				//从后台获取签名,此处根据自己的接口写
				uni.request(
					url: 'http://192.168.41.43:9077/v3/jsApiPay', //仅为示例,并非真实接口地址。
					method: 'POST',
					data:
						openId: that.$data.openId,
						// orderId: '' // 订单编号
					,
					header:
						'content-type': 'application/x-www-form-urlencoded' //自定义请求头信息
					,
					success: (res) =>
						this.rtData = res.data.data;
						// 调用支付
						this.payRequest();
					,
					fail: () =>
						uni.showToast(
							title: "服务器内部错误!,请稍后再试",
							duration: 2000,
							icon: "none"
						);
					,
				);
			,

			// 微信js支付接口
			payRequest: function()
				//此为调取微信API接口
				var self = this;
				uni.showLoading(
					title: '加载中'
				);
				jweixin.config(
					debug: false, // 开启调试模式,调用的所有api的返回值会在客户端alert出来,若要查看传入的参数,可以在pc端打开,参数信息会通过log打出,仅在pc端时才会打印。
					appId: self.rtData.appId, // 必填,公众号的唯一标识
					timestamp: self.rtData.timeStamp, // 必填,生成签名的时间戳
					nonceStr: self.rtData.nonceStr, // 必填,生成签名的随机串
					signature: self.rtData.paySign, // 必填,签名,见附录1
					jsApiList: ['chooseWXPay'] // 必填,需要使用的JS接口列表,所有JS接口列表见附录2
				);
				jweixin.ready(function()
					jweixin.checkJsApi(
						jsApiList: ['chooseWXPay'], // 需要检测的JS接口列表,所有JS接口列表见附录2,
						success: function(res)
							console.log('checkjsapi Success')
							console.log(res);
						,
						fail: function(res)
							console.log('res')
							console.log(res);

					);
					jweixin.chooseWXPay(
						timestamp: self.rtData.timeStamp, // 支付签名时间戳,注意微信jssdk中的所有使用timestamp字段均为小写。但最新版的支付后台生成签名使用的timeStamp字段名需大写其中的S字符
						nonceStr: self.rtData.nonceStr, // 支付签名随机串,不长于 32 位
						package: self.rtData.package, // 统一支付接口返回的prepay_id参数值,提交格式如:prepay_id=***)
						signType: self.rtData.signType, // 签名方式,默认为'SHA1',使用新版支付需传入'MD5'
						paySign: self.rtData.paySign, // 支付签名
						success: function(res)
							// 支付成功后的回调函数
							uni.hideLoading();
							console.log('paysuccess')
							console.log(res)
						,
						cancel: function(r)
							uni.hideLoading();
						,
						fail: function(res)
							uni.hideLoading();
							console.log('payfail')
							console.log(res)

					);
				);

				jweixin.error(function(res)
					console.log('error')
					console.log(res)
					uni.hideLoading();
					uni.showToast(
						icon: 'none',
						title: '支付失败了',
						duration: 4000
					);
					// config信息验证失败会执行error函数,如签名过期导致验证失败,具体错误信息可以打开config的debug模式查看,也可以在返回的res参数中查看,对于SPA可以在这里更新签名。
					/*alert("config信息验证失败");*/
				);
			,
			// 初始页面,获取用户的openId
			onLoad: function(option)
				console.log('添加默认openId')
				// this.getCode()
				this.$data.openId = 'oSGyC4sGl4b_k1xyuHAnbpCpQyCM'
			,

			// 静默方式获取jsCode
			getCode()
				let user_appid = "wx8bcc446cbafebf08"; //个人开发者appid
				let local = window.location.href; //重定向地址
				console.log(local)
				let wx_code = this.getUrlParam("code"); // 截取路径中的code,如果没有就去微信授权,如果已经获取到了就直接传code给后台获取openId

				console.log("local:", local);
				//判断有没有code
				if (wx_code == null || wx_code === "")
					console.log("没有code跳转");
					//获取code的地址。获取成功重定向后地址栏中将会带有code
					window.location.href = `https://open.weixin.qq.com/connect/oauth2/authorize?appid=$user_appid&redirect_uri=$encodeURIComponent(
			          local
			        )&response_type=code&scope=snsapi_userinfo&state=123#wechat_redirect`;
				 else
					console.log("有code开始调用接口:", wx_code);
					// this.getOpenId(wx_code); //把code传给后台获取用户信息

			,
			//截取code
			//getUrlParam方法就是使用正则截取地址栏里的code,有兴趣可以研究一下,没兴趣直接拿来用
			getUrlParam: function(name)
				var reg = new RegExp("(^|&)" + name + "=([^&]*)(&|$)");
				var r = window.location.search.substr(1).match(reg);
				if (r != null) return unescape(r[2]);
				return null;
			,
		,

</script>

<style>
	.payv
		margin-top: 20%;

</style>
准备就绪之后,开始下一步的操作–公众号配置菜单。
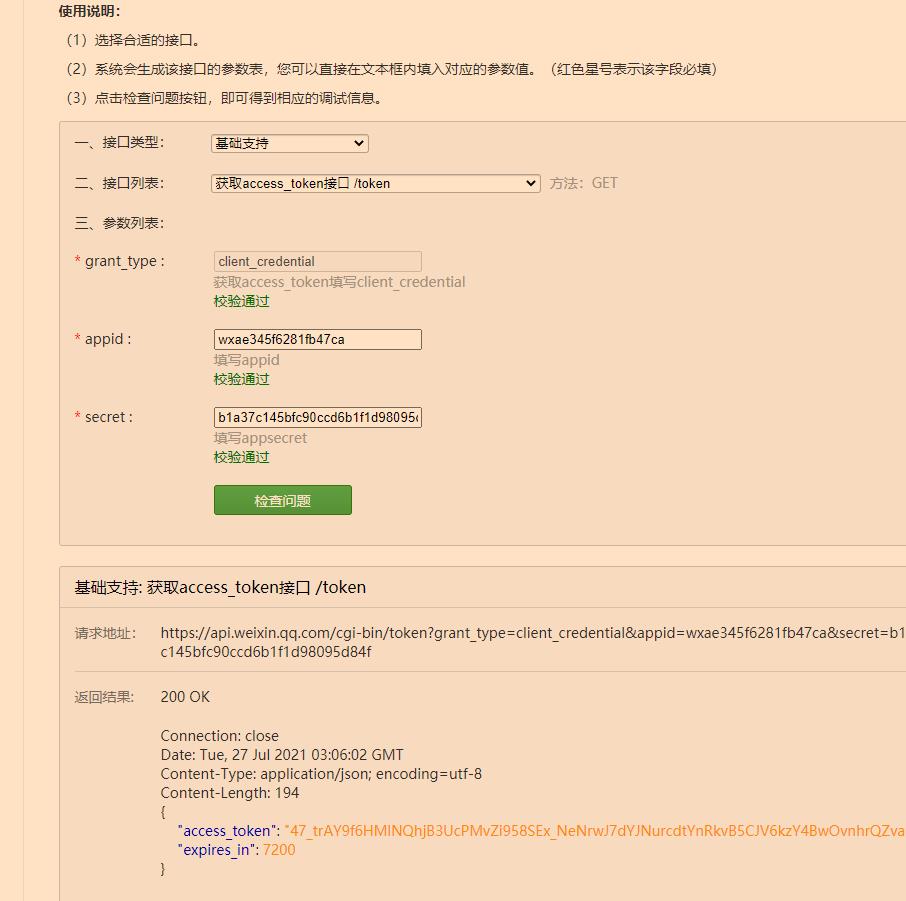
使用微信的接口调试工具设置的。地址:https://mp.weixin.qq.com/debug
- 第一步,获取access_tocken ,输入测试公众号页面的appID和appsecret,点击检查问题

- 获取到access_token之后,使用这个access_token给测试公众号设置菜单。接口类型选择自定义菜单,填入刚刚获取到的access_token,以及菜单的json串。

    "button":[

            "type":"view",
            "name":"ME",
            "url":"http://txv6jy.natappfree.cc/#/pages/zhang/zhang"

    ]
这个时候,在用微信测试公众号就会有菜单了。

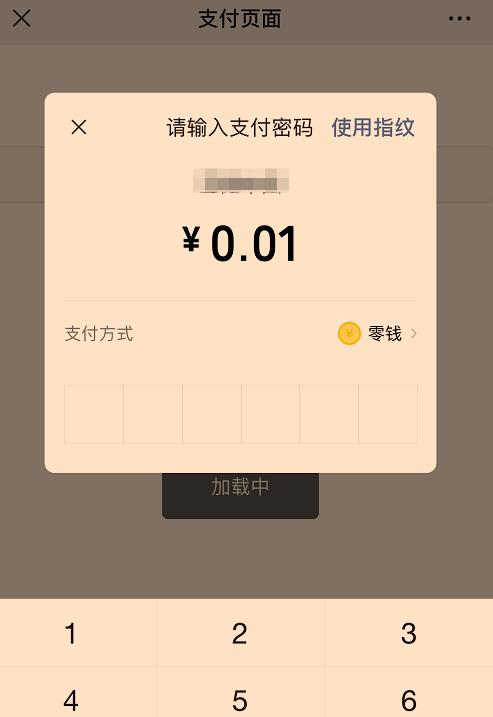
测试页面微信支付

问题总结
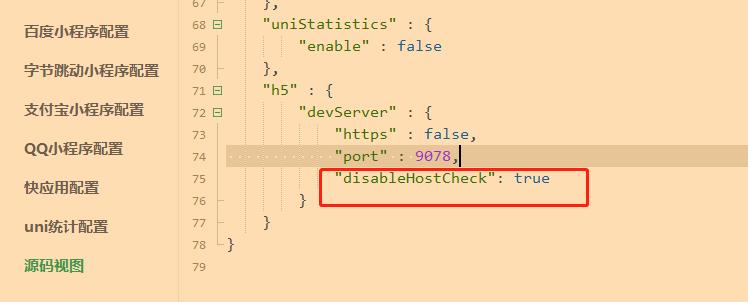
- 内网穿透访问页面时提示:Invalid Host header
解决方案:h5添加:“disableHostCheck”: true属性

以上是关于uni-app微信公众号H5支付页面的主要内容,如果未能解决你的问题,请参考以下文章