Sentinel的基本使用-整合SpringCloud
Posted _微风轻起
tags:
篇首语:本文由小常识网(cha138.com)小编为大家整理,主要介绍了Sentinel的基本使用-整合SpringCloud相关的知识,希望对你有一定的参考价值。
这一篇我们主要来介绍下`Spring-cloud`与`Sentinel`的整合使用,主要是对`feign`、`gateway`的控制。`feign`我们知道其是用来调用另一个微服务的。
一、feign调用demo介绍
1、属性配置&引用依赖
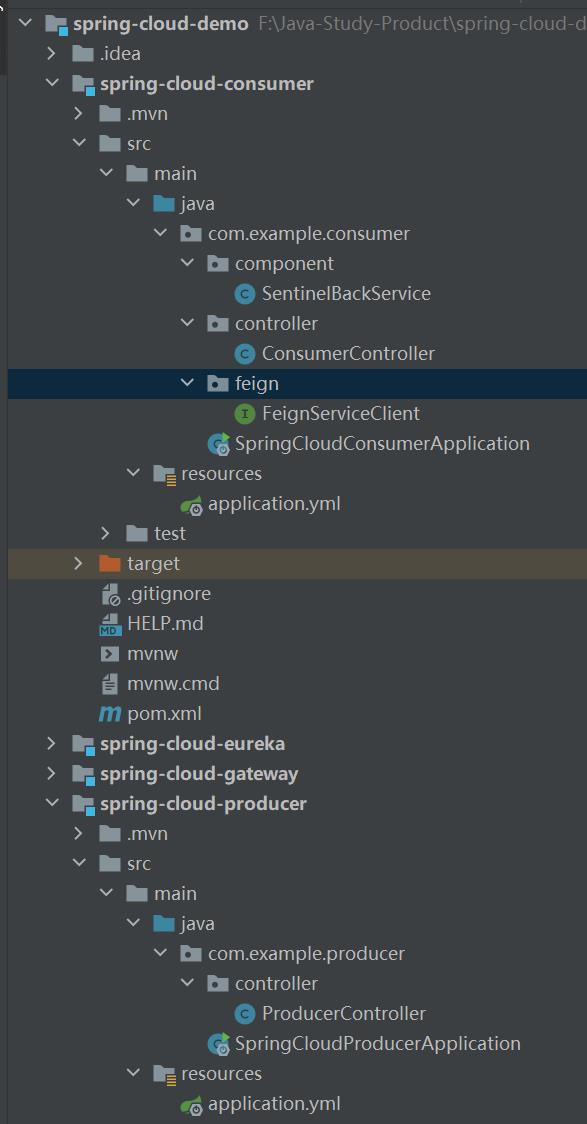
这是我们的项目,我们现在模拟的是spring-cloud-consumer调用spring-cloud-producer:
我们整合sentinel,需要在consumer项目中添加依赖:
<dependency>
    <groupId>com.alibaba.cloud</groupId>
    <artifactId>spring-cloud-starter-alibaba-sentinel</artifactId>
    <version>2.0.4.RELEASE</version>
</dependency>
同时在配置文件添加sentinel控制台的地址以及开始feign与sentinel的整合控制:
spring:
  application:
    name: spring-cloud-consumer
  cloud:
    sentinel:
      transport:
        dashboard: localhost:9000

feign:
  sentinel:
    enabled: true
2、FeignServiceClient
然后关于FeignServiceClient
@FeignClient(value = "spring-cloud-producer",fallback = SentinelBackService.class)
public interface FeignServiceClient

    @RequestMapping(value = "producer/simple",method = RequestMethod.GET)
    String producerSimpleMethod();
这里与hystrix的降级控制是类似的,都有一个回调来返回限制后的信息返回。这里我们配置的就是去请求spring-cloud-producer的producer/simple-api接口。
3、SentinelBackService
@Component
public class SentinelBackService implements FeignServiceClient
    @Override
    public String producerSimpleMethod()
        return "Error SentinelBackService !!!";
这个就是限制生效后的返回信息。
4、ConsumerController
@RestController
@RequestMapping("consumer")
public class ConsumerController

    @Autowired
    private FeignServiceClient feignServiceClient;

    @RequestMapping(value = "simple",method = RequestMethod.GET)
    public String consumerSimple()
        System.out.println("--------ConsumerController--------");
        return feignServiceClient.producerSimpleMethod();
我我们将eureka、producer、consumer这3个服务都启动。然后去访问ConsumerController的API。

5、feign调用限制
1、限流

我们可以看到资源的key生成的方式变了:其是请求方式:协议:服务名称/请求路径组成了。

我们添加控制就能看到对应的控制了。


这里我们同样可以添加熔断降级的限制。
2、熔断降级
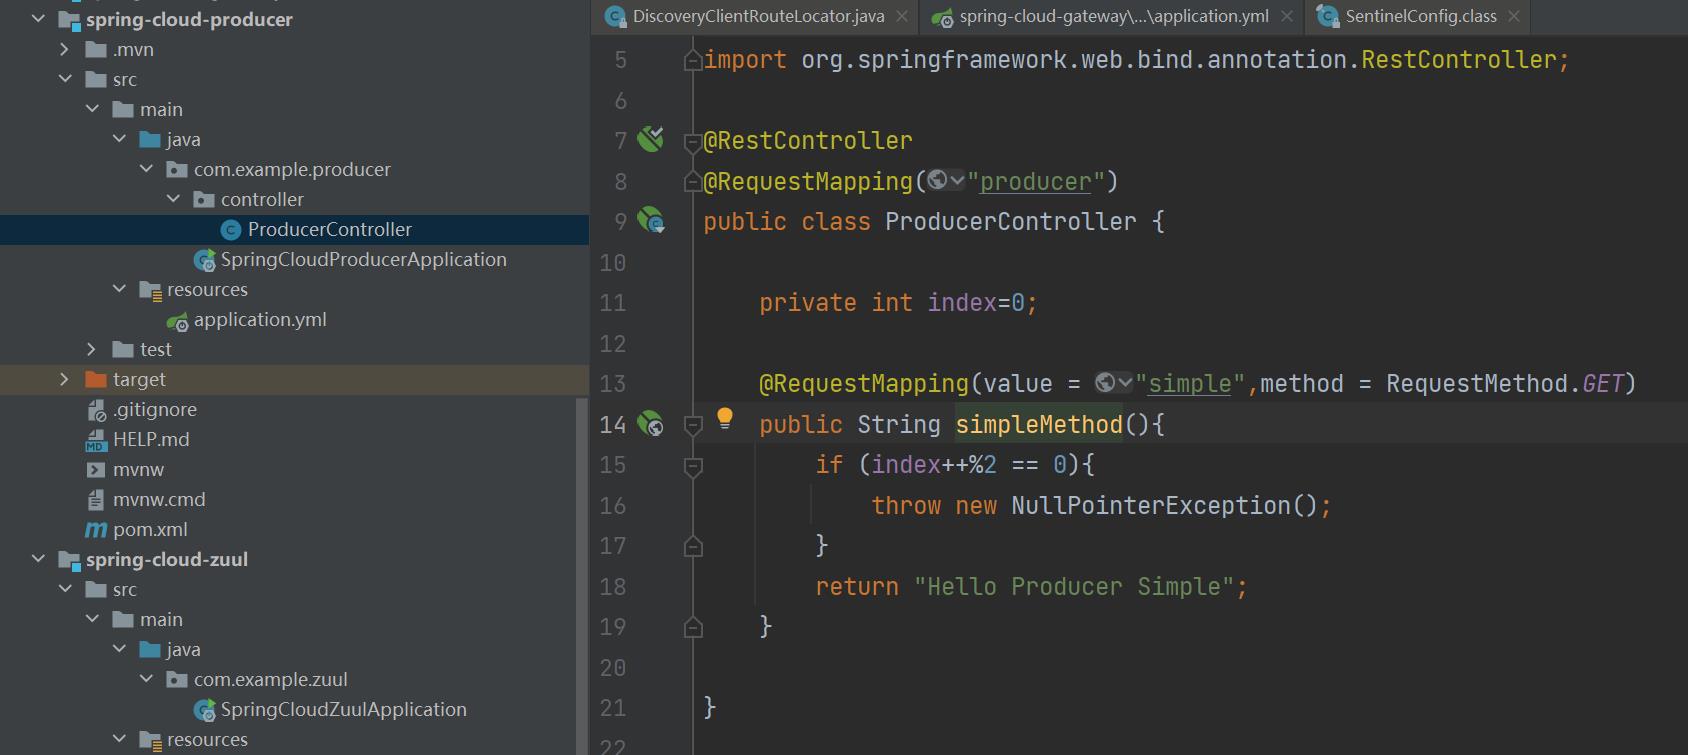
要测试熔断降级我们改下producer的逻辑,我们抛出异常,让feign不能调用成功。
@RestController
@RequestMapping("producer")
public class ProducerController

    private int index=0;

    @RequestMapping(value = "simple",method = RequestMethod.GET)
    public String simpleMethod()
        if (index++%2 == 0)
            throw new NullPointerException();

        return "Hello Producer Simple";
然后我们添加降级规则:
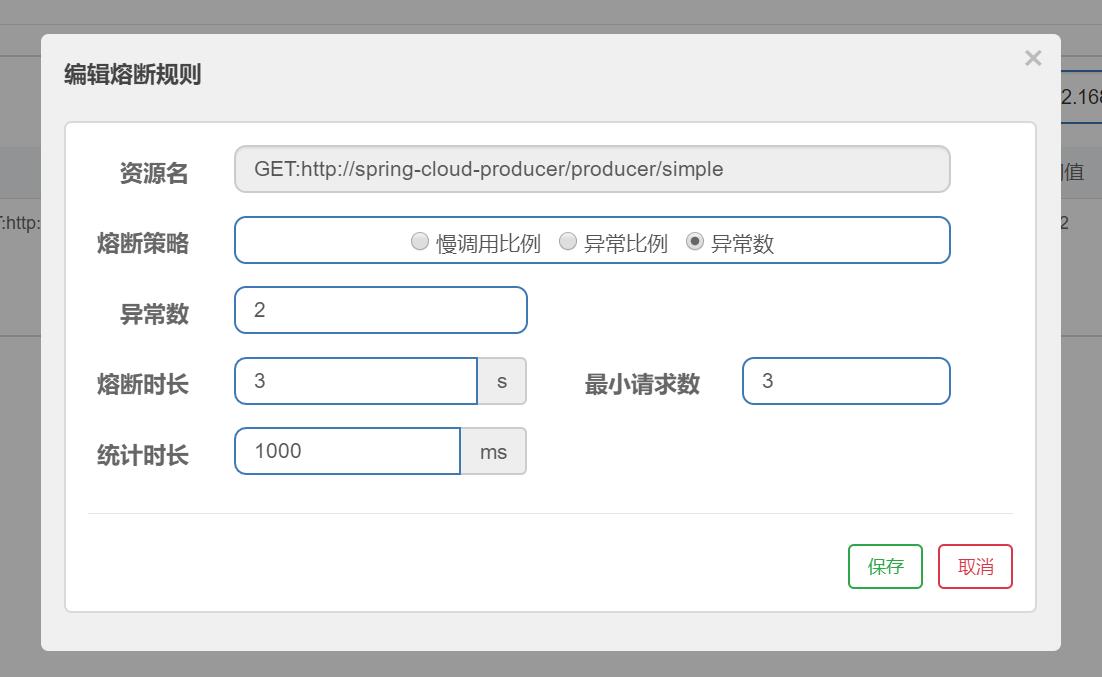

然后我们可以看到其的调用控制生效了(已经将原来的限流规则删除了),在3S(界面应该由于统计间隔的问题,只要2s体现)没有通过请求。
二、gateway网关流控demo
下面我们来看下sentinel与gateway的整合使用
首先我们来看下基础使用,整个项目我们有介绍,目前是spring-cloud-consumer调用spring-cloud-producer。
1、项目介绍
1)、spring-cloud-consumer
我们来看下consumer项目的controller
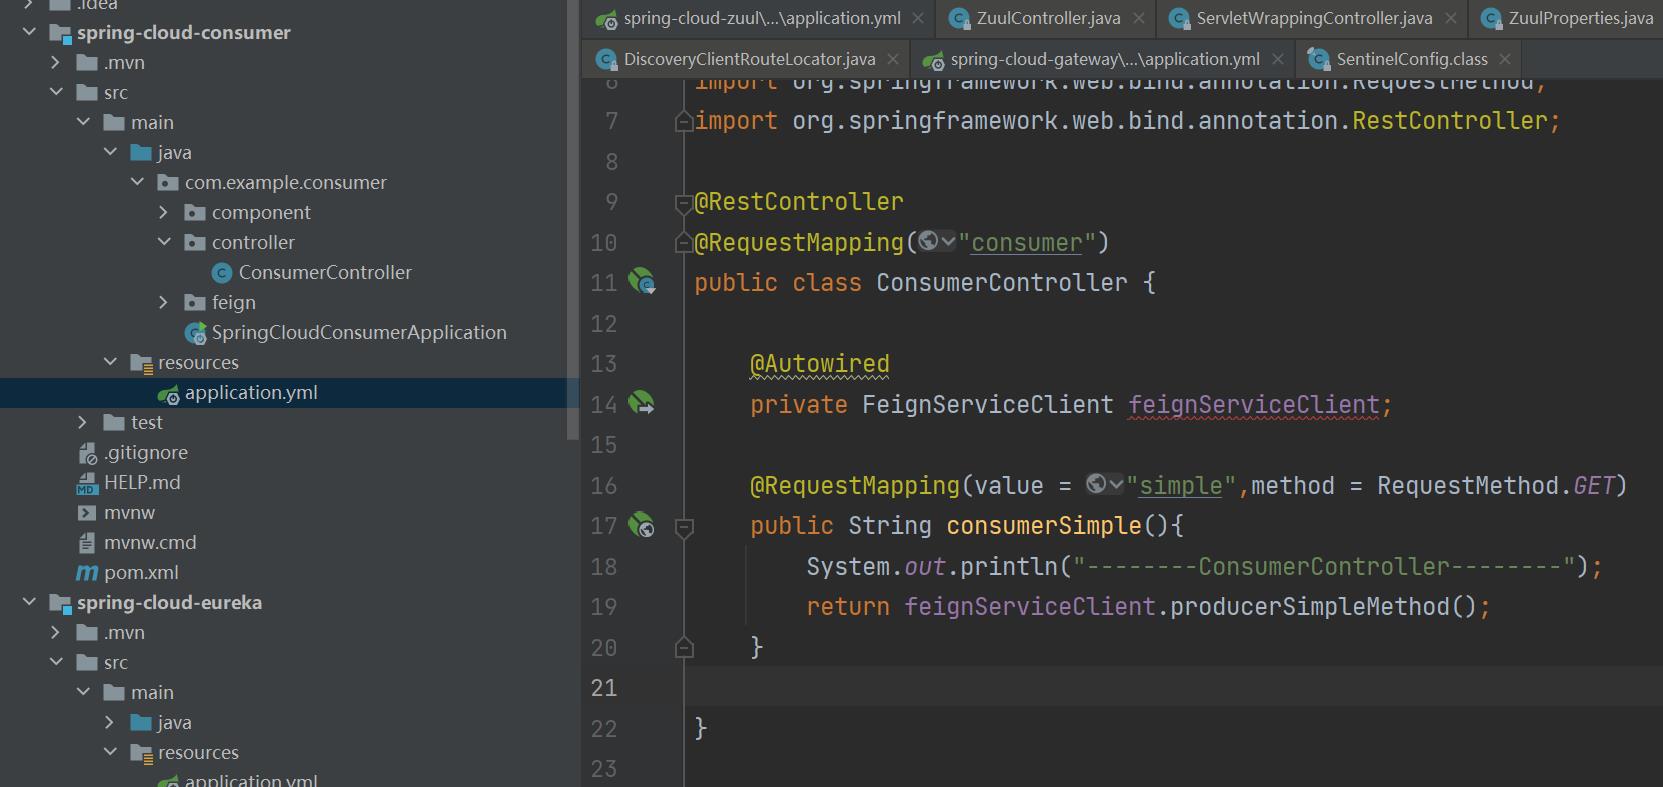
整个我们前面上面有讲过了,然后我们来看下zuul项目。
2)、spring-cloud-producer
3)、spring-cloud-gateway
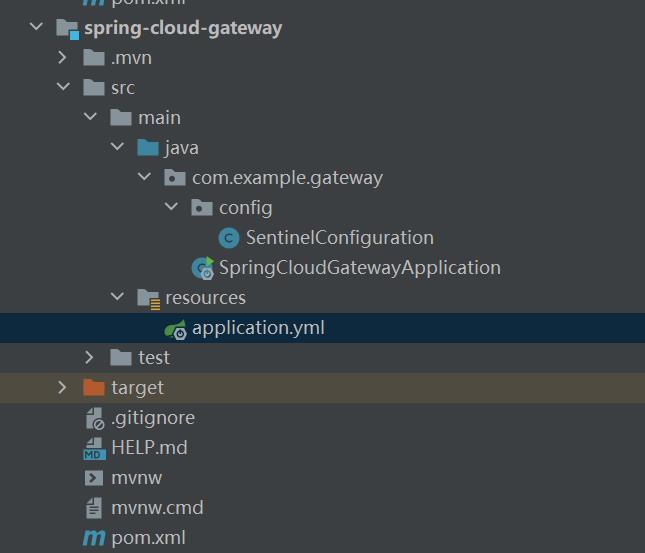
我们引入sentinel对于gateway的adapter相关的依赖,注意这里的版本号要与你本身引入的cloud的依赖相关联。
<dependency>
    <groupId>org.springframework.cloud</groupId>
    <artifactId>spring-cloud-starter-gateway</artifactId>
    <version>2.0.3.RELEASE</version>
</dependency>
<dependency>
    <groupId>org.springframework.cloud</groupId>
    <artifactId>spring-cloud-starter-netflix-eureka-client</artifactId>
    <version>2.0.3.RELEASE</version>
</dependency>
<dependency>
    <groupId>com.alibaba.cloud</groupId>
    <artifactId>spring-cloud-starter-alibaba-sentinel</artifactId>
    <version>2.1.0.RELEASE</version>
</dependency>
<dependency>
    <groupId>com.alibaba.cloud</groupId>
    <artifactId>spring-cloud-alibaba-sentinel-gateway</artifactId>
    <version>2.1.0.RELEASE</version>
</dependency>
<dependency>
    <groupId>com.alibaba.csp</groupId>
    <artifactId>sentinel-spring-cloud-gateway-adapter</artifactId>
    <version>1.7.2</version>
</dependency>
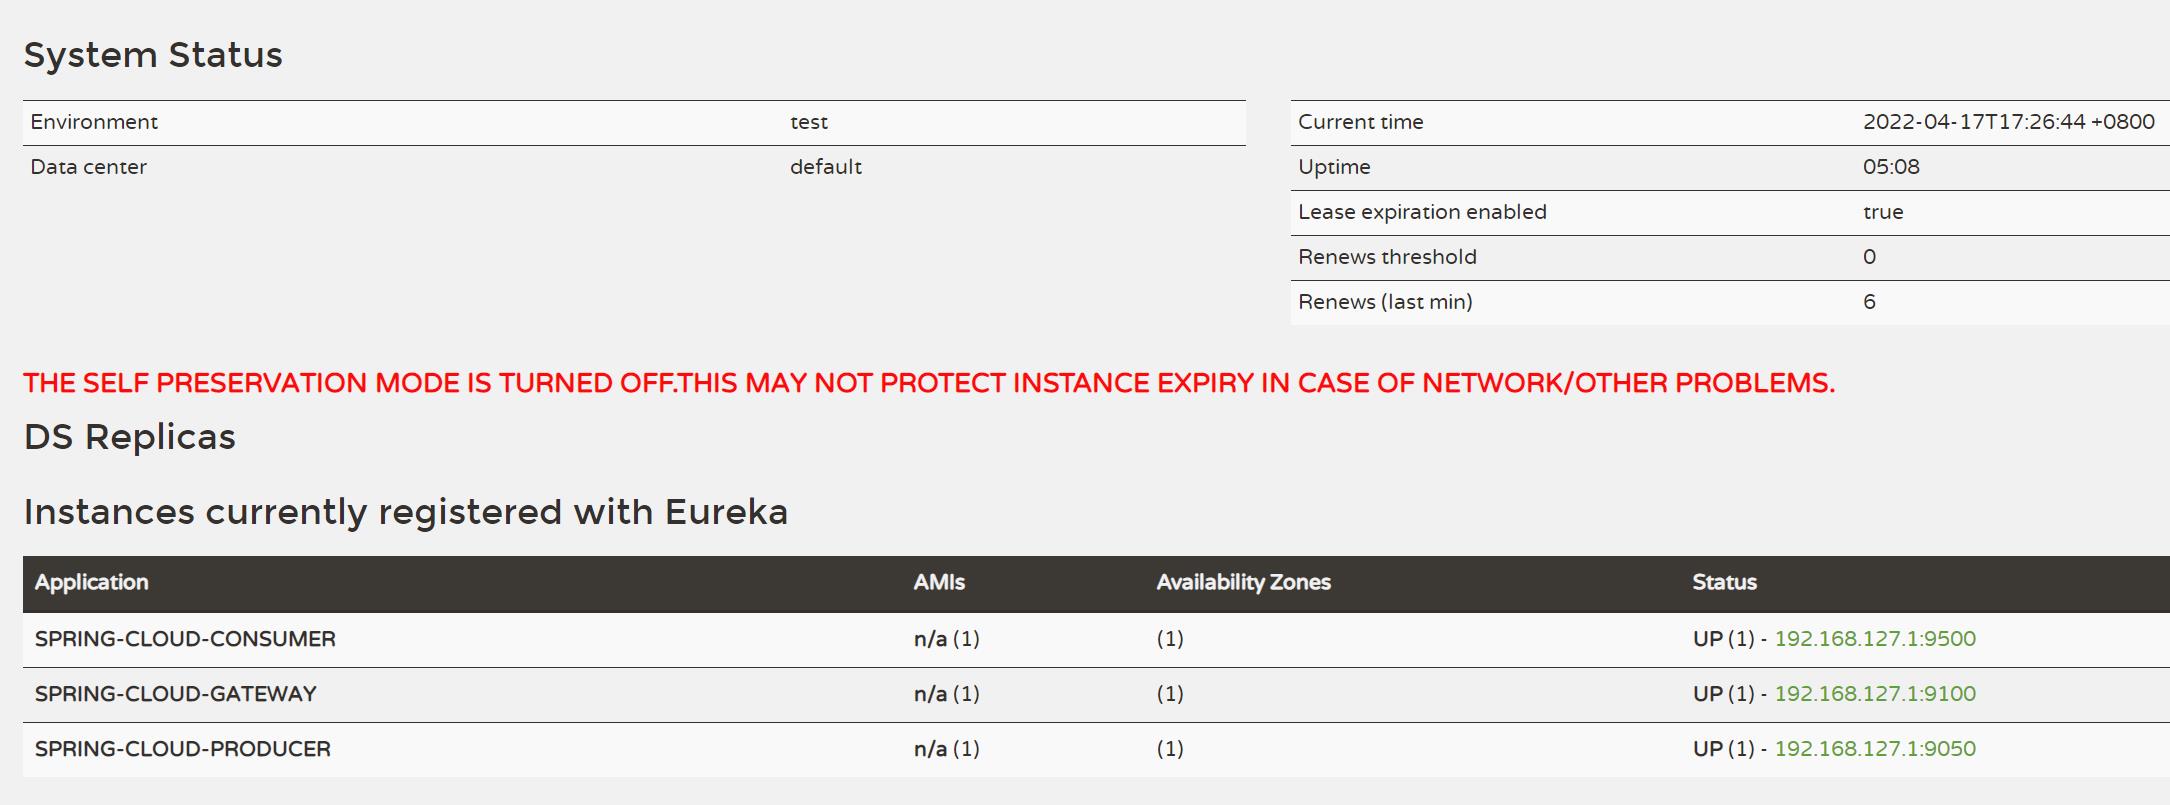
server:
  port: 9100

spring:
  application:
    name: spring-cloud-gateway
  cloud:
    gateway:
      routes:
        - id: sentinel-gateway-consumer
          uri: lb://spring-cloud-consumer
          predicates:
            - Path=/consumer/**
        - id: sentinel-gateway-producer
          uri: lb://spring-cloud-producer
          predicates:
            - Path=/producer/**
    sentinel:
      transport:
        dashboard: localhost:9000
        port: 9000
可以看到我们目前是有写了两个路由,一个是producer-server,例如我们能通过http://localhost:9100/producer/simple就直接路由到了spring-cloud-producer服务了:

同时我们也可以通过gateway->consumer->producer来调用,通过http://localhost:9100/consumer/simple也能到spring-cloud-producer。
现在我们就来看下在gateway中集成sentinel:
@Component
public class SentinelConfiguration

    @PostConstruct
    public void sentinelGateway()
        GatewayCallbackManager.setBlockHandler(new BlockRequestHandler()
            @Override
            public Mono<ServerResponse> handleRequest(ServerWebExchange serverWebExchange, Throwable throwable)
                return ServerResponse.status(200).syncBody("Blocked Error Gateway");

        );
我们这里主要是配置了一个当限流成功后供返回的提示信息。
@SpringBootApplication
@EnableDiscoveryClient
public class SpringCloudGatewayApplication

    public static void main(String[] args)
        System.setProperty(SentinelConfig.APP_TYPE,"1");
        SpringApplication.run(SpringCloudGatewayApplication.class, args);
二、sentinel相关配置
1)、API分组
然后们启动并访问路由相关的请求就能在控制台看到当前项目了,例如访问http://localhost:9100/consumer/simple

我们来配置api分组相关的流控:

这里是与我们配置文件配置的路由相关的;
routes:
  - id: sentinel-gateway-consumer
    uri: lb://spring-cloud-consumer
    predicates:
      - Path=/consumer/**
  - id: sentinel-gateway-producer
    uri: lb://spring-cloud-producer
    predicates:
      - Path=/producer/**
我们配置文件路由是前缀已及对应的路由路径/consumer/**。然后再进行流控信息设置:
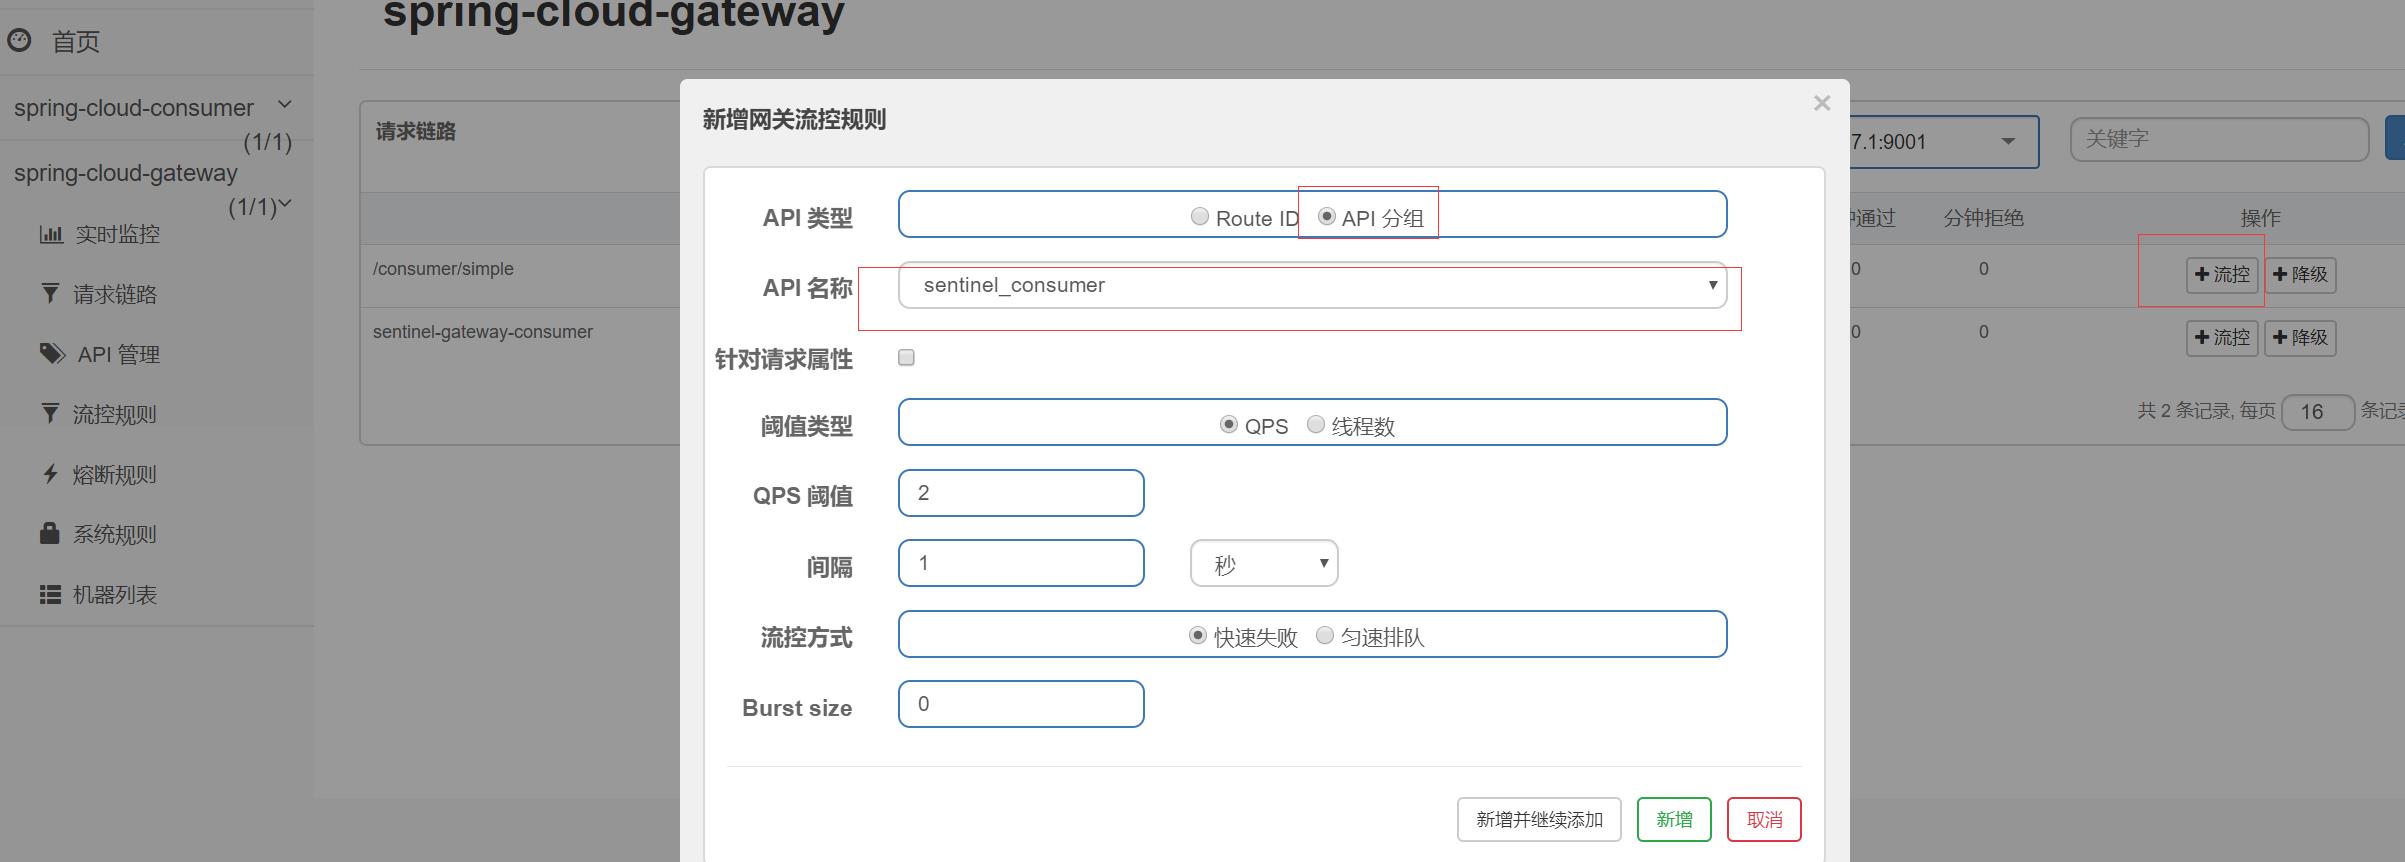
之后我们请求就能看到:


这个就是与api分组相关的流控。
2)、Route-ID
下面我们就来看下Route-ID分组的处理。

我们访问http://localhost:9100/consumer/simple默认生成了两个名称,其中sentinel-gateway-consumer就是根据配置文件中的id生成的,我们可以用它来配置Route-ID相关的控制:

我们新增控制:
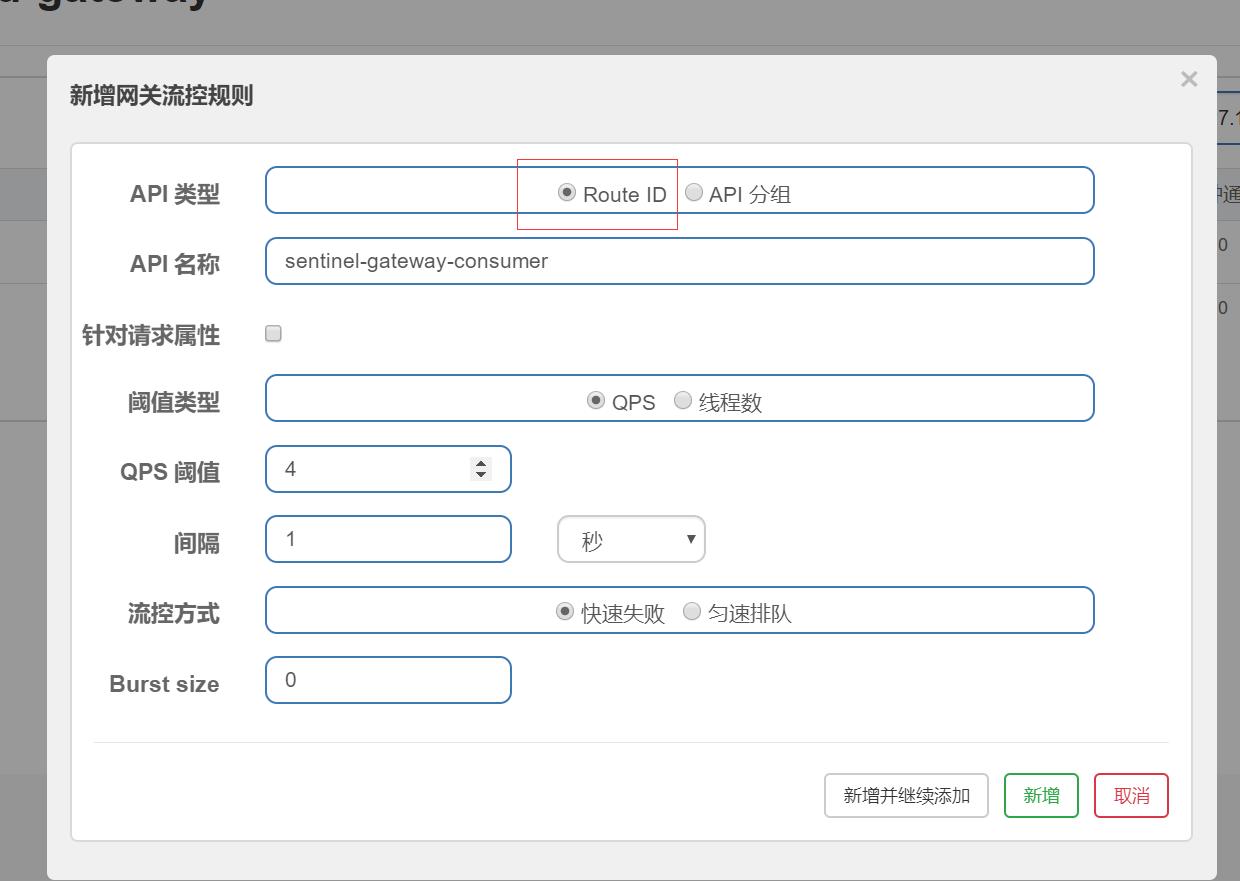
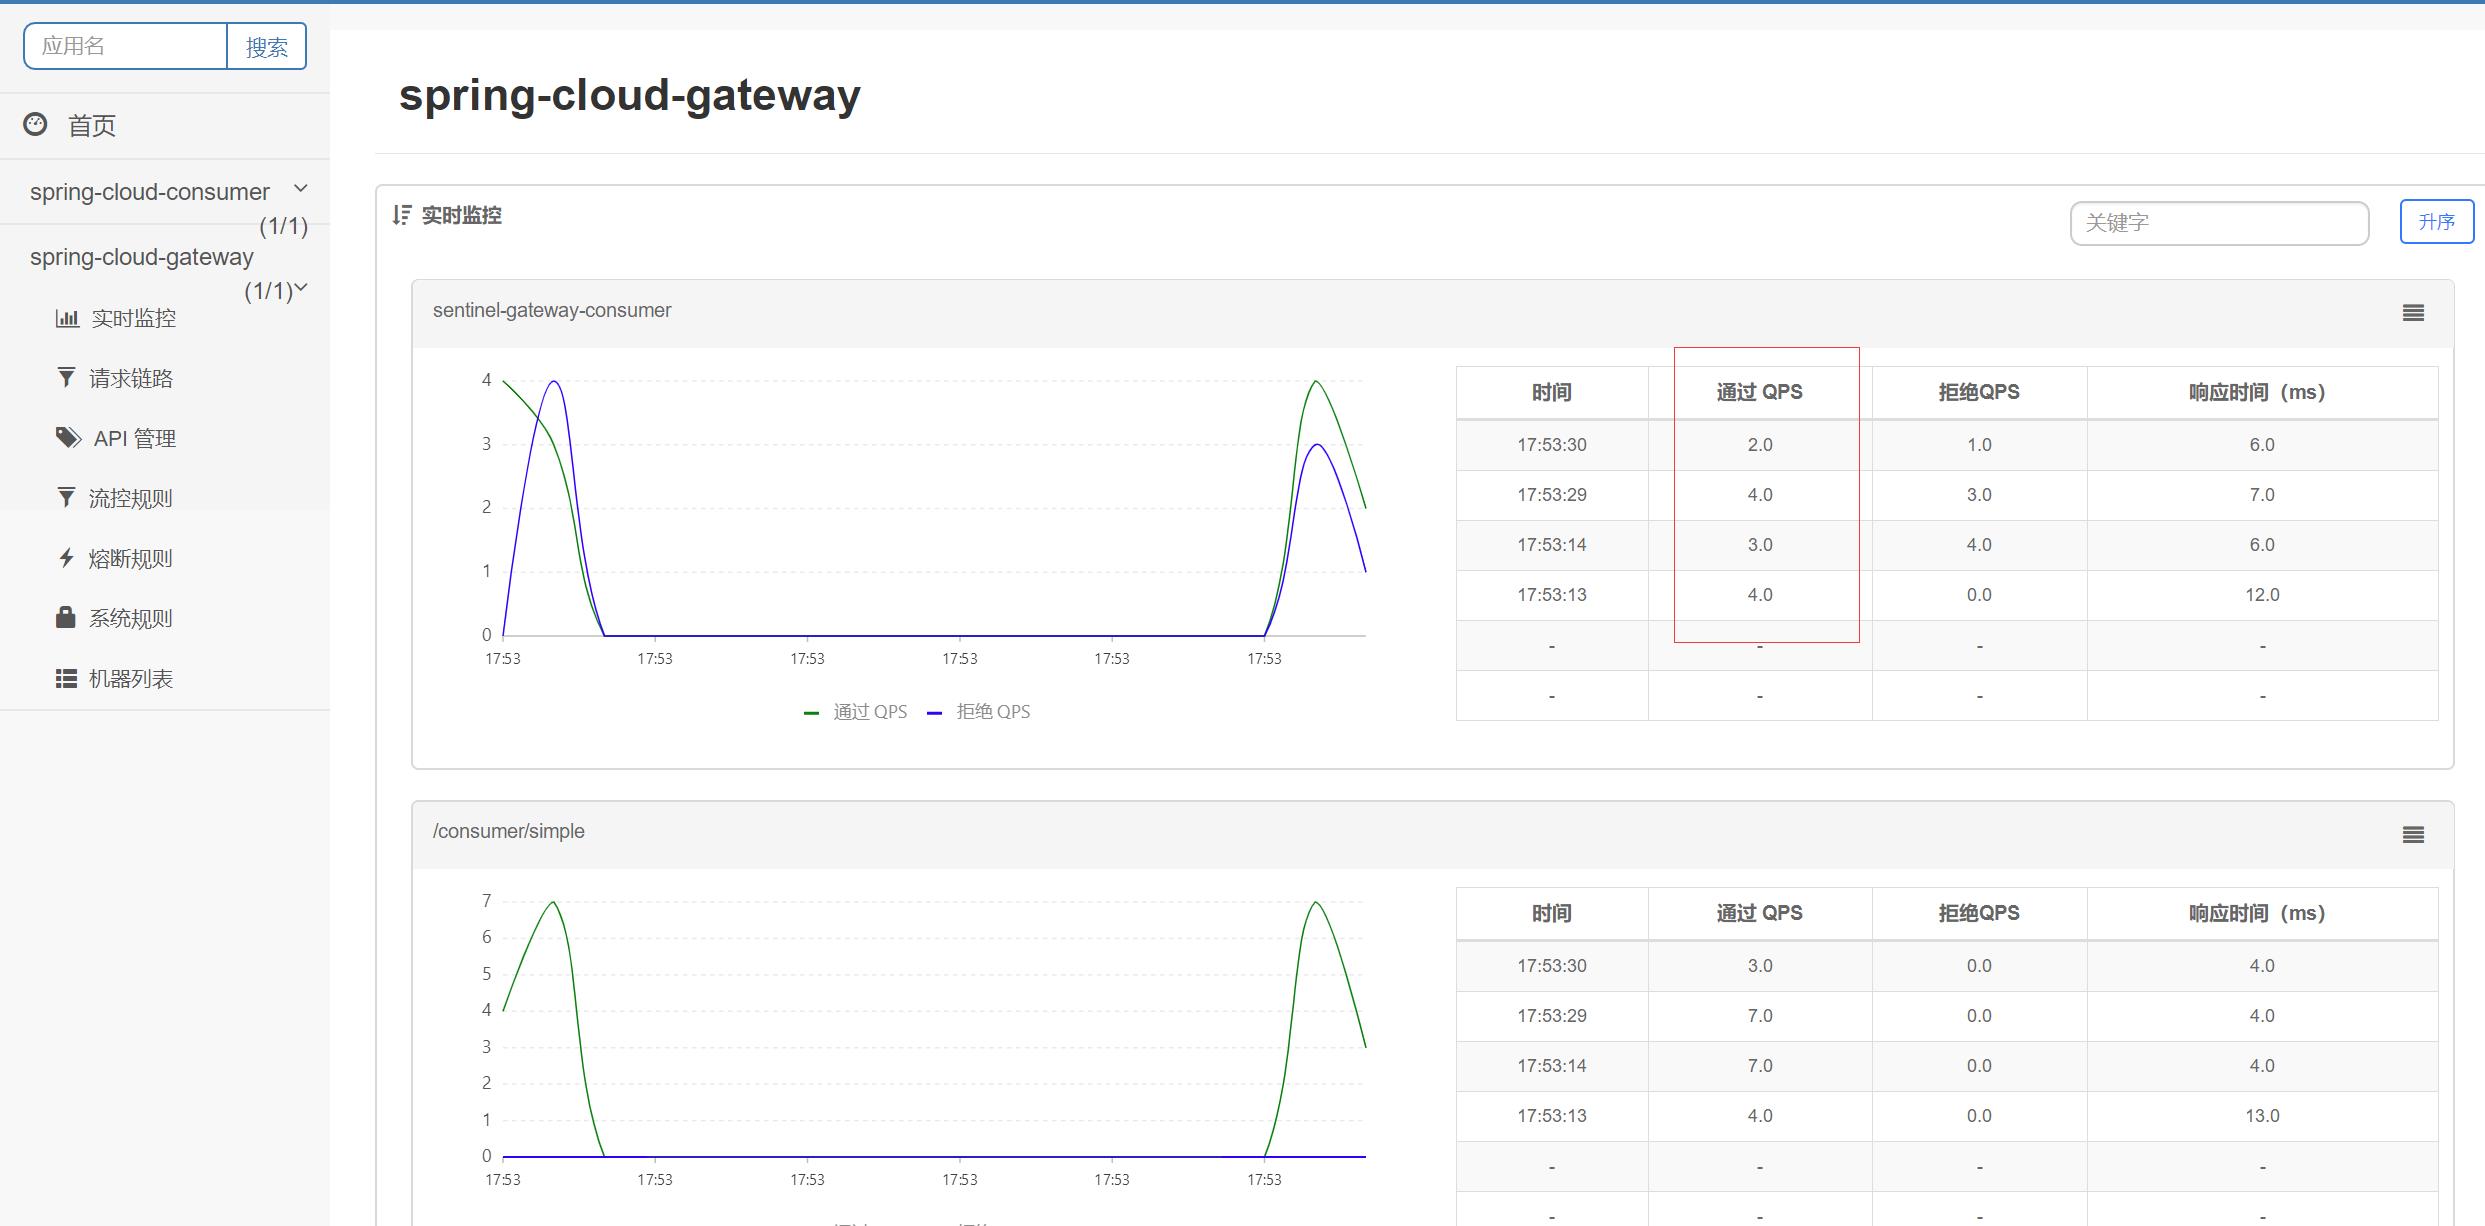
可以看到我们的规则生效了。
以上是关于Sentinel的基本使用-整合SpringCloud的主要内容,如果未能解决你的问题,请参考以下文章