Windows WSL Ubuntu Android 编译
Posted 清霜之辰
tags:
篇首语:本文由小常识网(cha138.com)小编为大家整理,主要介绍了Windows WSL Ubuntu Android 编译相关的知识,希望对你有一定的参考价值。
本文首发地址:https://blog.csdn.net/CSqingchen/article/details/123395496
最新更新地址:https://gitee.com/chenjim/chenjimblog
- 以管理员身份运行 命令提示符,运行
wsl --install,
此过程会自动安装WSL、虚拟机,下载ubuntu20.04,
更多参考 https://docs.microsoft.com/zh-cn/windows/wsl/install - 重启windows后自动安装ubuntu

从开始菜单启动,也可安装 - 替换换ubuntu20.04为阿里云源
sudo mv /etc/apt/sources.list /etc/apt/sources.list.bak
sudo vim /etc/apt/sources.list
填入以下内容后保存deb http://mirrors.aliyun.com/ubuntu/ focal main restricted universe multiverse deb-src http://mirrors.aliyun.com/ubuntu/ focal main restricted universe multiverse deb http://mirrors.aliyun.com/ubuntu/ focal-security main restricted universe multiverse deb-src http://mirrors.aliyun.com/ubuntu/ focal-security main restricted universe multiverse deb http://mirrors.aliyun.com/ubuntu/ focal-updates main restricted universe multiverse deb-src http://mirrors.aliyun.com/ubuntu/ focal-updates main restricted universe multiverse deb http://mirrors.aliyun.com/ubuntu/ focal-proposed main restricted universe multiverse deb-src http://mirrors.aliyun.com/ubuntu/ focal-proposed main restricted universe multiverse deb http://mirrors.aliyun.com/ubuntu/ focal-backports main restricted universe multiverse deb-src http://mirrors.aliyun.com/ubuntu/ focal-backports main restricted universe multiversesudo apt udpate && sudo apt upgrade
参考自 https://zhuanlan.zhihu.com/p/142014944
- android编译依赖工具链
sudo apt-get install git-core gnupg flex bison build-essential zip curl zlib1g-dev gcc-multilib g++-multilib libc6-dev-i386 libncurses5 lib32ncurses5-dev x11proto-core-dev libx11-dev lib32z1-dev libgl1-mesa-dev libxml2-utils xsltproc unzip fontconfig
参考自 https://source.android.com/setup/build/initializing
以下按需安装sudo apt-get install libssl-dev libncurses5 sudo apt-get install openjdk-8-jdk openjdk-8-jre sudo apt-get install git sudo apt-get install python3.7 sudo apt-get install python2 (如果没有python2) sudo ln -s /usr/bin/python2 /usr/bin/python (如果repo命令报错没有python) sudo apt-get install libssl-dev libtinfo5 libncurses5 (编译 xr 4100 代码) sudo apt-get install libxml-simple-perl (编译 xr 5100 代码)
- 迁移虚拟磁盘
Ubuntu默认文件在C盘,磁盘空间有限,源码下载及编译需要约350G空间,
且不可以直接使用共享的Windows磁盘,迁移命令和说明如下- 打开带管理员权限的PowerShell

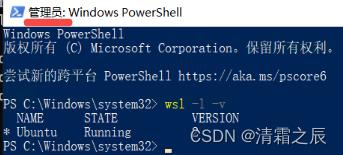
- 查看当前已经安装的WSL实例
wsl -l -v - 将现有WSL2实例备份导出
wsl --export Ubuntu D:\\Ubuntu_bak.tar - 注销现有实例了,‘Ubuntu’是上面步骤输出的实例名
wsl --unregister Ubuntu
wsl --distribution Ubuntu启动 - 将Ubuntu_bak.tar导入到指定存放虚拟磁盘镜像文件的路径‘D:\\WSL_Ubuntu’
wsl --import Ubuntu_new D:\\WSL_Ubuntu D:\\Ubuntu_bak.tar --version 2 - 设置默认登录用户,'chen’之前Ubuntu配置的登录名
ubuntu config --default-user chen - 重新启动wsl登录即可
更多可以参考 https://blog.csdn.net/u014175785/article/details/118181230
- 打开带管理员权限的PowerShell
如需给WSL添加虚拟磁盘,可参考
https://blog.csdn.net/CSqingchen/article/details/126266773
- 扩充wsl磁盘空间
wsl 默认的硬盘是256G,源码编译是不够的,需要扩充其默认大小,相关命令和说明如下- 终止所有 WSL 实例
wsl --shutdown - 调整 WSL 2 VHD 的大小,管理员权限打开命令行提示符,执行以下命令
diskpart
DISKPART> Select vdisk file="D:\\WSL_Ubuntu\\ext4.vhdx"
注意路径是上面迁移磁盘后的路径,未迁移的默认路径如下
%LOCALAPPDATA%\\Packages\\xxxx\\LocalState\\ext4.vhdx
其中xxxx需要替换为以下命令的输出
Get-AppxPackage -Name "*Ubuntu*" | Select PackageFamilyName - 当前虚拟值的最大值
detail vdisk - 更改最大值,必须比原来大,以 MB 为单位,比如512G,如下
expand vdisk maximum=512000 - 启动wsl,登录wsl,运行以下命令,让 WSL 知道它可扩展其文件系统的大小
sudo mount -t devtmpfs none /dev
mount | grep ext4其中输出的/dev/sdX在下一步用
sudo resize2fs /dev/sdb 512000M
扩充完成
更多信息可以参考https://docs.microsoft.com/zh-cn/windows/wsl/vhd-size
- 终止所有 WSL 实例
- repo安装使用项目配置
- 下载repo
curl https://mirrors.tuna.tsinghua.edu.cn/git/git-repo -o repo && chmod +x repo - 添加repo到环境变量
sudo mv repo /bin/repo - repo的运行过程中,会尝试访问 官方的git源 更新自己,一般情况无法正常更新,
可以将如下内容复制到~/.bashrc最后,替换默认Repo源,再重启终端即可
export REPO_URL='https://mirrors.tuna.tsinghua.edu.cn/git/git-repo'
更多可参考 https://blog.csdn.net/CSqingchen/article/details/78125769
- 下载repo
- 下载 LineageOS 源码
repo init -u https://github.com/LineageOS/android.git -b lineage-19.1
repo sync
如果一定要Google Android 源码,可以参考 https://mirrors.tuna.tsinghua.edu.cn/help/AOSP/ - 源码编译
source build/envsetup.sh
lunch lineage****-userdebug
make -j$(nproc) 2>&1 | tee build.log
或者使用脚本brunch your_device_codename - 设置windows目录大小写敏感
fsutil.exe file SetCaseSensitiveInfo D:\\code enable

相关文章连接
Window 10 使用WSL2下载编译Android 10 系统源码
how-to-build-lineageos-on-windows-10-using-wsl-2
以上是关于Windows WSL Ubuntu Android 编译的主要内容,如果未能解决你的问题,请参考以下文章