在KubeSphere启动服务网格Istio并解决解决ContainerCreating问题
Posted 虎鲸不是鱼
tags:
篇首语:本文由小常识网(cha138.com)小编为大家整理,主要介绍了在KubeSphere启动服务网格Istio并解决解决ContainerCreating问题相关的知识,希望对你有一定的参考价值。
KubeSphere 服务网格
官网介绍:
KubeSphere 服务网格基于Istio,将微服务治理和流量管理可视化。它拥有强大的工具包,包括熔断机制、蓝绿部署、金丝雀发布、流量镜像、链路追踪、可观测性和流量控制等。KubeSphere 服务网格支持代码无侵入的微服务治理,帮助开发者快速上手,Istio 的学习曲线也极大降低。KubeSphere 服务网格的所有功能都旨在满足用户的业务需求。
当前3.3.0版本的 KubeSphere 暂不支持为多集群应用创建灰度发布策略。单集群或者最简单的All-in-one虚拟机还是可以用的。有多集群灰度发布需求暂时不能考虑KubeSphere,需要自行搭建K8S集群及Istio等组件,自己想办法解决。
Istio
中文官网:https://istio.io/latest/zh/
Istio是个很常见的服务网格组件,主要是负载均衡、流量管控等功能。
灰度发布
KubeSphere官网概述:https://kubesphere.com.cn/docs/v3.3/project-user-guide/grayscale-release/overview/
所谓的灰度发布,其实就是通过不同的发布策略,将老旧的微服务替换为新版本微服务,且升级过程中遇到问题时风险更小,尽量减少对prod环境的影响。
蓝绿部署
KubeSphere官网介绍:https://kubesphere.com.cn/docs/v3.3/project-user-guide/grayscale-release/blue-green-deployment/
蓝绿部署会创建一个相同的备用环境,在该环境中运行新的应用版本,从而为发布新版本提供一个高效的方式,不会出现宕机或者服务中断。通过这种方法,KubeSphere 将所有流量路由至其中一个版本,即在任意给定时间只有一个环境接收流量。如果新构建版本出现任何问题,可以立刻回滚至先前版本。
这种发布策略很容易理解,就是创建备份,如果新版本不稳定或者功能、性能不达标,就立即回撤到老版本。Istio切换流量转发比一定是较人工重新部署上线更加迅速。
金丝雀发布
KubeSphere官网介绍:https://kubesphere.com.cn/docs/v3.3/project-user-guide/grayscale-release/canary-release/
金丝雀部署缓慢地向一小部分用户推送变更,从而将版本升级的风险降到最低。具体来讲,可以在高度响应的仪表板上进行定义,选择将新的应用版本暴露给一部分生产流量。另外,执行金丝雀部署后,KubeSphere 会监控请求,提供实时流量的可视化视图。在整个过程中,可以分析新的应用版本的行为,选择逐渐增加向它发送的流量比例。待对构建版本有把握后,便可以把所有流量路由至该构建版本。
这种发布策略就类似与各种网游的内测、封测、公测、正式运营。让各种精英用户率先体验,再逐步扩大测试范围,直到稳定运行。
流量镜像
KubeSphere官网介绍:https://kubesphere.com.cn/docs/v3.3/project-user-guide/grayscale-release/traffic-mirroring/
流量镜像复制实时生产流量并发送至镜像服务。默认情况下,KubeSphere 会镜像所有流量,也可以指定一个值来手动定义镜像流量的百分比。常见用例包括:
- 测试新的应用版本。可以对比镜像流量和生产流量的实时输出。
- 测试集群。可以将实例的生产流量用于集群测试。
- 测试数据库。可以使用空数据库来存储和加载数据。
这种发布策略就是将同一份prod环境的流量请求发送到镜像服务,类似MQ中消息的1对多分发。这种方式只会占用网络带宽、CPU时间片、内存、硬盘等资源,但是只要资源充足没有遇到性能瓶颈,就不会影响到prod环境。相同的流量请求转发到镜像服务后,便可以利用prod的数据做功能测试、性能压测。
启动服务网格Istio
KubeKey中文Github文档:https://github.com/kubesphere/kubekey/blob/master/README_zh-CN.md
KubeSphere官方文档:https://kubesphere.com.cn/docs/v3.3/installing-on-linux/introduction/multioverview/
在安装KubeSphere之前就可以修改配置,这样安装好KubeSphere后,正常情况会自动启动Istio。这是通过KubeKey实现的。
安装KubeSphere前配置启动
Linux安装KubeSphere时
root@zhiyong-ksp1:/home/zhiyong/kubesphereinstall# ./kk create config
Generate KubeKey config file successfully
root@zhiyong-ksp1:/home/zhiyong/kubesphereinstall# ll
总用量 70344
drwxrwxr-x  3 zhiyong zhiyong     4096 8月  16 23:14 ./
drwxr-xr-x 16 zhiyong zhiyong     4096 8月  16 23:12 ../
-rw-r--r--  1 root    root        1065 8月  16 23:14 config-sample.yaml
-rwxr-xr-x  1 zhiyong zhiyong 54910976 7月  26 14:17 kk*
drwxr-xr-x 12 root    root        4096 8月   8 10:04 kubekey/
-rw-rw-r--  1 zhiyong zhiyong 17102249 8月   8 01:03 kubekey-v2.2.2-linux-amd64.tar.gz
root@zhiyong-ksp1:/home/zhiyong/kubesphereinstall# cat config-sample.yaml

apiVersion: kubekey.kubesphere.io/v1alpha2
kind: Cluster
metadata:
  name: sample
spec:
  hosts:
  - name: node1, address: 172.16.0.2, internalAddress: 172.16.0.2, user: ubuntu, password: "Qcloud@123"
  - name: node2, address: 172.16.0.3, internalAddress: 172.16.0.3, user: ubuntu, password: "Qcloud@123"
  roleGroups:
    etcd:
    - node1
    control-plane:
    - node1
    worker:
    - node1
    - node2
  controlPlaneEndpoint:
    ## Internal loadbalancer for apiservers
    # internalLoadbalancer: haproxy

    domain: lb.kubesphere.local
    address: ""
    port: 6443
  kubernetes:
    version: v1.23.8
    clusterName: cluster.local
    autoRenewCerts: true
    containerManager: docker
  etcd:
    type: kubekey
  network:
    plugin: calico
    kubePodsCIDR: 10.233.64.0/18
    kubeServiceCIDR: 10.233.0.0/18
    ## multus support. https://github.com/k8snetworkplumbingwg/multus-cni
    multusCNI:
      enabled: false
  registry:
    privateRegistry: ""
    namespaceOverride: ""
    registryMirrors: []
    insecureRegistries: []
  addons: []
笔者创建的是默认的yaml配置文件。
还需要有如下内容:
servicemesh:
enabled: true # 将“false”更改为“true”。
istio: # Customizing the istio installation configuration, refer to https://istio.io/latest/docs/setup/additional-setup/customize-installation/
  components:
    ingressGateways:
    - name: istio-ingressgateway # 将服务暴露至服务网格之外。默认不开启。
      enabled: false
    cni:
      enabled: false # 启用后,会在 Kubernetes pod 生命周期的网络设置阶段完成 Istio 网格的 pod 流量转发设置工作。
之后执行:
./kk create cluster -f config-sample.yaml
KubeKey会自动在Linux服务器创建一个包含Istio组件的K8S集群。
当然也可以手动安装Istio这种CNI组件。
Istio中文官网安装文档:https://istio.io/latest/zh/docs/setup/additional-setup/cni/
K8S集群安装KubeSphere时
由于KubeSphere既可以运行在Linux服务器,又可以直接运行在K8S的pod中,故已经有K8S集群时,也可以在安装KubeSphere时启动服务网格组件Istio。方法大同小异。
vim cluster-configuration.yaml

---
apiVersion: installer.kubesphere.io/v1alpha1
kind: ClusterConfiguration
metadata:
  name: ks-installer
  namespace: kubesphere-system
  labels:
    version: v3.3.0
spec:
  persistence:
    storageClass: ""        # If there is no default StorageClass in your cluster, you need to specify an existing StorageClass here.
  authentication:
    jwtSecret: ""           # Keep the jwtSecret consistent with the Host Cluster. Retrieve the jwtSecret by executing "kubectl -n kubesphere-system get cm kubesphere-config -o yaml | grep -v "apiVersion" | grep jwtSecret" on the Host Cluster.
  local_registry: ""        # Add your private registry address if it is needed.
  # dev_tag: ""               # Add your kubesphere image tag you want to install, by default it's same as ks-installer release version.
  etcd:
    monitoring: false       # Enable or disable etcd monitoring dashboard installation. You have to create a Secret for etcd before you enable it.
    endpointIps: localhost  # etcd cluster EndpointIps. It can be a bunch of IPs here.
    port: 2379              # etcd port.
    tlsEnable: true
  common:
    core:
      console:
        enableMultiLogin: true  # Enable or disable simultaneous logins. It allows different users to log in with the same account at the same time.
        port: 30880
        type: NodePort
    # apiserver:            # Enlarge the apiserver and controller manager's resource requests and limits for the large cluster
    #  resources:
    # controllerManager:
    #  resources:
    redis:
      enabled: false
      enableHA: false
      volumeSize: 2Gi # Redis PVC size.
    openldap:
      enabled: false
      volumeSize: 2Gi   # openldap PVC size.
    minio:
      volumeSize: 20Gi # Minio PVC size.
    monitoring:
      # type: external   # Whether to specify the external prometheus stack, and need to modify the endpoint at the next line.
      endpoint: http://prometheus-operated.kubesphere-monitoring-system.svc:9090 # Prometheus endpoint to get metrics data.
      GPUMonitoring:     # Enable or disable the GPU-related metrics. If you enable this switch but have no GPU resources, Kubesphere will set it to zero.
        enabled: false
    gpu:                 # Install GPUKinds. The default GPU kind is nvidia.com/gpu. Other GPU kinds can be added here according to your needs.
      kinds:
      - resourceName: "nvidia.com/gpu"
        resourceType: "GPU"
        default: true
    es:   # Storage backend for logging, events and auditing.
      # master:
      #   volumeSize: 4Gi  # The volume size of Elasticsearch master nodes.
      #   replicas: 1      # The total number of master nodes. Even numbers are not allowed.
      #   resources:
      # data:
      #   volumeSize: 20Gi  # The volume size of Elasticsearch data nodes.
      #   replicas: 1       # The total number of data nodes.
      #   resources:
      logMaxAge: 7             # Log retention time in built-in Elasticsearch. It is 7 days by default.
      elkPrefix: logstash      # The string making up index names. The index name will be formatted as ks-<elk_prefix>-log.
      basicAuth:
        enabled: false
        username: ""
        password: ""
      externalElasticsearchHost: ""
      externalElasticsearchPort: ""
  alerting:                # (CPU: 0.1 Core, Memory: 100 MiB) It enables users to customize alerting policies to send messages to receivers in time with different time intervals and alerting levels to choose from.
    enabled: false         # Enable or disable the KubeSphere Alerting System.
    # thanosruler:
    #   replicas: 1
    #   resources:
  auditing:                # Provide a security-relevant chronological set of records,recording the sequence of activities happening on the platform, initiated by different tenants.
    enabled: false         # Enable or disable the KubeSphere Auditing Log System.
    # operator:
    #   resources:
    # webhook:
    #   resources:
  devops:                  # (CPU: 0.47 Core, Memory: 8.6 G) Provide an out-of-the-box CI/CD system based on Jenkins, and automated workflow tools including Source-to-Image & Binary-to-Image.
    enabled: false             # Enable or disable the KubeSphere DevOps System.
    # resources:
    jenkinsMemoryLim: 2Gi      # Jenkins memory limit.
    jenkinsMemoryReq: 1500Mi   # Jenkins memory request.
    jenkinsVolumeSize: 8Gi     # Jenkins volume size.
    jenkinsJavaOpts_Xms: 1200m  # The following three fields are JVM parameters.
    jenkinsJavaOpts_Xmx: 1600m
    jenkinsJavaOpts_MaxRAM: 2g
  events:                  # Provide a graphical web console for Kubernetes Events exporting, filtering and alerting in multi-tenant Kubernetes clusters.
    enabled: false         # Enable or disable the KubeSphere Events System.
    # operator:
    #   resources:
    # exporter:
    #   resources:
    # ruler:
    #   enabled: true
    #   replicas: 2
    #   resources:
  logging:                 # (CPU: 57 m, Memory: 2.76 G) Flexible logging functions are provided for log query, collection and management in a unified console. Additional log collectors can be added, such as Elasticsearch, Kafka and Fluentd.
    enabled: false         # Enable or disable the KubeSphere Logging System.
    logsidecar:
      enabled: true
      replicas: 2
      # resources:
  metrics_server:                    # (CPU: 56 m, Memory: 44.35 MiB) It enables HPA (Horizontal Pod Autoscaler).
    enabled: false                   # Enable or disable metrics-server.
  monitoring:
    storageClass: ""                 # If there is an independent StorageClass you need for Prometheus, you can specify it here. The default StorageClass is used by default.
    node_exporter:
      port: 9100
      # resources:
    # kube_rbac_proxy:
    #   resources:
    # kube_state_metrics:
    #   resources:
    # prometheus:
    #   replicas: 1  # Prometheus replicas are responsible for monitoring different segments of data source and providing high availability.
    #   volumeSize: 20Gi  # Prometheus PVC size.
    #   resources:
    #   operator:
    #     resources:
    # alertmanager:
    #   replicas: 1          # AlertManager Replicas.
    #   resources:
    # notification_manager:
    #   resources:
    #   operator:
    #     resources:
    #   proxy:
    #     resources:
    gpu:                           # GPU monitoring-related plug-in installation.
      nvidia_dcgm_exporter:        # Ensure that gpu resources on your hosts can be used normally, otherwise this plug-in will not work properly.
        enabled: false             # Check whether the labels on the GPU hosts contain "nvidia.com/gpu.present=true" to ensure that the DCGM pod is scheduled to these nodes.
        # resources:
  multicluster:
    clusterRole: none  # host | member | none  # You can install a solo cluster, or specify it as the Host or Member Cluster.
  network:
    networkpolicy: # Network policies allow network isolation within the same cluster, which means firewalls can be set up between certain instances (Pods).
      # Make sure that the CNI network plugin used by the cluster supports NetworkPolicy. There are a number of CNI network plugins that support NetworkPolicy, including Calico, Cilium, Kube-router, Romana and Weave Net.
      enabled: false # Enable or disable network policies.
    ippool: # Use Pod IP Pools to manage the Pod network address space. Pods to be created can be assigned IP addresses from a Pod IP Pool.
      type: none # Specify "calico" for this field if Calico is used as your CNI plugin. "none" means that Pod IP Pools are disabled.
    topology: # Use Service Topology to view Service-to-Service communication based on Weave Scope.
      type: none # Specify "weave-scope" for this field to enable Service Topology. "none" means that Service Topology is disabled.
  openpitrix: # An App Store that is accessible to all platform tenants. You can use it to manage apps across their entire lifecycle.
    store:
      enabled: false # Enable or disable the KubeSphere App Store.
  servicemesh:         # (0.3 Core, 300 MiB) Provide fine-grained traffic management, observability and tracing, and visualized traffic topology.
    enabled: false     # Base component (pilot). Enable or disable KubeSphere Service Mesh (Istio-based).
    istio:  # Customizing the istio installation configuration, refer to https://istio.io/latest/docs/setup/additional-setup/customize-installation/
      components:
        ingressGateways:
        - name: istio-ingressgateway
          enabled: false
        cni:
          enabled: false
  edgeruntime:          # Add edge nodes to your cluster and deploy workloads on edge nodes.
    enabled: false
    kubeedge:        # kubeedge configurations
      enabled: false
      cloudCore:
        cloudHub:
          advertiseAddress: # At least a public IP address or an IP address which can be accessed by edge nodes must be provided.
            - ""            # Note that once KubeEdge is enabled, CloudCore will malfunction if the address is not provided.
        service:
          cloudhubNodePort: "30000"
          cloudhubQuicNodePort: "30001"
          cloudhubHttpsNodePort: "30002"
          cloudstreamNodePort: "30003"
          tunnelNodePort: "30004"
        # resources:
        # hostNetWork: false
      iptables-manager:
        enabled: true
        mode: "external"
        # resources:
      # edgeService:
      #   resources:
  gatekeeper:        # Provide admission policy and rule management, A validating (mutating TBA) webhook that enforces CRD-based policies executed by Open Policy Agent.
    enabled: false   # Enable or disable Gatekeeper.
    # controller_manager:
    #   resources:
    # audit:
    #   resources:
  terminal:
    # image: 'alpine:3.15' # There must be an nsenter program in the image
    timeout: 600         # Container timeout, if set to 0, no timeout will be used. The unit is seconds
同样是修改这一段:
servicemesh:
enabled: true # 将“false”更改为“true”。
istio: # Customizing the istio installation configuration, refer to https://istio.io/latest/docs/setup/additional-setup/customize-installation/
  components:
    ingressGateways:
    - name: istio-ingressgateway # 将服务暴露至服务网格之外。默认不开启。
      enabled: false
    cni:
      enabled: false # 启用后,会在 Kubernetes pod 生命周期的网络设置阶段完成 Istio 网格的 pod 流量转发设置工作。
之后:
kubectl apply -f https://github.com/kubesphere/ks-installer/releases/download/v3.3.0/kubesphere-installer.yaml

kubectl apply -f cluster-configuration.yaml
K8S会根据描述的yaml文件配置项自动安装KubeSphere,并安装和配置好Istio。
安装KubeSphere后配置启动
由于Istio组件是运行在K8S的pod中,故只要有K8S环境就可以启动pod使用Istio。安装好KubeSphere之后,不管KubeSphere是运行在Linux还是K8S的pod,也不管K8S集群是All-in-one还是多节点,在KubeSphere中配置启动Istio都很容易。
按照笔者的All-in-one环境:https://lizhiyong.blog.csdn.net/article/details/126236516
先使用管理员登录:
http://192.168.88.20:30880
admin
Aa123456

平台管理→集群管理:
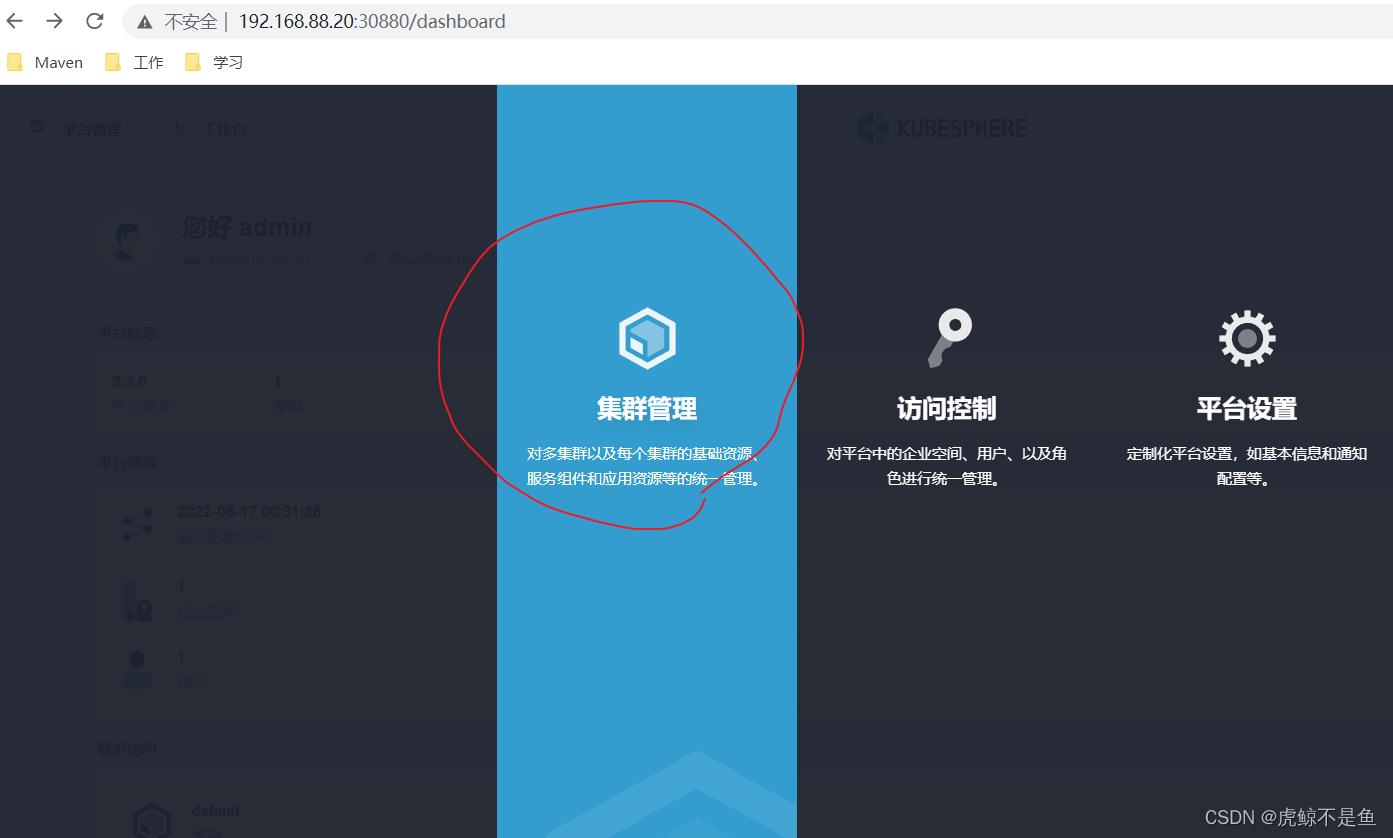
在定制资源定义,搜索clusterconf:
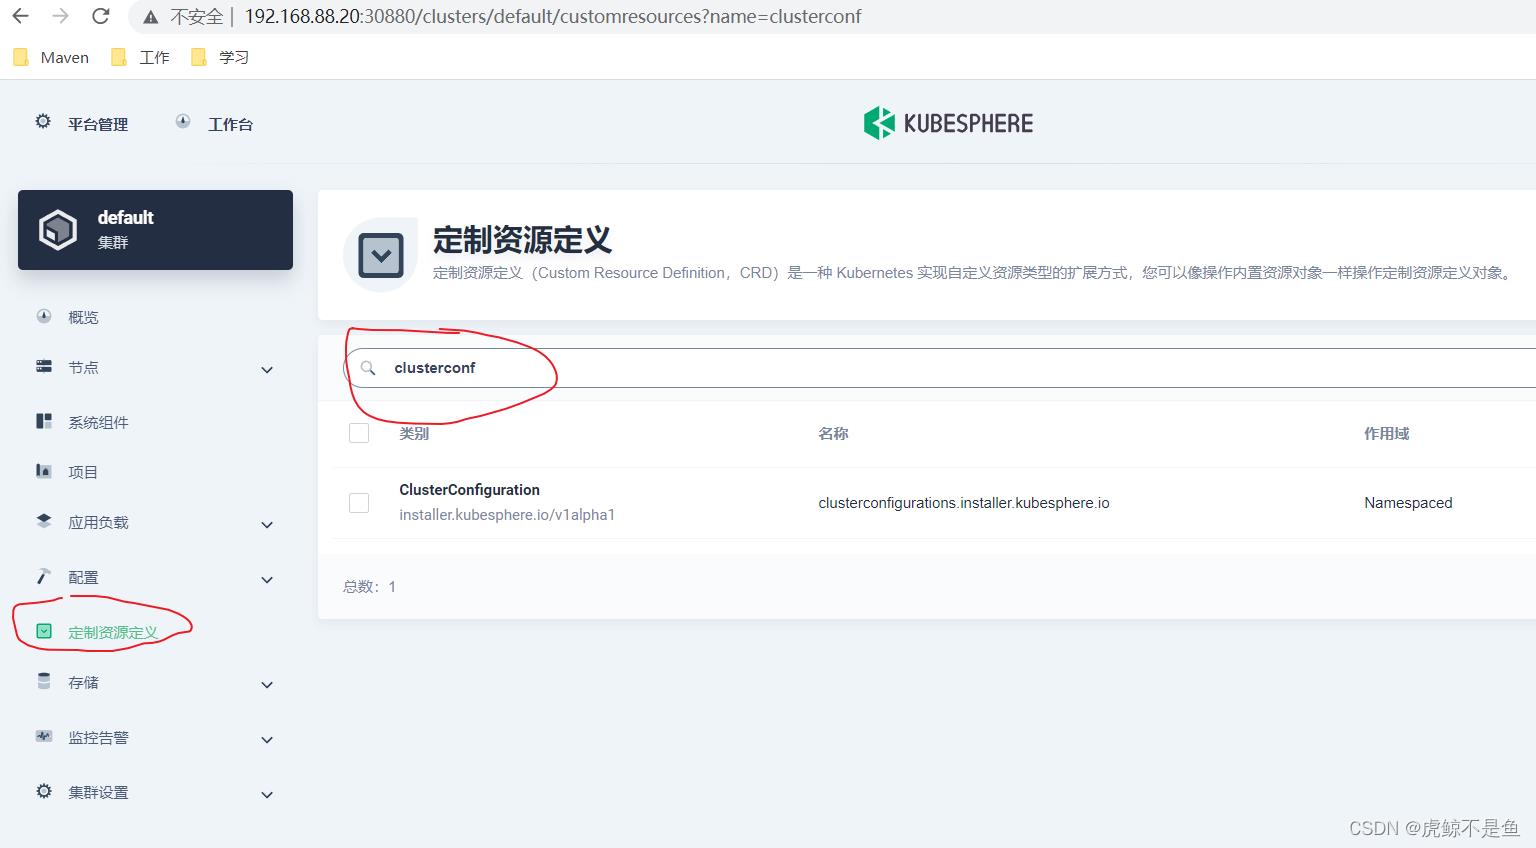
点进这个ClusterConfiguration之后:
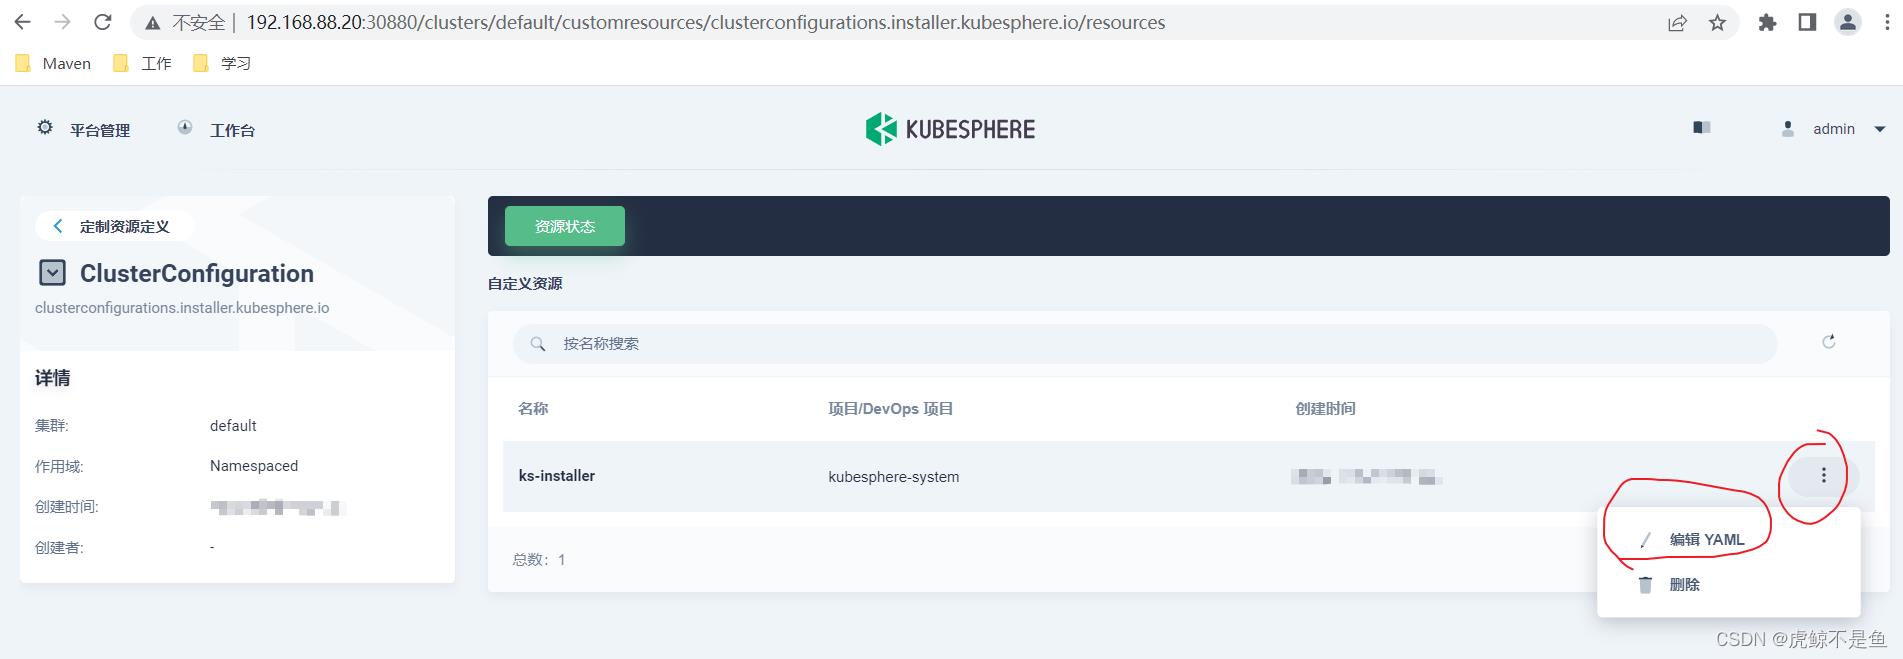
可以编辑yaml。
该yaml目前的内容:
apiVersion: installer.kubesphere.io/v1alpha1
kind: ClusterConfiguration
metadata:
  annotations:
    kubectl.kubernetes.io/last-applied-configuration: >
      "apiVersion":"installer.kubesphere.io/v1alpha1","kind":"ClusterConfiguration","metadata":"annotations":,"labels":"version":"v3.3.0","name":"ks-installer","namespace":"kubesphere-system","spec":"alerting":"enabled":false,"auditing":"enabled":false,"authentication":"jwtSecret":"","common":"core":"console":"enableMultiLogin":true,"port":30880,"type":"NodePort","es":"basicAuth":"enabled":false,"password":"","username":"","elkPrefix":"logstash","externalElasticsearchHost":"","externalElasticsearchPort":"","logMaxAge":7,"gpu":"kinds":["default":true,"resourceName":"nvidia.com/gpu","resourceType":"GPU"],"minio":"volumeSize":"20Gi","monitoring":"GPUMonitoring":"enabled":false,"endpoint":"http://prometheus-operated.kubesphere-monitoring-system.svc:9090","openldap":"enabled":false,"volumeSize":"2Gi","redis":"enabled":false,"volumeSize":"2Gi","devops":"enabled":false,"jenkinsJavaOpts_MaxRAM":"2g","jenkinsJavaOpts_Xms":"1200m","jenkinsJavaOpts_Xmx":"1600m","jenkinsMemoryLim":"2Gi","jenkinsMemoryReq":"1500Mi","jenkinsVolumeSize":"8Gi","edgeruntime":"enabled":false,"kubeedge":"cloudCore":"cloudHub":"advertiseAddress":[""],"service":"cloudhubHttpsNodePort":"30002","cloudhubNodePort":"30000","cloudhubQuicNodePort":"30001","cloudstreamNodePort":"30003","tunnelNodePort":"30004","enabled":false,"iptables-manager":"enabled":true,"mode":"external","etcd":"endpointIps":"192.168.88.20","monitoring":false,"port":2379,"tlsEnable":true,"events":"enabled":false,"logging":"enabled":false,"logsidecar":"enabled":true,"replicas":2,"metrics_server":"enabled":false,"monitoring":"gpu":"nvidia_dcgm_exporter":"enabled":false,"node_exporter":"port":9100,"storageClass":"","multicluster":"clusterRole":"none","network":"ippool":"type":"none","networkpolicy":"enabled":false,"topology":"type":"none","openpitrix":"store":"enabled":false,"persistence":"storageClass":"","servicemesh":"enabled":false,"istio":"components":"cni":"enabled":false,"ingressGateways":["enabled":false,"name":"istio-ingressgateway"],"terminal":"timeout":600,"zone":"cn"
  labels:
    version: v3.3.0
  name: ks-installer
  namespace: kubesphere-system
spec:
  alerting:
    enabled: false
  auditing:
    enabled: false
  authentication:
    jwtSecret: ''
  common:
    core:
      console:
        enableMultiLogin: true
        port: 30880
        type: NodePort
    es:
      basicAuth:
        enabled: false
        password: ''
        username: ''
      elkPrefix: logstash
      externalElasticsearchHost: ''
      externalElasticsearchPort: ''
      logMaxAge: 7
    gpu:
      kinds:
        - default: true
          resourceName: nvidia.com/gpu
          resourceType: GPU
    minio:
      volumeSize: 20Gi
    monitoring:
      GPUMonitoring:
        enabled: false
      endpoint: 'http://prometheus-operated.kubesphere-monitoring-system.svc:9090'
    openldap:
      enabled: false
      volumeSize: 2Gi
    redis:
      enabled: false
      volumeSize: 2Gi
  devops:
    enabled: false
    jenkinsJavaOpts_MaxRAM: 2g
    jenkinsJavaOpts_Xms: 1200m
    jenkinsJavaOpts_Xmx: 1600m
    jenkinsMemoryLim: 2Gi
    jenkinsMemoryReq: 1500Mi
    jenkinsVolumeSize: 8Gi
  edgeruntime:
    enabled: false
    kubeedge:
      cloudCore:
        cloudHub:
          advertiseAddress:
            - ''
        service:
          cloudhubHttpsNodePort: '30002'
          cloudhubNodePort: '30000'
          cloudhubQuicNodePort: '30001'
          cloudstreamNodePort: '30003'
          tunnelNodePort: '30004'
      enabled: false
      iptables-manager:
        enabled: true
        mode: external
  etcd:
    endpointIps: 192.168.88.20
    monitoring: false
    port: 2379
    tlsEnable: true
  events:
    enabled: false
  logging:
    enabled: false
    logsidecar:
      enabled: true
      replicas: 2
  metrics_server:
    enabled: false
  monitoring:
    gpu:
      nvidia_dcgm_exporter:
        enabled: false
    node_exporter:
      port: 9100
    storageClass: ''
  multicluster:
    clusterRole: none
  network:
    ippool:
      type: none
    networkpolicy:
      enabled: false
    topology:
      type: none
  openpitrix:
    store:
      enabled: false
  persistence:
    storageClass: ''
  servicemesh:
    enabled: false
    istio:
      components:
        cni:
          enabled: false
        ingressGateways:
          - enabled: false
            name: istio-ingressgateway
  terminal:
    timeout: 600
  zone: cn
显然按照官网文档,应该将末尾修改为:
servicemesh:
enabled: true # 将“false”更改为“true”。
istio: # Customizing the istio installation configuration, refer to https://istio.io/latest/docs/setup/additional-setup/customize-installation/
  components:
    ingressGateways:
    - name: istio-ingressgateway # 将服务暴露至服务网格之外。默认不开启。
      enabled: false
    cni:
      enabled: false # 启用后,会在 Kubernetes pod 生命周期的网络设置阶段完成 Istio 网格的 pod 流量转发设置工作。
根据yaml的规范,true前的空格绝对不能少!!!
确定保存后,即可检查Istio组件的安装过程【Ubuntu20.04需要切换root用户执行】:
kubectl logs -n kubesphere-system $(kubectl get pod -n kubesphere-system -l 'app in (ks-install, ks-installer)' -o jsonpath='.items[0].metadata.name') -f
然后:
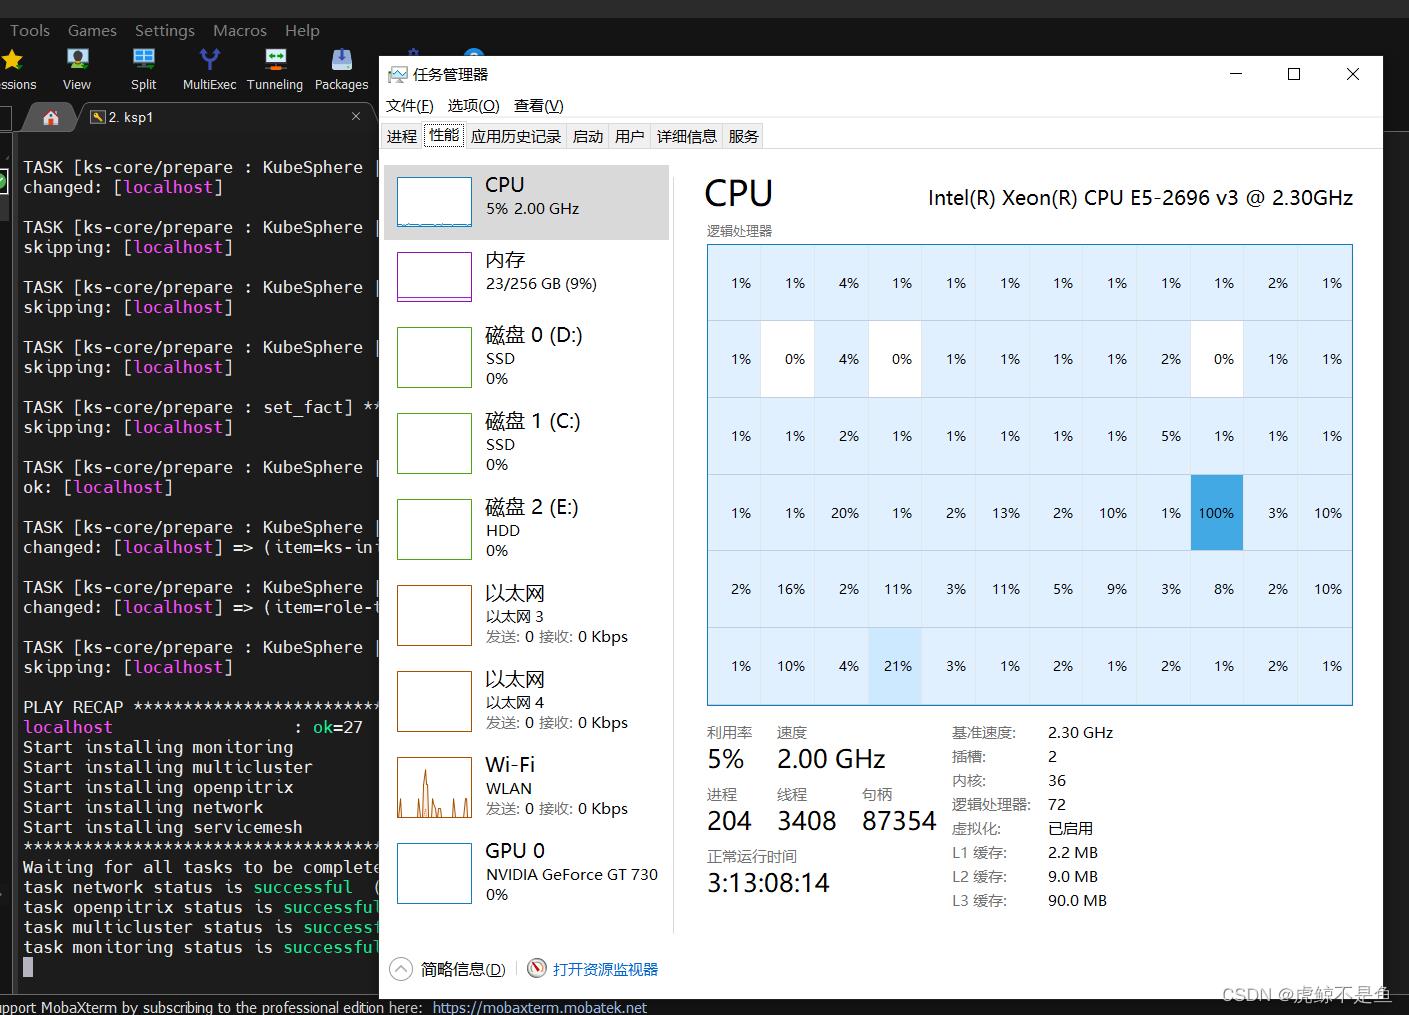
喜闻乐见的1核有难,15核点赞。。。有条件还是要上高主频的U,虽然核多也很重要。
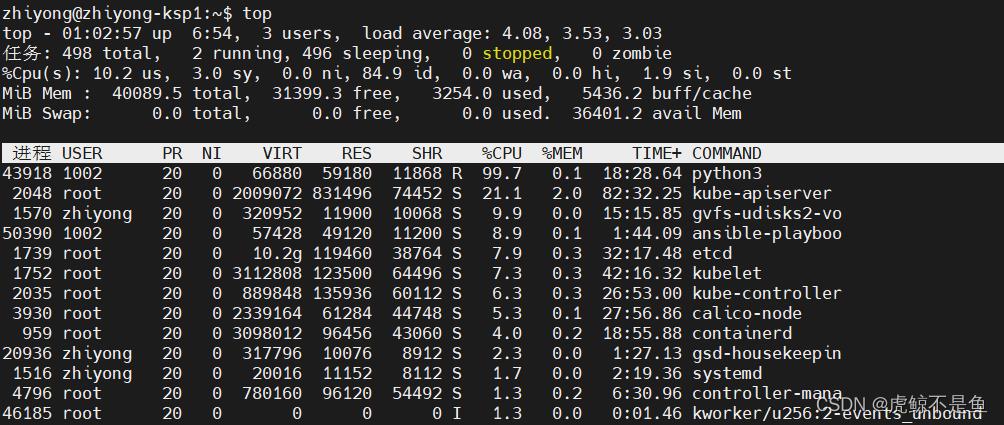
Top查看CPU占用情况,发现python3占用了99.7%的CPU。。。
等一阵子以后:
Waiting for all tasks to be completed ...
task network status is successful  (1/5)
task openpitrix status is successful  (2/5)
task multicluster status is successful  (3/5)
task monitoring status is successful  (4/5)
task servicemesh status is successful  (5/5)
**************************************************
Collecting installation results ...
#####################################################
###              Welcome to KubeSphere!           ###
#####################################################

Console: http://192.168.88.20:30880
Account: admin
Password: P@88w0rd

NOTES:
  1. After you log into the console, please check the
     monitoring status of service components in
     "Cluster Management". If any service is not
     ready, please wait patiently until all components
     are up and running.
  2. Please change the default password after login.
这就代表完成了Istio的安装及初始化。不需要理会这个原始密码。重新登录还是要用已经更改的密码。
验证Istio组件安装情况
在WebUI可以看到:
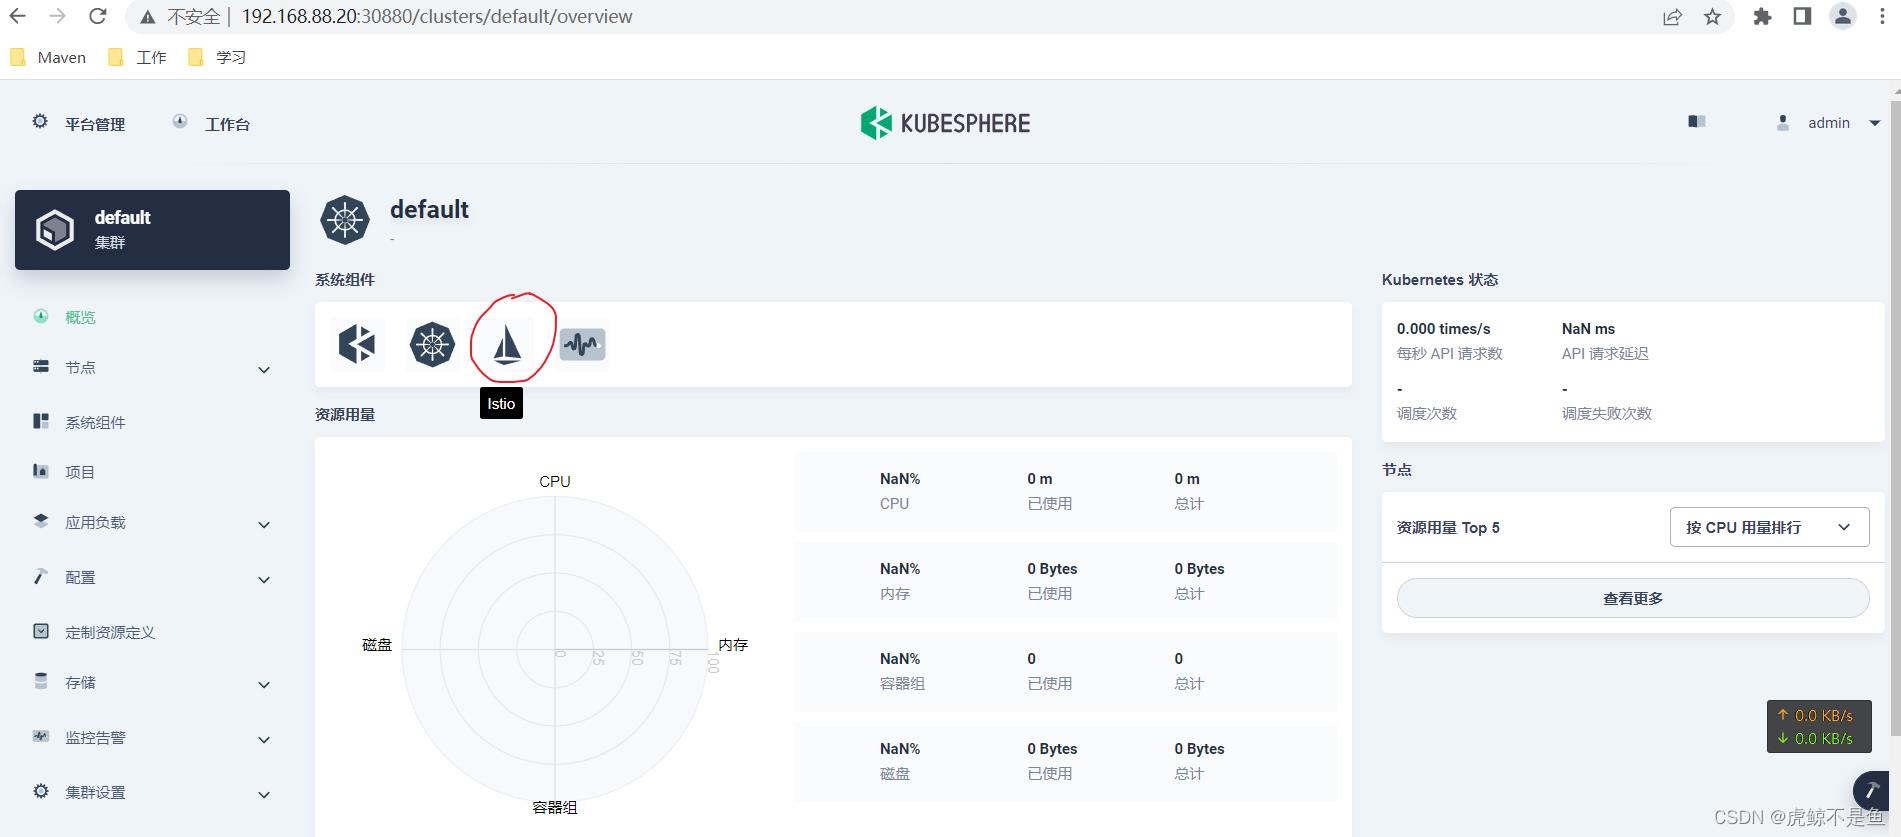
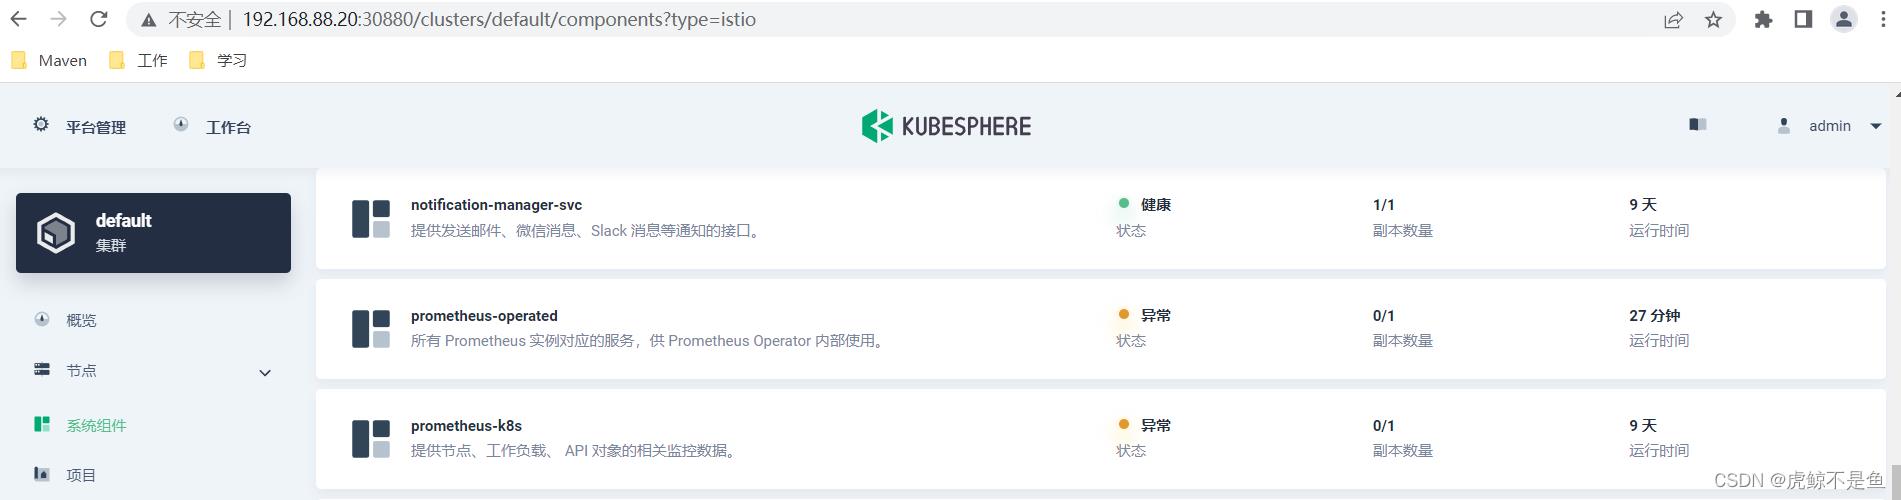
系统组件中已经出现了Istio组件。但是点进去发现:
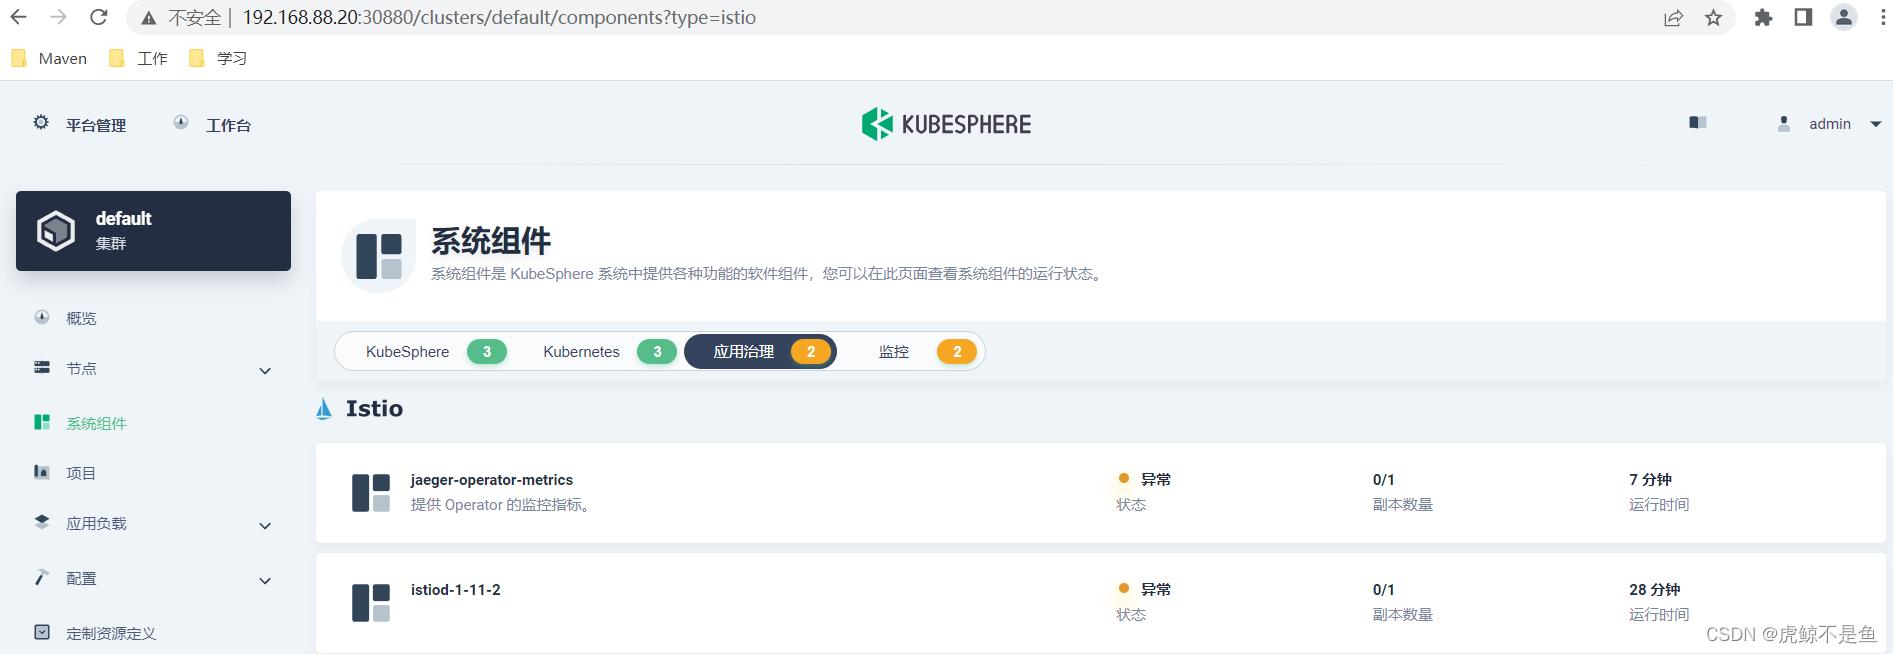
此时不但Istio异常,连带之前正常的Prometheus也一并异常了:
执行:
root@zhiyong-ksp1:/home/zhiyong# kubectl get pod -n istio-system
NAME                              READY   STATUS              RESTARTS   AGE
istiod-1-11-2-54dd699c87-99krn    0/1     ContainerCreating   0          27m
jaeger-operator-fccc48b86-vtcr8   0/1     ContainerCreating   0          7m10s
kiali-operator-c459985f7-sttfs    0/1     ContainerCreating   0          7m5s

root@zhiyong-ksp1:/home/zhiyong# kubectl get pod --all-namespaces
NAMESPACE                      NAME                                                              READY   STATUS              RESTARTS     AGE
istio-system                   istiod-1-11-2-54dd699c87-99krn                                    0/1     ContainerCreating   0            30m
istio-system                   jaeger-operator-fccc48b86-vtcr8                                   0/1     ContainerCreating   0            9m53s
istio-system                   kiali-operator-c459985f7-sttfs                                    0/1     ContainerCreating   0            9m48s
kube-system                    calico-kube-controllers-f9f9bbcc9-2v7lm                           1/1     Running             1 (8d ago)   8d
kube-system                    calico-node-4mgc7                                                 1/1     Running             1 (8d ago)   8d
kube-system                    coredns-f657fccfd-2gw7h                                           1/1     Running             1 (8d ago)   8d
kube-system                    coredns-f657fccfd-pflwf                                           1/1     Running             1 (8d ago)   8d
kube-system                    kube-apiserver-zhiyong-ksp1                                       1/1     Running             1 (8d ago)   8d
kube-system                    kube-controller-manager-zhiyong-ksp1                              1/1     Running             1 (8d ago)   8d
kube-system                    kube-proxy-cn68l                                                  1/1     Running             1 (8d ago)   8d
kube-system                    kube-scheduler-zhiyong-ksp1                                       1/1     Running             1 (8d ago)   8d
kube-system                    nodelocaldns-96gtw                                                1/1     Running             1 (8d ago)   8d
kube-system                    openebs-localpv-provisioner-68db4d895d-p9527                      1/1     Running             0            8d
kube-system                    snapshot-controller-0                                             1/1     Running             1 (8d ago)   8d
kubesphere-controls-system     default-http-backend-587748d6b4-ccg59                             1/1     Running             1 (8d ago)   8d
kubesphere-controls-system     kubectl-admin-5d588c455b-82cnk                                    1/1     Running             1 (8d ago)   8d
kubesphere-logging-system      elasticsearch-logging-curator-elasticsearch-curator-2767784rhhk   0/1     ContainerCreating   0            15m
kubesphere-logging-system      elasticsearch-logging-data-0                                      0/1     Pending             0            32m
kubesphere-logging-system      elasticsearch-logging-discovery-0                                 0/1     Pending             0            32m
kubesphere-monitoring-system   alertmanager-main-0                                               2/2     Running             2 (8d ago)   8d
kubesphere-monitoring-system   kube-state-metrics-6d6786b44-bbb4f                                3/3     Running             3 (8d ago)   8d
kubesphere-monitoring-system   node-exporter-8sz74                                               2/2     Running             2 (8d ago)   8d
kubesphere-monitoring-system   notification-manager-deployment-6f8c66ff88-pt4l8                  2/2     Running             2 (8d ago)   8d
kubesphere-monitoring-system   notification-manager-operator-6455b45546-nkmx8                    2/2     Running             2 (8d ago)   8d
kubesphere-monitoring-system   prometheus-k8s-0                                                  0/2     Terminating         0            8d
kubesphere-monitoring-system   prometheus-operator-66d997dccf-c968c                              2/2     Running             2 (8d ago)   8d
kubesphere-system              ks-apiserver-6b9bcb86f4-hsdzs                                     1/1     Running             1 (8d ago)   8d
kubesphere-system              ks-console-599c49d8f6-ngb6b                                       1/1     Running             1 (8d ago)   8d
kubesphere-system              ks-controller-manager-66747fcddc-r7cpt                            1/1     Running             1 (8d ago)   8d
kubesphere-system              ks-installer-5fd8bd46b8-dzhbb                                     1/1     Running             1 (8d ago)   8d
耐心等一会儿。。。
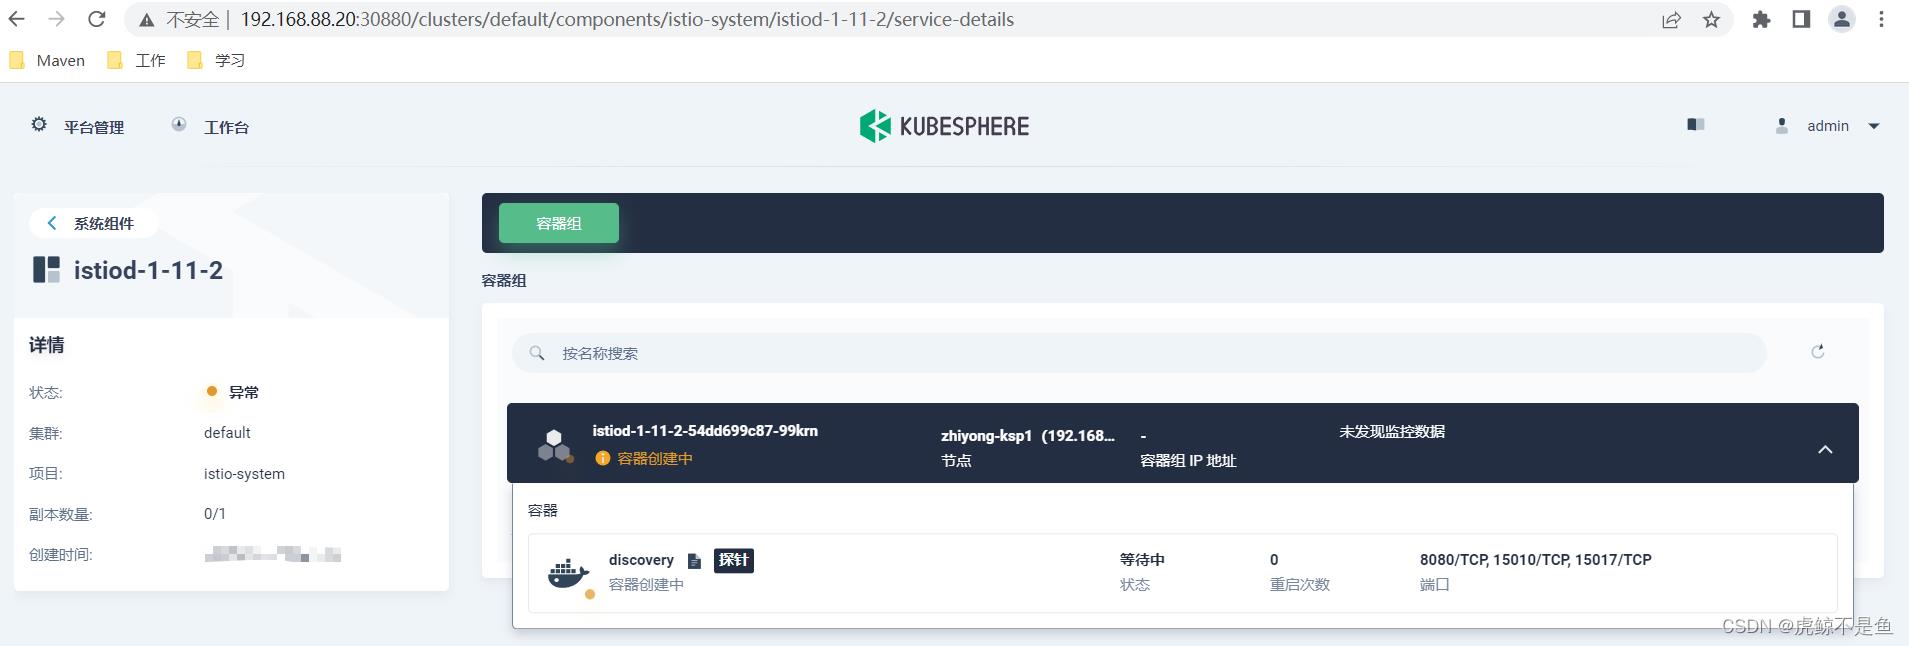
从KubeSphere的web UI监控可以看出目前状态还是容器创建中。但是一直这样也不合适。。。
解决ContainerCreating
查看日志
root@zhiyong-ksp1:/home/zhiyong# kubectl describe pod istiod-1-11-2-54dd699c87-99krn -n istio-system
Name: istiod-1-11-2-54dd699c87-99krn
Namespace: istio-system
Priority: 0
Node: zhiyong-ksp1/192.168.88.20
Start Time: Wed, 17 Aug 2022 00:44:55 +0800
Labels: app=istiod
install.operator.istio.io/owning-resource=unknown
istio=istiod
istio.io/rev=1-11-2
operator.istio.io/component=Pilot
pod-template-hash=54dd699c87
sidecar.istio.io/inject=false
Annotations: prometheus.io/port: 15014
prometheus.io/scrape: true
sidecar.istio.io/inject: false
Status: Pending
IP:
IPs: <none>
Controlled By: ReplicaSet/istiod-1-11-2-54dd699c87
Containers:
discovery:
Container ID:
Image: registry.cn-beijing.aliyuncs.com/kubesphereio/pilot:1.11.1
Image ID:
Ports: 8080以上是关于在KubeSphere启动服务网格Istio并解决解决ContainerCreating问题的主要内容,如果未能解决你的问题,请参考以下文章
在KubeSphere启动服务网格Istio并解决解决ContainerCreating问题