自己动手编译 JDK(MacOS)
Posted 冬瓜白
tags:
篇首语:本文由小常识网(cha138.com)小编为大家整理,主要介绍了自己动手编译 JDK(MacOS)相关的知识,希望对你有一定的参考价值。
相关文章
去年就尝试过自己编译 JDK,但是失败了,最近在分析 Java 虚拟机是如何处理 Linux 信号的时候,虽然大体流程清晰了,但是还是有很多方面无法理解,所以编译调试 JDK 势在必行。
我的操作系统版本:macOS Catalina 10.15.5。
安装 XCode 和 Commnad Line Tools for XCode
这个应该是可以不安装的,但是为了避免出现依赖问题,我还是安装了。
安装版本:11.5 (11E608c)。
获取 OpenJDK 源码
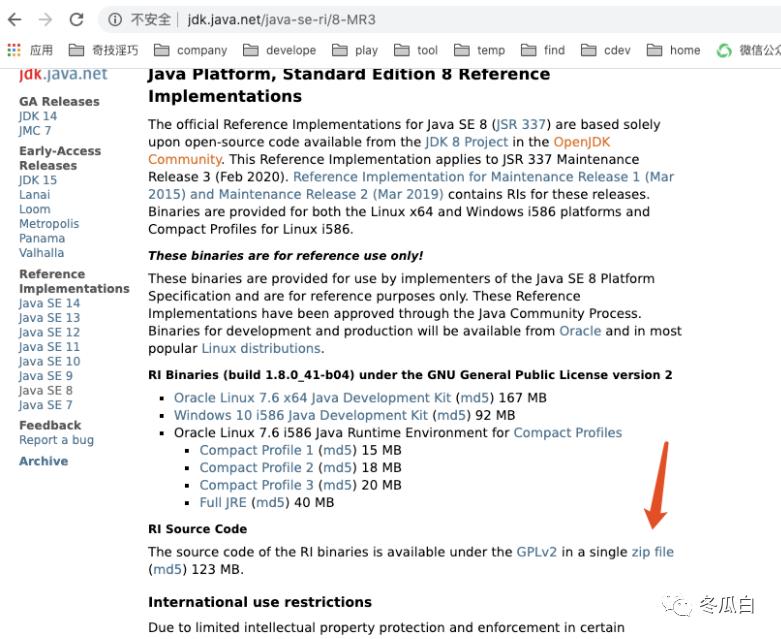
OpenJDK 是使用 Mercurial 进行代码管理的,Mercurial 很小众,那还要再安装 Mercurial,感觉没必要,而且听说拉源码的时候网络很容易断。这里直接下载下来:http://jdk.java.net/

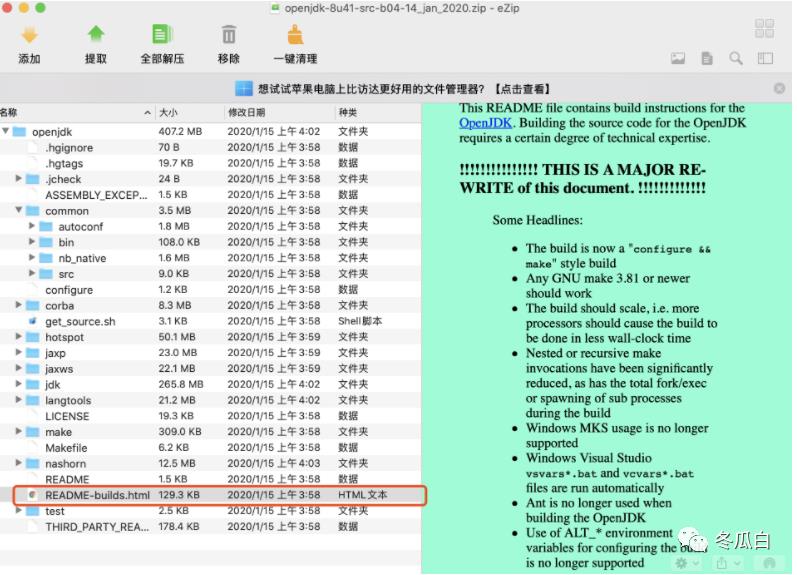
我一开始选择了 8,源码下载下来后,查看一下说明:

坑爹的是看到了这个:

想想也是,8 其实已经算是一个老版本了,印象中编辑 JDK 之前需要准备一个 N-1 版本的可用的 Bootstrap JDK,我本机已经装了 JDK 11:
  ➜ ~ java11


  ➜ ~ java -version


  java version "11.0.2" 2019-01-15 LTS


  Java(TM) SE Runtime Environment 18.9 (build 11.0.2+9-LTS)


  Java HotSpot(TM) 64-Bit Server VM 18.9 (build 11.0.2+9-LTS, mixed mode)
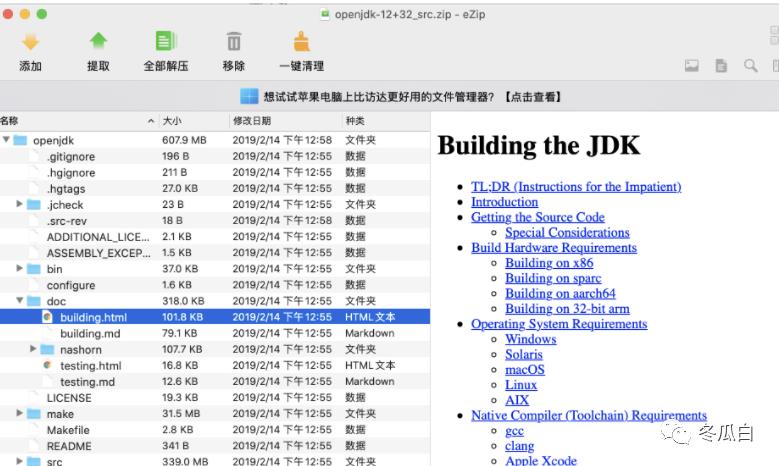
那我换一个下载 12:

macOS
Apple is using a quite aggressive scheme of pushing OS updates, and coupling these updates with required updates of Xcode. Unfortunately, this makes it difficult for a project such as the JDK to keep pace with a continuously updated machine running macOS. See the section on Apple Xcode on some strategies to deal with this.
It is recommended that you use at least Mac OS X 10.13 (High Sierra). At the time of writing, the JDK has been successfully compiled on macOS 10.12 (Sierra).
The standard macOS environment contains the basic tooling needed to build, but for external libraries a package manager is recommended. The JDK uses homebrew in the examples, but feel free to use whatever manager you want (or none).
Apple Xcode
The oldest supported version of Xcode is 8.
看着版本勉强应该可以契合,先试试。
准备环境
根据网上资料显示,需要安装这么几个:
  brew install ccache //加速编译


  brew install freetype //字体引擎,编译过程中会被依赖到
安装过程中更新 Homebrew 花了很长时间。
Configure 检查
首先需要配置编译参数,building.html 也有参数说明:
Configure Arguments for Tailoring the Build
--enable-debug- Set the debug level tofastdebug(this is a shorthand for--with-debug-level=fastdebug)
--with-debug-level=- Set the debug level, which can berelease,fastdebug,slowdebugoroptimized. Default isrelease.optimizedis variant ofreleasewith additional Hotspot debug code.
--with-native-debug-symbols=- Specify if and how native debug symbols should be built. Available methods arenone,internal,external,zipped. Default behavior depends on platform. See Native Debug Symbols for more details.
--with-version-string=- Specify the version string this build will be identified with.
--with-version-=- A group of options, where` can be any ofpre,opt,build,major,minor,securityorpatch.Usethese options to modify just the corresponding part of the versionstringfromthedefault,orthe value providedby--with-version-string`.
--with-jvm-variants=[,...]- Build the specified variant (or variants) of Hotspot. Valid variants are:server,client,minimal,core,zero,custom. Note that not all variants are possible to combine in a single build.
--with-jvm-features=[,...]- Use the specified JVM features when building Hotspot. The list of features will be enabled on top of the default list. For thecustomJVM variant, this default list is empty. A complete list of available JVM features can be found usingbash configure--help.
--with-target-bits=- Create a target binary suitable for running on a `` platform. Use this to create 32-bit output on a 64-bit build platform, instead of doing a full cross-compile. (This is known as a reduced build.)On Linux, BSD and AIX, it is possible to override where Java by default searches for runtime/JNI libraries. This can be useful in situations where there is a special shared directory for system JNI libraries. This setting can in turn be overriden at runtime by setting the
java.library.pathproperty.
--with-jni-libpath=- Use the specified path as a default when searching for runtime libraries.
为了便于以后再回过头看,我这里完成记录命令执行过程:
  ➜ 2.10.1 cd ~/Desktop/temp/openjdk12


  ➜ openjdk12 ls


  openjdk 2 openjdk-12+32_src.zip


  ➜ openjdk12 cd openjdk\ 2


  ➜ openjdk 2 ll


  total 80


  -rw-r--r--@ 1 dongguabai staff 2.1K 2 14 2019 ADDITIONAL_LICENSE_INFO


  -rw-r--r--@ 1 dongguabai staff 1.5K 2 14 2019 ASSEMBLY_EXCEPTION


  -rw-r--r--@ 1 dongguabai staff 19K 2 14 2019 LICENSE


  -rw-r--r--@ 1 dongguabai staff 2.7K 2 14 2019 Makefile


  -rw-r--r--@ 1 dongguabai staff 341B 2 14 2019 README


  drwxr-xr-x@ 9 dongguabai staff 288B 5 27 13:40 bin


  -rw-r--r--@ 1 dongguabai staff 1.6K 2 14 2019 configure


  drwxr-xr-x@ 7 dongguabai staff 224B 5 27 13:40 doc


  drwxr-xr-x@ 68 dongguabai staff 2.1K 5 27 13:40 make


  drwxr-xr-x@ 78 dongguabai staff 2.4K 5 27 13:41 src


  drwxr-xr-x@ 16 dongguabai staff 512B 5 27 13:41 test


  ➜ openjdk 2 ./configure --with-target-bits=64 --with-freetype=/usr/local/Cellar/freetype/2.10.1 --enable-ccache --with-jvm-variants=server,client --with-boot-jdk-jvmargs="-Xlint:deprecation -Xlint:unchecked" --disable-warnings-as-errors --with-debug-level=slowdebug 2>&1 | tee configure_mac_x64.log


  zsh: permission denied: ./configure


  ➜ openjdk 2 sudo ./configure --with-target-bits=64 --with-freetype=/usr/local/Cellar/freetype/2.10.1 --enable-ccache --with-jvm-variants=server,client --with-boot-jdk-jvmargs="-Xlint:deprecation -Xlint:unchecked" --disable-warnings-as-errors --with-debug-level=slowdebug 2>&1 | tee configure_mac_x64.log


  Password:


  sudo: ./configure: command not found


  ➜ openjdk 2 chmod u+x configure


  ➜ openjdk 2 sudo ./configure --with-target-bits=64 --with-freetype=/usr/local/Cellar/freetype/2.10.1 --enable-ccache --with-jvm-variants=server,client --with-boot-jdk-jvmargs="-Xlint:deprecation -Xlint:unchecked" --disable-warnings-as-errors --with-debug-level=slowdebug 2>&1 | tee configure_mac_x64.log


  /Users/dongguabai/Desktop/temp/openjdk12/openjdk: /Users/dongguabai/Desktop/temp/openjdk12/openjdk: No such file or directory


  ➜ openjdk 2 pwd


  /Users/dongguabai/Desktop/temp/openjdk12/openjdk 2


  ➜ openjdk 2 cd ..


  ➜ openjdk12 mv openjdk\ 2 openjdk


  ➜ openjdk12 ll


  total 361664


  drwxr-xr-x@ 20 dongguabai staff 640B 5 27 13:49 openjdk


  -rw-r--r--@ 1 dongguabai staff 173M 5 27 13:25 openjdk-12+32_src.zip


  ➜ openjdk12 cd openjdk


  ➜ openjdk ls


  ADDITIONAL_LICENSE_INFO Makefile configure make


  ASSEMBLY_EXCEPTION README configure_mac_x64.log src


  LICENSE bin doc test


  ➜ openjdk sudo ./configure --with-target-bits=64 --with-freetype=/usr/local/Cellar/freetype/2.10.1 --enable-ccache --with-jvm-variants=server,client --with-boot-jdk-jvmargs="-Xlint:deprecation -Xlint:unchecked" --disable-warnings-as-errors --with-debug-level=slowdebug 2>&1 | tee configure_mac_x64.log


  Runnable configure script is not present


  Generating runnable configure script at /Users/dongguabai/Desktop/temp/openjdk12/openjdk/build/.configure-support/generated-configure.sh


  Autoconf is not found on the PATH, and AUTOCONF is not set.


  You need autoconf to be able to generate a runnable configure script.


  You might be able to fix this by running 'brew install autoconf'.


  Error: Cannot find autoconf
发现报错了,缺少 autoconf,还是那句话,要认真读文档啊:
Build Tools Requirements
Autoconf
The JDK requires Autoconf on all platforms. At least version 2.69 is required.
To install on an apt-based Linux, try running
sudo apt-getinstall autoconf.To install on an rpm-based Linux, try running
sudo yum install autoconf.To install on macOS, try running
brew install autoconf.To install on Windows, try running
/setup-x86_64-q-P autoconf.If
configurehas problems locating your installation of autoconf, you can specify it using theAUTOCONFenvironment variable, like this:
AUTOCONF=<path to autoconf> configure ...
安装 autoconf 后再走一遍:
➜ openjdk brew install autoconf
Updating Homebrew...
==> Downloading https://homebrew.bintray.com/bottles/autoconf-2.69.catalina.bottle.4.tar.gz
==> Downloading from https://akamai.bintray.com/ca/ca510b350e941fb9395522a03f9d2fb5df276085d806ceead763acb95889a368?__gda__=exp=1590559880~hmac
######################################################################## 100.0%
==> Pouring autoconf-2.69.catalina.bottle.4.tar.gz
以上是关于自己动手编译 JDK(MacOS)的主要内容,如果未能解决你的问题,请参考以下文章
JNI用C加载JDK产生JVM虚拟机,并运行JAVA类main函数(MACOS/LINUX/WINDOWS)