重磅:canvas之粒子效果
Posted web前端课堂
tags:
篇首语:本文由小常识网(cha138.com)小编为大家整理,主要介绍了重磅:canvas之粒子效果相关的知识,希望对你有一定的参考价值。
置顶 web前端课堂 海量的知识点和精选的技术解析
在网上看了几篇关于canvas粒子效果的文章,很多小伙伴(新手)一看到代码就懵逼了,小编接下来用流式编程方法(没有对象,纯纯的上下文编写),给大家讲解一下实现canvas粒子效果最简单有效的方式。
原理,通过获取canvas上面的像素点,获取rgba值,通过计算移动这些点,逐渐聚合分离的效果
第一、获取图片路径,画到画布上
ctx.drawImage(img,0,0,img.width,img.height)
第二、获取图片的rgba值
var imgData=ctx.getImageData(0,0,canvas.width,canvas.height);
第三、new一个粒子对象(只有这一个地方需要对象,要不代码会特别臃肿),Alpha(rgba中的a值)大于125的值就是图片的点,同时计算x、y坐标和计算移动速度,push到pointArr数组中
pointArr.push(new Particle(
    x_random,y_random,x,y,vx,vy,color
))
Particle对象里面包括每一帧的图片渲染draw方法和移动move方法和update方法,大家感兴趣的话也可以添加鼠标mouseover方法。
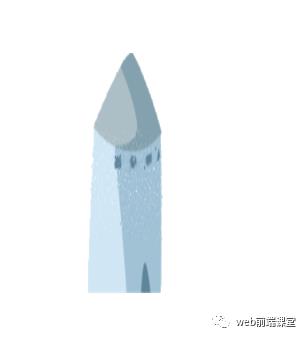
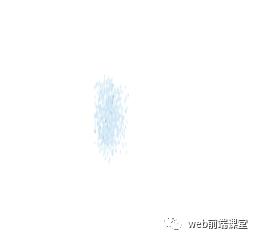
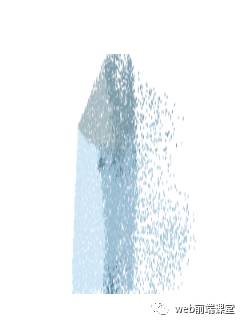
效果展示
完整代码
<canvas id="canvas" style="width:300px;height:300px;position: absolute;top:200px;left: 50%;-webkit-transform: translateX(-50%);"></canvas>
<script>
    var canvas=document.getElementById("canvas")
    var ctx=canvas.getContext("2d")
    var pointArr=[] //获取图片每个点a值>125 的rgba值 数组
    var animateArray=[]//获取需要正要懂的点 数组
    var ite=100
    var start =0
    var end=start + ite
    var img = new Image()
    img.src = "2.png"
    img.onload = function () {
        ctx.drawImage(img,0,0,img.width,img.height)
        getImage()
    }
    function getImage(){
        var imgData=ctx.getImageData(0,0,canvas.width,canvas.height);
        for(var x = 0;x<canvas.width;x++){
            for(var y=0;y<canvas.height;y++){
                var i=(y*canvas.width+x)*4
                if(imgData.data[i+3]>=125){
                    var color="rgba("+imgData.data[i]+","+imgData.data[i+1]+","+imgData.data[i+2]+","+imgData.data[i+3]+")"
                    var x_random = x + Math.random() * 20,
                            vx = -Math.random() * 200 + 400,
                            y_random = img.height / 2 - Math.random() * 40 + 20,
                            vy;
                    if (y_random < this.imgy + img.height / 2) {
                        vy = Math.random() * 100;
                    } else {
                        vy = -Math.random() * 100;
                    }
                    pointArr.push(new Particle(
                        x_random,y_random,x,y,vx,vy,color
                    ))
                    pointArr[pointArr.length - 1].drawSelf();
                }
            }
        }
        animate(function(tickTime) {
            if (animateArray.length < pointArr.length) {
                if (end > (pointArr.length - 1)) {
                    end = (pointArr.length - 1)
                }
                animateArray = animateArray.concat(pointArr.slice(start,end))
                start += ite;
                end += ite;
            }
            for(var i=0;i<animateArray.length;i++){
                animateArray[i].update(tickTime)
            }
        })
    }
    var RAF = (function() {
        return window.requestAnimationFrame || window.webkitRequestAnimationFrame || window.mozRequestAnimationFrame || window.oRequestAnimationFrame || window.msRequestAnimationFrame || function(callback) {
                    window.setTimeout(callback, 1000 / 60);
                };
    })();
    function animate(tick){
        if(typeof tick == "function"){
            var tickTime = 20;
            ctx.clearRect(0,0,canvas.width,canvas.height)
            tick(tickTime)
            RAF(function () {
                animate(tick)
            })
        }
    }
    function Particle(x, y, ex, ey, vx, vy, color) {
        this.x = x;
        this.y = y;
        this.ex = ex;
        this.ey = ey;
        this.vx = vx;
        this.vy = vy;
        this.a = 1500;
        this.color = color;
        this.width = 1;
        this.height = 2;
        this.stop = false;
        this.maxCheckTimes = 5;
        this.checkLength = 1;
        this.checkTimes = 0;
    }
    var oldColor = "";
    var mouseX = null, mouseY = null;
    var mouseRadius = 50;
    Particle.prototype = {
        constructor: Particle,
        drawSelf: function() {
            if (oldColor != this.color) {
                ctx.fillStyle = this.color;
                oldColor = this.color
            }
            ctx.fillRect(this.x - this.width / 2, this.y - this.height / 2, this.width, this.height);
        },
        move: function(tickTime) {
            if (this.stop) {
                this.x = this.ex;
                this.y = this.ey;
            } else {
                tickTime = tickTime / 1000;
                var cx = this.ex - this.x;
                var cy = this.ey - this.y;
                var angle = Math.atan(cy / cx);
                var ax = Math.abs(this.a * Math.cos(angle));
                ax = this.x > this.ex ? -ax : ax
                var ay = Math.abs(this.a * Math.sin(angle));
                ay = this.y > this.ey ? -ay : ay;
                this.vx += ax * tickTime;
                this.vy += ay * tickTime;
                this.vx *= 0.95;
                this.vy *= 0.95;
                this.x += this.vx * tickTime;
                this.y += this.vy * tickTime;
                if (Math.abs(this.x - this.ex) <= this.checkLength && Math.abs(this.y - this.ey) <= this.checkLength) {
                    this.checkTimes++;
                    if (this.checkTimes >= this.maxCheckTimes) {
                        this.stop = true;
                    }
                } else {
                    this.checkTimes = 0
                }
            }
        },
        update: function(tickTime) {
            this.move(tickTime);
            this.drawSelf();
        },
    };
</script>
若果大家有什么不会的地方可以留言,小编会耐心的给大家讲解
以上是关于重磅:canvas之粒子效果的主要内容,如果未能解决你的问题,请参考以下文章