flutter环境搭建与体验
Posted 倪伟金
tags:
篇首语:本文由小常识网(cha138.com)小编为大家整理,主要介绍了flutter环境搭建与体验相关的知识,希望对你有一定的参考价值。
flutter环境搭建与体验
早在2015年flutter就被提出来,Beta1版本于2018年2月27日在2018世界移动大会公布。它是谷歌的移动UI框架,可以快速在ios和android上构建高质量的原生用户界面。 Flutter可以与现有的代码一起工作。在全世界,Flutter正在被越来越多的开发者和组织使用,并且Flutter是完全免费、开源的。下面开始介绍flutter的环境搭建。
第一步(使用镜像)
由于在国内访问Flutter有时可能会受到限制,Flutter官方为中国开发者搭建了临时镜像,大家可以将如下环境变量加入到用户环境变量中:(如图)
第二步(获取flutter sdk)
获取步骤
1.去flutter官网下载其最新可用的安装包;
https://flutter.io/docs/development/tools/sdk/archive#windows
注意,Flutter的渠道版本会不停变动,请以Flutter官网为准。另外,在中国大陆地区,要想正常获取安装包列表或下载安装包,可能需要翻墙,读者也可以去Flutter github项目下去下载安装包 。https://github.com/flutter/flutter/releases
2.将安装包zip解压到你想安装Flutter SDK的路径(如:C:\src\flutter;注意,不要将flutter安装到需要一些高权限的路径如C:\Program Files\)。
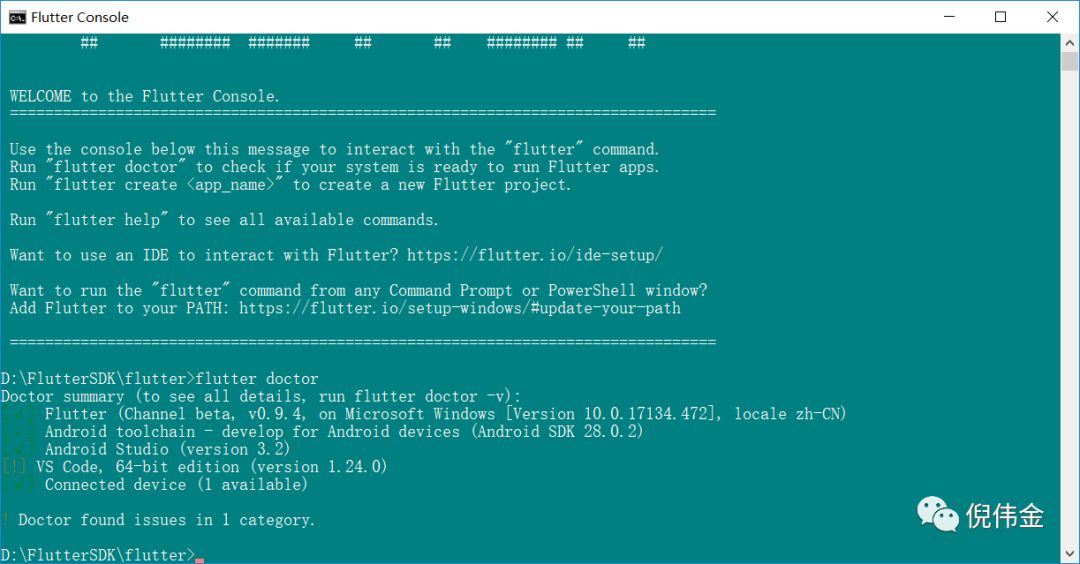
3.在Flutter安装目录的flutter文件下找到flutter_console.bat,双击运行并启动flutter命令行,接下来,你就可以在Flutter命令行运行flutter命令了。
(如flutter doctor,执行该命令会下载它自己的依赖项并自行编译。以后再运行就会快得多。)

第三步(安装Flutter Dart插件)
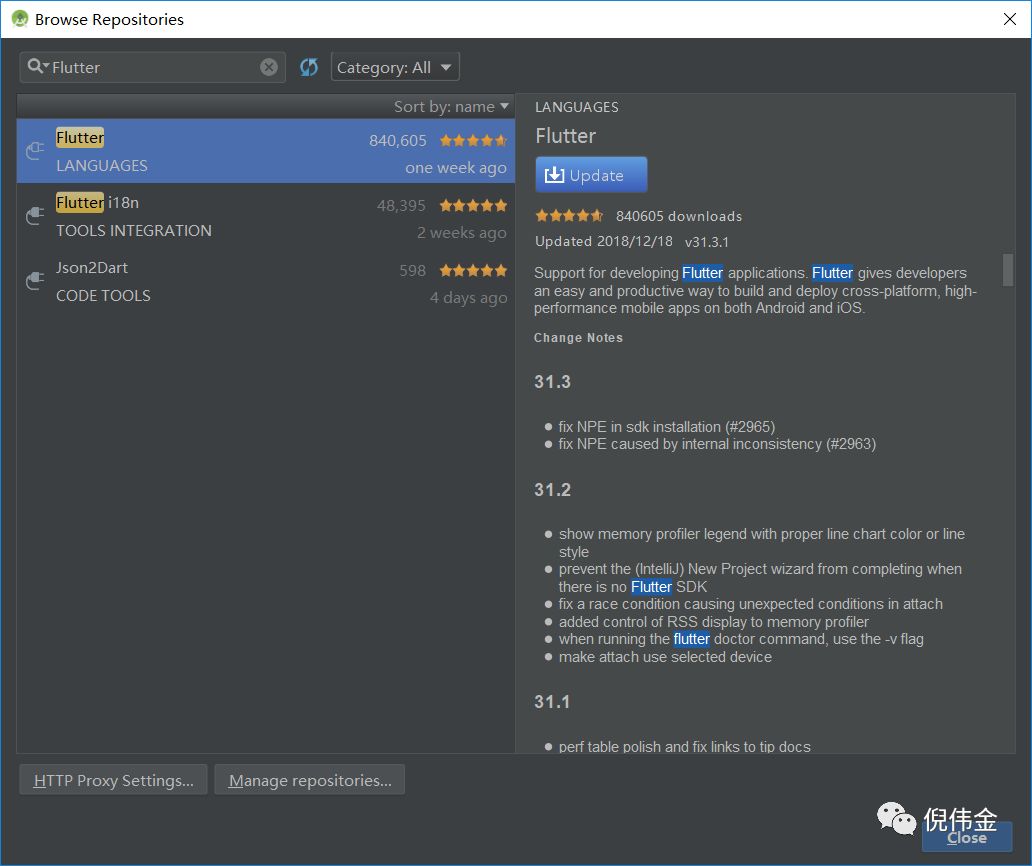
flutter是用dart语言写的,在IDE中需要添加Dart插件才能提供代码分析 (输入代码时进行验证、代码补全等).而Flutter插件则是支持Flutter开发工作流 (运行、调试、热重载等).这里使用的IDE是Android Studio。
步骤如下
1.启动Android Studio.
2.打开插件首选项 (Preferences>Plugins on macOS, File>Settings>Plugins on Windows & Linux).
3.选择 Browse repositories…, 选择 Flutter 插件并点击 install.
4.重启Android Studio后插件生效.

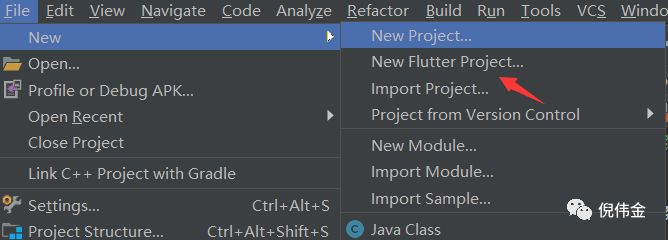
重启完IDE之后就可以新建flutter项目了,如图

参考官网自己摸索实现一个登陆页面
import 'package:flutter/material.dart';

void main(){runApp(new loginState());}
/***
 * login page base
 */
class loginState extends StatelessWidget{

  @override
  Widget build(BuildContext context) {
    var title = 'Web Images';
    return new MaterialApp(
      title: title,
      home: new Scaffold(
        appBar: new AppBar(
          title: new Text(title),
        ),
        body: new loginView(),
      ),
    );
  }

}

TextEditingController schoolController = new TextEditingController();
TextEditingController userController   = new TextEditingController();
TextEditingController passController   = new TextEditingController();


/*****
 * login ui view
 */
class  loginView extends StatelessWidget{
  @override
  Widget build(BuildContext context) {
    return new ListView(
      children: <Widget>[
        new Column(
          children: <Widget>[
            loginTopImg(),
            loginSchoolInput(),
            loginUserEditInput(),
            loginPassEditInput(),
            loginButton(context)
          ],
        )
      ],
    );
  }

}


/****
 * login page top img
 */
// ignore: missing_function_parameters
Widget loginTopImg()  {
  return new Padding(
    padding: EdgeInsets.all(40.0),
    child: new Image.asset(
      'images/icon_login_logo.png',
      scale: 1.3,
    ),
  );
}

/*****
 * login page school input
 * ***/
Widget loginSchoolInput(){
  return new Padding(
    padding: EdgeInsets.fromLTRB(20.0, 0.0 ,20.0, 0.0),
    child: new Stack(
      alignment: Alignment(1.0, 1.0),
      children: <Widget>[
        new Row(
          children: <Widget>[
            new Padding(
              padding: EdgeInsets.all(5.0),
              child: new Image.asset(
                "images/icon_school.png",
                width: 40.0,
                height: 40.0,
                fit: BoxFit.fill,
              ),
            ),
            new Expanded(
                child: new TextField(
                  controller: schoolController,
                  decoration: new InputDecoration(
                      hintText: "请输入学校"
                  ),
                )
            )

          ],
        ),
        new IconButton(
          icon: new Icon(Icons.clear),
          onPressed: (){
            schoolController.clear();
          } ,
        )
      ],
    ),
  );
}

/******
 * login user edit input
 * ********/
Widget loginUserEditInput(){
  return new Padding(
    padding: EdgeInsets.fromLTRB(20.0, 10.0, 20.0, 0.0),
    child: new Stack(
      alignment: Alignment(1.0, 1.0),
      children: <Widget>[
        new Row(
          children: <Widget>[
            new Padding(
              padding: EdgeInsets.all(5.0),
              child: new Image.asset(
                "images/icon_username.png",
                width: 40.0,
                height: 40.0,
                fit: BoxFit.fill,
              ),
            ),
            new Expanded(
                child: new TextField(
                  controller: userController,
                  decoration: new InputDecoration(
                      hintText: "请输入用户名"
                  ),
                )
            ),
          ],
        ),
        new IconButton(icon: new Icon(Icons.clear), onPressed: (){
          userController.clear();
        })
      ],
    ) ,
  );
}

/******
 * login pass edit input
 * ********/
Widget loginPassEditInput(){
  return new Padding(
    padding: EdgeInsets.fromLTRB(20.0, 10.0, 20.0, 0.0),
    child: new Stack(
      alignment: Alignment(1.0, 1.0),
      children: <Widget>[
        new Row(
          children: <Widget>[
            new Padding(
              padding: EdgeInsets.all(5.0),
              child: new Image.asset(
                "images/icon_password.png",
                width: 40.0,height: 40.0,
                fit: BoxFit.fill,
              ),
            ),
            new Expanded(
                child: new TextField(
                  controller: passController,
                  decoration: new InputDecoration(
                      hintText: "请输入密码"
                  ),
                )
            ),
          ],
        ),
        new IconButton(icon: new Icon(Icons.clear), onPressed: (){
          passController.clear();
        })
      ],
    ),
  );
}

/************
 * login button
 * **********/
Widget loginButton(BuildContext context){
  return new Container(
    width: 300.0,
    padding: EdgeInsets.fromLTRB(30.0,15.0 , 30.0, 0.0),
    child: new Card(
      elevation: 10.0, // 正常情况下浮动的距离
      color: Colors.amber,
      child: new FlatButton(
        color: Colors.amber,
        child: new Padding(
          padding: EdgeInsets.all(8.0),
          child: new Text("登录",
            style: new TextStyle(
                color: Colors.white,
                fontSize: 16.0
            ),),
        ),
        onPressed: (){
          _checkSub(context);
        },
      ),
    ),
  );
}

/********
 * 登录提交校验
 */
void _checkSub(BuildContext context){
  String msgStr = "";
  if(!schoolController.text.isNotEmpty ){
    msgStr = "请先输入学校";
  }else  if(!userController.text.isNotEmpty){
    msgStr = "用户账号不能为空";
  }else  if(!passController.text.isNotEmpty){
    msgStr = "用户密码不能为空";
  }

  if(msgStr != ''){
    showDialog(
        context: context,
        builder: (context){
          return new AlertDialog(
            title: new Text("提示信息"),
            content: new Text(msgStr),
            actions: <Widget>[
              new FlatButton(child: new Text("确定"),onPressed: (){
                Navigator.of(context).pop();
              }),
            ],
          );
        }
    );
  }else{
    Navigator.of(context).push(
      new MaterialPageRoute(builder: (context){
        new loginState();
      }),
    );
  }
}
注意一点是本地图片的引用(需要在pubspec.yaml中声明)
flutter:
  uses-material-design: true
  assets:
     - images/icon_login_logo.png
     - images/icon_password.png
     - images/icon_school.png
     - images/icon_username.png
效果图
以上是关于flutter环境搭建与体验的主要内容,如果未能解决你的问题,请参考以下文章