Fish Redux,阿里出品的Flutter框架
Posted Carson带你学习Android
tags:
篇首语:本文由小常识网(cha138.com)小编为大家整理,主要介绍了Fish Redux,阿里出品的Flutter框架相关的知识,希望对你有一定的参考价值。
本篇文章来自菜鸟阿呆的投稿,分享了阿里Flutter框架:fish_redux的学习与实践过程
https://juejin.im/user/2840793776393847
/ 讲解内容 /
-
页面切换的转场动画 -
页面怎么更新数据 -
fish_redux各个模块之间,怎么传递数据 -
怎么配合ListView使用 -
ListView怎么使用adapter,数据怎么和item绑定 -
怎么将Page当做widget使用(BottomNavigationBar,NavigationRail等等导航栏控件会使用到) -
这个直接使用:XxxPage.buildPage(null) 即可
引入
-
GitHub地址:https://github.com/alibaba/fish-redux -
Pub地址:https://pub.dev/packages/fish_redux
    fish_redux: ^0.3.4
#演示列表需要用到的库
dio: ^3.0.9    #网络请求框架
json_annotation: ^2.4.0 #json序列化和反序列化用的
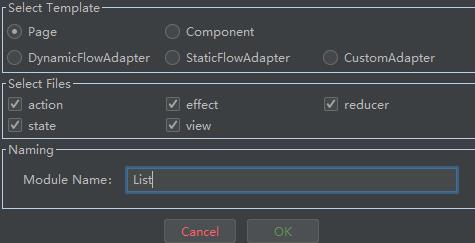
开发插件
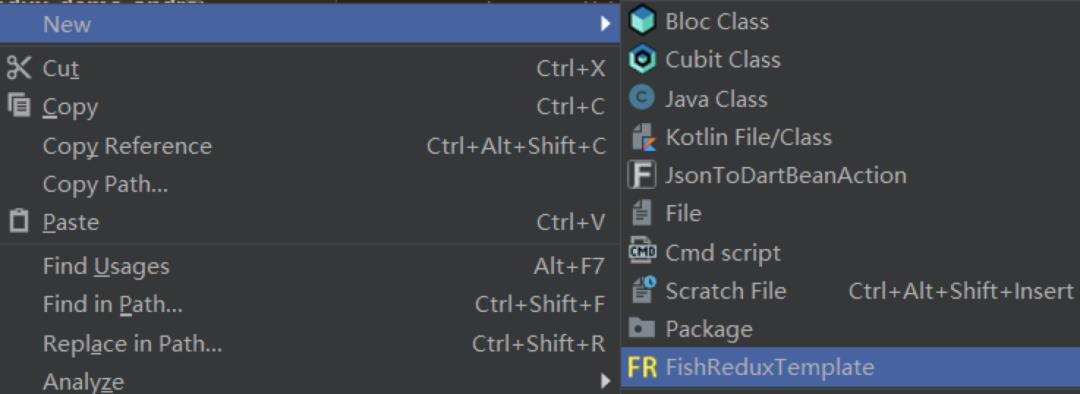
-
Component:这个一般是可复用的相关的组件;列表的item,也可以选择这个 -
Adapter:这里有三个Adapter,都可以不用了;fish_redux第三版推出了功能更强大的adapter,更加灵活的绑定方式
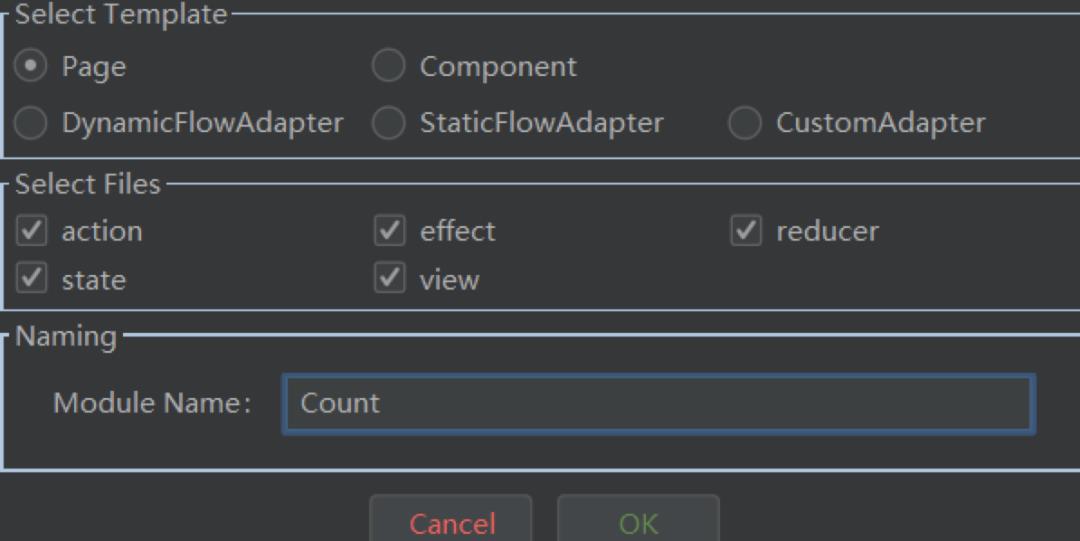

-
page:总页面,注册effect,reducer,component,adapter的功能,相关的配置都在此页面操作 -
state:这地方就是我们存放子模块变量的地方;初始化变量和接受上个页面参数,也在此处,是个很重要的模块 -
view:主要是我们写页面的模块 -
action:这是一个非常重要的模块,所有的事件都在此处定义和中转 -
effect:相关的业务逻辑,网络请求等等的“副作用”操作,都可以写在该模块 -
reducer:该模块主要是用来更新数据的,也可以写一些简单的逻辑或者和数据有关的逻辑操作
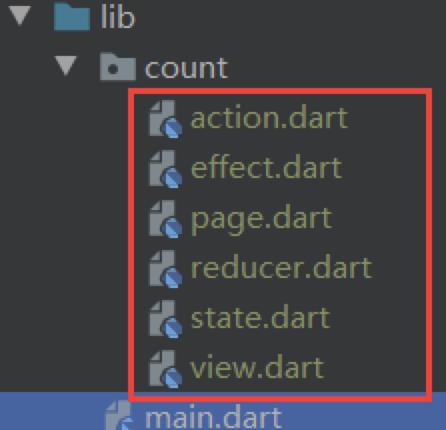

redux流程
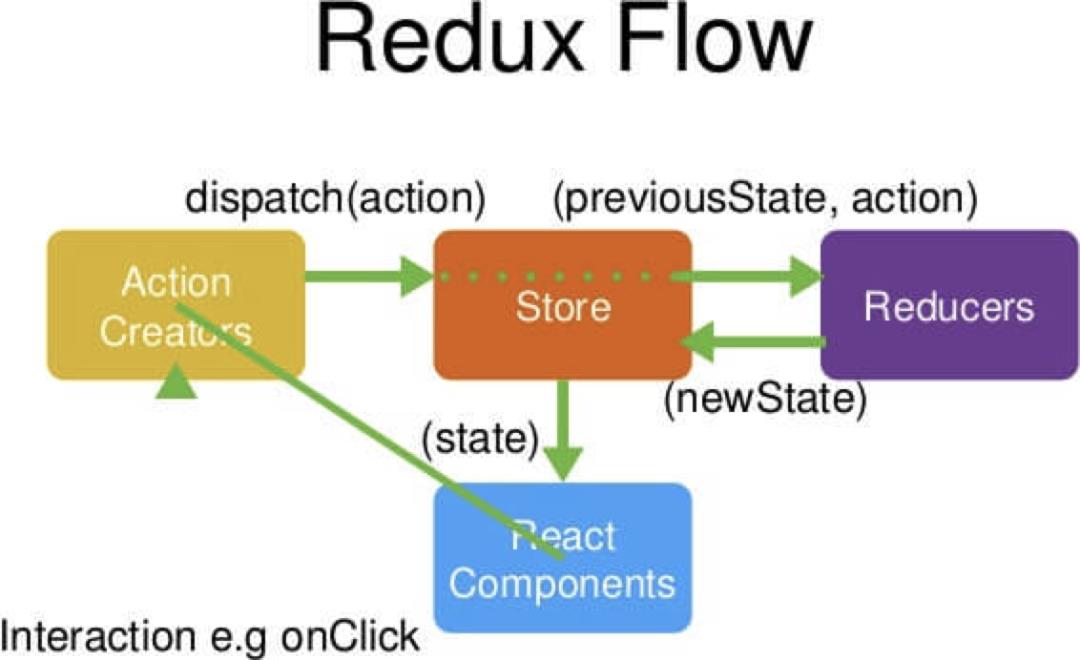
fish_redux流程
-
可以发现,事件的传递,都是通过dispatch这个方法,而且action这层很明显是非常关键的一层,事件的传递,都是在该层定义和中转的 -
这图在语雀上调了半天,就在上面加了个自己的github水印地址
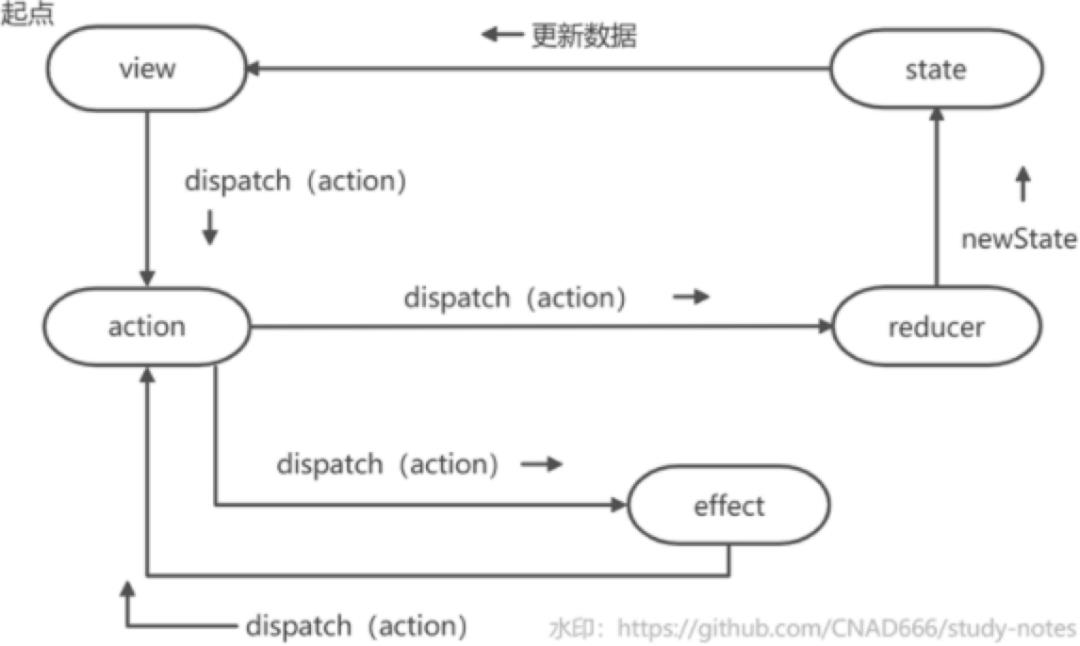
-
redux里面的store是全局的。fish_redux里面也有这个全局store的概念,放在子模块里面理解store,react;对应fish_redux里的就是:state,view -
fish_redux里面多了effect层:这层主要是处理逻辑,和相关网络请求之类 -
reducer里面,理论上也是可以处理一些和数据相关,简单的逻辑;但是复杂的,会产生相应较大的“副作用”的业务逻辑,还是需要在effect中写
-
计数器 fish_redux正常情况下的流转过程 fish_redux各模块怎么传递数据
-
列表文章 网络请求数据,列表加载 fish_redux在ListView中使用
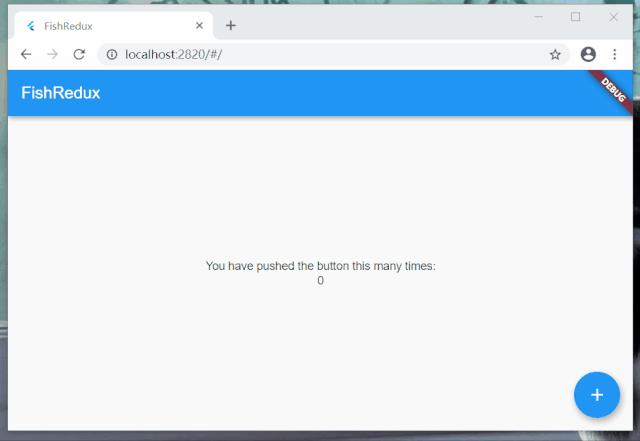
标准模式
-
main
    ///需要使用hide隐藏Page
import 'package:flutter/cupertino.dart'hide Page;
import 'package:flutter/material.dart' hide Page;
void main() {
  runApp(MyApp());
}
Widget createApp() {
  ///定义路由
  final AbstractRoutes routes = PageRoutes(
    pages: <String, Page<Object, dynamic>>{
      "CountPage": CountPage(),
    },
  );
  return MaterialApp(
    title: 'FishDemo',
    home: routes.buildPage("CountPage", null), //作为默认页面
    onGenerateRoute: (RouteSettings settings) {
      //ios页面切换风格
      return CupertinoPageRoute(builder: (BuildContext context) {
        return routes.buildPage(settings.name, settings.arguments);
      })
//      Material页面切换风格
//      return MaterialPageRoute<Object>(builder: (BuildContext context) {
//        return routes.buildPage(settings.name, settings.arguments);
//      });
    },
  );
}
-
state
    class CountState implements Cloneable<CountState> {
  int count;
  @override
  CountState clone() {
    return CountState()..count = count;
  }
}
CountState initState(Map<String, dynamic> args) {
  return CountState()..count = 0;
}
-
view
-
state:这个就是我们的数据层,页面需要的变量都写在state层 -
dispatch:类似调度器,调用action层中的方法,从而去回调effect,reducer层的方法 -
viewService:这个参数,我们可以使用其中的方法:buildComponent(“组件名”),调用我们封装的相关组件
    Widget buildView(CountState state, Dispatch dispatch, ViewService viewService) {
  return _bodyWidget(state, dispatch);
}
Widget _bodyWidget(CountState state, Dispatch dispatch) {
  return Scaffold(
    appBar: AppBar(
      title: Text("FishRedux"),
    ),
    body: Center(
      child: Column(
        mainAxisAlignment: MainAxisAlignment.center,
        children: <Widget>[
          Text('You have pushed the button this many times:'),
          ///使用state中的变量,控住数据的变换
          Text(state.count.toString()),
        ],
      ),
    ),
    floatingActionButton: FloatingActionButton(
      onPressed: () {
        ///点击事件,调用action 计数自增方法
        dispatch(CountActionCreator.countIncrease());
      },
      child: Icon(Icons.add),
    ),
  );
}
-
action
    enum CountAction { increase, updateCount }
class CountActionCreator {
  ///去effect层去处理自增数据
  static Action countIncrease() {
    return Action(CountAction.increase);
  }
  ///去reducer层更新数据,传参可以放在Action类中的payload字段中,payload是dynamic类型,可传任何类型
  static Action updateCount(int count) {
    return Action(CountAction.updateCount, payload: count);
  }
}
-
effect
-
action:该对象中,我们可以拿到payload字段里面,在action里面保存的值 -
ctx:该对象中,可以拿到state的参数,还可以通过ctx调用dispatch方法,调用action中的方法,在这里调用dispatch方法,一般是把处理好的数据,通过action中转到reducer层中更新数据
    Effect<CountState> buildEffect() {
  return combineEffects(<Object, Effect<CountState>>{
    CountAction.increase: _onIncrease,
  });
}
///自增数
void _onIncrease(Action action, Context<CountState> ctx) {
  ///处理自增数逻辑
  int count = ctx.state.count + 1;
  ctx.dispatch(CountActionCreator.updateCount(count));
}
-
reducer
    Reducer<CountState> buildReducer() {
  return asReducer(
    <Object, Reducer<CountState>>{
      CountAction.updateCount: _updateCount,
    },
  );
}
///通知View层更新界面
CountState _updateCount(CountState state, Action action) {
  final CountState newState = state.clone();
  newState..count = action.payload;
  return newState;
}
-
view —-> action —-> reducer
-
view
   Widget buildView(CountState state, Dispatch dispatch, ViewService viewService) {
  return _bodyWidget(state, dispatch);
}
Widget _bodyWidget(CountState state, Dispatch dispatch) {
  return Scaffold(
    appBar: AppBar(
      title: Text("FishRedux"),
    ),
    body: Center(
      child: Column(
        mainAxisAlignment: MainAxisAlignment.center,
        children: <Widget>[
          Text('You have pushed the button this many times:'),
          Text(state.count.toString()),
        ],
      ),
    ),
    floatingActionButton: FloatingActionButton(
      onPressed: () {
        ///点击事件,调用action 计数自增方法
        dispatch(CountActionCreator.updateCount());
      },
      child: Icon(Icons.add),
    ),
  );
}
-
action
   enum CountAction { updateCount }
class CountActionCreator {
  ///去reducer层更新数据,传参可以放在Action类中的payload字段中,payload是dynamic类型,可传任何类型
  static Action updateCount() {
    return Action(CountAction.updateCount);
  }
}
-
reducer
   Reducer<CountState> buildReducer() {
  return asReducer(
    <Object, Reducer<CountState>>{
      CountAction.updateCount: _updateCount,
    },
  );
}
///通知View层更新界面
CountState _updateCount(CountState state, Action action) {
  final CountState newState = state.clone();
  newState..count = state.count + 1;
  return newState;
}
搞定


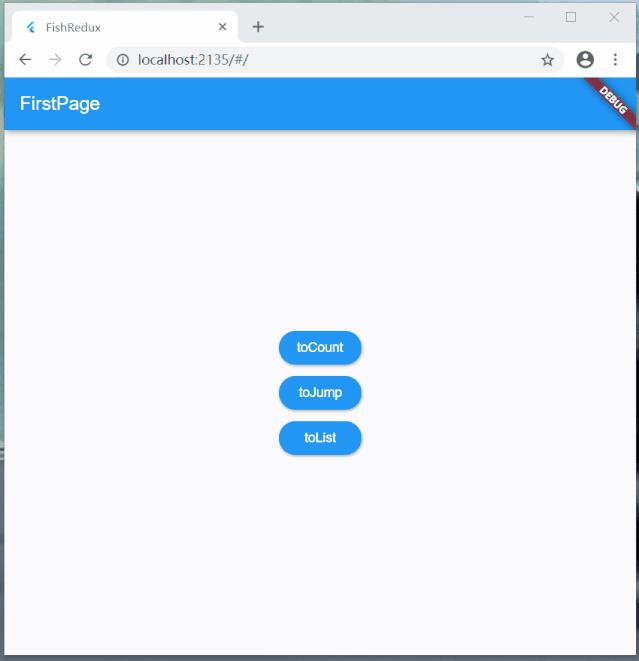
准备
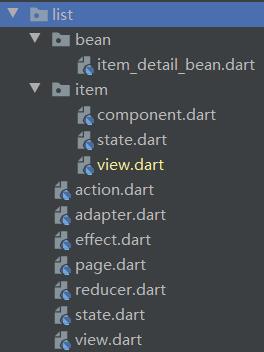
实现
-
main
   void main() {
  runApp(createApp());
}
Widget createApp() {
  ///定义路由
  final AbstractRoutes routes = PageRoutes(
    pages: <String, Page<Object, dynamic>>{
      ///导航页面
      "GuidePage": GuidePage(),
      ///计数器模块演示
      "CountPage": CountPage(),
      ///页面传值跳转模块演示
      "FirstPage": FirstPage(),
      "SecondPage": SecondPage(),
      ///列表模块演示
      "ListPage": ListPage(),
    },
  );
  return MaterialApp(
    title: 'FishRedux',
    home: routes.buildPage("GuidePage", null), //作为默认页面
    onGenerateRoute: (RouteSettings settings) {
      //ios页面切换风格
      return CupertinoPageRoute(builder: (BuildContext context) {
        return routes.buildPage(settings.name, settings.arguments);
      });
    },
  );
}
流程
-
创建item(Component) —-> 创建adapter文件 —-> state集成相应的Source —-> page里面绑定adapter
-
初始化列表模块 -
这个就是正常的创建fish_redux模板代码和文件 -
item模块 -
根据接口返回json,创建相应的bean —-> 创建item模块 —-> 编写state —-> 编写view界面 -
列表模块逻辑完善:俩地方分俩步(adapter创建及其绑定,正常page页面编辑) -
创建adapter文件 —-> state调整 —-> page中绑定adapter -
view模块编写 —-> action添加更新数据事件 —-> effect初始化时获取数据并处理 —-> reducer更新数据
初始化列表模块
item模块
-
创建bean实体
-
api: https://www.wanandroid.com/project/list/1/json
-
网站: https://javiercbk.github.io/json_to_dart/ -
插件:AS中可以搜索:FlutterJsonBeanFactory
-
ItemDetailBean代码:https://github.com/CNAD666/ExampleCode/blob/master/Flutter/fish_redux_demo/lib/list/bean/item_detail_bean.dart
-
创建item模块
-
state
   import 'package:fish_redux/fish_redux.dart';
import 'package:fish_redux_demo/list/bean/item_detail_bean.dart';
class ItemState implements Cloneable<ItemState> {
  Datas itemDetail;
  ItemState({this.itemDetail});
  @override
  ItemState clone() {
    return ItemState()
        ..itemDetail = itemDetail;
  }
}
ItemState initState(Map<String, dynamic> args) {
  return ItemState();
}
-
view
-
左边:单纯的图片展示 -
右边:采用了纵向布局(Column),结合Expanded形成比例布局,分别展示三块东西:标题,内容,作者和时间
   Widget buildView(ItemState state, Dispatch dispatch, ViewService viewService) {
  return _bodyWidget(state);
}
Widget _bodyWidget(ItemState state) {
  return Card(
    shape: RoundedRectangleBorder(borderRadius: BorderRadius.circular(20)),
    elevation: 5,
    margin: EdgeInsets.only(left: 20, right: 20, top: 20),
    child: Row(
      children: <Widget>[
        //左边图片
        Container(
          margin: EdgeInsets.all(10),
          width: 180,
          height: 100,
          child: Image.network(
            state.itemDetail.envelopePic,
            fit: BoxFit.fill,
          ),
        ),
        //右边的纵向布局
        _rightContent(state),
      ],
    ),
  );
}
///item中右边的纵向布局,比例布局
Widget _rightContent(ItemState state) {
  return Expanded(
      child: Container(
    margin: EdgeInsets.all(10),
    height: 120,
    child: Column(
      mainAxisAlignment: MainAxisAlignment.start,
      children: <Widget>[
        //标题
        Expanded(
          flex: 2,
          child: Container(
            alignment: Alignment.centerLeft,
            child: Text(
              state.itemDetail.title,
              style: TextStyle(fontSize: 16),
              maxLines: 1,
              overflow: TextOverflow.ellipsis,
            ),
          ),
        ),
        //内容
        Expanded(
            flex: 4,
            child: Container(
              alignment: Alignment.centerLeft,
              child: Text(
                state.itemDetail.desc,
                style: TextStyle(fontSize: 12),
                maxLines: 3,
                overflow: TextOverflow.ellipsis,
              ),
            )),
        Expanded(
          flex: 3,
          child: Column(
            mainAxisAlignment: MainAxisAlignment.end,
            children: <Widget>[
              //作者
              Row(
                children: <Widget>[
                  Text("作者:", style: TextStyle(fontSize: 12)),
                  Expanded(
                    child: Text(state.itemDetail.author,
                        style: TextStyle(color: Colors.blue, fontSize: 12),
                        overflow: TextOverflow.ellipsis),
                  )
                ],
              ),
              //时间
              Row(children: <Widget>[
                Text("时间:", style: TextStyle(fontSize: 12)),
                Expanded(
                  child: Text(state.itemDetail.niceDate,
                      style: TextStyle(color: Colors.blue, fontSize: 12),
                      overflow: TextOverflow.ellipsis),
                )
              ])
            ],
          ),
        ),
      ],
    ),
  ));
}
列表模块逻辑完善
-
创建adapter
   class ListItemAdapter extends SourceFlowAdapter<ListState> {
  static const String item_style = "project_tab_item";
  ListItemAdapter()
      : super(
          pool: <String, Component<Object>>{
            ///定义item的样式
            item_style: ItemComponent(),
          },
        );
}
-
state调整
   class ListState extends MutableSource implements Cloneable<ListState> {
  ///这地方一定要注意,List里面的泛型,需要定义为ItemState
  ///怎么更新列表数据,只需要更新这个items里面的数据,列表数据就会相应更新
  List<ItemState> items;
  @override
  ListState clone() {
    return ListState()..items = items;
  }
  ///使用上面定义的List,继承MutableSource,就把列表和item绑定起来了
  @override
  Object getItemData(int index) => items[index];
  @override
  String getItemType(int index) => ListItemAdapter.item_style;
  @override
  int get itemCount => items.length;
  @override
  void setItemData(int index, Object data) {
    items[index] = data;
  }
}
ListState initState(Map<String, dynamic> args) {
  return ListState();
}
-
page中绑定adapter
   class ListPage extends Page<ListState, Map<String, dynamic>> {
  ListPage()
      : super(
          initState: initState,
          effect: buildEffect(),
          reducer: buildReducer(),
          view: buildView,
          dependencies: Dependencies<ListState>(
              ///绑定Adapter
              adapter: NoneConn<ListState>() + ListItemAdapter(),
              slots: <String, Dependent<ListState>>{}),
          middleware: <Middleware<ListState>>[],
        );
}
-
view
   Widget buildView(ListState state, Dispatch dispatch, ViewService viewService) {
  return Scaffold(
    appBar: AppBar(
      title: Text("ListPage"),
    ),
    body: _itemWidget(state, viewService),
  );
}
Widget _itemWidget(ListState state, ViewService viewService) {
  if (state.items != null) {
    ///使用列表
    return ListView.builder(
      itemBuilder: viewService.buildAdapter().itemBuilder,
      itemCount: viewService.buildAdapter().itemCount,
    );
  } else {
    return Center(
      child: CircularProgressIndicator(),
    );
  }
}
-
action
   enum ListAction { updateItem }
class ListActionCreator {
  static Action updateItem(var list) {
    return Action(ListAction.updateItem, payload: list);
  }
}
-
effect
   Effect<ListState> buildEffect() {
  return combineEffects(<Object, Effect<ListState>>{
    ///进入页面就执行的初始化操作
    Lifecycle.initState: _init,
  });
}
void _init(Action action, Context<ListState> ctx) async {
  String apiUrl = "https://www.wanandroid.com/project/list/1/json";
  Response response = await Dio().get(apiUrl);
  ItemDetailBean itemDetailBean =
      ItemDetailBean.fromJson(json.decode(response.toString()));
  List<Datas> itemDetails = itemDetailBean.data.datas;
  ///构建符合要求的列表数据源
  List<ItemState> items = List.generate(itemDetails.length, (index) {
    return ItemState(itemDetail: itemDetails[index]);
  });
  ///通知更新列表数据源
  ctx.dispatch(ListActionCreator.updateItem(items));
}
-
reducer
以上是关于Fish Redux,阿里出品的Flutter框架的主要内容,如果未能解决你的问题,请参考以下文章
刚刚,阿里宣布开源Flutter应用框架Fish Redux!