259.Spring Boot+Spring Security:记住我(Remember-Me): 基于持久化token的方案
Posted SpringBoot
tags:
篇首语:本文由小常识网(cha138.com)小编为大家整理,主要介绍了259.Spring Boot+Spring Security:记住我(Remember-Me): 基于持久化token的方案相关的知识,希望对你有一定的参考价值。
说明
(1)JDK版本:1.8
(2)Spring Boot 2.0.6
(3)Spring Security 5.0.9
(4)Spring Data JPA 2.0.11.RELEASE
(5)hibernate5.2.17.Final
(6)mysqlDriver 5.1.47
(7)MySQL 8.0.12
前言
在前一节,我们使用了简单加密token的方式实现了“记住我“,这一节我们使用持久化token的方式进行实现”记住我“。
一、编码分析
我们先分析下都需要做什么事情:
(1)如何开启持久化token方式:可以使用and().rememberMe()进行开启记住我,然后指定tokenRepository(),即指定了token持久化方式。
(2)tokenRepository怎么实现:这里我们可以使用Spring Security提供的JdbcTokenRepositoryImpl即可,这里只需要配置一个数据源即可。
(3)持久化token的数据保存在哪里:这里的数据是保存在persistent_logins表中。
(4)persistent_logins表生成方式:有两种方式可以生成,第一种就是手动方式,根据表结构自己创建表;第二种方式就是使用JdbcTokenRepositoryImpl配置为自动创建,这种方式虽然会自动生成,但是存在的一个小问题就是第二次运行程序的就会保存了,因为persistent_logins已经存在了,不知道底层为什么就不能判断,或者处理下异常呐?所以我的使用方式就是第一次执行的时候,打开配置,生成表之后,注释掉配置。
二、编码实现
2.1 定义持久化的tokenRepository
在WebSecurityConfig中定义tokenRepository()方法,由于在方法的实现中需要使用到数据源,我们需要先注入数据源:
@Autowired
private DataSource dataSource;
tokenRepository()的实现代码如下:
@Bean
public PersistentTokenRepository tokenRepository(){
        JdbcTokenRepositoryImpl jdbcTokenRepositoryImpl =new JdbcTokenRepositoryImpl();
        jdbcTokenRepositoryImpl.setDataSource(dataSource);
        //自动创建数据库表:persistent_logins,使用一次后注释掉,不然会报错
        //jdbcTokenRepositoryImpl.setCreateTableOnStartup(true);
        return jdbcTokenRepositoryImpl;
}
在这上面有一段注释setCreateTableOnStartup,就是在启动的时候,会自动创建表persistent_logins,多次启动会报错,所以在表创建成功之后,会注释掉这段代码哦。
2.2 开启remember me功能
配置WebSecurityConfig类中的configure(HttpSecurityhttp)方法,开启remember me功能:
http.authorizeRequests() // 定义哪些URL需要被保护、哪些不需要被保护
            .antMatchers("/login").permitAll()// 设置所有人都可以访问登录页面
            .antMatchers("/","/index").permitAll()
            .antMatchers("/test/**","/test1/**").permitAll()
            .antMatchers("/res/**/*.{js,html}").permitAll()
            .anyRequest().access("@authService.canAccess(request,authentication)")

            //.anyRequest().authenticated()  // 任何请求,登录后可以访问
            .and().formLogin().loginPage("/login")

            //设置记住我
            .and().rememberMe().tokenRepository(tokenRepository()).tokenValiditySeconds(1209600) .userDetailsService(customUserDetailService)

            //设置并发session个数.
            .and().sessionManagement().maximumSessions(1)
            ;
tokenValiditySeconds()配置cookie的过期时间,默认就是1209600秒,即2周。
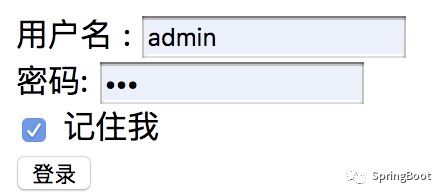
2.3 登录页login.html上添加一个CheckBox控件
在登录页login.html上添加一个CheckBox控件:
<form th:action="@{/login}" method="post">
     <div><label> 用户名 : <input type="text" name="username"/> </label></div>
     <div><label> 密码: <input type="password" name="password"/> </label></div>
     <div><label> <input type="checkbox" name="remember-me"/> 记住我</label></div>
      <div><input type="submit" value="登录"/></div>
</form>
2.4 测试
首先生成表:persistent_logins
(1)手动的方式,就是执行以下表结构:
DROP TABLE IF EXISTS `persistent_logins`;
CREATE TABLE `persistent_logins` (
  `username` varchar(64) NOT NULL,
  `series` varchar(64) NOT NULL,
  `token` varchar(64) NOT NULL,
  `last_used` timestamp NOT NULL,
  PRIMARY KEY (`series`)
) ENGINE=InnoDB DEFAULT CHARSET=utf8mb4 COLLATE=utf8mb4_0900_ai_ci;
(2)自动的方式,就是打开上面启动主动生成表的注解,启动程序即可生成。
这下就可以进行测试了,访问登录页面:

登录成功之后,可以看到浏览器的cookie中多了一个cookie:
这时候说明我们配置的remember-me已经开始工作了。
查看表persistent_logins:
历史文章
我就是我,是颜色不一样的烟火。
我就是我,是与众不同的小苹果。
à悟空学院:http://t.cn/Rg3fKJD
学院中有Spring Boot相关的课程!点击「阅读原文」进行查看!
SpringBoot视频:http://t.cn/R3QepWG
Spring Cloud视频:http://t.cn/R3QeRZc
SpringBoot Shiro视频:http://t.cn/R3QDMbh
SpringBoot交流平台:http://t.cn/R3QDhU0
SpringData和JPA视频:http://t.cn/R1pSojf
SpringSecurity5.0视频:http://t.cn/EwlLjHh
Sharding-JDBC分库分表实战:http://t.cn/E4lpD6e
以上是关于259.Spring Boot+Spring Security:记住我(Remember-Me): 基于持久化token的方案的主要内容,如果未能解决你的问题,请参考以下文章