Spring的三种Circuit Breaker
Posted ImportSource
tags:
篇首语:本文由小常识网(cha138.com)小编为大家整理,主要介绍了Spring的三种Circuit Breaker相关的知识,希望对你有一定的参考价值。
今天我们分享的内容是在spring下的三种circuit breaker的做法。接下来我们分别演示spring cloud netflix hystrix、spring retry @Retryable、spring retry @CircuitBreaker三种熔断开关的基本使用和演示。
Netflix Hystrix
首先我们通过spring initializr来生成一个spring boot应用(你可以通过diff.wiki来生成模版,也可以使用spring官方的spring initializr:http://start.spring.io/)。
ok,如上,我们分别加入了web、retry、hystrix、actuator的依赖。
然后我们使用spring boot 1.5.2.RELEASE版本。
ok,现在我们使用idea打开刚刚生成的项目。
我们来看看依赖的内容和初始代码:
<dependency>
   <groupId>org.springframework.boot</groupId>
   <artifactId>spring-boot-starter-actuator</artifactId>
</dependency>
<dependency>
   <groupId>org.springframework.cloud</groupId>
   <artifactId>spring-cloud-starter-hystrix</artifactId>
</dependency>
<dependency>
   <groupId>org.springframework.retry</groupId>
   <artifactId>spring-retry</artifactId>
</dependency>
<dependency>
   <groupId>org.springframework.boot</groupId>
   <artifactId>spring-boot-starter-web</artifactId>
</dependency>
@SpringBootApplication
public class RobustClientApplication {

    public static void main(String[] args) {
        SpringApplication.run(RobustClientApplication.class, args);
    }
}
现在我们去新建一个business service:
@Service
class ShakyBusinessService {
    public int desireNumber() throws Exception {
        if (Math.random() > .5) {
            Thread.sleep(1000 * 3);
            throw new RuntimeException("Boom");
        }
        return 1;
    }
}
逻辑很简单,就是如果当random的数字大于某值时,线程睡3秒,然后抛出一个运行时异常。
然后我们新建一个rest controller:
@RestController
class ShakyRestController{
    private final ShakyBusinessService shakyBusinessService;

    @Autowired
    public ShakyRestController(ShakyBusinessService shakyBusinessService){
        this.shakyBusinessService=shakyBusinessService;
    }

    @GetMapping("/boom")
    public int boom() throws  Exception{
        return this.shakyBusinessService.desireNumber();
    }

}
上面的代码很简单。就是注入刚刚创建的service。然后一个getmapping返回。
然后我们启动:
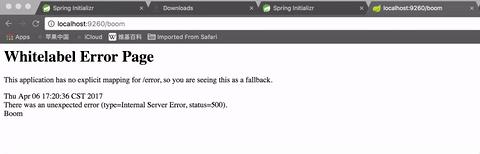
在几次尝试后,我们发现当数值小于.5时,就会有如下效果:

ok,就像上面看到的一样,说:This application has no explicit mapping for /error, so you are seeing this as a fallback.
说没有专门配置error,所以我们就把下面一个页面作为一个fallback页面。
今天我们说的是circuit breaker,所以这里我们也不会去配置/error这个mapping。
接下来我们就开始circuit breaker之旅吧。
首先在application类上加上如下注解:
@SpringBootApplication
@EnableCircuitBreaker
public class RobustClientApplication {
上面的注解意思很简单,就是告诉应用程序现在可以使用circuit breaker了。
然后我们在刚刚创建的service里边的方法上加上如下注解:
@HystrixCommand(fallbackMethod = "fallback")
public int desireNumber() throws Exception {
    if (Math.random() > .5) {
        Thread.sleep(1000 * 3);
        throw new RuntimeException("Boom");
    }
    return 1;
}
就是这一行:
@HystrixCommand(fallbackMethod = "fallback")
这里我们配置了一个fallback method,方法名就叫 fallback 。
然后我们在当前service类下新建一个和desireNumber方法签名一样的方法fallback:
public int fallback(){
    return 2;
}
上面的方法只是简单的返回2。
至于具体的hystrix command注解以及其它细节,我们这里先跳过,稍后会介绍到。
好,现在代码总体是这个样子的:
@SpringBootApplication
@EnableCircuitBreaker
public class RobustClientApplication {

    public static void main(String[] args) {
        SpringApplication.run(RobustClientApplication.class, args);
    }
}


@RestController
class ShakyRestController{
    private final ShakyBusinessService shakyBusinessService;

    @Autowired
    public ShakyRestController(ShakyBusinessService shakyBusinessService){
        this.shakyBusinessService=shakyBusinessService;
    }

    @GetMapping("/boom")
    public int boom() throws  Exception{
        return this.shakyBusinessService.desireNumber();
    }


}

@Service
class ShakyBusinessService {

    public int fallback(){
        return 2;
    }

    @HystrixCommand(fallbackMethod = "fallback")
    public int desireNumber() throws Exception {
        if (Math.random() > .5) {
            Thread.sleep(1000 * 3);
            throw new RuntimeException("Boom");
        }
        return 1;
    }
}
现在我们重启应用来看看效果。
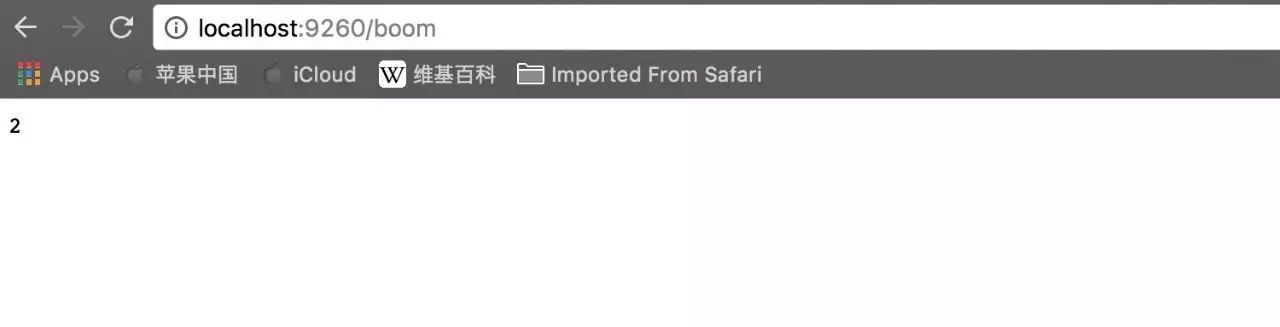
发现没?无论我们尝试多少次,都不会再出现下面的这个错误页面了:
好,我们现在已经知道了hystrix的circuit breaker的基本使用了。
但现在你还并不知道hystrix的一些内部的监控信息。你也许发现了,我们之前引入了actuator的依赖。这个是为什么呢?
现在我们去下面这个url看看:
http://localhost:9260/hystrix.stream
访问后可以看到类似下面的内容:
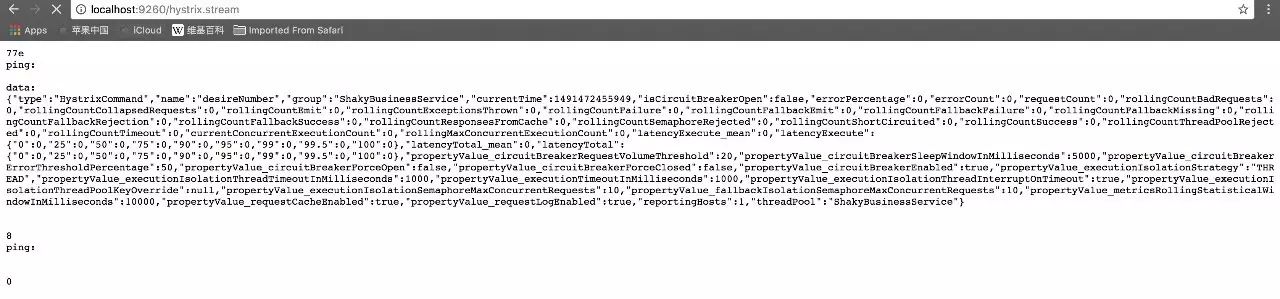
也许从endpoint名称你就可以知道,这是一个reactive stream web的url。它会持续不断的向发送了/hystrix.stream请求的客户端推送实时的hystrix监控信息。
下面我们从一个动画里看看持续推送的效果:
这就是我们要引入actuator的原因。因为要暴露actuator的hystrix.stream endpoint。
ok,现在是一些json数据。看起来比较费劲。我们可以集成一些针对这个的ui看起来更加的直观。
现在我们就来一个比较有名的ui :hystrix dashboard。
回到spring initializr来新建一个hystrix dashboard项目。

我们引入了web、hystrix dashboard依赖。
然后下载,打开项目:
看看依赖:
<dependency>
   <groupId>org.springframework.cloud</groupId>
   <artifactId>spring-cloud-starter-hystrix-dashboard</artifactId>
</dependency>
<dependency>
   <groupId>org.springframework.boot</groupId>
   <artifactId>spring-boot-starter-web</artifactId>
</dependency>
然后我们在dashboard这个项目的application类上加上以下注解:
@SpringBootApplication
@EnableHystrixDashboard
public class HystrixDashboardApplication {

   public static void main(String[] args) {
      SpringApplication.run(HystrixDashboardApplication.class, args);
   }
}
就是这个注解:
@EnableHystrixDashboard
然后我们启动dashboard应用。
好,启动后我们访问如下url:
http://localhost:8765/hystrix.html
结果如下:
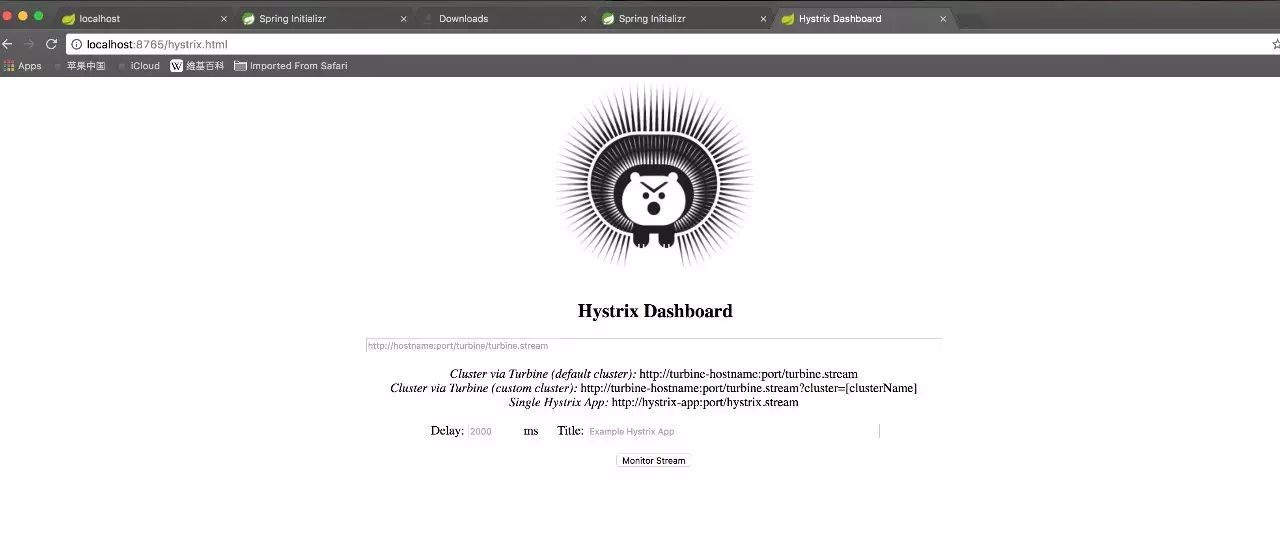
说明hystrix dashboard 已可使用。
然后我们输入框输入之前我们的那个stream endpoint的rest api,点击monitor stream。
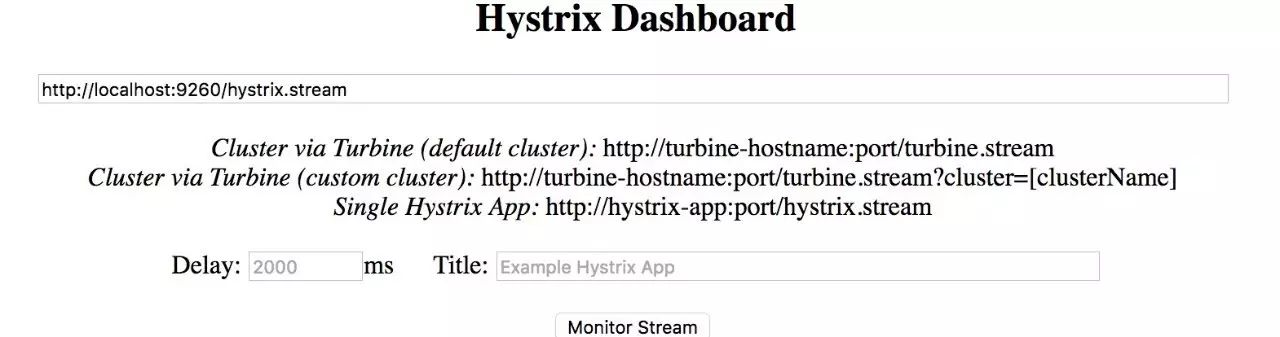
进入监控界面:
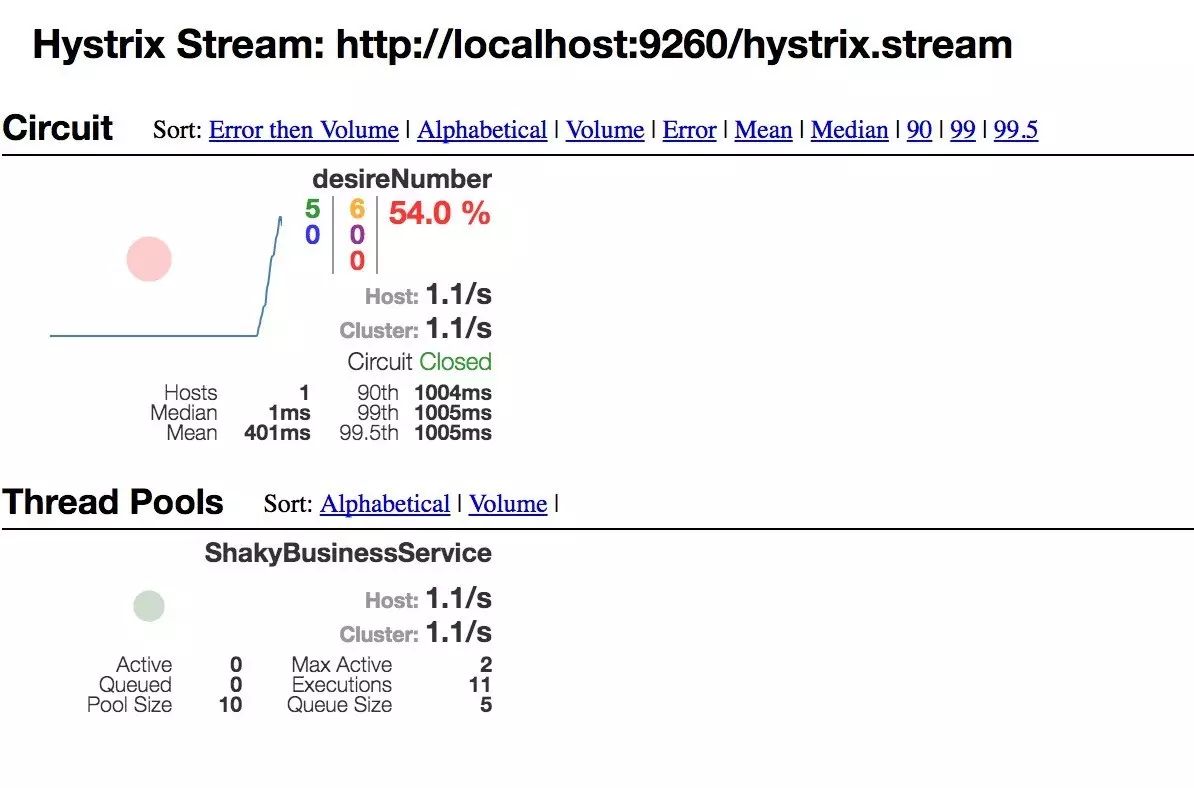
接下来我们就通过不断的访问/boom 这个service。然后看看hystrix dashboard的实时监控情况:
关于这个hystrix是何方神圣。这是一个netflix微服务体系下的一个项目。原版的实现是没有注解的。后来有人就想,既然注解的方式这么优雅这么火这么方便,于是就基于hystrix编写了一个注解版本,项目名字叫做:javanica。
后来spring cloud 发现注解的方式简直和自己是天作之合,于是也集成了javanica。所以spring cloud netflix 的hystrix支持主要就是基于javanica的。
所以要想了解spring cloud hystrix,你只要了解了javanica其实就可以了。
javanica详解:
ps:javanica的翻译中有一两段翻译的较生硬,建议结合官方文档查看。
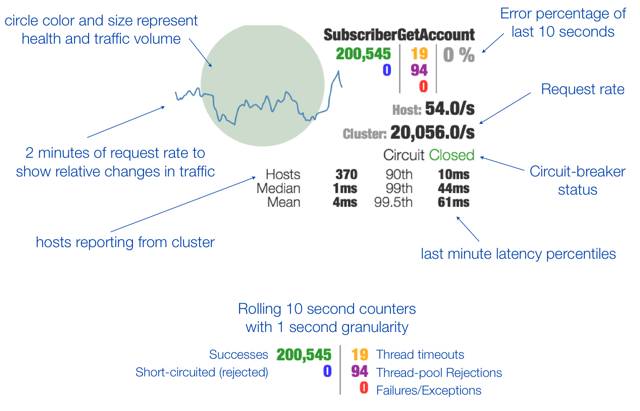
至于上面的dashboard中每个指标都表示什么意思,下面还是上一张图:
Spring Retry @Retryable
接下来我们来接入retry的使用。
现在分别把@EnableCircuitBreaker和@HystrixCommand注释掉。
然后我们在application类上加上@EnableRetry注解:
@SpringBootApplication
//@EnableCircuitBreaker
@EnableRetry
public class RobustClientApplication {
然后在desireNumber方法上加上@Retryable注解:
//@HystrixCommand(fallbackMethod = "fallback")
@Retryable(include = BoomException.class)
public int desireNumber() throws Exception {
    System.out.println("calling desireNumber()");
    if (Math.random() > .5) {
        Thread.sleep(1000 * 3);
        throw new BoomException("Boom");
    }
    return 1;
}
并且添加一个异常类。表示当调用该方法时出现该异常时,则执行重试。默认是执行3次。如果三次都抛该异常,则跳转至fallback方法去执行fallback逻辑。
另外为了我们能看到执行效果,我们在desireNumber中添加一行打印输出,以此来查看retry次数情况:
System.out.println("calling desireNumber()");
接下来我们就在之前的fallback方法上加上@Recover注解:
@Recover
public int fallback(){
    return 2;
}
然后我们再定义一个BoomException类,很简单:
class BoomException extends RuntimeException{
    public BoomException(String message){
        super(message);
    }
}
现在全部代码是这样:
@SpringBootApplication
//@EnableCircuitBreaker
@EnableRetry
public class RobustClientApplication {

    public static void main(String[] args) {
        SpringApplication.run(RobustClientApplication.class, args);
    }
}


@RestController
class ShakyRestController{
    private final ShakyBusinessService shakyBusinessService;

    @Autowired
    public ShakyRestController(ShakyBusinessService shakyBusinessService){
        this.shakyBusinessService=shakyBusinessService;
    }

    @GetMapping("/boom")
    public int boom() throws  Exception{
        return this.shakyBusinessService.desireNumber();
    }


}

class BoomException extends RuntimeException{
    public BoomException(String message){
        super(message);
    }
}

@Service
class ShakyBusinessService {

    @Recover
    public int fallback(){
        return 2;
    }

    //@HystrixCommand(fallbackMethod = "fallback")
    @Retryable(include = BoomException.class)
    public int desireNumber() throws Exception {
        System.out.println("calling desireNumber()");
        if (Math.random() > .5) {
            Thread.sleep(1000 * 3);
            throw new BoomException("Boom");
        }
        return 1;
    }
}
我们再重启该应用。
然后执行几次请求,看看效果:
可以看到我们没发出一次请求,一旦方法执行进入到if逻辑内,便会抛出BoomException。这时候根据@Retryable的include的属性所配置的BoomException,自然就会拦截到该异常,然后再次执行该方法,如果尝试三次还是没法失败则直接跳至fallback方法返回。
上面就是我们通过使用spring retry的@Retryable来做的效果。这种做法虽然不像是一个正宗的circuit breaker。但指定次数retry后,最后跳转到fallback方法,也算是一种最后对所执行的方法的一种解救,从而不至于所有的请求卡死排队在这里造成雪崩效应,从这个角度上,spring retry也算是一种circuit breaker。
另外这个spring retry最初是spring batch中的一个模块,后来被独立了出来,然后被用于很多的spring的其它module中,包括spring batch 、spring cloud dataflow 、spring integration 等其它项目。
Spring Retry @CircuitBreaker
接下来我们将使用spring retry中的一个新的功能就是@CircuitBreaker,这算是一个真正的断路器了。
ok,我们接下来就来体验下@CircuitBreaker。
我们把desireNumber方法的@Retryable的注解注释掉,或者直接修改成@CircuitBreaker。然后把sleep代码也注释掉。其它的都不动,然后来看看效果。
//@HystrixCommand(fallbackMethod = "fallback")
//@Retryable(include = BoomException.class)
@CircuitBreaker(include = BoomException.class)
public int desireNumber() throws Exception {
    System.out.println("calling desireNumber()");
    if (Math.random() > .5) {
        //Thread.sleep(1000 * 3);
        throw new BoomException("Boom");
    }
    return 1;
}
然后我们重启应用来看看效果。
另外为了更好的看到效果,我们对@CircuitBreaker添加了两个属性:
@CircuitBreaker(include = BoomException.class,openTimeout = 20000L,resetTimeout = 5000L )
public int desireNumber() throws Exception {
上面的动图的效果就是以上配置。
我们设置openTimeout为20秒,表示阻断开关开启20秒;设置resetTimeout为5秒,表示阻断开关开启到第5秒的时候,再设置为半打开状态,给请求一次机会。
所以你会看到一开始还是在执行调用的方法本身,到之后,就彻底拒绝调用了,直接执行了fallback方法,直到开关关闭才放请求进来。
上面我们还只是设置了两个timeout参数。你也会纳闷,circuitbreaker会在什么情况下开启呢?是累计多少次开启开关拒绝访问呢?
现在我们再为@CircuitBreaker配置一个属性:maxAttempts。这个默认值是3,在这里的演示中并不能很多的得到效果。所以我们把它显式的设置为1。
然后重启应用看看效果:
发现没?当我们第一次出现2的时候,也就是第一次出现异常并执行了fallback方法之后,circuitbreaker立马就开启了,因为我们发现之后再也没有进入请求的方法去打印输出日志。
另外值得注意的是@CircuitBreaker其实本质上是基于spring retry的@Retryable
这个注解实现的,以下是@CircuitBreaker的源码:
@Target({ ElementType.METHOD, ElementType.TYPE })
@Retention(RetentionPolicy.RUNTIME)
@Documented
@Retryable(stateful = true)
public @interface CircuitBreaker {
   /**
    * @return the maximum number of attempts (including the first failure), defaults to 3
    */
   int maxAttempts() default 3;

}
另外要注意的是,@CircuitBreaker虽然是基于@Retryable实现的,且
maxAttempts同样默认是3。而且我们看@Retryable的源码:
@Target({ ElementType.METHOD, ElementType.TYPE })
@Retention(RetentionPolicy.RUNTIME)
@Documented
public @interface Retryable {

    ...

   /**
    * @return the maximum number of attempts (including the first failure), defaults to 3
    */
   int maxAttempts() default 3;


}
发现也有maxAttempts同样是3。
但这两个有一点稍微的不同。就是当你单纯的使用@Retryable的功能时,这个retry3次是spring retry框架自动帮我们尝试3次。而当你使用@CircuitBreaker注解的时候,却表示客户端请求的失败次数,也就是我们得手动刷新浏览器模拟三次。而且你也许也注意到了,我们上面的@CircuitBreaker演示中,我们每发起一次请求“System.out.println(xxxx); ”总是只执行一次,而不是3次。而@Retryable的演示的时候,每发起一次请求,如果遇到失败,最大有可能要打印三行“System.out.println(xxxx); ”。
总结
上面我们分别演示了hystrix、spring retry @Retryable、spring retry @CircuitBreaker 的用法和基本介绍。毫无疑问hystrix是功能最强大的。我们演示的hystrix是javanica这个项目的使用风格,基于注解的使用风格,spring cloud hystrix 也是集成了javanica。spring retry 的@Retryable方式虽然没有真正的开关,但重试几次后跳转到fallback方法也算是一定程度的熔断,至少算是不会导致雪崩,所以从这个角度上也算是一种熔断器。spring retry 的@CircuitBreaker则提供了熔断开关,并支持在指定的异常出现时,在指定配置的最大尝试次数达到后便开启熔断拒绝执行service方法,而是直接跳转至fallback方法;同时还支持配置熔断的时长,以及熔断半开关状态等。但却不支持线程池的配置等。但功能简单有简单的好处,使用起来总是那么快捷和立竿见影,还是很萌的,各取所需吧。
本文通过对三种做法的对比和演示,让你对熔断的逻辑有一个总体的了解。更多详细的细节还需要你通过查看官方文档和阅读源码来获得。
上面涉及到的代码,你可以点击“阅读原文”去github查看。
以上是关于Spring的三种Circuit Breaker的主要内容,如果未能解决你的问题,请参考以下文章