腾讯云携手CODING,云端IDE——Cloud Studio初体验
Posted 苏易北
tags:
篇首语:本文由小常识网(cha138.com)小编为大家整理,主要介绍了腾讯云携手CODING,云端IDE——Cloud Studio初体验相关的知识,希望对你有一定的参考价值。
Cloud Studio及Coding WebIDE简介
4月16日,与宣布达成战略合作,共同发布以腾讯云云服务器为基础的国内第一款完全基于云端的IDE工具:Cloud Studio的beta版本。
4月16日上线的Cloud Studio
有别于Heroku这样的PaaS云计算平台,根据两家在微信推送中的表述,Cloud Studio更接近于SaaS的概念——本质上是一款在线云端开发工具,减少用户安装IDE的成本,并与腾讯云IaaS/PaaS深度结合,从而提供代码编写、调试、上线一站式闭环体验。

Coding提供前端IDE,腾讯云提供后端计算服务
Cloud Studio的前身正是CODING自主研发的Coding WebIDE,CODING的老用户应该会比较熟悉。在Cloud Studio的登录界面仍然保留了旧版WebIDE的访问入口提示,方便老用户继续访问。

Coding WebIDE
值得注意的是,WebIDE的首页明确提到,其底层基于容器技术,可以让系统的预热时间从分钟级降到秒级,配置好的开发环境也可以快捷的保存与分享。
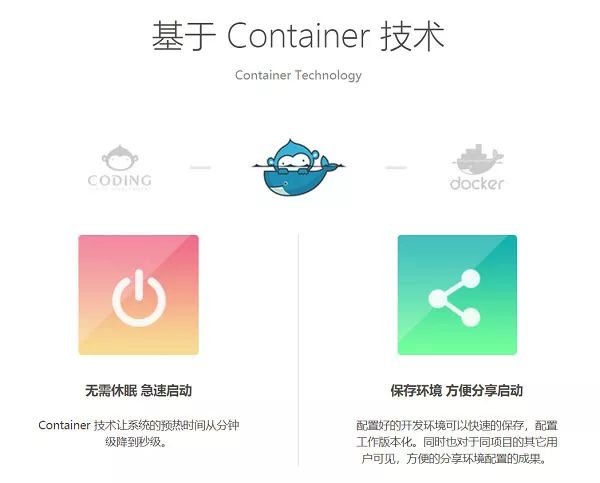
WebIDE基于容器技术
而源于Coding WebIDE的Cloud Studio同样采用了容器技术,这点可以在腾讯云发布的微信推送中得到印证,以下为部分内容摘抄。
“软件研发效率在不断提升,开发工具也需要同步更新迭代,这就对计算资源提出了更高要求。每台 Cloud Studio 的背后,都有腾讯云云服务器、容器服务等服务在提供计算支持,帮助用户升级开发模式、变更应用交付、重构数据管理方式,提速企业应用部署。依托腾讯云的强大弹性能力,还能够做到资源快速伸、容灾等。开发者使用Cloud Studio 时登录浏览器即可进行编程,提供完整的 Linux 环境,并且支持自定义域名指向、动态计算资源调整,可以完成各种应用的开发编译与部署。另外,每个 Cloud Studio 拥有独立的计算资源,支持多环境快速切换、协同编辑、全功能 Terminal 等功能。据悉,下一步,Cloud Studio 将开放调配资源、在线 Terminal 操作云资源等功能。”
话不多说,现在就来初探Cloud Studio吧~
注册CODING账号
Cloud Studio是由CODING和腾讯云共同提供的服务,自然需要我们注册这两家的账号。访问https://studio.coding.net,随即跳转至CODING账号登录界面,因为我之前就是CODING的用户,直接登录,进入下一步。
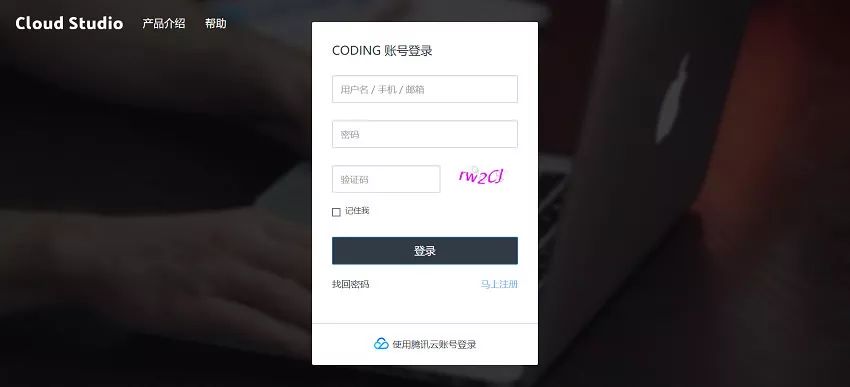
注册CODING账号
申请Free Trial
登录CODING账户之后,系统会首先检测是否已有云主机。首次登录可以申请30天的免费试用。按照官方的说法,到期之后可按低至9.9元/月的价格续费主机,可以说是很划算了。
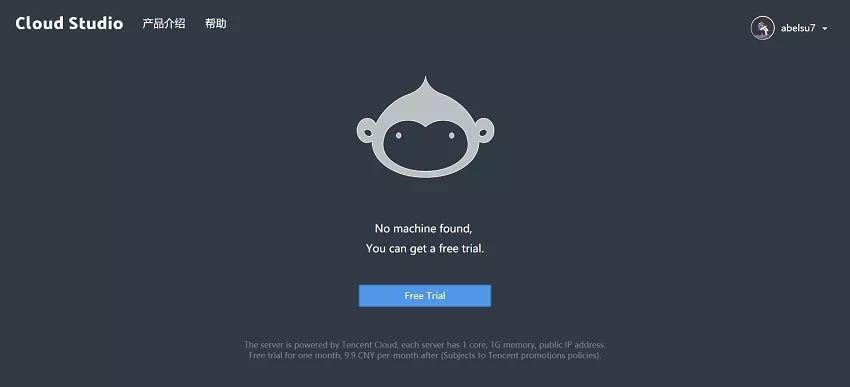
申请free trial
该界面还有产品介绍和帮助文档的访问链接,正式进入Cloud Studio之前不妨先去逛一逛。

Cloud Studio产品介绍
重点提及的功能包括多环境切换、协同编辑以及全功能Terminal,终端默认使用oh-my-zsh,好评~
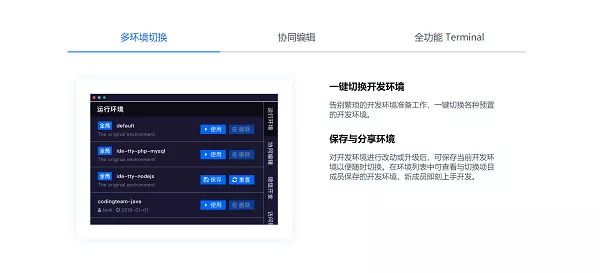
多环境切换
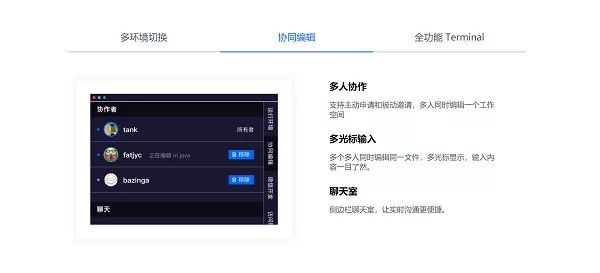
协同编辑
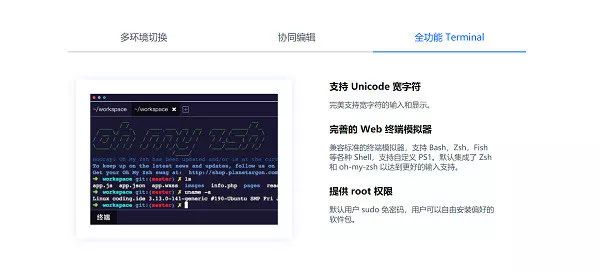
全功能Terminal,默认oh-my-zsh
回到正题,继续我们的Cloud Studio的体验之旅。
腾讯云授权
申请Free Trial试用后,系统会自动申请一台1核1GB,10G空间的腾讯云主机作为Cloud Studio的后端服务器,如果之前没有绑定腾讯云的账号,此时会跳转至腾讯云的授权页面,点击授权即可。如无意外,就会进入Cloud Studio的主界面中。
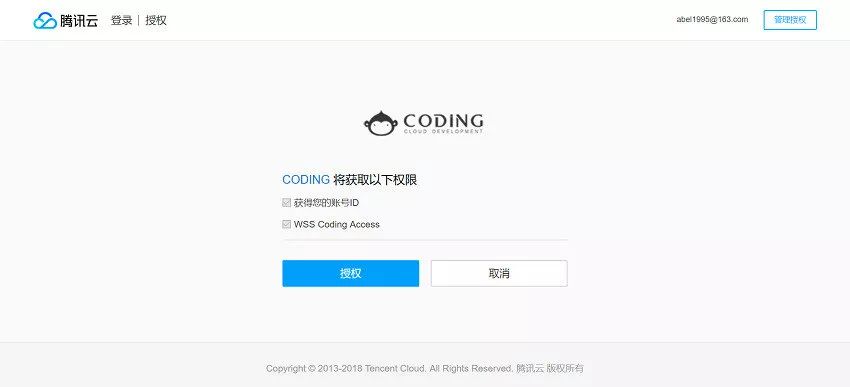
腾讯云授权
开始使用Cloud Studio
Cloud Studio有着广阔的使用场景。在其官方介绍中,将开发微信小程序作为示例场景进行展示。
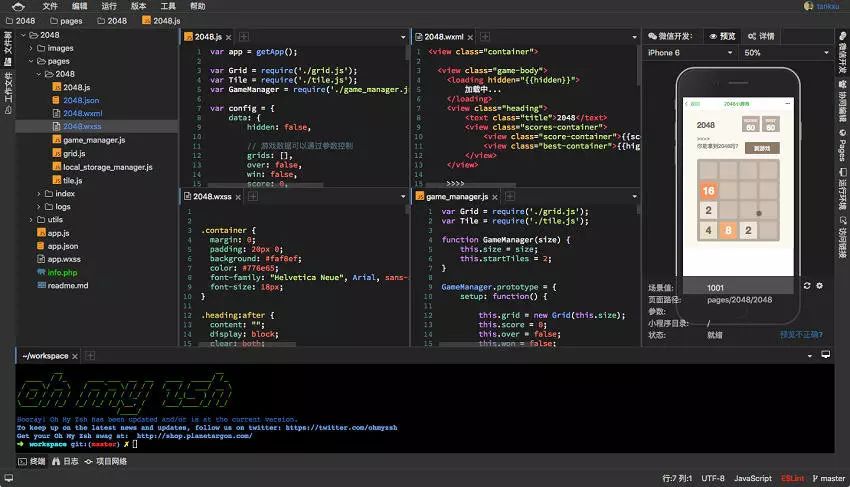
开发微信小程序
另外Cloud Studio还支持协同编辑和聊天的功能,以官方介绍图为例。
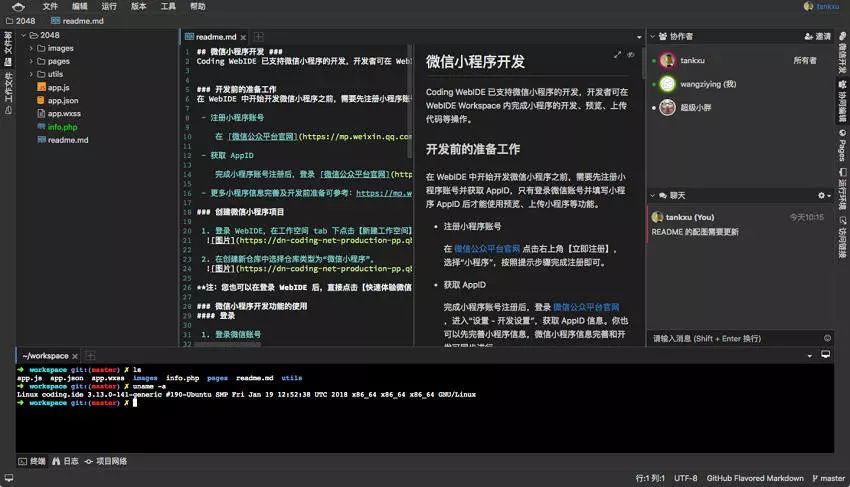
协同编辑与聊天
而用户初次进入Cloud Studio会创建默认的workspace,也可以创建空项目或从CODING导入已有项目。可以看到IDE的风格和IntelliJ IDEA很相似。
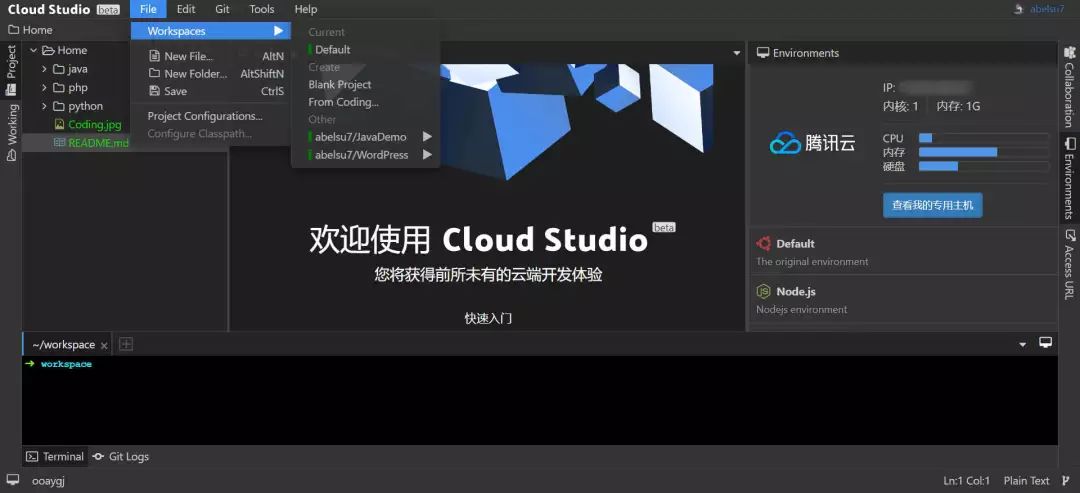
管理Workspaces
Cloud Studio预设了包括Node.js、Jekyll、Hexo、PHP、Ruby、Java、Python、.Net、Machine Learning(是的,你没有看错)等多种开发环境,用户可在Environments选项卡中快速切换。
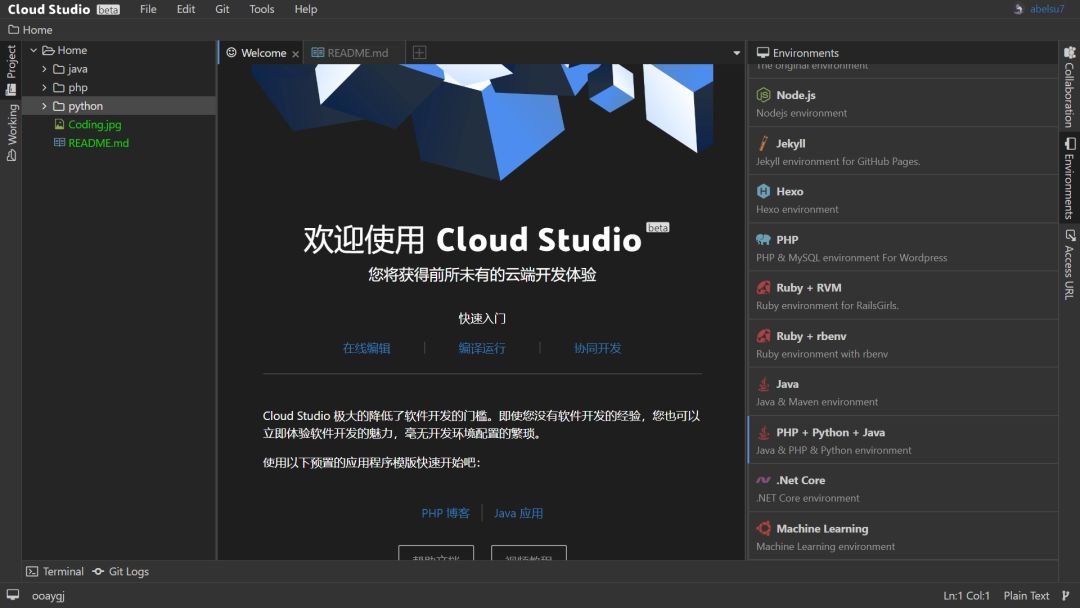
快速切换多种预设开发环境
在General Setting中,可对界面显示语言及文件树隐藏文件进行设置。
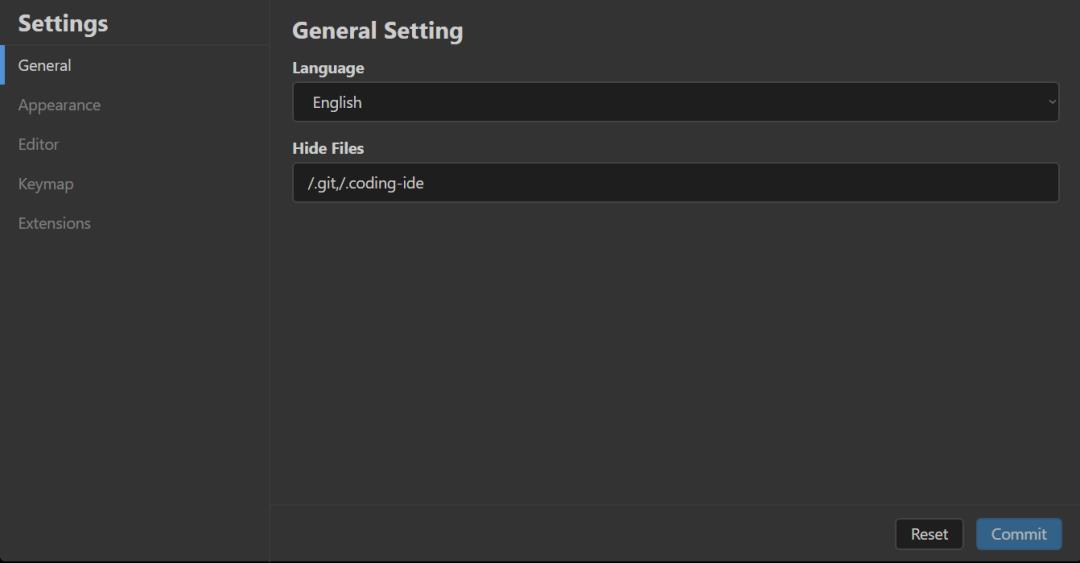
General Setting
在Appearance Setting中,可切换亮/暗主题,并设置代码高亮配色,默认为material。
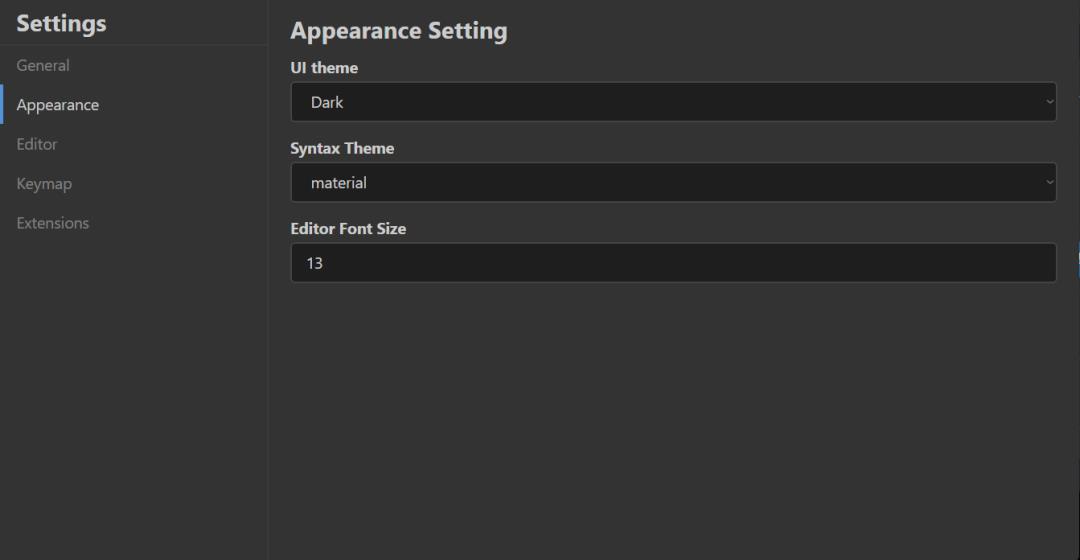
Appearance Setting
在Editor Setting中,可设置缩进风格与缩进宽度。
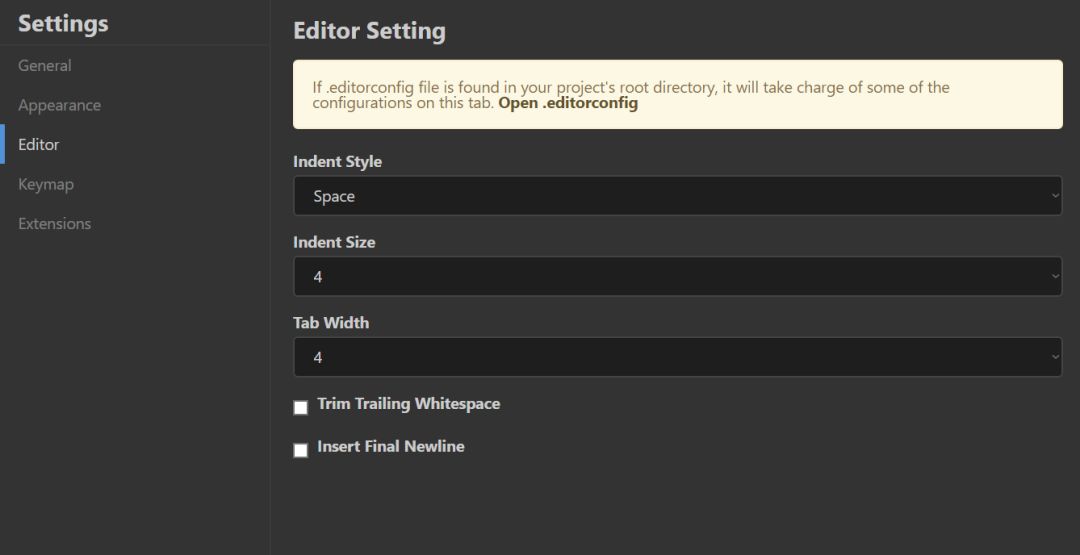
Editor Setting
在Keymap Setting中,可设置快捷键风格,预设包括Default、Sublime、Vim和Emacs。
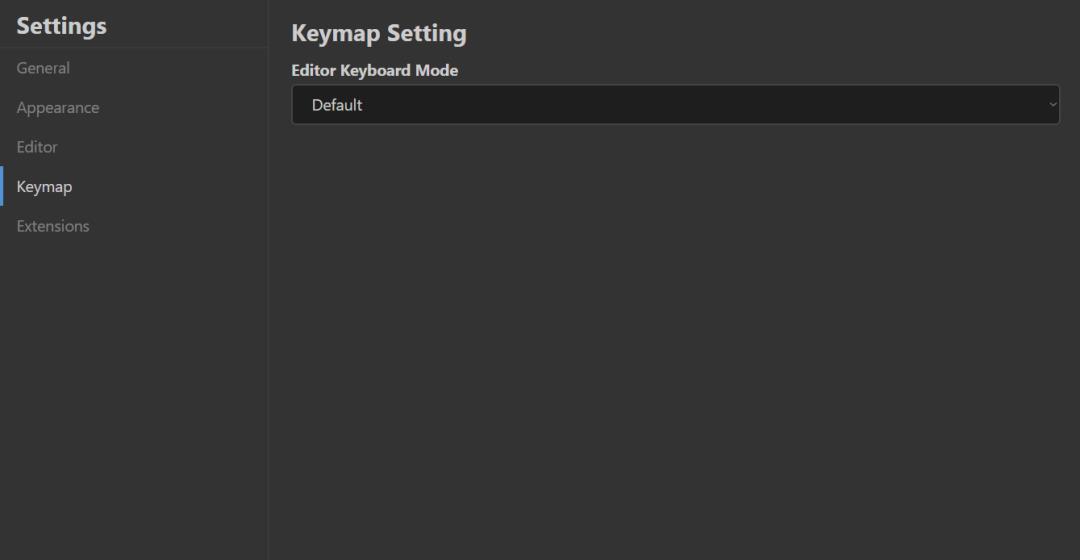
Keymap Setting
在Extension Setting中,可搜索并安装各类插件,目前插件数量十分有限,相信日后会逐渐提高数量与质量。
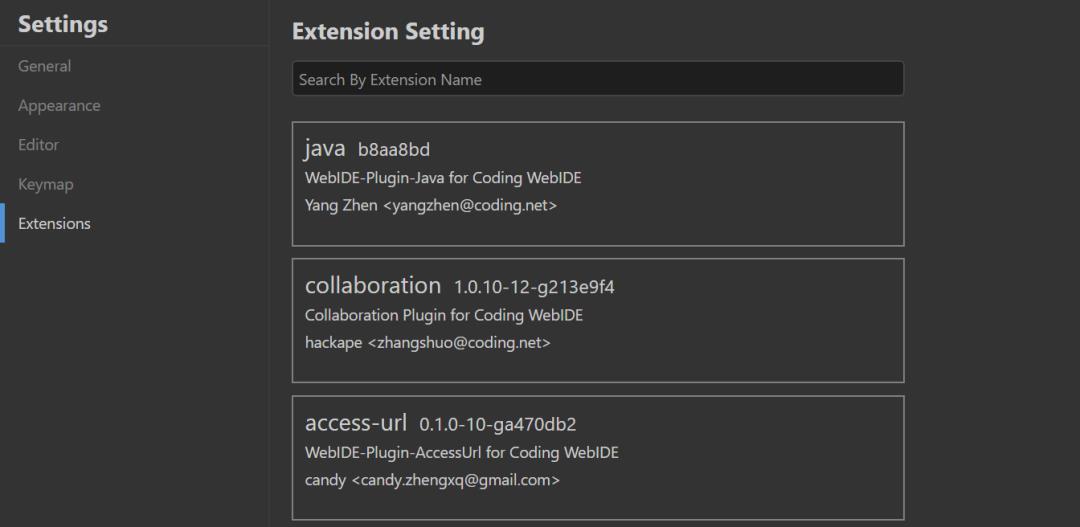
Extension Setting
查看腾讯云专用主机
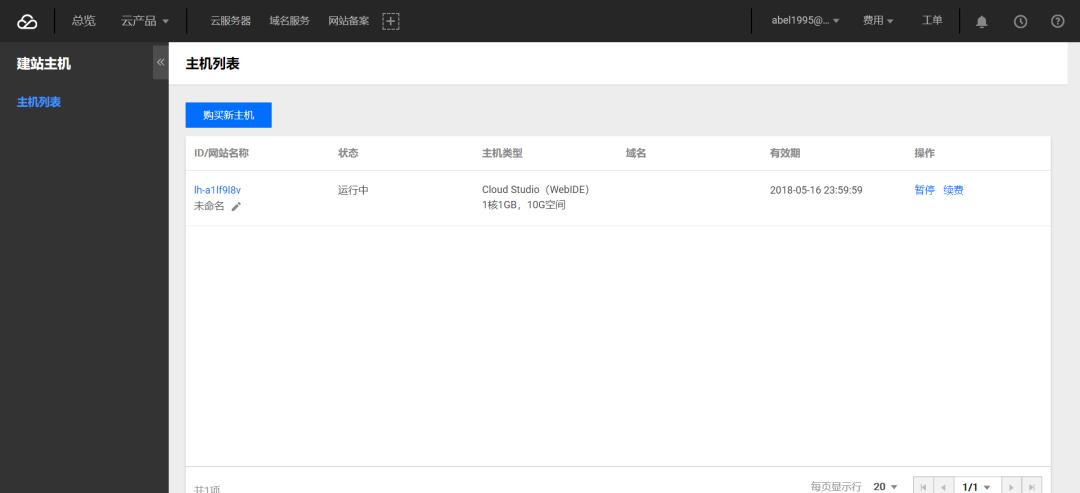
腾讯云主机列表
点击该主机查看详细信息,发现其位于成都机房,剩余30天有效期。
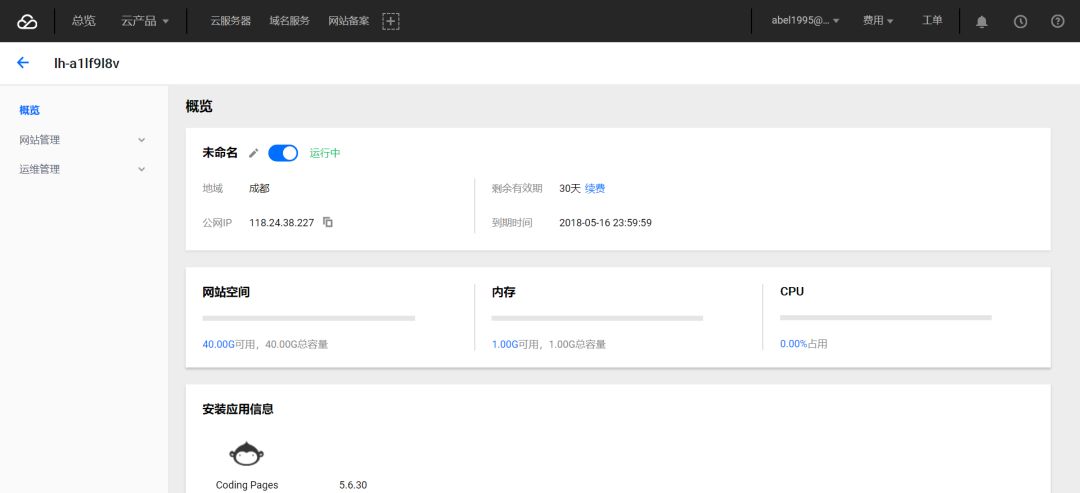
主机概览
返回Cloud Studio,继续体验之旅。
体验终端
接下来通过Cloud Studio中的集成终端来对这台云主机一探究竟,可以看到配色还是比较舒服的。
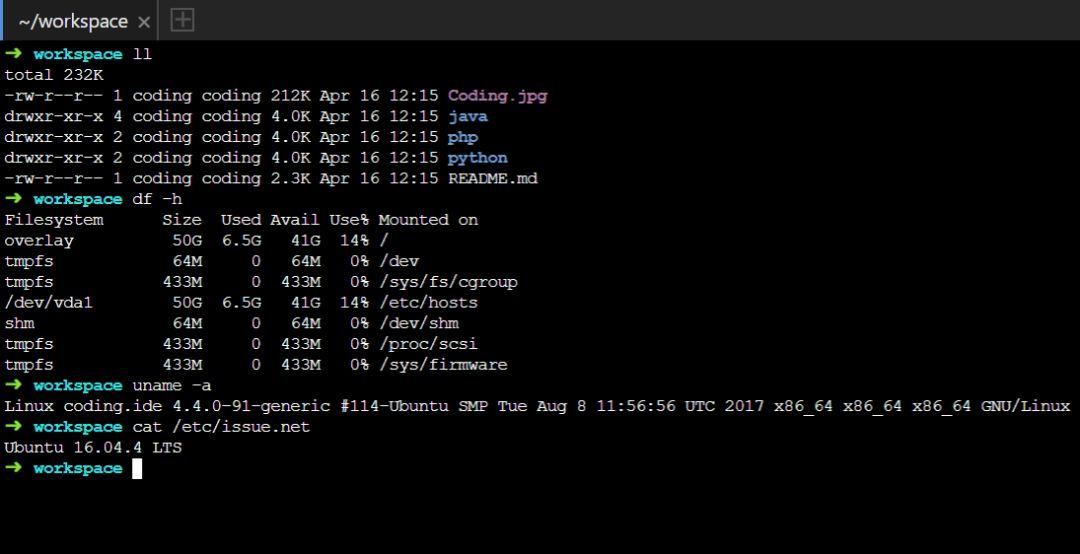
云主机系统为Ubuntu 16.04.4 LTS
使用df及uname命令,发现该云主机根目录挂载了40G存储空间,操作系统为Ubuntu 16.04.4 LTS。
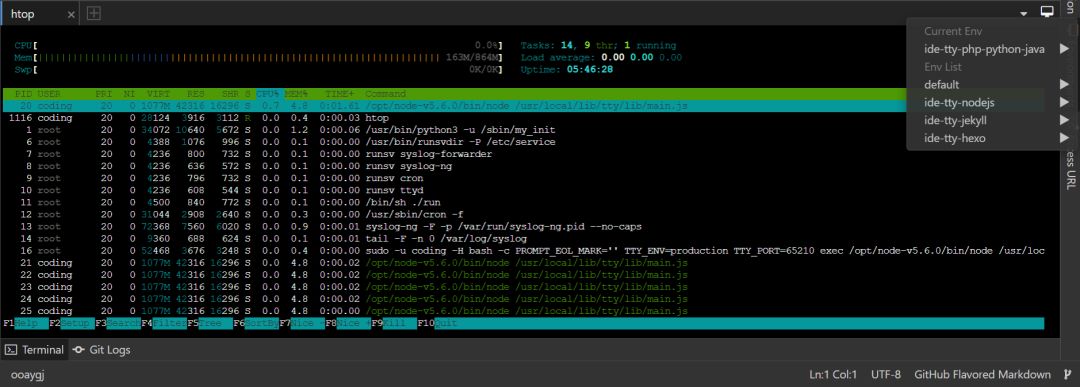
使用htop命令查看系统进程
点击终端右上角的图标,可以快速切换终端运行环境。使用htop命令发现该云主机为1核CPU、内存1G。
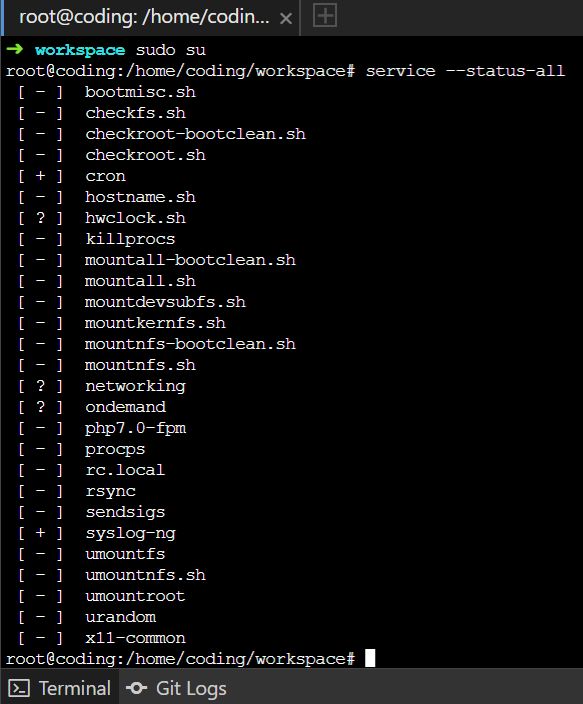
获取root权限
由于用户未设置密码,使用su命令可直接获取root权限。
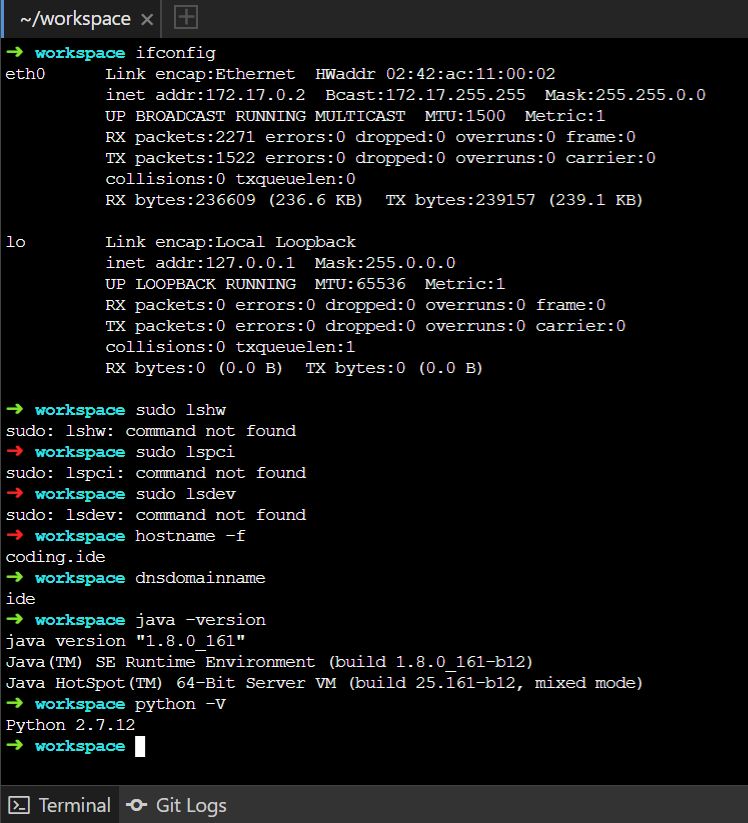
查看Java、Python版本
可通过ifconfig命令查看网卡信息,但与硬件相关的命令均无法调用。Java版本为1.8.0_161,Python2版本为2.7.12,Python3版本为3.5.2。
体验官方Demo
体验完强大的Terminal之后,就来试跑一下官方提供的Demo吧~
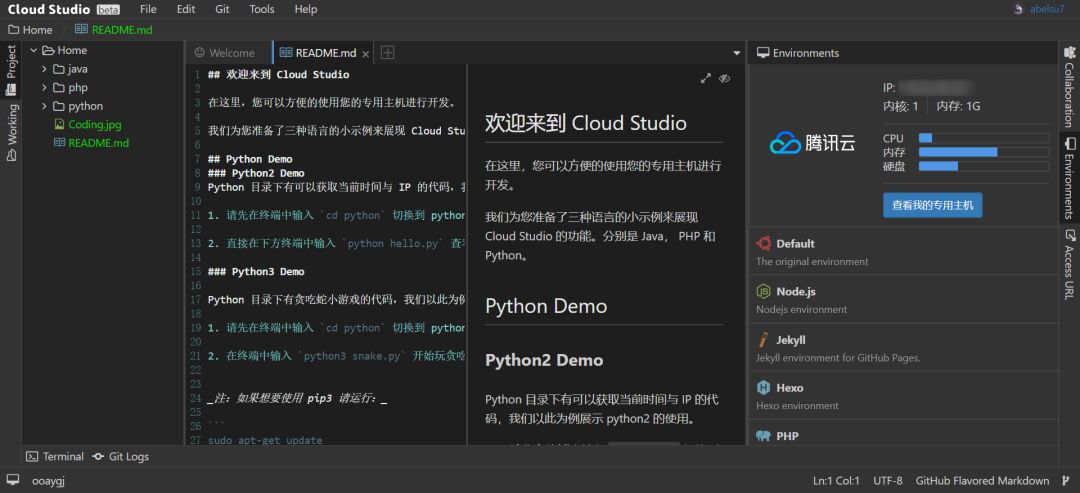
官方Demo说明文档
在默认的Workspace中,CODING准备了Java、Python、PHP三种语言的小示例帮助用户体验Cloud Studio的基本功能。
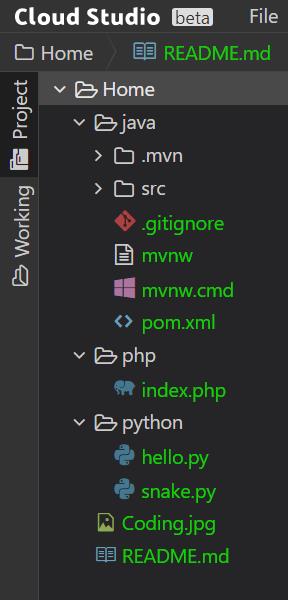
Demo代码结构
Python 2 Demo
Python 2的Demo功能很简单:获取当前时间与IP,hello.py代码如下。
 1#!/usr/bin/env python
 2# -*- coding: utf-8 -*-
 3
 4import socket
 5import time
 6
 7def get_time():
 8    return time.strftime('%Y-%m-%d',time.localtime(time.time()))
 9
10def get_host_ip():
11    try:
12        s = socket.socket(socket.AF_INET, socket.SOCK_DGRAM)
13        s.connect(('8.8.8.8', 80))
14        ip = s.getsockname()[0]
15    finally:
16        s.close()
17
18    return ip
19
20print "您好,欢迎来到 Cloud Studio"
21print "当前时间是:" + get_time()
22print "您的IP是:" + get_host_ip()
进入python目录,运行python hello.py即可。
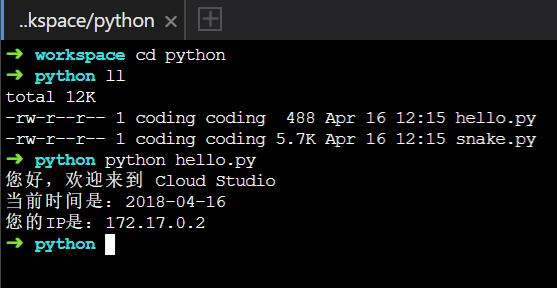
Python 2 Demo
Python 3 Demo
Python 3的Demo要更有趣一些:来自Github上的开源项目Cursed Snake,这是一个由borisuvarov开发、基于Python 3的控制台贪吃蛇游戏,snake.py代码如下。
  1#!/usr/local/bin/python3
  2# -*- coding: utf-8 -*-
  3"""
  4Simple Snake console game for Python 3.
  5
  6From https://github.com/borisuvarov/cursed_snake
  7
  8Use it as introduction to curses module.
  9
 10Warning: curses module available only in Unix.
 11On Windows use UniCurses (https://pypi.python.org/pypi/UniCurses).
 12UniCurses is not installed by default.
 13
 14"""
 15
 16import curses  # https://docs.python.org/3/library/curses.html
 17import time
 18import random
 19
 20
 21def redraw():  # Redraws game field and it's content after every turn
 22    # win.erase()
 23    win.clear()
 24    draw_food()  # Draws food on the game field
 25    draw_snake()  # Draws snake
 26    draw_menu()
 27    win.refresh()
 28
 29
 30def draw_menu():
 31    win.addstr(0,0, "Score: " + str(len(snake) - 2) + "      Press 'q' to quit", curses.color_pair(5))
 32
 33
 34def draw_snake():
 35    try:
 36        n = 0  # There can be only one head
 37        for pos in snake:  # Snake is the list of [y, x], so we swap them below
 38            if n == 0:
 39                win.addstr(pos[1], pos[0], "@", curses.color_pair(ex_foodcolor))  # Draws head
 40            else:
 41                win.addstr(pos[1], pos[0], "#", curses.color_pair(ex_foodcolor))  # Draws segment of the body
 42            n += 1
 43    except Exception as drawingerror:
 44        print(drawingerror, str(cols), str(rows))
 45
 46
 47def draw_food():
 48    for pos in food:
 49        win.addstr(pos[1], pos[0], "+", curses.color_pair(foodcolor))
 50
 51
 52def drop_food():
 53    x = random.randint(1, cols - 2)
 54    y = random.randint(1, rows - 2)
 55    for pos in snake:  # Do not drop food on snake
 56        if pos == [x, y]:
 57            drop_food()
 58
 59    food.append([x, y])
 60
 61
 62def move_snake():
 63    global snake  # List
 64    global grow_snake  # Boolean
 65    global cols, rows  # Integers
 66
 67    head = snake[0]  # Head is the first element of "snake list"
 68    if not grow_snake:  # Remove tail if food was not eaten on this turn
 69        snake.pop()
 70    else:  # If food was eaten on this turn, we don't pop last item of list,
 71        grow_snake = False  # but we restore default state of grow_snake
 72    if direction == DIR_UP:  # Calculate the position of the head
 73        head = [head[0], head[1] - 1]  # We will swap x and y in draw_snake()
 74        if head[1] == 0:
 75            head[1] = rows - 2  # Snake passes through the border
 76    elif direction == DIR_DOWN:
 77        head = [head[0], head[1] + 1]
 78        if head[1] == rows - 1:
 79            head[1] = 1
 80    elif direction == DIR_LEFT:
 81        head = [head[0] - 1, head[1]]
 82        if head[0] == 0:
 83            head[0] = cols - 2
 84    elif direction == DIR_RIGHT:
 85        head = [head[0] + 1, head[1]]
 86        if head[0] == cols - 1:
 87            head[0] = 1
 88
 89    snake.insert(0, head)  # Insert new head
 90
 91
 92def is_food_collision():
 93    for pos in food:
 94        if pos == snake[0]:
 95            food.remove(pos)
 96            global foodcolor
 97            global ex_foodcolor
 98            ex_foodcolor = foodcolor
 99            foodcolor = random.randint(1, 6)  # Pick random color of the next food
100            return True
101    return False
102
103
104def game_over():
105    global is_game_over
106    is_game_over = True
107    win.erase()
108    win.addstr(10, 20, "Game over! Your score is " + str(len(snake)) + "  Press 'q' to quit", curses.color_pair(1))
109
110
111def is_suicide():  # If snake collides with itself, game is over
112    for i in range(1, len(snake)):
113        if snake[i] == snake[0]:
114            return True
115    return False
116
117
118def end_game():
119    curses.nocbreak()
120    win.keypad(0)
121    curses.echo()
122    curses.endwin()
123
124
125# Initialisation starts --------------------------------------------
126DIR_UP = 0  # Snake's directions, values are not important,
127DIR_RIGHT = 1  # they сan be "a", "b", "c", "d" or something else
128DIR_DOWN = 2
129DIR_LEFT = 3
130
131is_game_over = False
132grow_snake = False
133
134snake = [[10, 5], [9, 5]]  # Set snake size and position
135direction = DIR_RIGHT
136food = []
137foodcolor = 2
138ex_foodcolor = 3
139
140win = curses.initscr()  # Game field in console initialised with curses module
141curses.start_color()  # Enables colors
142curses.init_pair(1, curses.COLOR_CYAN, curses.COLOR_BLACK)
143curses.init_pair(2, curses.COLOR_BLUE, curses.COLOR_BLACK)
144curses.init_pair(3, curses.COLOR_GREEN, curses.COLOR_BLACK)
145curses.init_pair(4, curses.COLOR_MAGENTA, curses.COLOR_BLACK)
146curses.init_pair(5, curses.COLOR_RED, curses.COLOR_BLACK)
147curses.init_pair(6, curses.COLOR_YELLOW, curses.COLOR_BLACK)
148win.keypad(1)  # Enable arrow keys
149win.nodelay(1)  # Do not wait for keypress
150curses.curs_set(0)  # Hide cursor
151curses.cbreak()  # Read keys instantaneously
152curses.noecho()  # Do not print stuff when keys are pressed
153rows, cols = win.getmaxyx()  # Get terminal window size
154
155#  Initialisation ends ---------------------------------------------
156
157
158#  Main loop starts ------------------------------------------------
159drop_food()
160redraw()
161
162
163while True:
164    if is_game_over is False:
165        redraw()
166    key = win.getch()  # Returns a key, if pressed
167    time.sleep(0.1)  # Speed of the game
168
169    if key != -1:  # win.getch returns -1 if no key is pressed
170        if key == curses.KEY_UP:
171            if direction != DIR_DOWN:  # Snake can't go up if she goes down
172                direction = DIR_UP
173        elif key == curses.KEY_RIGHT:
174            if direction != DIR_LEFT:
175                direction = DIR_RIGHT
176        elif key == curses.KEY_DOWN:
177            if direction != DIR_UP:
178                direction = DIR_DOWN
179        elif key == curses.KEY_LEFT:
180            if direction != DIR_RIGHT:
181                direction = DIR_LEFT
182        elif chr(key) == "q":
183            break
184
185    if is_game_over is False:
186        move_snake()
187
188    if is_suicide():
189        game_over()
190
191    if is_food_collision():
192        drop_food()
193        grow_snake = True
194
195end_game()
196#  Main loop ends --------------------------------------------------
真的可以玩哦!不过貌似在Cloud Studio上有延时(毕竟要与服务器交互),感兴趣的不妨在本地跑一跑哈哈~
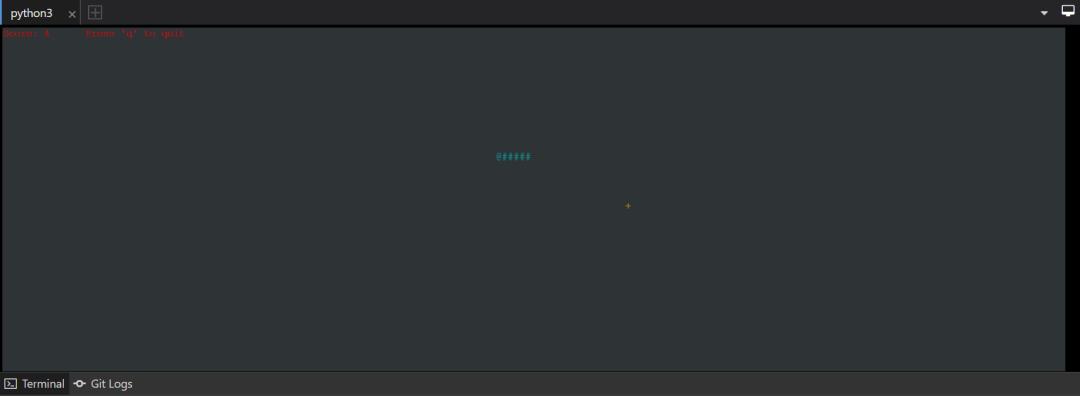
Python 3 Demo
php Demo
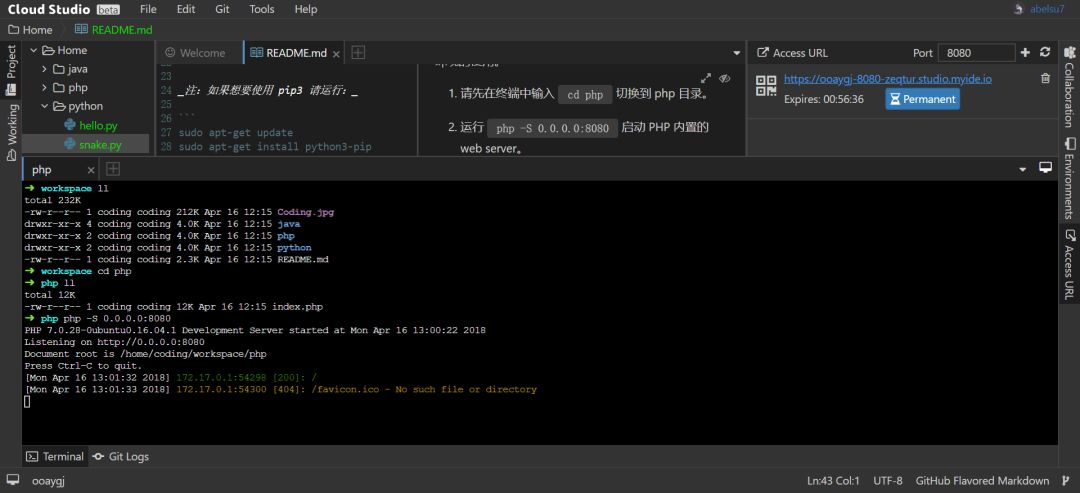
PHP Web Demo
一个很简单的PHP Web Demo,配合Cloud Studio中的Access URL选项卡使用,可将来自公网的访问重定向至云主机PHP Web Server的监听端口。这里提示找不到favico.ico,页面图标无法加载,公网通过重定向链接可访问PHP服务。
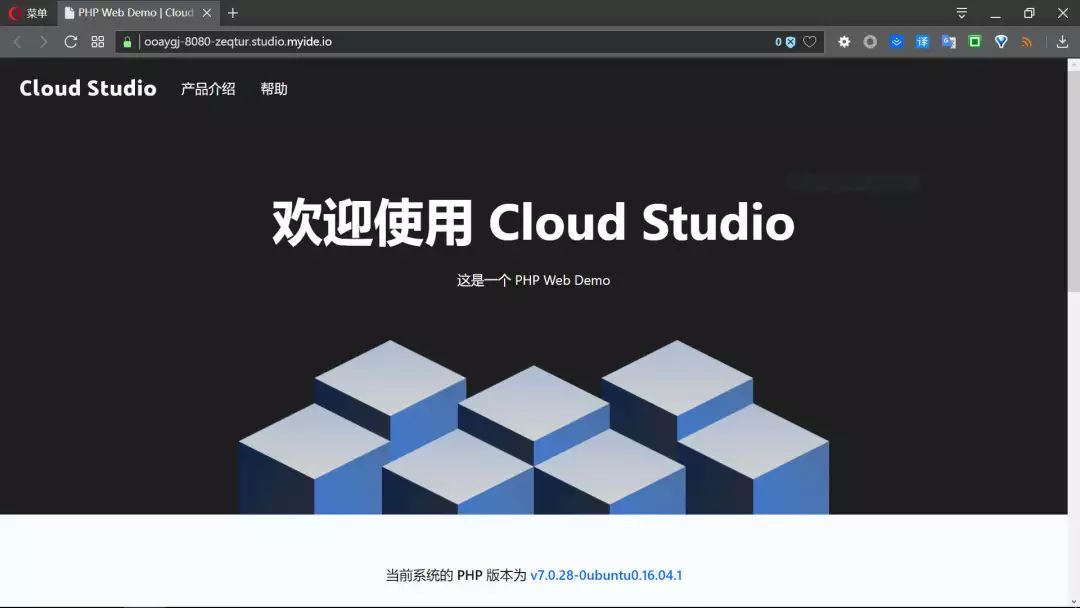
公网访问PHP Server
Java Demo
官方提供的Java Demo是一个基于Maven构建的Spring Boot项目,StudioDemoApplication.java代码如下。
 1package com.coding.studiodemo;
 2
 3import org.springframework.boot.SpringApplication;
 4import org.springframework.boot.autoconfigure.SpringBootApplication;
 5import org.springframework.web.bind.annotation.RequestMapping;
 6import org.springframework.stereotype.Controller;
 7import org.springframework.ui.ModelMap;
 8
 9@SpringBootApplication
10@Controller
11public class StudioDemoApplication {
12    @RequestMapping("/")
13    public String greeting(ModelMap map) {
14        String jreVersion = System.getProperty("java.specification.version");
15        map.addAttribute("jreVersion", "v" + jreVersion);
16        return "index";
17    }
18
19    public static void main(String[] args) {
20        SpringApplication.run(StudioDemoApplication.class, args);
21    }
22}
配置文件pom.xml代码如下
 1<?xml version="1.0" encoding="UTF-8"?>
 2<project xmlns="http://maven.apache.org/POM/4.0.0" xmlns:xsi="http://www.w3.org/2001/XMLSchema-instance"
 3    xsi:schemaLocation="http://maven.apache.org/POM/4.0.0 http://maven.apache.org/xsd/maven-4.0.0.xsd">
 4    <modelVersion>4.0.0</modelVersion>
 5
 6    <groupId>com.coding</groupId>
 7    <artifactId>studio-demo</artifactId>
 8    <version>0.0.1-SNAPSHOT</version>
 9    <packaging>jar</packaging>
10
11    <name>studio-demo</name>
12    <description>Demo project for Spring Boot</description>
13
14    <parent>
15        <groupId>org.springframework.boot</groupId>
16        <artifactId>spring-boot-starter-parent</artifactId>
17        <version>2.0.1.RELEASE</version>
18        <relativePath/> <!-- lookup parent from repository -->
19    </parent>
20
21    <properties>
22        <project.build.sourceEncoding>UTF-8</project.build.sourceEncoding>
23        <project.reporting.outputEncoding>UTF-8</project.reporting.outputEncoding>
24        <java.version>1.8</java.version>
25    </properties>
26
27    <dependencies>
28        <dependency>
29            <groupId>org.springframework.boot</groupId>
30            <artifactId>spring-boot-starter</artifactId>
31        </dependency>
32
33        <dependency>
34            <groupId>org.springframework.boot</groupId>
35            <artifactId>spring-boot-starter-test</artifactId>
36            <scope>test</scope>
37        </dependency>
38        <dependency>
39            <groupId>org.springframework.boot</groupId>
40            <artifactId>spring-boot-starter-web</artifactId>
41        </dependency>
42        <dependency>
43            <groupId>org.springframework.boot</groupId>
44            <artifactId>spring-boot-starter-thymeleaf</artifactId>
45        </dependency>
46    </dependencies>
47    <build>
48        <plugins>
49            <plugin>
50                <groupId>org.springframework.boot</groupId>
51                <artifactId>spring-boot-maven-plugin</artifactId>
52            </plugin>
53        </plugins>
54    </build>
55
56
57</project>
查看Maven版本为3.3.9,直接运行mvn spring-boot:run启动服务,由于是第一次运行,需要等待一段时间来下载依赖。
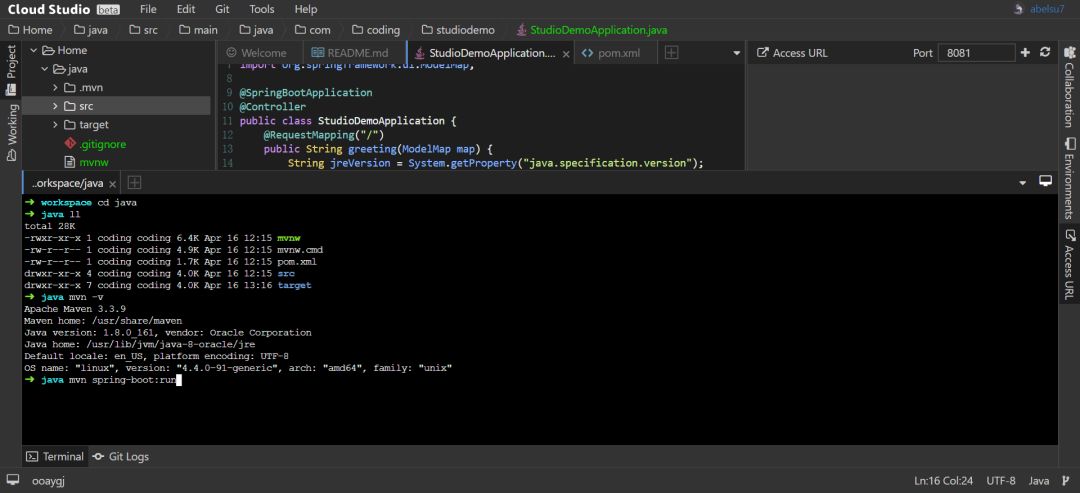
启动Maven服务
依赖下载完成后,服务启动成功,创建Access URL供公网访问。
服务成功启动,创建Access URL
最后访问该链接,成功访问Java Web Demo Page,Cloud Studio初体验结束~
Java Web Demo
总结一下
和传统的云主机相比,基于容器技术的Cloud Studio更加轻量快捷,可视化IDE加持大大提升了开发效率,应用场景也更有针对性。如果只是希望在预搭建的环境中跑一些服务或进行一些实验,Cloud Studio会是一个不错的选择。
但是,Free Trial版本中Access URL的有效期仅为1个小时(解除有效期限制须升级CODING钻石会员),并且无法通过公网IP访问腾讯云专用主机,因此如果需要在公网中提供服务又对图形界面没有太大执念的话,各家的云主机仍是开发的第一选择。
参考文章
Cloud Studio | Coding.net
Coding WebIDE | Coding.net
Cloud Studio帮助文档 | Coding.net
以上是关于腾讯云携手CODING,云端IDE——Cloud Studio初体验的主要内容,如果未能解决你的问题,请参考以下文章