spring+struts2+hibernate整合(ssh)
Posted 程序员提升之路
tags:
篇首语:本文由小常识网(cha138.com)小编为大家整理,主要介绍了spring+struts2+hibernate整合(ssh)相关的知识,希望对你有一定的参考价值。
ssh整合
ssh整合需要一步一步的来,首先我们先整合spring和hibernat。
1.整合之前先把关于spring,hibernate,struts2的相关包导入(将其放入lib目录下)
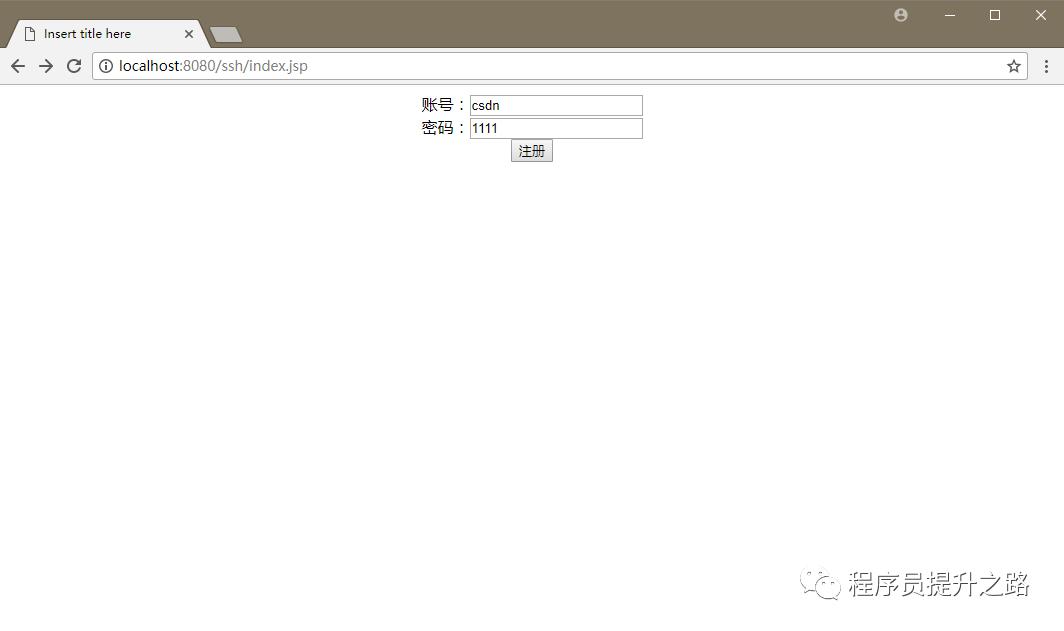
2.首先创建一个用户注册的jsp(插入操作)。
index.jsp
[html] view plain copy
<%@ page language="java" contentType="text/html; charset=UTF-8"
pageEncoding="UTF-8"%>
<!DOCTYPE html PUBLIC "-//W3C//DTD HTML 4.01 Transitional//EN" "http://www.w3.org/TR/html4/loose.dtd">
<html>
<head>
<meta http-equiv="Content-Type" content="text/html; charset=UTF-8">
<title>Insert title here</title>
</head>
<body>
<center>
<form action="register.action" method="post">
账号:<input type="text" name="userName"><br>
密码:<input type="text" name="pwd"><br>
<input type="submit" value="注册">
</form>
</center>
</body>
</html>
3.创建前端控制器web.xml(struts2的前端控制器)
web.xml
[html] view plain copy
<?xml version="1.0" encoding="UTF-8"?>
<web-app xmlns:xsi="http://www.w3.org/2001/XMLSchema-instance" xmlns="http://java.sun.com/xml/ns/javaee" xsi:schemaLocation="http://java.sun.com/xml/ns/javaee http://java.sun.com/xml/ns/javaee/web-app_3_0.xsd" id="WebApp_ID" version="3.0">
<display-name>ssh</display-name>
<welcome-file-list>
<welcome-file>index.html</welcome-file>
<welcome-file>index.htm</welcome-file>
<welcome-file>index.jsp</welcome-file>
<welcome-file>default.html</welcome-file>
<welcome-file>default.htm</welcome-file>
<welcome-file>default.jsp</welcome-file>
</welcome-file-list>
<!-- 读取spring的配置文件 -->
<context-param>
<param-name>contextConfigLocation</param-name>
<param-value>classpath:application-*.xml</param-value>
</context-param>
<!--设置监听,一访问的时候就开始读取配置文件 -->
<listener>
<listener-class>org.springframework.web.context.ContextLoaderListener</listener-class>
</listener>
<!-- struts2的前端控制器,凡是以.action结尾的文件都要走拦截 -->
<filter>
<filter-name>struts</filter-name>
<filter-class>org.apache.struts2.dispatcher.ng.filter.StrutsPrepareAndExecuteFilter</filter-class>
</filter>
<filter-mapping>
<filter-name>struts</filter-name>
<url-pattern>*.action</url-pattern>
</filter-mapping>
</web-app>
4.我们上面注册提交的路径是register.action路径他也走了控制器,要在struts2的配置文件中接收这个请求。
4.1配置struts2的配置文件struts.xml(src目录下)
struts.xml
[html] view plain copy
<?xml version="1.0" encoding="UTF-8"?>
<!DOCTYPE struts PUBLIC
"-//Apache Software Foundation//DTD Struts Configuration 2.0//EN"
"http://struts.apache.org/dtds/struts-2.0.dtd">
<!--
package:相当于模块,包的概念。
namespace:命名空间,相当于springMvc中的注解RequestMapper里面的路径。
extends:struts2的配置文件都需要直接或者间接继承struts-default
struts-default:是一个xml文件,这个xml文件中配置了很多拦截器、校验等等内容
如果不继承struts-default,那struts2的核心内容就使用不了
-->
<struts>
<package name="default" namespace="" extends="struts-default">
<!--
action:前面的请求路径会和action中的name匹配,如果匹配到了那么就走method相对应得方法
name:与前台请求的url相对应,不需要写.action
method:对应执行方法,
默认值为execute(),如果执行方法是execute(),可以省略method
-->
<action name="register" class="com.cn.action.UserAction" method="register">
<!--result:返回值,或者返回的页面
里面的属性有:name:执行完method方法后返回的值,如果不写method返回的是success
type:跳转方式,默认的为转发
-->
<result>success.jsp</result>
</action>
</package>
</struts>
5.建一个action后端控制器相当于springmvc的controller
UserAction.java
[java] view plain copy
package com.cn.action;
import java.util.Date;
import com.cn.pojo.User;
import com.cn.service.IUserService;
import com.opensymphony.xwork2.ActionSupport;
public class UserAction extends ActionSupport {
/**
* User对象是pojo包下面的
*
* hibernate接收前台相应传过来的参数使用全局变量类接收的
*
* action相当于SpringMVC中的controller层,
* 此层需要调用service层的实现,server层则需要调用dao层中的数据。
*
* IUserService:调用service层。
*
* 生成getter,setter方法
*
*
*/
private User user;
private IUserService userServiceImpl;
public String register(){
//设置主键,使用的是时间戳
user.setUserId(String.valueOf(new Date().getTime()));
System.out.println(user);
//调用server层的添加数据的方法
String saveUser = userServiceImpl.saveUser(user);
System.out.println(saveUser);
//返回success,是因为我们继承了ActionSupport方法,此方法中定义的默认值,在struts配置文件中<result>中可以不写name属性
return SUCCESS;
}
public User getUser() {
return user;
}
public void setUser(User user) {
this.user = user;
}
public IUserService getUserServiceImpl() {
return userServiceImpl;
}
public void setUserServiceImpl(IUserService userServiceImpl) {
this.userServiceImpl = userServiceImpl;
}
}
6.定义与数据库对应的pojo类
User.java
[java] view plain copy
package com.cn.pojo;
public class User {
private String userId;
private String pwd;
private String userName;
public String getUserId() {
return userId;
}
public void setUserId(String userId) {
this.userId = userId;
}
public String getPwd() {
return pwd;
}
public void setPwd(String pwd) {
this.pwd = pwd;
}
public String getUserName() {
return userName;
}
public void setUserName(String userName) {
this.userName = userName;
}
@Override
public String toString() {
return "User [userId=" + userId + ", pwd=" + pwd + ", userName=" + userName + "]";
}
public User() {
super();
// TODO Auto-generated constructor stub
}
public User(String userId, String pwd, String userName) {
super();
this.userId = userId;
this.pwd = pwd;
this.userName = userName;
}
}
注意:本人比较智障了。。。将数据库的主键设置成了varchar类型,由此主键生成策略是不太好用的所以使用了时间戳的方式作为主键。。
7.创建对象与数据库表的映射关系文件
User.hbm.xml
[html] view plain copy
<?xml version="1.0" encoding="UTF-8"?>
<!DOCTYPE hibernate-mapping PUBLIC
"-//Hibernate/Hibernate Mapping DTD 3.0//EN"
"http://www.hibernate.org/dtd/hibernate-mapping-3.0.dtd">
<hibernate-mapping>
<!-- name:对应的类的包名
table:数据库表名
id:主键
name:对象的属性
column:数据库中的列
property:其他列和属性
-->
<class name="com.cn.pojo.User" table="user_2">
<id name="userId" column="userId"></id>
<property name="pwd" column="pwd"></property>
<property name="userName" column="Name"></property>
</class>
</hibernate-mapping>
8.配置spring的核心配置文件,我们要将hibernate的核心配置文件一起注入到spring中,让spring容器来统一管理。
application-context.xml
[html] view plain copy
<?xml version="1.0" encoding="UTF-8"?>
<beans xmlns="http://www.springframework.org/schema/beans"
xmlns:context="http://www.springframework.org/schema/context"
xmlns:xsi="http://www.w3.org/2001/XMLSchema-instance"
xmlns:aop="http://www.springframework.org/schema/aop"
xsi:schemaLocation="http://www.springframework.org/schema/beans
http://www.springframework.org/schema/beans/spring-beans.xsd
http://www.springframework.org/schema/aop
http://www.springframework.org/schema/aop/spring-aop.xsd
http://www.springframework.org/schema/context
http://www.springframework.org/schema/context/spring-context.xsd">
<!--
将dao层交给容器管理
我们在dao层中需要获取到sessionFactory对象,从而操作数据库,所以要注入一个sessionFactory属性,
其应用的就是下面sessionFactory中的内容
-->
<bean id="userDaoImpl" class="com.cn.dao.impl.UserDaoImpl" >
<property name="sessionFactory" ref="sessionFactory"> </property>
</bean>
<!--
将Service层交给容器管理
与dao层相同,需要引用dao层的数据。
-->
<bean id="userServiceImpl" class="com.cn.service.impl.UserServiceImpl">
<property name="userDaoImpl" ref="userDaoImpl"></property>
</bean>
<!-- 将action交给容器管理
应用service层的数据
scope属性:
prototype:每次访问都创建一个对象,默认使用的是单例模式,只创建一个对象
由于Struts2框架本身每次访问就需要创建action对象对象,如果使用默认的单例模式,
肯定会出现报错的问题
-->
<bean id="userAction" class="com.cn.action.UserAction" scope="prototype">
<property name="userServiceImpl" ref="userServiceImpl"></property>
</bean>
<!--
将hibernate交给spring容器管理
获取sessionFactory -->
<bean id="sessionFactory" class="org.springframework.orm.hibernate4.LocalSessionFactoryBean">
<property name="dataSource" ref="dataSource"></property>
<!-- hibernate属性注入
并通过读取property文件读取其中的属性
-->
<property name="hibernateProperties">
<props>
<!-- 方言 -->
<prop key="hibernate.dialect">${hibernate.dialect}</prop>
<!-- 显示sql数据 -->
<prop key="hibernate.show_sql">${hibernate.show_sql}</prop>
<!-- 格式化显示 -->
<prop key="hibernate.format_sql">${hibernate.format_sql}</prop>
</props>
</property>
<!-- 映射文件 -->
<property name="mappingResources">
<array>
<value>com/cn/pojo/User.hbm.xml</value>
</array>
</property>
</bean>
<!-- 配置数据库数据源 -->
<bean id="dataSource" class="org.springframework.jdbc.datasource.DriverManagerDataSource">
<property name="driverClassName" value="${hibernate.driver}"></property>
<property name="url" value="${hibernate.url}"></property>
<property name="username" value="${hibernate.username}"></property>
<property name="password" value="${hibernate.password}"></property>
</bean>
<!-- 读取properties配置文件 -->
<context:property-placeholder location="classpath:db.properties"/>
</beans>
9.property文件(db.property)
[plain] view plain copy
hibernate.driver = oracle.jdbc.driver.OracleDriver
hibernate.url = jdbc:oracle:thin:@localhost:1521:orcl
hibernate.username = yao
hibernate.password = 123456
hibernate.dialect = org.hibernate.dialect.Oracle10gDialect
hibernate.show_sql= true
hibernate.format_sql=true
10.server层接口和实现
IUserservice.java
[java] view plain copy
package com.cn.service;
import com.cn.pojo.User;
public interface IUserService {
String saveUser(User user);
}
UserServiceImpl.java
[java] view plain copy
package com.cn.service.impl;
import com.cn.dao.IUserDao;
import com.cn.pojo.User;
import com.cn.service.IUserService;
public class UserServiceImpl implements IUserService{
private IUserDao userDaoImpl;
@Override
public String saveUser(User user) {
String i = userDaoImpl.saveUser(user);
return i;
}
public IUserDao getUserDaoImpl() {
return userDaoImpl;
}
public void setUserDaoImpl(IUserDao userDaoImpl) {
this.userDaoImpl = userDaoImpl;
}
}
11.dao层接口和实现
IUserDao.java
[java] view plain copy
package com.cn.dao;
import com.cn.pojo.User;
public interface IUserDao {
String saveUser(User user);
}
UserDaoImpl.java
[java] view plain copy
package com.cn.dao.impl;
import java.io.Serializable;
import org.hibernate.Session;
import org.hibernate.SessionFactory;
import com.cn.dao.IUserDao;
import com.cn.pojo.User;
import com.opensymphony.xwork2.ActionContext;
public class UserDaoImpl implements IUserDao {
private SessionFactory sessionFactory;
@Override
public String saveUser(User user) {
/**
* 通过sessionFactory对象获取session对象
* 再通过session来操作数据库
* getCurrentSession()方法是使用spring中那个session,如果使用openSession()是创建一个新的session对象
* 这样提交事务的时候就提交不上去,不是一个session。
*/
Session session = sessionFactory.getCurrentSession();
String i =(String) session.save(user);
return i;
}
public SessionFactory getSessionFactory() {
return sessionFactory;
}
public void setSessionFactory(SessionFactory sessionFactory) {
this.sessionFactory = sessionFactory;
}
}
12.创建事务
application-tx.xml
[html] view plain copy
<?xml version="1.0" encoding="UTF-8"?>
<beans xmlns="http://www.springframework.org/schema/beans"
xmlns:context="http://www.springframework.org/schema/context"
xmlns:xsi="http://www.w3.org/2001/XMLSchema-instance"
xmlns:aop="http://www.springframework.org/schema/aop"
xmlns:tx="http://www.springframework.org/schema/tx"
xsi:schemaLocation="http://www.springframework.org/schema/beans
http://www.springframework.org/schema/beans/spring-beans.xsd
http://www.springframework.org/schema/aop
http://www.springframework.org/schema/aop/spring-aop.xsd
http://www.springframework.org/schema/context
http://www.springframework.org/schema/context/spring-context.xsd
http://www.springframework.org/schema/tx
http://www.springframework.org/schema/tx/spring-tx.xsd">
<bean id="hibernateTx" class="org.springframework.orm.hibernate4.HibernateTransactionManager">
<property name="sessionFactory" ref="sessionFactory"></property>
</bean>
<!-- 定义通知 -->
<tx:advice id="txAdvice" transaction-manager="hibernateTx">
<tx:attributes>
<tx:method name="save*" read-only="false"/>
<tx:method name="insert*" read-only="false"/>
<tx:method name="updata*" read-only="false"/>
<tx:method name="delete*" read-only="true"/>
</tx:attributes>
</tx:advice>
<!--定义切面 -->
<aop:config>
<aop:pointcut expression="execution(* com.cn.service.*.*(..))" id="point"/>
<aop:advisor advice-ref="txAdvice" pointcut-ref="point"/>
</aop:config>
</beans>
13.创建注册成功的jsp
success.jsp
[html] view plain copy
<%@ page language="java" contentType="text/html; charset=UTF-8"
pageEncoding="UTF-8"%>
<!DOCTYPE html PUBLIC "-//W3C//DTD HTML 4.01 Transitional//EN" "http://www.w3.org/TR/html4/loose.dtd">
<html>
<head>
<meta http-equiv="Content-Type" content="text/html; charset=UTF-8">
<title>Insert title here</title>
</head>
<body>
<center>
<h1>
注册成功
</h1>
</center>
</body>
</html>
14测试
http://localhost:8080/ssh/index.jsp

这是项目目录结构
以上是关于spring+struts2+hibernate整合(ssh)的主要内容,如果未能解决你的问题,请参考以下文章