用 Mapbox Android SDK 做一款共享单车 App—— 消费者端
Posted 极客学院
tags:
篇首语:本文由小常识网(cha138.com)小编为大家整理,主要介绍了用 Mapbox Android SDK 做一款共享单车 App—— 消费者端相关的知识,希望对你有一定的参考价值。
今日限免课程:《共享单车项目—Android开发实战》
课程大纲
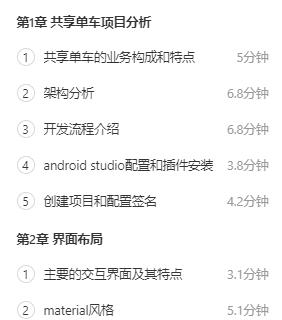
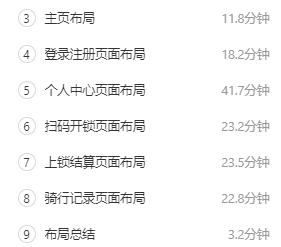
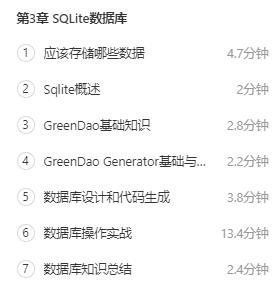
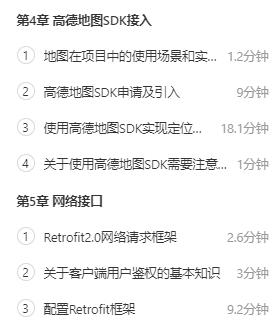
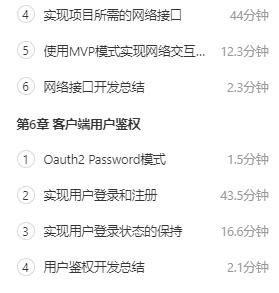
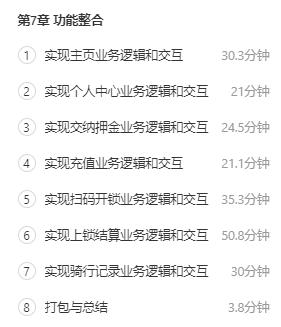

(滑动查看课程目录)
课程免费仅限今日,24小时后恢复原价
若想直接学习课程,扫码学习



长按扫码,立即学习
(以下内容为正文)
共享单车的PM要是早点看到这个教程,可能结果就不一样了吧~
虽然近期的共享单车行业有些风波,但根据麦肯锡预测,截至 2030 年,包括但不限于共享单车的微移动(Micro-mobility)市场在美国将会达到 3,000 亿美元,在欧洲将会达到 1,500 亿美元,在中国将会达到 500 亿美元。
这篇文章将会从技术的角度,手把手教你如何构建一款共享单车类的导航 App,为它加入了导航的功能,并提出了让应用出奇制胜的细节设计思路,还提供源码哦,要不要来试一试?
关于作者

这篇教程将会循序渐进帮助你掌握下面的内容:
如何使用 Navigation SDK 在 App 中嵌入导航功能,并使用 Direction API 设置步行、骑行、驾驶等模式。
如何设计符合自己品牌风格的地图,切换地图模式并自定义图层以便显示不能停车的区域。
一些帮助你提升团队效率的小建议。
我们贴心地为你提供了 Demo 和源码。
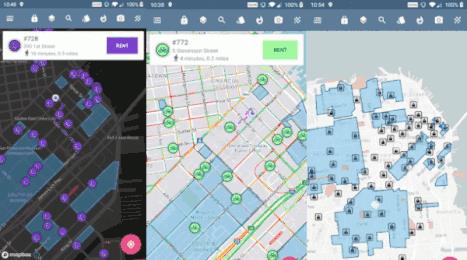
Step 1:步行导航
对于用户来说的第一步,就是寻找从他们所在的位置到车站/自行车停放处/打车点地最短路程。
这个功能可以通过 Direction API 实现 —— 当点击车辆的 SymbolLayer 图标时,代码中会发生很多事情,其中一个操作是获取该车辆的坐标并发出 Directions API 请求,询问从用户的实时位置到所选交通工具的导航信息。
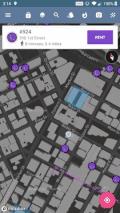
如下代码所示:
directionsApiClient = MapboxDirections.builder()
 .origin(getAppropriateOriginPoint())
 .destination(Point.fromLngLat(selectedVehicleCoordinates.getLongitude(), selectedVehicleCoordinates.getLatitude()))
 .overview(DirectionsCriteria.OVERVIEW_FULL)
 .profile(PROFILE_WALKING)
 .accessToken(getString(R.string.mapbox_access_token))
 .build();
发出 Directions API 请求
如果分析一下上面的代码,.profile 方法用来请求您导航需要的交通方式。上面代码中的.profile(PROFILE_WALKING) 指的是「步行」,其他交通方式参数如下:
.profile(PROFILE_DRIVING):驾驶
.profile(PROFILE_CYCLING):骑行(最好在街区)
.profile(PROFILE_DRIVING_TRAFFIC):考虑当前和历史交通状况的驾驶情况
上面的代码也能返回起始点和终点的距离和所需时间,完整的应用如下代码所示:
directionsApiClient.enqueueCall(new Callback<DirectionsResponse>() {
@Override
public void onResponse(Call<DirectionsResponse> call, Response<DirectionsResponse> response) {
// Check that the response isn't null and that the response has a route
if (response.body() == null) {
Log.d(TAG, getString(R.string.set_right_token));
} else if (response.body().routes().size() < 1) {
Log.d(TAG, getString(R.string.no_routes_found));
} else {
// Retrieve and draw the navigation route on the map
routeToSelectedVehicle = response.body().routes().get(0);
drawNavigationPolylineRoute(routeToSelectedVehicle);
setVehicleWalkToDistanceAndTime(response.body());
getVehicleLocation(Point.fromLngLat(selectedVehicleCoordinates.getLongitude(),
selectedVehicleCoordinates.getLatitude()));
}
}

@Override
public void onFailure(Call<DirectionsResponse> call, Throwable throwable) {
Toast.makeText(context, R.string.failure_to_retrieve, Toast.LENGTH_LONG).show();
}
});
设置粉红色路线的方法:
private void initDashWalkingDirectionLineLayer() {
  loadedMapStyle.addSource(new GeoJsonSource(WALK_TO_VEHICLE_ROUTE_SOURCE_ID));
  loadedMapStyle.addLayerBelow(new LineLayer(WALK_TO_VEHICLE_ROUTE_LINE_LAYER_ID,
  WALK_TO_VEHICLE_ROUTE_SOURCE_ID)
  .withProperties(
    lineWidth(6f),
    lineOpacity(.6f),
    lineCap(LINE_CAP_ROUND),
    lineJoin(LINE_JOIN_ROUND),
    lineColor(Color.parseColor("#d742f4")),
    lineDasharray(new Float[] {1f, 2f})), NEIGHBORHOOD_PARKING_ZONE_FILL_LAYER_ID);
};
更新粉红色路线:
private void drawNavigationPolylineRoute(DirectionsRoute route) {
    if (mapboxMap.getStyle() != null) {
    GeoJsonSource navLineRouteSource = mapboxMap.getStyle().getSourceAs(WALK_TO_VEHICLE_ROUTE_SOURCE_ID);
      if (navLineRouteSource != null) {
        navLineRouteSource.setGeoJson(Feature.fromGeometry(LineString.fromPolyline(
          route.geometry(), Constants.PRECISION_6)));
      }
    }}
Step 2:地理编码(Geocoding)
我们可以在请求中使用 GeocodingCriteria.TYPE_ADDRESS 来实现这个功能,代码如下:
private void getVehicleLocation(Point vehicleLocation) {
  MapboxGeocoding.builder()
    .accessToken(getString(R.string.mapbox_access_token))
    .query(Point.fromLngLat(vehicleLocation.longitude(), vehicleLocation.latitude()))
    .geocodingTypes(GeocodingCriteria.TYPE_ADDRESS)
    .build()
    .enqueueCall(new Callback<GeocodingResponse>() {
      @Override
 public void onResponse(Call<GeocodingResponse> call, Response<GeocodingResponse> response) {
        List<CarmenFeature> results = response.body().features();
        if (results.size() > 0) {
          TextView vehicleAddress = view.findViewById(R.id.vehicle_address);
vehicleAddress.setText(results.get(0).address() != null ?
  results.get(0).placeName().split(",")[0] : getString(R.string.address_unknown));
        } else {
          // No result for your request were found.
          Log.d(TAG, "onResponse: No result found");
        }
      }

      @Override
 public void onFailure(Call<GeocodingResponse> call, Throwable throwable) {
        throwable.printStackTrace();
      }
    });
}
最后的效果是这样的。
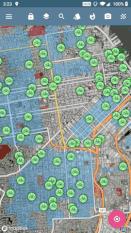
Step 3:嵌入路线导航
还记得之前用共享单车的时候,我们可以用 App 找到自行车,但是却不能直接导航到我们想要去的地方,反而需要用其他的地图 App 来实现,很不方便,对于产品方来说,也不是一个长久之计。
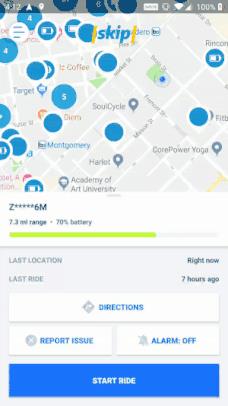
用户需要打开谷歌地图才能导航
为什么不把这些功能都集成在一个 App 中呢?
我们可以使用 Mapbox Navigation SDK for Android 在 App 中添加路线导航的功能,并且把控完整的用户体验,比如地图的样式、实时交通等数据层、POI、充电站和码头等等。
Mapbox Navigation SDK for Android 包含了 Mapbox 官方专业的制图团队设计的 UI,只需要几行代码就可以实现你的需求啦。下面的代码展示了如何嵌入路线导航,可以关注下包含 NavigationView 的部分。
NavigationRoute.builder(context)
  .accessToken(getString(R.string.mapbox_access_token))
  .origin(Point.fromLngLat(selectedOriginLong, selectedOriginLat))
  .destination(Point.fromLngLat(selectedDestinationLong, selectedDestinationLat))
  .profile(PROFILE_WALKING)
  .build()
  .getRoute(new Callback<DirectionsResponse>() {
    @Override
 public void onResponse(Call<DirectionsResponse> call, Response<DirectionsResponse> response) {

      NavigationViewOptions options = NavigationViewOptions.builder()
        .navigationListener(TurnByTurnNavigationFragment.this)
        .directionsRoute(response.body().routes().get(0))
        .directionsProfile(PROFILE_WALKING)
        .shouldSimulateRoute(true)
        .build();

      navigationView.startNavigation(options);
    }

    @Override
 public void onFailure(Call<DirectionsResponse> call, Throwable t) {
      Toast.makeText(context, R.string.failure_to_retrieve, Toast.LENGTH_LONG).show();
    }
});
在 App 中,当你点击了「RENT」按钮以后,就开始路线导航了。比如下面这个效果,屏幕顶部的按钮依然会保持可见,因为 NavigationView 被放在了 fragment container 中。
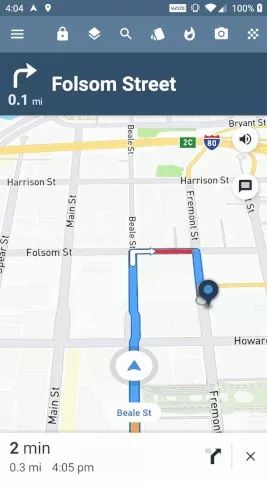
那么我要是不想让顶部按钮显示出来怎么办呢?那就不要在 fragment container 中使用,可以考虑使用 NavigationLauncher 方法,如下图所示。
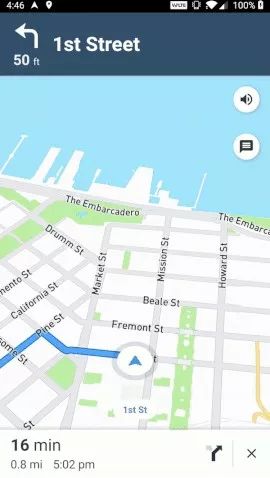
Mapbox 支持多种自定义布局和样式,非常开放且灵活。
NavigationRoute.builder(context)
  .accessToken(getString(R.string.mapbox_access_token))
  .voiceUnits(IMPERIAL)
  .profile(PROFILE_WALKING)
  .origin(getAppropriateOriginPoint())
  .destination(Point.fromLngLat(selectedDestination.getLongitude(), selectedDestination.getLatitude()))
  .build()
  .getRoute(new Callback<DirectionsResponse>() {
    @Override
 public void onResponse(Call<DirectionsResponse> call, Response<DirectionsResponse> response) {

      NavigationLauncherOptions options = NavigationLauncherOptions.builder()
        .directionsRoute(response.body().routes().get(0))
        .directionsProfile(PROFILE_WALKING)
        .shouldSimulateRoute(true)
        .build();
      view.findViewById(R.id.main_mapView).setVisibility(View.INVISIBLE);

      NavigationLauncher.startNavigation(context, options);

    }

    @Override
 public void onFailure(Call<DirectionsResponse> call, Throwable t) {
      Toast.makeText(context, R.string.failure_to_retrieve, Toast.LENGTH_LONG).show();
    }
  });
Step 4:自定义图标
一些共享出行的 App 里面会特别显示出来停车区域,以及充电桩位置等,就像下面展示的那样,黑色的图标在被点击之后,还会改变尺寸,这要归功于 runtime styling。
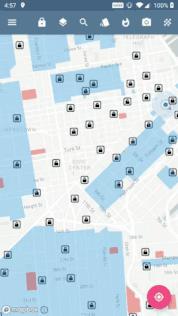
runtime styling 能够根据数据的属性和用户交互,动态实时地改变地图的样式。如何实现点击后变化的效果呢?我们这里用到了一个数据库,包含所有的车库位置。当 App 启动后,我们会在数据库中相同的 SymbolLayer 中添加两个版本,并且对每一层应用相同的 iconImage。简单来讲,我们让这两层叠在一起 —— 所以你只能看到一个图标 —— 一层是「regular」模式,另一层的 id 是 SELECTED_LOCK_STATION_SYMBOL_LAYER_ID。
当 SymbolLayer 图标被点击的时候,可以设置 iconSize 增加,如下面代码所示。
private void increaseIconSize(final SymbolLayer symbolLayer) {
  ValueAnimator symbolLayerIconAnimator = new ValueAnimator();
  symbolLayerIconAnimator.setObjectValues(1f, 1.4f);
  symbolLayerIconAnimator.setDuration(300);
  symbolLayerIconAnimator.addUpdateListener(new ValueAnimator.AnimatorUpdateListener() {
    @Override
    public void onAnimationUpdate(ValueAnimator animator) {
      symbolLayer.setProperties(
          PropertyFactory.iconSize((float) animator.getAnimatedValue())
      );
    }
  });
  symbolLayerIconAnimator.start();
  garageSelected = true;
}
在本项目中,我们使用 Sketch 来绘制自定义图标,在源码中我们也包括了一些自定义图标方便你使用。

Step 5:可交互边界
实时多边形样式定义
我们要做的应用程序,不能仅仅关注用户,还要和用户周围的环境有所交互。比如 Scoot 使用 Mapbox Maps SDK for Android 和 Mapbox Maps SDK for iOS 在地图上展示自定义的停车区域和充电桩位置,如下图。
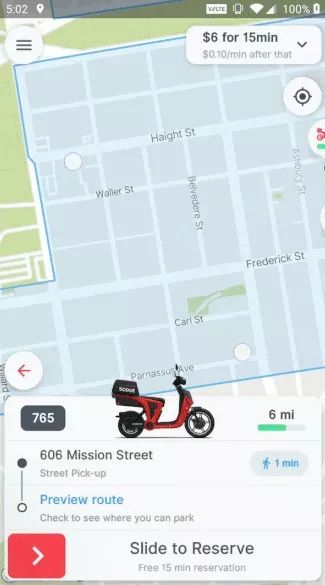
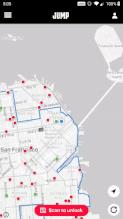
同样的,JUMP 使用 LineLayer 标出他们的服务区域。这些区域可以在 Mapbox Studio 中进行自定义设计,再跨平台部署。当然,这些区域也可以在程序运行时实时绘制,不一定非要在 Mapbox Studio 中提前设计好。
我们在这里用 Mapbox Studio 的 datasets 功能创建一些独立的停车区域,然后导出这些数据为 tileset,并保存在自己的 Mapbox Studio 账户中。我们可以根据tileset ID 创建一个 VectorSource, 然后用这个 VectorSource 创建 FIllLayer。在下面的代码中,我们使用 runtime styling 调整颜色和透明度。
private void addNeighborhoodParkingZonesToMap(@NonNull Style loadedMapStyle) {
  loadedMapStyle.addSource(new VectorSource(NEIGHBORHOOD_PARK_ZONE_SOURCE_ID,
    "mapbox://langsmith.cjf7o0ajv084v3uojct9q3k8b-0o6pu"));
  FillLayer neighborhoodParkingZone = new FillLayer(NEIGHBORHOOD_PARKING_ZONE_FILL_LAYER_ID,
    NEIGHBORHOOD_PARK_ZONE_SOURCE_ID)
    .withProperties(
      fillOpacity(0.4f),
      fillColor(Color.parseColor("#45AAE9")));
  neighborhoodParkingZone.setSourceLayer("GoShare_Bike_Neighborhood_Parkin");
  loadedMapStyle.addLayerBelow(neighborhoodParkingZone, NO_PARK_ZONE_FILL_LAYER_ID);}
数据驱动的样式表达
在城市里,有一些区域不允许停放共享车辆。我们使用红色的多边形和 FillLayers 来创建这样的禁停区域,主要包括下面几种区域:
私人土地
限制区域
不适合停车的区域,比如码头或者陡坡
没法锁车辆的区域
上面的区域背后对应的是不同的数据属性,我们可以使用 data-driven styling 对不同的数据属性赋予不同的样式。比如私人土地和限制区域是深红色的,但是不适合停车的区域可以是橙色的表示警告等等。为了简化,下面的代码把所有禁停区域设置成红色。
private void addPreferredParkingZonesToMap(@NonNull Style loadedMapStyle) {
  loadedMapStyle.addSource(new VectorSource(PREFERRED_PARKING_ZONE_SOURCE_ID,
    "mapbox://langsmith.cjf7nijrv18a633mzibqwj0a5-2a2gm"));
  FillLayer preferredParkingFillLayer = new FillLayer(PREFERRED_PARKING_ZONE_FILL_LAYER_ID,
   PREFERRED_PARKING_ZONE_SOURCE_ID)
    .withProperties(
      fillOpacity(0.4f),
      fillColor(Color.parseColor("#FFA500")));
  preferredParkingFillLayer.setSourceLayer("GoShare_Bike_Preferred_Parking_Z");
  loadedMapStyle.addLayerBelow(preferredParkingFillLayer, INDIVIDUAL_BIKE_SYMBOL_LAYER_ID);
}
您可以看到红色的禁停区域和蓝色的停车区域在地图上很清楚地呈现了出来。
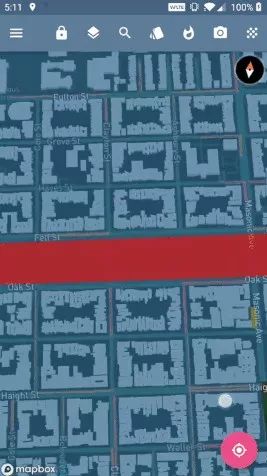
你会发现红色区域的透明度随着缩放比例的不同而发生着变化,是通过下面的代码实现的。
fillOpacity(interpolate(exponential(1f), zoom(),
    stop(5, 0f),
    stop(12, .25f),
    stop(18f, 1f))),
我们之前介绍过 Mapbox Studio 中的样式编辑方法,其中就包括如何设置透明度随着缩放程度变化而变化,如下图所示。
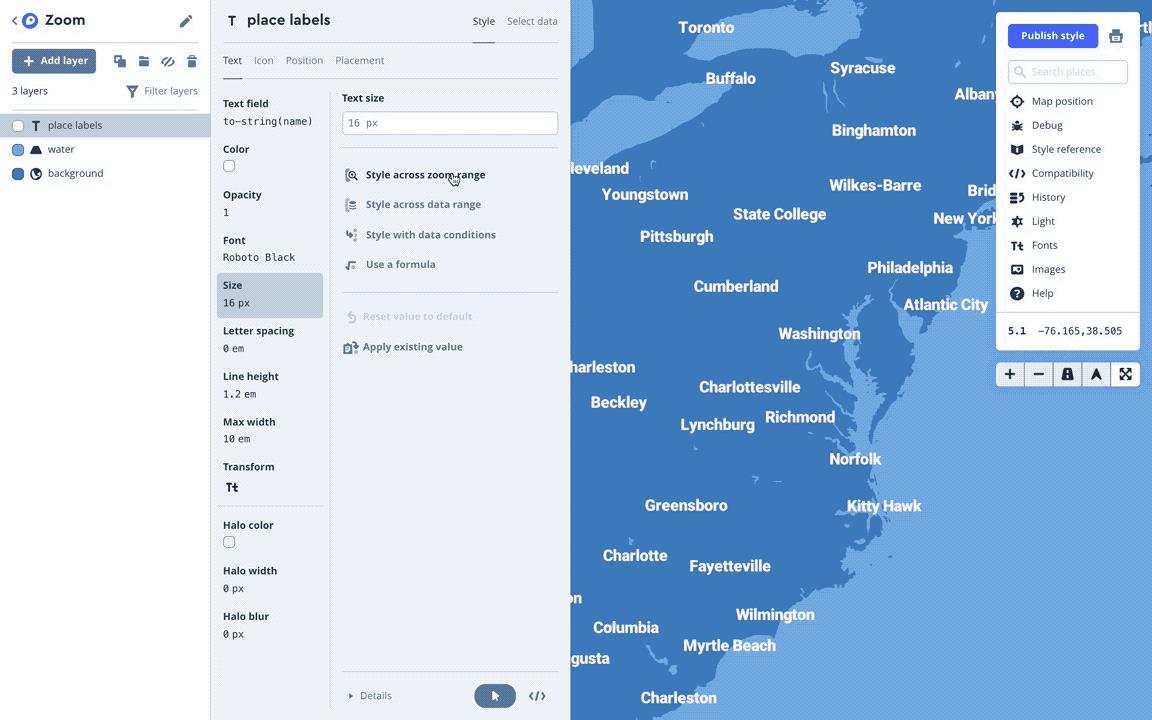
那么若回到我们这次的项目,当缩放指数是 5 的时候,FillLayer 的透明度为 0;当缩放指数增加到 12,透明度应该按比例增加到 0.25;当缩放指数是 18 的时候,透明度变成最大值 1。为了保证平滑的过渡效果,我们可以在每个缩放指数停止之间插入不透明度。
还有一点需要注意的是,我们应该为区域加上边缘,比如蓝色的区域边缘是深蓝色的,这样会很好看。
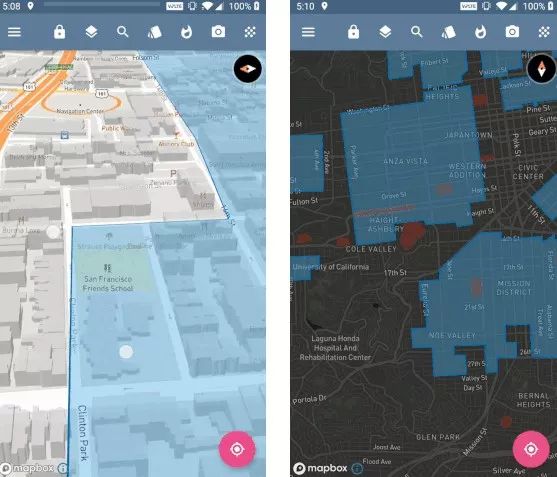
下面的代码增加了 LineLayer,这一层与 FillLayer 分享同样的数据源。可以看下 LineLayer 是如何被自定义的。
LineLayer neighborhoodZoneLineOutline = new LineLayer(NEIGHBORHOOD_PARKING_ZONE_LINE_LAYER_ID,
  NEIGHBORHOOD_PARK_ZONE_SOURCE_ID)
  .withProperties(
    lineWidth(2f),
    lineCap(LINE_CAP_ROUND),
    lineJoin(LINE_JOIN_ROUND),
    lineColor(Color.parseColor("#006db2")));
neighborhoodZoneLineOutline.setSourceLayer("GoShare_Bike_Neighborhood_Parkin");
loadedMapStyle.addLayerBelow(neighborhoodZoneLineOutline, NO_PARK_ZONE_FILL_LAYER_ID);
Step 6:控制地图的样式
元素可见度
如果不想在地图上看到一英里外的单车,要怎么办呢?过滤掉吧。地图由层构成,每一层的就像 PS 中的图层一样,是可以被隐藏掉的。
mapboxMap.getLayer(layerName).setProperties(visibility(NONE));
//or
mapboxMap.getLayer(layerName).setProperties(visibility(VISIBLE));
比如,你可以设置只显示充电超过 50% 的单车。或者说,如果你在做一个线上推广活动,只显示那些参与活动的单车。这一点看似简单,但是能够在提升用户体验的同时,帮助你实现商业目标。
标记聚类
地图上有太多的标记有时候会令人很难找到需要的信息,Mapbox Android Demo app 内包含了一个可以将 data-driven styling 转化为聚类 GeoJSON 数据的案例。我们可以用这个例子来聚类单车数据,让它们看起来更清爽。
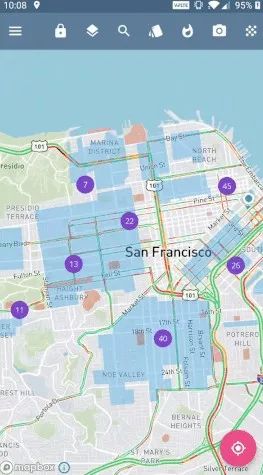
for (int i = 0; i < scooterLayers.length; i++) {
  //Add clusters" circles
  CircleLayer circleClusterLayer = new CircleLayer(sourceId + "cluster-" + i, sourceId);
  circleClusterLayer.setProperties(
    circleColor(scooterLayers[0][1]),
    circleRadius(14f)
  );

  Expression pointCount = toNumber(get("point_count"));

  // Add a filter to the cluster layer that hides the circles based on "point_count"
  circleClusterLayer.setFilter(
    i == 0
      ? gte(pointCount, literal(scooterLayers[i][0])) :
      Expression.all(
        gte(pointCount, literal(scooterLayers[i][0])),
        lt(pointCount, literal(scooterLayers[i - 1][0])
        )
      ));
  mapboxMap.getStyle().addLayer(circleClusterLayer);
  }

  //Add the count labels
  SymbolLayer count = new SymbolLayer(CLUSTER_COUNT_SYMBOL_LAYER_ID, sourceId);
  count.withProperties(
  textField("{point_count}"),
  textSize(12f),
  textColor(Color.WHITE),
  textIgnorePlacement(true),
  textAllowOverlap(true)
  );

  mapboxMap.getStyle().addLayer(count);
控制地图样式
用户有时候想要用卫星图看地标,导航的时候需要交通信息,或者一些极简主义者更喜欢流畅简单的地图样式。我们在这个项目中考虑循坏显示多种专业的地图设计样式,比如街景地图、浅色地图、深色地图、日间交通地图、夜间交通地图、卫星街景地图等。
当地图样式变化的时候,数据需要在样式下载完成后重新加载。这就是为什么我们实现的 MapView 对象的 OnDidFinishLoadingStyleListener() 方法最终覆盖 onDidFinishLoadingStyle() 的原因。
mapView.addOnDidFinishLoadingStyleListener(VehicleMapFragment.this);

...

@Override
public void onDidFinishLoadingStyle() {
  if (mapboxMap != null && mapboxMap.getStyle() != null) {
  Style style = mapboxMap.getStyle();
  setUpMapData(style);
  if (style.getUrl().equals(Style.MAPBOX_STREETS)) {
    if (streetsStyleWaterShouldEqualToolbarColor) {
      changeWaterColorToDifferentColor(style);
    }
  }
}
}
地图样式同样可以被实时调整,以便提升用户体验。举个例子,当旧金山地图从白天到黑夜切换的时候,San Francisco 的标志就会变得非常明显,甚至占据大部分的注意力,所以就可以在切换样式的时候,从代码端把它去掉,毕竟使用者都知道自己在旧金山。
mapboxMap.getLayer("settlement-label").setProperties(visibility("none"));我们还可以使用 runtime styling 让水系的颜色变成深蓝。你可能不知道吧,这个深蓝色正好是 App 的 UI 颜色 —— 你可以用 App 的设计颜色控制地图的颜色。(小贴士:在中国使用的地图需要符合《地图管理条例》,目前 Mapbox 的中国地图样式支持街景、暗黑、浅色)
private boolean streetsStyleWaterShouldEqualToolbarColor = true;

...

if (streetsStyleWaterShouldEqualToolbarColor) {
  changeWaterColorToDifferentColor(style);
}

...

private void changeWaterColorToDifferentColor(@NonNull Style loadedMapStyle) {
  // Darken the water color map layer so that the light blue parking neighborhood color doesn't match the water color
  int toolbarColor = ((ColorDrawable) context.findViewById(R.id.toolbar).getBackground()).getColor();
  loadedMapStyle.getLayer("water").setProperties(fillColor(toolbarColor));
}
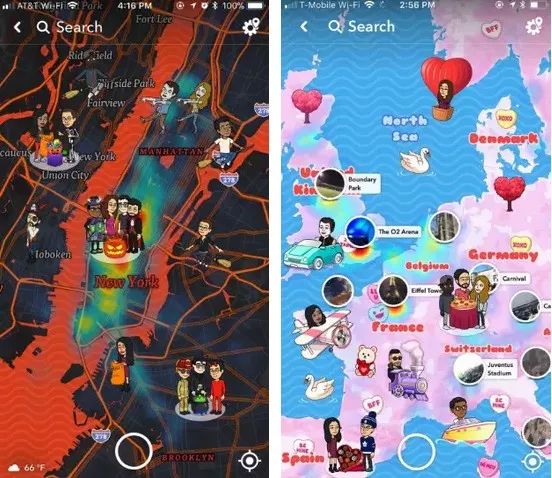
说到地图样式,这里有一些设计方法和思路:
根据品牌风格设计地图,
根据用户所在位置的天气实时改变地图样式
在夜晚调整地图样式为深色
为特定的活动设计特定风格的地图,比如
为节日设计特定的地图,比如SnapChat的万圣节地图和情人节地图
Step 7:巧用插件,打造更快的地图
Places 插件
Intent intent = new PlaceAutocomplete.IntentBuilder()
  .accessToken(getString(R.string.mapbox_access_token))
  .placeOptions(PlaceOptions.builder()
    .backgroundColor(Color.parseColor('#EEEEEE'))
    .limit(10)
    .build(PlaceOptions.MODE_CARDS))
  .build(context);
startActivityForResult(intent, PLACE_SEARCH_REQUEST_CODE_AUTOCOMPLETE);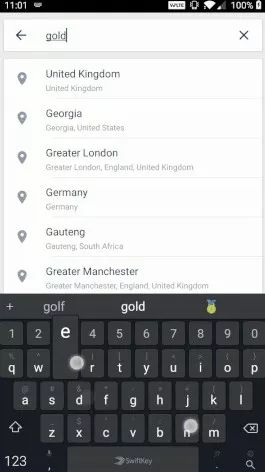
Building 插件
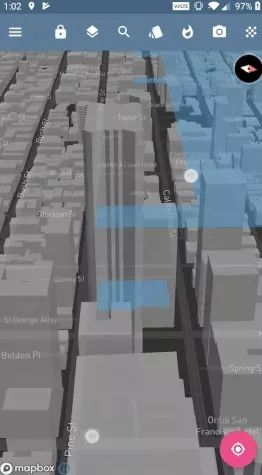
使用 Building Plugin for Android 可以很方便地帮助你在地图上添加 3D 建筑。该插件也使用 runtime styling,这样建筑就可以随着缩放指数而改变高度了。但是当放大地图的时候,可能会带来轻微的建筑被抬高的效果。
private void initBuildingPlugin(@NonNull Style loadedMapStyle) {
  buildingPlugin = new BuildingPlugin(mapView, mapboxMap, loadedMapStyle);
  buildingPlugin.setVisibility(true);
}
LocationComponent
Maps SDK 的 LocationComponent 方法能够帮助你在地图上显示设备的位置。虽然我们并没有在项目中使用任何的相机追踪功能,但是在 LocationComponent 文档中有非常多的样式选项。
下面的代码展示了如何加载 LocationComponent:
// Get the LocationComponent from the map
locationComponent = mapboxMap.getLocationComponent();

// Activate the LocationComponent. It can be customized if you pass in a
// LocationComponentOptions object as method parameter.
locationComponent.activateLocationComponent(context, loadedMapStyle, true);

// Enable to make the LocationComponent's device icon visible on the map
locationComponent.setLocationComponentEnabled(true);

// Set the LocationComponent's camera mode
locationComponent.setCameraMode(CameraMode.NONE);

// Set the LocationComponent's render mode
locationComponent.setRenderMode(RenderMode.NORMAL);
当我点击应用右下角粉色的位置按钮时,地图将会跳转到设备所在的位置。
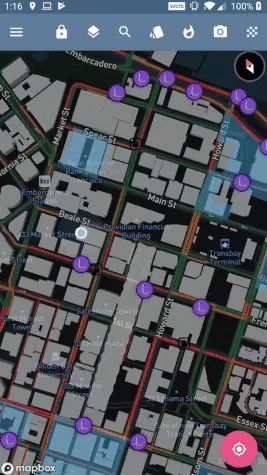
mapboxMap.animateCamera(CameraUpdateFactory.newLatLngZoom(
locationComponent != null && locationComponent.getLastKnownLocation() != null ?
  new LatLng(locationComponent.getLastKnownLocation()) : MIDDLE_OF_SF_COORDINATES,
  15), 15);
LocationComponent 也有很多的自定义选项。其中一个选项是自定义设备位置标志图像,比如可以直接把用户的头像设置为设备的标志。
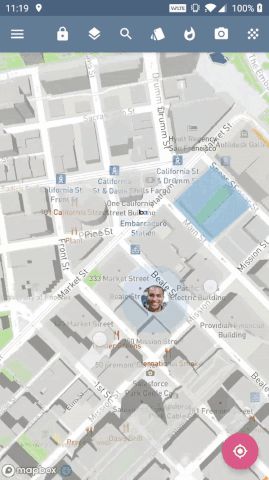
嗨 看到我们的作者了吗
LocationComponentOptions locationComponentOptions = LocationComponentOptions.builder(context)
  .foregroundDrawable(R.drawable.user_profile_photo)
  .build();

  ...

locationComponent.activateLocationComponent(context, loadedMapStyle, locationComponentOptions);
Step 8:最后我们再做一些微调吧
地图相机的调整
当共享车辆被选中后,地图相机会缓缓地调整自己,以保证车辆在地图的中间。当车辆被选中的时候,且缩放指数小于 12 的时候,相机也会调整地图的缩放指数为 14。相机的调整速度是可以设置的。
private void adjustCameraZoom() {
 mapboxMap.animateCamera(CameraUpdateFactory.newLatLngZoom(
  new LatLng(currentSelectedVehicleLatLng.getLatitude(), currentSelectedVehicleLatLng.getLongitude()),
  mapboxMap.getCameraPosition().zoom < 12 ? 14 : mapboxMap.getCameraPosition().zoom), 1800);
}
罗盘的调整
我们希望在 Mapbox 的 SDK 中调整 UI 的位置越简单越好,下面的代码告诉你如何调整罗盘。
private void adjustCompass(boolean lowerBelowCardview) {
  mapboxMap.getUiSettings().setCompassMargins(mapboxMap.getUiSettings().getCompassMarginLeft(),
    lowerBelowCardview ? view.findViewById(R.id.single_vehicle_distance_and_time_info_cardview).getMeasuredHeight()
      + 30 : 0,
    mapboxMap.getUiSettings().getCompassMarginRight(),
    mapboxMap.getUiSettings().getCompassMarginBottom());
}
多语言支持
Mapbox Localization Plugin for Android 自动检测 Android 设备的系统语言,将地图上显示的语言改成系统语言。
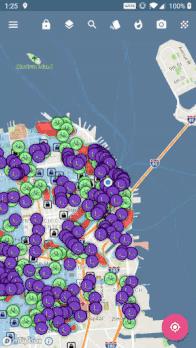
private void enableLocalizationPlugin(@NonNull Style loadedMapStyle) {
  LocalizationPlugin localizationPlugin = new LocalizationPlugin(mapView,
  mapboxMap, loadedMapStyle);
  localizationPlugin.matchMapLanguageWithDeviceDefault();
}
我们也可以用 R.string.xml 文件,一次性为应用翻译各种语言。详细使用办法可以查看官方文档。

充电时间 - 今天限免课程
时下热门共享单车项目,助你快速掌握热门技术,课程从产品设计、业务分析、布局、逻辑开发、上线发布角度,快速构建一个可以应用落地的Android客户端。

课程大纲


(滑动查看课程目录)
课程的设计逻辑
共享经济成为当前互联网的新兴模式;共享单车已经开始融入我们的生活,作为一名开发者,一定要跟紧趋势,保持技术和业务的时效性。
本课程以ofo 为参考,从商业和成本角度,以产品设计、需求分析、数据库设计、具体功能实现、部署与上线的项目开发流程,一步步带你实现一个架构清晰、功能全面的共享单车客户端。
哪些人适合学习?
具备 Java语言基础
了解 Android基本框架,有开发过Android程序经验最好
具备一定的数据库知识,会sql语句操
如何进行学习?
扫描下方二维码
注册极客学院账号,开启学习之旅

长按扫码,立即学习
以上是关于用 Mapbox Android SDK 做一款共享单车 App—— 消费者端的主要内容,如果未能解决你的问题,请参考以下文章