Vue Router 详解
Posted
tags:
篇首语:本文由小常识网(cha138.com)小编为大家整理,主要介绍了Vue Router 详解相关的知识,希望对你有一定的参考价值。
参考技术Ahash本质上是改变window.location的href属性 ,你只能改变#后面的url片段。 我们可以通过直接赋值location.hash来改变href, 但是页面不发生刷新
history接口是HTML5新增的, history 它有五种模式改变URL而不刷新页面.
(1)params 刷新页面参数会丢失
(2)query 刷新页面参数不丢失
全局守卫:
跳转前: router.beforeEach((to,from,next)=>
to: Route : 即将要进入的目标 [路由对象]
from: Route : 当前导航正要离开的路由
next: Function : 一定要调用该方法来 resolve 这个钩子。执行效果依赖 next 方法的调用参数。
next() : 进行管道中的下一个钩子。如果全部钩子执行完了,则导航的状态就是 confirmed (确认的)。
next(false) : 中断当前的导航。如果浏览器的 URL 改变了 (可能是用户手动或者浏览器后退按钮),那么 URL 地址会重置到 from 路由对应的地址。
next(\'/\') 或者 next( path: \'/\' ) : 跳转到一个不同的地址。当前的导航被中断,然后进行一个新的导航。你可以向 next 传递任意位置对象,且允许设置诸如 replace: true、name: \'home\' 之类的选项以及任何用在router-link 的 to prop 或 router.push中的选项。
next(error)导航会被终止且该错误会被传递给 router.onError()注册过的回调
)
跳转后 : router.afterEach((to,from)=>// ...)
beforeEnter: (to, from, next) =>
router.push(url) 导航到新url,向 history栈添加一条新访问记录,等同于window.history.pushState
router.replace(url) 导航到新url,替换 history 栈中当前记录,等同于window.history.replaceState
router.go(n) 在 history 记录中向前或者后退多少步,类似 window.history.go(n)
router.go(1) 在浏览器记录中前进一步,等同于 history.forward()
router.go(-1) 后退一步记录,等同于 history.back()
router.go(0) 刷新当前页面
router.back() 导航回退一步,类似于router.go(-1)
router. forward() 导航前进一步,但是不刷新前进页的表单,类似于router.go(1)
Vue3的vue-router路由详解
这篇文章是接着【三分钟快速搭建Vue3+webpack项目】的内容做的开发,有基础的可以跳过 【三分钟快速搭建Vue3+webpack项目】,直接看以下的内容。
Vue3的vue-router路由详解:
首先安装路由依赖模块:
npm install vue-router@4所需代码文件如下图:
图1
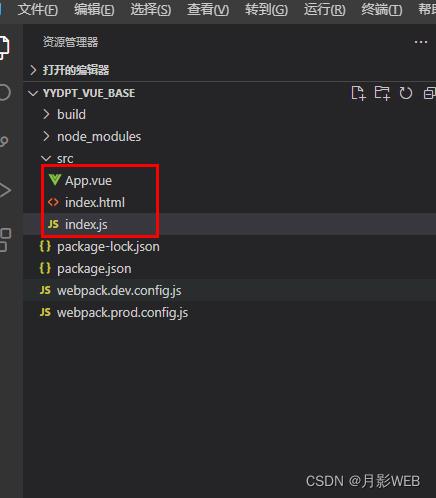
所需要的主要文件:index.html、index.js、App.vue
index.html:模板页面,项目中的代码编译之后都是放入到模板页面中id为app的元素这种。
代码如下:
<!DOCTYPE html>
<html>
  <head>
    <meta charset="utf-8">
    <meta name="viewport" content="width=device-width,initial-scale=1.0">
    <title>Vue</title>
  </head>
  <body>
    <div id="app"></div>
  </body>
</html>index.js:创建一个vue应用,将路由放入应用之中,并挂载到模板页面id为app的元素上。
代码如下:
import  createApp  from 'vue'
import  createRouter,createWebHashHistory  from 'vue-router'
import App from './App.vue'

// 1. 定义路由组件:这里直接用的对象数据,也可以导入其他组件。
const Main =  render() return '月影WEB 欢迎大家来学习各种技术知识!'
const Lists =  render() return '月影WEB-列表页面'
const Details =  render() return '月影WEB-详情页面'

// 2. 定义一些路由:每个路由都需要映射到一个组件。
const routes = [
     path: '/', component: Main ,
     path: '/lists', component: Lists ,
     path: '/details', component: Details ,
]

// 3. 创建路由实例并传递 `routes` 配置。
const router = createRouter(
    // 内部提供了 history 模式的实现。为了简单起见,我们在这里使用 hash 模式。
    history: createWebHashHistory(),
    routes, // `routes: routes` 的缩写
)

// 4.创建一个vue应用,将App组件和定义的路由放入到vue应用,并挂载到模板页面id为app的元素上。
createApp(App).use(router).mount('#app')
1. 定义路由组件:这里直接用的对象数据,也可以导入其他组件。
const Main = render() return '月影WEB 欢迎大家来学习各种技术知识!'
const Lists = render() return '月影WEB-列表页面'
const Details = render() return '月影WEB-详情页面'
注意:Main、Lists 、Details 定义了三个路由组件,return后面就是每个路由组件展示的UI。
2. 定义一些路由:每个路由都需要映射到一个组件。
const routes = [
path: '/', component: Main ,
path: '/lists', component: Lists ,
path: '/details', component: Details ,
]
注意:path是路由路径,也是地址栏会显示的路径,component是放路由组件的,每个路由路径都可以进行组件映射。
3. 创建路由实例并传递 `routes` 配置。
const router = createRouter(
// 内部提供了 history 模式的实现。为了简单起见,我们在这里使用 hash 模式。
history: createWebHashHistory(),
routes, // `routes: routes` 的缩写
)
注意:这里只做了简单的配置,history是路由的模式,routes放定义的路由,createRouter创建路由实例。
4.创建一个vue应用,将App组件和定义的路由放入到vue应用,并挂载到模板页面id为app的元素上。
createApp(App).use(router).mount('#app')
App.vue:用来展示不同的路由页面UI。
代码如下:
<template>
    <router-view></router-view>
</template>
<script>
export default


</script>
注意:<router-view>是用来展示路由对应的组件UI的。
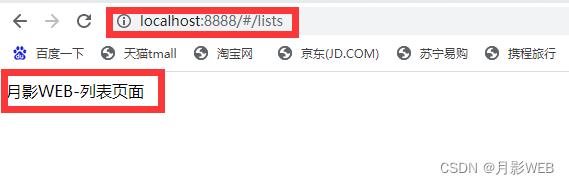
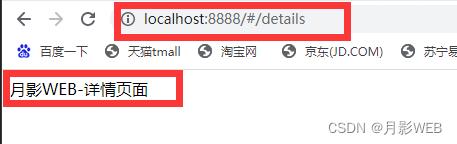
启动服务的效果如下:
path: '/', component: Main

path: '/lists', component: Lists
path: '/details', component: Details
关注公众号(月影WEB),了解更多的前后端知识;
欢迎大家关注互相交流学习;
以上是关于Vue Router 详解的主要内容,如果未能解决你的问题,请参考以下文章