OpenCV与图像处理
Posted 无人驾驶视觉
tags:
篇首语:本文由小常识网(cha138.com)小编为大家整理,主要介绍了OpenCV与图像处理相关的知识,希望对你有一定的参考价值。
本章节的主要内容图像特征提取:HOG、Haar、LBP。
以下代码均在python3.6,opencv4.2.0环境下试了跑一遍,可直接运行。
最常用的三种传统的图像特征提取算法分别为Haar特征、LBP特征及HOG特征,三种特征描述了三种不同的局部信息:
1、 HOG描述的则是图像在局部范围内对应的形状边缘梯度信息。
2、 Haar描述的是图像在局部范围内像素值明暗变换信息。
3、 LBP描述的是图像在局部范围内对应的纹理信息。
1、HOG特征提取
在一副图像中,局部目标的表象和形状能够被梯度或边缘的方向密度分布很好地描述。本质:梯度主要存在于边缘的地方。
HOG特征的提取过程:
(1)Gamma校正,进行归一化:输入图像进行校正,常见的系数在2.5左右。主要是为了补偿显示器带来的灰度偏差,降低局部阴影及背景因素的影响。
(2)图像转灰度。
(3)计算图像的梯度与方向,可以使用Sobel算子实现,最终得到图像的梯度振幅与角度。
(4)将图像划分为小细胞单元cells,例如:8x8的小网格,对每个cells做梯度方向权重直方图统计,形成每个cell的descriptor。
(5)块描述子:将每几个cell组成一个block,例如:将2x2的网格单元组合成为一个大的块(Block),主要是将每个Cell的直方图合并为一个大block的直方图向量,block内归一化梯度直方图。一个block内所有cell的特征descriptor串联起来便得到该block的HOG特征descriptor。对每个block的descriptor做归一化处理,常见的归一化处理为L2-norm或者L1-norm将图像image内的所有归一化处理的block的HOG特征descriptor串联起来就可以得到该image的HOG特征descriptor了,这个descriptor就是最终的可供分类使用的特征向量了。
代码实战:
# coding:utf-8import cv2import numpy as npimport mathimport matplotlib.pyplot as pltclass Hog_descriptor():#---------------------------## 初始化# cell_size每个细胞单元的像素数# bin_size表示把360分为多少边#---------------------------#def __init__(self, img, cell_size=16, bin_size=8):self.img = img# self.img = np.sqrt(img / np.max(img))# self.img = np.sqrt(img / float(np.max(img)))self.img = np.sqrt(img*1.0 / float(np.max(img)))self.img = img * 255self.cell_size = cell_sizeself.bin_size = bin_sizeself.angle_unit = 360 / self.bin_sizeassert type(self.bin_size) == int, "bin_size should be integer,"assert type(self.cell_size) == int, "cell_size should be integer,"assert 360 % self.bin_size == 0, "bin_size should be divisible by 360"#---------------------------## 获取hog向量和图片#---------------------------#def extract(self):# 获得原图的shapeheight, width = self.img.shape# 计算原图的梯度大小gradient_magnitude, gradient_angle = self.global_gradient()gradient_magnitude = abs(gradient_magnitude)# cell_gradient_vector用来保存每个细胞的梯度向量cell_gradient_vector = np.zeros((int(height / self.cell_size), int(width / self.cell_size), self.bin_size))height_cell,width_cell,_ = np.shape(cell_gradient_vector)#---------------------------## 计算每个细胞的梯度直方图#---------------------------#for i in range(height_cell):for j in range(width_cell):# 获取这个细胞内的梯度大小cell_magnitude = gradient_magnitude[i * self.cell_size:(i + 1) * self.cell_size,j * self.cell_size:(j + 1) * self.cell_size]# 获得这个细胞内的角度大小cell_angle = gradient_angle[i * self.cell_size:(i + 1) * self.cell_size,j * self.cell_size:(j + 1) * self.cell_size]# 转化为梯度直方图格式cell_gradient_vector[i][j] = self.cell_gradient(cell_magnitude, cell_angle)# hog图像hog_image = self.render_gradient(np.zeros([height, width]), cell_gradient_vector)hog_vector = []# block为2x2for i in range(height_cell - 1):for j in range(width_cell - 1):block_vector = []block_vector.extend(cell_gradient_vector[i][j])block_vector.extend(cell_gradient_vector[i][j + 1])block_vector.extend(cell_gradient_vector[i + 1][j])block_vector.extend(cell_gradient_vector[i + 1][j + 1])mag = lambda vector: math.sqrt(sum(i ** 2 for i in vector))magnitude = mag(block_vector)if magnitude != 0:normalize = lambda block_vector, magnitude: [element / magnitude for element in block_vector]block_vector = normalize(block_vector, magnitude)hog_vector.append(block_vector)return hog_vector, hog_image#---------------------------## 计算原图的梯度大小# 角度大小#---------------------------#def global_gradient(self):gradient_values_x = cv2.Sobel(self.img, cv2.CV_64F, 1, 0, ksize=5)gradient_values_y = cv2.Sobel(self.img, cv2.CV_64F, 0, 1, ksize=5)gradient_magnitude = cv2.addWeighted(gradient_values_x, 0.5, gradient_values_y, 0.5, 0)gradient_angle = cv2.phase(gradient_values_x, gradient_values_y, angleInDegrees=True)return gradient_magnitude, gradient_angle#---------------------------## 分解角度信息到# 不同角度的直方图上#---------------------------#def cell_gradient(self, cell_magnitude, cell_angle):orientation_centers = [0] * self.bin_sizefor i in range(cell_magnitude.shape[0]):for j in range(cell_magnitude.shape[1]):gradient_strength = cell_magnitude[i][j]gradient_angle = cell_angle[i][j]min_angle, max_angle, mod = self.get_closest_bins(gradient_angle)orientation_centers[min_angle] += (gradient_strength * (1 - (mod / self.angle_unit)))orientation_centers[max_angle] += (gradient_strength * (mod / self.angle_unit))return orientation_centers#---------------------------## 计算每个像素点所属的角度#---------------------------#def get_closest_bins(self, gradient_angle):idx = int(gradient_angle / self.angle_unit)mod = gradient_angle % self.angle_unitreturn idx, (idx + 1) % self.bin_size, mod#---------------------------## 将梯度直方图进行绘图#---------------------------#def render_gradient(self, image, cell_gradient):cell_width = self.cell_size / 2max_mag = np.array(cell_gradient).max()for x in range(cell_gradient.shape[0]):for y in range(cell_gradient.shape[1]):cell_grad = cell_gradient[x][y]cell_grad /= max_magangle = 0angle_gap = self.angle_unitfor magnitude in cell_grad:angle_radian = math.radians(angle)x1 = int(x * self.cell_size + magnitude * cell_width * math.cos(angle_radian))y1 = int(y * self.cell_size + magnitude * cell_width * math.sin(angle_radian))x2 = int(x * self.cell_size - magnitude * cell_width * math.cos(angle_radian))y2 = int(y * self.cell_size - magnitude * cell_width * math.sin(angle_radian))cv2.line(image, (y1, x1), (y2, x2), int(255 * math.sqrt(magnitude)))angle += angle_gapreturn imageif __name__ == '__main__':#加载图像img = cv2.imread('person.jpg')gray_img = cv2.cvtColor(img,cv2.COLOR_BGR2GRAY)#显示原图像plt.figure(figsize=(6.4,2.0*3.2))plt.subplot(1,3,1)plt.imshow(img)plt.title("img") # 图形标题#显示灰度化图像plt.subplot(1,3,2)plt.imshow(gray_img)plt.title("gray_img")#HOG特征提取hog = Hog_descriptor(gray_img, cell_size=20, bin_size=12)hog_vector, hog_image = hog.extract()#绘制特征图plt.subplot(1,3,3)plt.imshow(hog_image, cmap=plt.cm.gray)plt.title("hog_image")plt.show()
运行结果:
HOG特征
2、Haar特征提取
基于哈尔小波的特征,使用积分图加速计算特征,使用检测窗口中指定位置的相邻矩形,计算每一个矩形的像素和并取其差值,然后用这些差值来对图像的子区域进行分类。Haar特征值反映了图像的灰度变化情况。
代码实战:
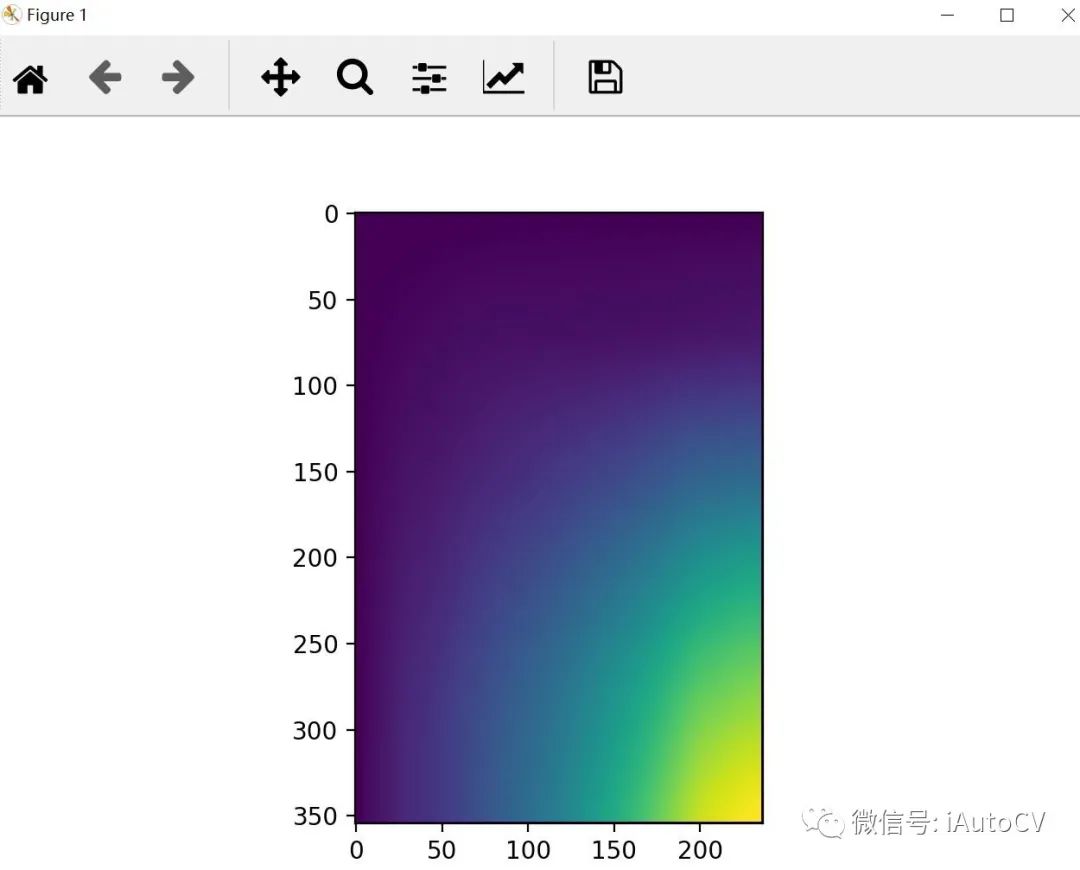
import cv2import numpy as npimport matplotlib.pyplot as plt#获取积分图像def integral( img ):#积分图像比原始图像多一行一列,积分图像第一行第一列为0integimg = np.zeros( shape = (img.shape[0] + 1, img.shape[1] + 1), dtype = np.int32 )for i in range( 1, img.shape[0] ):for j in range( 1, img.shape[1] ):integimg[i][j] = img[i][j] + integimg[i-1][j] + integimg[i][j-1] - integimg[i-1][j-1]plt.imshow( integimg )plt.show()print( 'Done!' )return integimg#获取单一尺度的Haar特征def haar_onescale( img, integimg, haarblock_width, haarblock_height ):#步长为1,no paddinghaarimg = np.zeros( shape = ( img.shape[0] - haarblock_width + 1, img.shape[1] - haarblock_height + 1 ), dtype = np.int32 )haar_feature_onescale = []for i in range( haarimg.shape[0] ):for j in range( haarimg.shape[1] ):# i,j映射回原图形的坐标m = haarblock_width + in = haarblock_height + ihaar_all = integimg[m][n] - integimg[m-haarblock_width][n] - integimg[m][n-haarblock_height] + integimg[m-haarblock_width][n-haarblock_height]# print(haar_all)haar_black = integimg[m][n- int( haarblock_height/2 )] - integimg[m-haarblock_width][n-int( haarblock_height/2 )]- integimg[m][n-haarblock_height] + integimg[m-haarblock_width][n-haarblock_height]# 1*all - 2*black = white - blackhaarimg[i][j] = 1 * haar_all - 2 * haar_blackhaar_feature_onescale.append( haarimg[i][j] )# print(haar_black)plt.imshow( haarimg )plt.show()print( 'Done!' )print( '当前尺度下的Haar特征维度为:{}'.format( len( haar_feature_onescale ) ) )return haar_feature_onescale#获取全尺度下的Haar特征def harr( haarblock_width, haarblock_height, Scale_num ):feature = []haar_num = 0for i in range( Scale_num):haarblock_width = i*haarblock_width + 24haarblock_height = i*haarblock_height + 24print( '当前 Haarblock 尺度为: ( {}, {} )'.format( haarblock_height, haarblock_width ) )haar_feature_onescale = haar_onescale( img, integimg, haarblock_width, haarblock_height )haar_num += len( haar_feature_onescale )feature.append( haar_feature_onescale )haarblock_width = 24haarblock_height = 24#计算总的Haar特征维度print( '[INFO] 计算Haar特征维数' )print( 'Haar特征总的维度为:{}'.format( haar_num ) )return featureif __name__ == '__main__':#以灰度图的方式读取图像img = cv2.imread( 'face.jpg', cv2.IMREAD_GRAYSCALE )if ( img is None ):print( 'Not read img.' )#确定Haarblock的大小haarblock_width = 24haarblock_height = 24width_limt = int( img.shape[0] / haarblock_width )height_limt = int( img.shape[1] / haarblock_height )print( '行方向尺度个数为: {}, 列方向尺度个数为:{}'.format( width_limt, height_limt ) )#可获取的尺度数量Scale_num = min( height_limt, width_limt )print( '可用尺度个数为:{}'.format( Scale_num ) )#获取积分图像print( '[INFO] 计算积分图像' )integimg = integral( img )print( '[INFO] 提取图像Haar特征' )haar_feature = harr( haarblock_width, haarblock_height, Scale_num )
运行结果:
Haar特征

3、LBP特征提取
原始的LBP算子定义为在3*3的窗口内,以窗口中心像素为阈值,将相邻的8个像素的灰度值与其进行比较,若周围像素值大于中心像素值,则该像素点的位置被标记为1,否则为0。利用在空间位置上邻近的像素来对当前像素进行二进制编码,就是LBP。
代码实战:
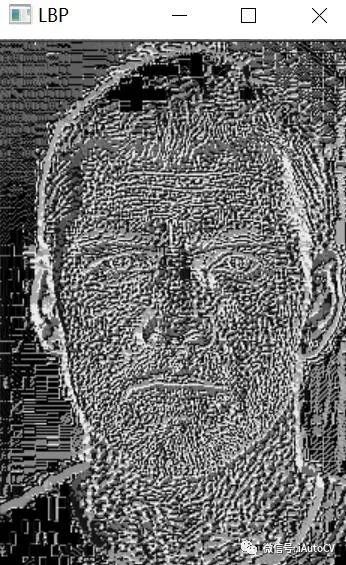
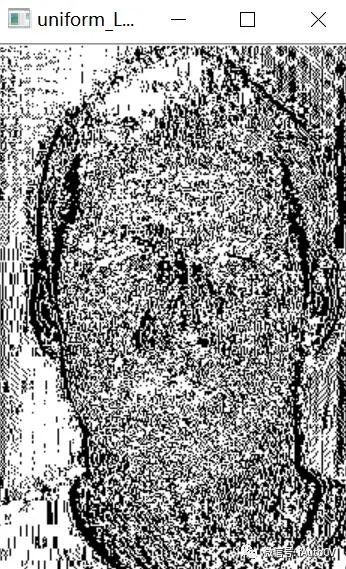
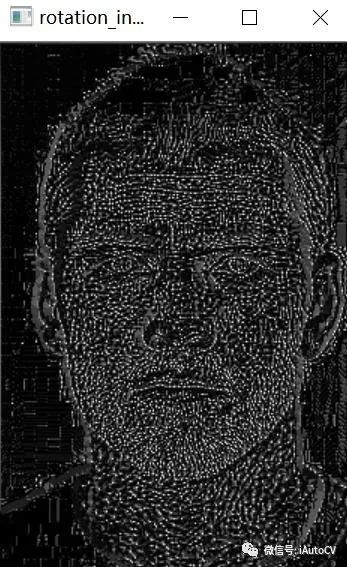
#coding:utf-8#------------------------------------## 1、5种LBP算法复现:# 1、原始LBP算子:LBP# 2、LBP等价模式:uniform_LBP# 3、LBP旋转不变模式:rotation_invariant_LBP# 4、LBP旋转不变等价模式:rotation_invariant_uniform_LBP# 5、圆形LBP算子:circular_LBP#------------------------------------#import numpy as npimport cv2import matplotlib.pyplot as pltimport mathdef LBP(src):# param src:灰度图像height = src.shape[0]width = src.shape[1]# dst = np.zeros([height, width], dtype=np.uint8)dst = src.copy()lbp_value = np.zeros((1,8), dtype=np.uint8)neighbours = np.zeros((1,8), dtype=np.uint8)for x in range(1, width-1):for y in range(1, height-1):0] = src[y - 1, x - 1]1] = src[y - 1, x]2] = src[y - 1, x + 1]3] = src[y, x - 1]4] = src[y, x + 1]5] = src[y + 1, x - 1]6] = src[y + 1, x]7] = src[y + 1, x + 1]center = src[y, x]for i in range(8):if neighbours[0, i] > center:i] = 1else:i] = 0lbp = lbp_value[0, 0] * 1 + lbp_value[0, 1] * 2 + lbp_value[0, 2] * 4 + lbp_value[0, 3] * 8 \+ lbp_value[0, 4] * 16 + lbp_value[0, 5] * 32 + lbp_value[0, 6] * 64 + lbp_value[0, 0] * 128x] = lbpreturn dstdef getHopCnt(num):# param num:8位的整形数,0-255if num > 255:num = 255elif num < 0:num = 0num_b = bin(num)num_b = str(num_b)[2:]# 补0if len(num_b) < 8:temp = []for i in range(8-len(num_b)):temp.append('0')temp.extend(num_b)num_b = tempcnt = 0for i in range(8):if i == 0:former = num_b[-1]else:former = num_b[i-1]if former == num_b[i]:passelse:cnt += 1return cntdef uniform_LBP(src, norm=True):# param src:原始图像# param norm:是否做归一化到【0-255】的灰度空间table = np.zeros((256), dtype=np.uint8)temp = 1for i in range(256):if getHopCnt(i) <= 2:= temptemp += 1height = src.shape[0]width = src.shape[1]dst = np.zeros([height, width], dtype=np.uint8)dst = src.copy()lbp_value = np.zeros((1, 8), dtype=np.uint8)neighbours = np.zeros((1, 8), dtype=np.uint8)for x in range(1, width - 1):for y in range(1, height - 1):0] = src[y - 1, x - 1]1] = src[y - 1, x]2] = src[y - 1, x + 1]3] = src[y, x - 1]4] = src[y, x + 1]5] = src[y + 1, x - 1]6] = src[y + 1, x]7] = src[y + 1, x + 1]center = src[y, x]for i in range(8):if neighbours[0, i] > center:i] = 1else:i] = 0lbp = lbp_value[0, 0] * 1 + lbp_value[0, 1] * 2 + lbp_value[0, 2] * 4 + lbp_value[0, 3] * 8 \+ lbp_value[0, 4] * 16 + lbp_value[0, 5] * 32 + lbp_value[0, 6] * 64 + lbp_value[0, 0] * 128x] = table[lbp]if norm is True:return img_max_min_normalization(dst)else:return dstdef img_max_min_normalization(src, min=0, max=255):height = src.shape[0]width = src.shape[1]if len(src.shape) > 2:channel = src.shape[2]else:channel = 1src_min = np.min(src)src_max = np.max(src)if channel == 1:dst = np.zeros([height, width], dtype=np.float32)for h in range(height):for w in range(width):w] = float(src[h, w] - src_min) / float(src_max - src_min) * (max - min) + minelse:dst = np.zeros([height, width, channel], dtype=np.float32)for c in range(channel):for h in range(height):for w in range(width):w, c] = float(src[h, w, c] - src_min) / float(src_max - src_min) * (max - min) + minreturn dstdef value_rotation(num):value_list = np.zeros((8), np.uint8)temp = int(num)= tempfor i in range(7):temp = ((temp << 1) | int(temp / 128)) % 256= tempreturn np.min(value_list)def rotation_invariant_LBP(src):# param src:原始图像height = src.shape[0]width = src.shape[1]# dst = np.zeros([height, width], dtype=np.uint8)dst = src.copy()lbp_value = np.zeros((1, 8), dtype=np.uint8)neighbours = np.zeros((1, 8), dtype=np.uint8)for x in range(1, width - 1):for y in range(1, height - 1):0] = src[y - 1, x - 1]1] = src[y - 1, x]2] = src[y - 1, x + 1]3] = src[y, x - 1]4] = src[y, x + 1]5] = src[y + 1, x - 1]6] = src[y + 1, x]7] = src[y + 1, x + 1]center = src[y, x]for i in range(8):if neighbours[0, i] > center:i] = 1else:i] = 0lbp = lbp_value[0, 0] * 1 + lbp_value[0, 1] * 2 + lbp_value[0, 2] * 4 + lbp_value[0, 3] * 8 \+ lbp_value[0, 4] * 16 + lbp_value[0, 5] * 32 + lbp_value[0, 6] * 64 + lbp_value[0, 0] * 128x] = value_rotation(lbp)return dstdef rotation_invariant_uniform_LBP(src):# param src:原始图像table = np.zeros((256), dtype=np.uint8)temp = 1for i in range(256):if getHopCnt(i) <= 2:= temptemp += 1height = src.shape[0]width = src.shape[1]dst = np.zeros([height, width], dtype=np.uint8)dst = src.copy()lbp_value = np.zeros((1, 8), dtype=np.uint8)neighbours = np.zeros((1, 8), dtype=np.uint8)for x in range(1, width - 1):for y in range(1, height - 1):0] = src[y - 1, x - 1]1] = src[y - 1, x]2] = src[y - 1, x + 1]3] = src[y, x - 1]4] = src[y, x + 1]5] = src[y + 1, x - 1]6] = src[y + 1, x]7] = src[y + 1, x + 1]center = src[y, x]for i in range(8):if neighbours[0, i] > center:i] = 1else:i] = 0lbp = lbp_value[0, 0] * 1 + lbp_value[0, 1] * 2 + lbp_value[0, 2] * 4 + lbp_value[0, 3] * 8 \+ lbp_value[0, 4] * 16 + lbp_value[0, 5] * 32 + lbp_value[0, 6] * 64 + lbp_value[0, 0] * 128x] = table[lbp]dst = img_max_min_normalization(dst)for x in range(width):for y in range(height):x] = value_rotation(dst[y, x])return dstdef circular_LBP(src, radius, n_points):# param src:原始图像height = src.shape[0]width = src.shape[1]# dst = np.zeros([height, width], dtype=np.uint8)dst = src.copy()=np.float32)=np.float32)neighbours = np.zeros((1, n_points), dtype=np.uint8)lbp_value = np.zeros((1, n_points), dtype=np.uint8)for x in range(radius, width - radius - 1):for y in range(radius, height - radius - 1):lbp = 0.for n in range(n_points):theta = float(2 * np.pi * n) / n_pointsx_n = x + radius * np.cos(theta)y_n = y - radius * np.sin(theta)# 向下取整x1 = int(math.floor(x_n))y1 = int(math.floor(y_n))# 向上取整x2 = int(math.ceil(x_n))y2 = int(math.ceil(y_n))# 将坐标映射到0-1之间tx = np.abs(x - x1)ty = np.abs(y - y1)# 根据0-1之间的x,y的权重计算公式计算权重w1 = (1 - tx) * (1 - ty)w2 = tx * (1 - ty)w3 = (1 - tx) * tyw4 = tx * ty# 根据双线性插值公式计算第k个采样点的灰度值neighbour = src[y1, x1] * w1 + src[y2, x1] * w2 + src[y1, x2] * w3 + src[y2, x2] * w4n] = neighbourcenter = src[y, x]# print('center:{}; neighbours:{}'.format(center, neighbours))for n in range(n_points):if neighbours[0, n] > center:n] = 1else:n] = 0# print('lbp_value:{}'.format(lbp_value))for n in range(n_points):lbp += lbp_value[0, n] * 2**n# print('lbp_value[0, n] * 2**n : {}'.format(lbp_value[0, n] * 2**n))# print('lbp_value transformed:{}'.format(lbp))x] = int(lbp / (2**n_points-1) * 255)# print('dst value of [{}, {}]:{}'.format(y, x, dst[y,x]))return dstdef disp_test_result(img, gray, dst, mode=0):# param mode = 0, opencv显示图片# param mode = 1, matplotlib显示图片if mode == 0:img)gray)dst1)dst2)dst3)dst4)dst5)cv2.waitKey()cv2.destroyAllWindows()else:plt.figure()plt.subplot(171)plt.imshow(img)plt.title('src')plt.subplot(172)cmap='gray')plt.title('gray')plt.subplot(173)cmap='gray')plt.title('LBP')plt.subplot(174)cmap='gray')plt.title('uniform_LBP')plt.subplot(175)cmap='gray')plt.title('rotation_invariant_LBP')plt.subplot(176)cmap='gray')plt.title('rotation_invariant_uniform_LBP')plt.subplot(177)cmap='gray')plt.title('circular_LBP')plt.show()if __name__ == '__main__':img = cv2.imread('face.jpg')gray = cv2.cvtColor(img, cv2.COLOR_BGR2GRAY)dst1 = LBP(gray)dst2 = uniform_LBP(gray)dst3 = rotation_invariant_LBP(gray)dst4 = rotation_invariant_uniform_LBP(gray)dst5 = circular_LBP(gray, radius=4, n_points=16)gray, dst1, mode=0)gray, dst2, mode=0)gray, dst3, mode=0)gray, dst4, mode=0)gray, dst5, mode=0)
运行结果:
原图

灰度图

LBP图

uniform_LBP图

rotation_invariant_LBP图

rotation_invariant_uniform_LBP图
circular_LBP图
以上内容如有错误或者需要补充的,请留言!
以上是关于OpenCV与图像处理的主要内容,如果未能解决你的问题,请参考以下文章
pyhton—opencv直线检测(HoughLines)找到最长的一条线
机器视觉行业实践技巧 -- OpenCV技巧与方法:代码脚手架 -- 图像处理