mycat系列三SpringBoot + mybatisPlus + Mycat + Mysql (多主多从) 整合
Posted 阿甘正专
tags:
篇首语:本文由小常识网(cha138.com)小编为大家整理,主要介绍了mycat系列三SpringBoot + mybatisPlus + Mycat + Mysql (多主多从) 整合相关的知识,希望对你有一定的参考价值。
点击关注“阿甘正专”,设为星标
奇迹每天都在发生,等你而来

目录
一、前言
二、整合 SpringBoot + MybatisPlus + Mycat
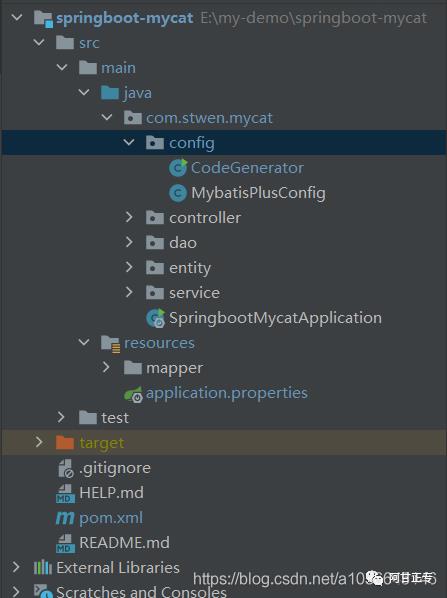
1、新建一个SpringBoot项目
2、pom依赖
3、application.properties 配置
4、生成实体类
5、测试
一、前言
通过前两篇博客,我们可以通过docker搭建mysql多主多从(主从复制)服务,并使用Mycat中间件实现分片、读写分离等:

下面,我们进入实际的项目开发演示,如何整合 SpringBoot + MybatisPlus + Mycat 的demo 示例。
二、整合 SpringBoot + MybatisPlus + Mycat
1、新建一个SpringBoot项目
名称:springboot-mycat
版本:2.3.3.RELEASE
2、pom依赖
主要依赖如下:lombok、mybatis-plus、pagehelper(分页插件)、Jdbc连接驱动等
<dependency>
<groupId>org.springframework.boot</groupId>
<artifactId>spring-boot-starter-web</artifactId>
</dependency>
<dependency>
<groupId>org.projectlombok</groupId>
<artifactId>lombok</artifactId>
<optional>true</optional>
</dependency>
<dependency>
<groupId>mysql</groupId>
<artifactId>mysql-connector-java</artifactId>
<version>5.1.38</version>
</dependency>
<dependency>
<groupId>com.baomidou</groupId>
<artifactId>mybatis-plus-boot-starter</artifactId>
<version>3.1.1</version>
</dependency>
<dependency>
<groupId>com.baomidou</groupId>
<artifactId>mybatis-plus-generator</artifactId>
<version>3.1.2</version>
</dependency>
<dependency>
<groupId>org.freemarker</groupId>
<artifactId>freemarker</artifactId>
<version>2.3.28</version>
</dependency>
<!-- 数据库连接池 -->
<dependency>
<groupId>com.alibaba</groupId>
<artifactId>druid</artifactId>
<version>1.1.22</version>
</dependency>
<!-- 分页-->
<dependency>
<groupId>com.github.pagehelper</groupId>
<artifactId>pagehelper-spring-boot-starter</artifactId>
<version>1.2.5</version>
<exclusions>
<exclusion>
<groupId>org.mybatis</groupId>
<artifactId>mybatis</artifactId>
</exclusion>
</exclusions>
</dependency>
3、application.properties 配置
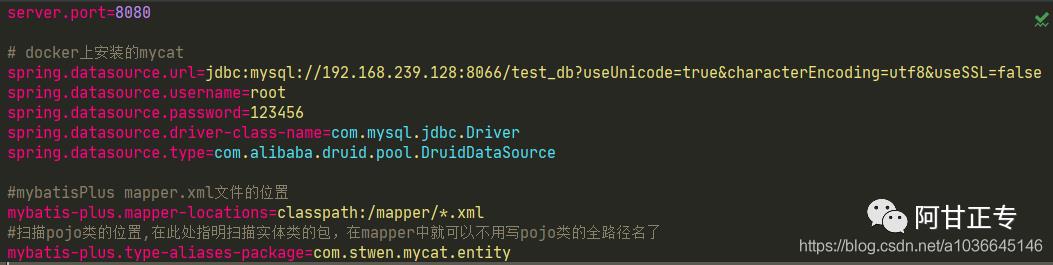
【说明】
spring.datasource.url:需要配置的是mycat的ip与端口,由mycat去拦截我们的sql语句,然后根据mycat配置的分片规则去操作具体的mysql物理数据库。
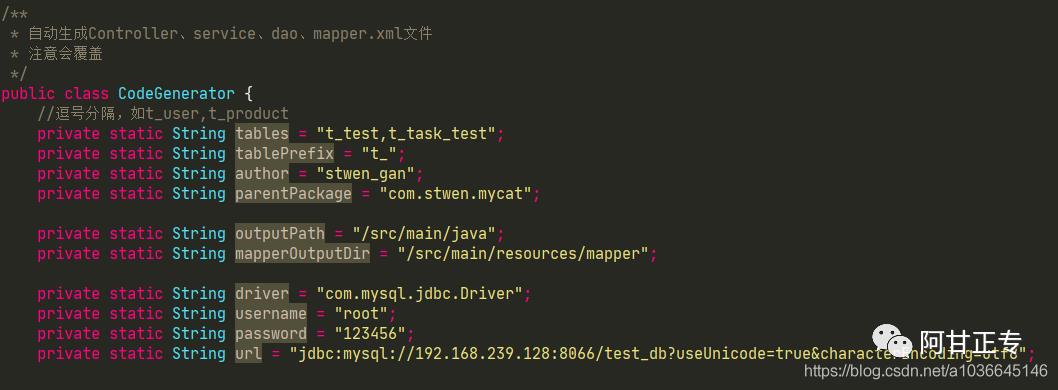
4、生成实体类
我们可以使用 mybatis-plus-generator 包,自动生成实体类等,这里就不演示了。
5、测试
5.1 新增测试
这里我们通过上一节《Docker安装mycat并实现MySQL主从复制、读写分离》,在test_db库中的t_test表进行新增测试
   @RestController
   @RequestMapping("/test")
   public class TestController {


   @Resource
   private TestDao testDao;
   @Autowired
   private ITestService testService;


   /**
    * 新增
    * @return
    */
   @RequestMapping("/save")
   public int save() {

    Test entity = new Test();
    entity.setTitle("马马哈哈");
    int num = testDao.insert(entity);
    return num;

    }

   }
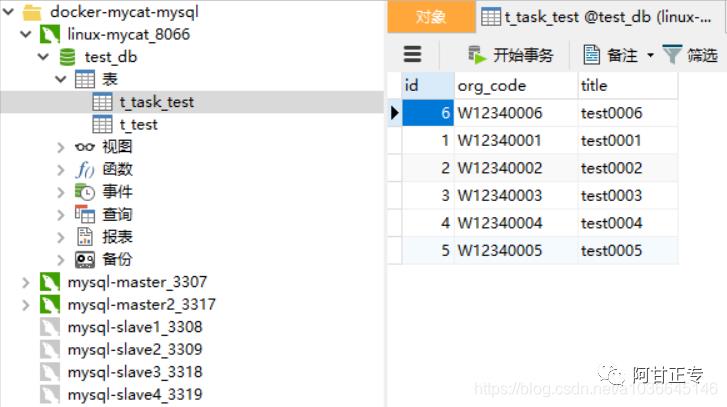
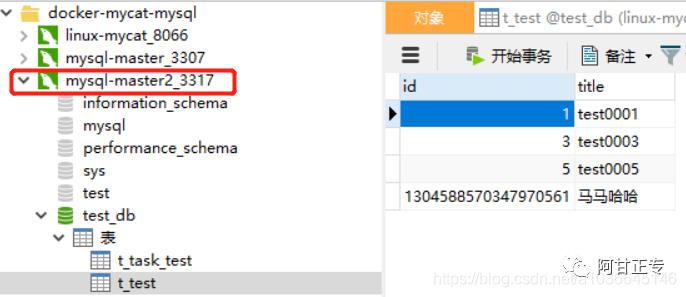
运行springboot的启动类,访问 localhost:8080/test/save ,成功后,便往我们的mysql数据库新增了一条记录,通过Navicat连接 mycat 查看:
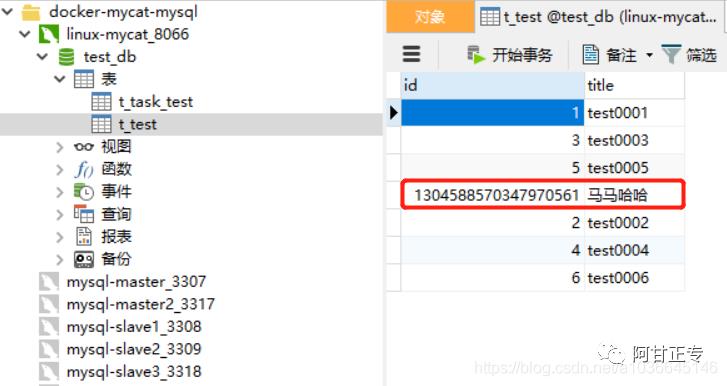
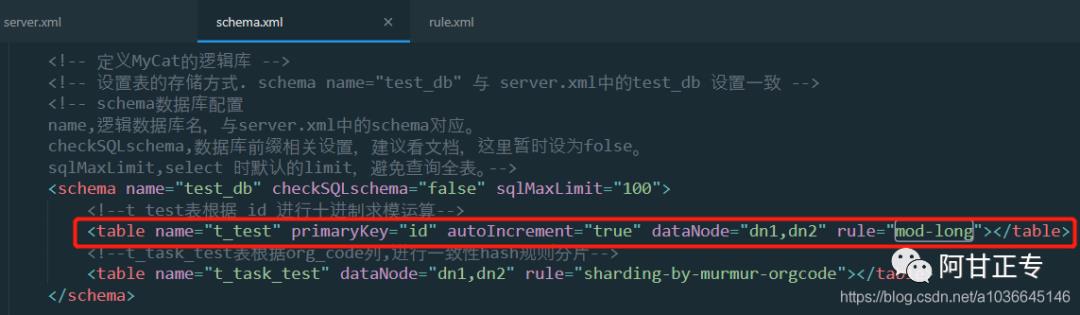
发现新增了一条数据,这里根据mycat配置的rule.xml规则分片,实际是插入到了第二个主库mysql-master2(当然它对应的从库也会同步复制过去)
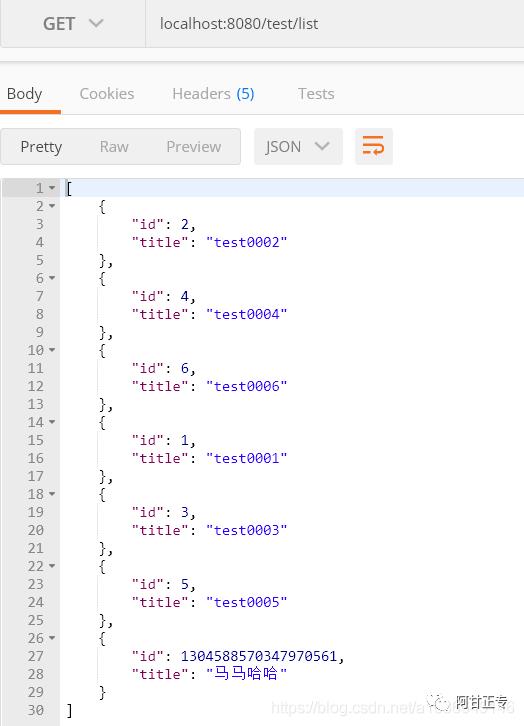
5.2 查询测试
这里,我们查询t_test表的所有记录(未排序)
   /**
    * 所有记录
    * @return
    */
   @RequestMapping("/list")
   public List<Test> query() {

    List<Test> list = testDao.selectList(null);
    return list;

   }
postman工具访问结果如下:
5.3 分页测试
这里,使用到pagehelper分页插件,它是通过拦截我们的sql,进行分页参数添加
controller
   /**
    * 列表分页查询
    * @return
    */
   @RequestMapping("/listByPage")
   public PageInfo listBypage() {

    PageInfo pageInfo = testService.listBypage();
    return pageInfo;

   }
service,按id升序
   /**
    * 列表分页查询
    * @return
    */
   @Override
   public PageInfo listBypage() {
   //分页,每页10条
   PageHelper.startPage(1, 10);
   // 按id升序
   List<Test> list = testDao.selectList(new QueryWrapper<Test>().orderByAsc("id"));


   PageInfo pageInfo = new PageInfo(list);
   return pageInfo;
   }
测试结果,如下:

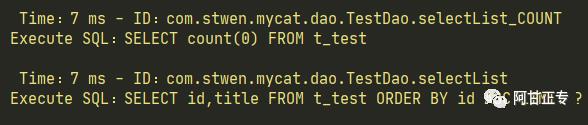
控制台,打印的sql
当然,你可以根据mycat配置不同的分片规则,往不同的mysql数据库操作数据,这里就不过多演示了。

●
●
●
●
●

右上角按钮分享给更多人哦~
来都来了,点个在看再走吧~~~
以上是关于mycat系列三SpringBoot + mybatisPlus + Mycat + Mysql (多主多从) 整合的主要内容,如果未能解决你的问题,请参考以下文章