Node.js 服务端实践之 GraphQL 初探
Posted Node地下铁
tags:
篇首语:本文由小常识网(cha138.com)小编为大家整理,主要介绍了Node.js 服务端实践之 GraphQL 初探相关的知识,希望对你有一定的参考价值。
0.问题来了
DT 时代,各种业务依赖强大的基础数据平台快速生长,如何高效地为各种业务提供数据支持,是所有人关心的问题。
现有的业务场景一般是这样的,业务方提出需求,然后寻找开发资源,由后端提供数据,让前端实现各种不同的业务视图。这样的做法存在很多的重复劳动,如果能够将其中通用的内容抽取出来提供给各个业务方反复使用,必然能够节省宝贵的开发时间和开发人力。
前端的解决方案是将视图组件化,各个业务线既可以是组件的使用者,也可以是组件的生产者。那么问题来了,前端通过组件实现了跨业务的复用,后端接口如何相应地提高开发效率呢?
我们假设某个业务需要以下数据内容 a:
{
  user(id: 3500401) {
 id,
 name,
    isViewerFriend
  }
}
对,这不是 JSON,但是我们仍然可以看懂它表示的是查询 id 为 3500401 用户的 id,name 和 isViewerFriend 信息。用户信息对于各个业务都是通用的,假设另外一个业务需要这样的用户信息 b:
{
  user(id: 3500401) {
    name,
    profilePicture(size: 50)  {
      uri,
      width,
      height
    }
  }
}
对比一下,我们发现只是少了两个字段,多了一个字段而已。如果要实现我们的目标,即复用同一个接口来支持这两种业务的话,会有以下几种做法:
用同一个接口,这个接口提供了所有数据。这样做的好处是实现起来简单,但缺点是对业务做判断的逻辑会增多,而且对于业务来说,响应内容中有些数据根本用不到;
使用参数来区分不同的业务方并返回相应的数据。好处仍然是实现简单,虽然不会有用不到的数据返回,但是仍然需要增加业务逻辑判断,会造成以后维护的困难。
此外,这样还会造成不同业务之间的强依赖,每次发布都需要各个业务线一起测试和回归。不重用接口则没法提高开发效率,重用接口则会有这些问题,那么到底有没有“好一点”的解决方案呢?
这是我们在处理复杂的前后端分离中经常要面临的一个思考。
1.GraphQL,一种新的思路
我们知道,用户信息对应的数据模型是固定的,每次请求其实是对这些数据做了过滤和筛选。对应到数据库操作,就是数据的查询操作。如果客户端也能够像“查询”一样发送请求,那不就可以从后端接口这个大的“大数据库”去过滤筛选业务需要的数据了吗?
GraphQL 就是基于这样的思想来设计的。上面提到的(a)和(b)类型的数据结构就是 GraphQL 的查询内容。使用上面的查询,GraphQL 服务器会分别返回如下响应内容。
a 查询对应的响应:
{
  "user" : { "id": 3500401, "name": "Jing Chen", "isViewerFriend": true }}
b 查询对应的响应:
{
  "user" : { "name": "Jing Chen", "profilePicture": { "uri": "http: //someurl.cdn/pic.jpg", "width": 50, "height": 50 }
 }
}
只需要改变查询内容,前端就能定制服务器返回的响应内容,这就是 GraphQL 的客户端指定查询(Client Specified Queries)。假如我们能够将基础数据平台做成一个 GraphQL 服务器,不就能为这个平台上的所有业务提供统一可复用的数据接口了吗?
了解了 GraphQL 的这些信息,我们一起来动手实践吧。
2.使用 Node.js 实现 GraphQL 服务器
我们先按照官方文档搭建一个 GraphQL 服务器:
$ mkdir graphql-intro && cd ./graphql-intro
$ npm install express --save
$ npm install babel --save
$ touch ./server.js
$ touch ./index.js
index.js 的内容如下:
//index.js
//require `babel/register` to handle javascript code

require('babel/register');
require('./server.js');
server.js 的内容如下:
//server.js

import express from 'express';
let app = express();
let PORT = 3000;

app.post('/graphql', (req, res) => { res.send('Hello!'); });

let server = app.listen(PORT, function() {

 let host = server.address().address;
 let port = server.address().port;
 console.log('GraphQL listening at http://%s:%s', host, port);
});
然后执行代码: nodemon index.js:
如果没有安装 nodemon,需要先 npm install -g nodemon,也推荐使用 node-dev 模块。
测试是否有效:
curl -XPOST http://localhost:3000/graphql接着编写 GraphQL Schema
接下来是添加 GraphQL Schema(Schema 是 GraphQL 请求的入口,用户的 GraphQL 请求会对应到具体的 Schema),首先回忆一下 GraphQL 请求是这样的:
query getHightScore { score }上面的请求是获取 getHightScore 的 score 值。也可以加上查询条件,例如:
query getHightScore(limit: 10) { score }这样的请求格式就是 GraphQL 中的 schema。通过 schema 可以定义服务器的响应内容。
接下来我们在项目中使用 graphql:
npm install graphql --save使用 body-parser 来处理请求内容:npm install body-parser --save。 而 graphql 这个 npm 包会负责组装服务器 schema 并处理 GraphQL 请求。
创建 schema:touch ./schema.js。
//schema.js

import {
  GraphQLObjectType,
  GraphQLSchema,
  GraphQLInt
}

from 'graphql';
let count = 0;
let schema = new GraphQLSchema({
  query: new GraphQLObjectType({
    name: 'RootQueryType',
    fields: {
      count: {
        type: GraphQLInt,
        resolve: function() {
          return count;
        }
      }
    }
  })
});

export default schema;
这段代码创建了一个 GraphQLSchema 实例。这个 schema 的顶级查询对象会返回一个 RootQueryType 对象,这个 RootQueryType 对象有一个整数类型的 count 域。GraphQL 除了支持整数( Interger ),还支持字符串( String )、列表( List )等多种类型的数据。
连接 schema
下面是将 GraphQL schema 和服务器连接起来,我们需要修改 server.js 为如下所示:
//server.js

import express from 'express';
import schema from './schema';
import { graphql } from 'graphql';
import bodyParser from 'body-parser';

let app = express();
let PORT = 3000;//Parse post content as text
app.use(bodyParser.text({ type: 'application/graphql' }));

app.post('/graphql', (req, res) => { //GraphQL executor graphql(schema, req.body) .then((result) => { res.send(JSON.stringify(result, null, 2)); }) });

let server = app.listen(PORT, function() {

 let host = server.address().address;
 let port = server.address().port;
 console.log('GraphQL listening at http://%s:%s', host, port); });
验证下效果:
curl -v -XPOST -H "Content-Type:application/graphql" -d 'query RootQueryType { count }' http://localhost:3000/graphql结果如下图所示:
GraphQL 查询还可以省略掉 query RootQueryType 前缀,即:

检查服务器
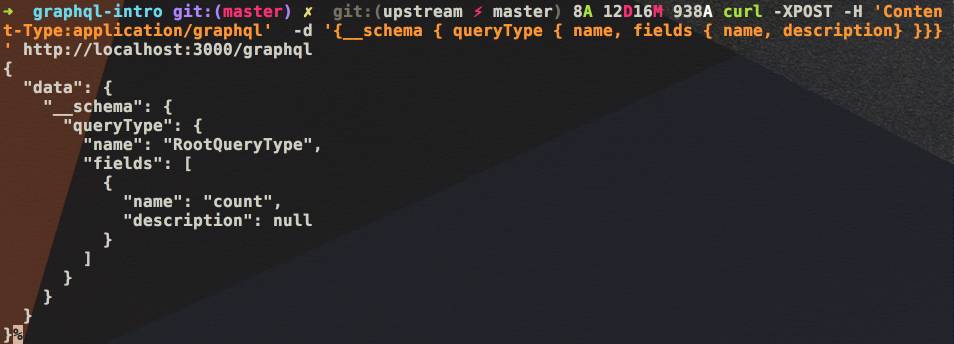
GraphQL 最让人感兴趣的是可以编写 GraphQL 查询来让 GraphQL 服务器告诉我们它支持那些查询,即官方文档提到的自检性(introspection)。
例如:
curl -XPOST -H 'Content-Type:application/graphql' -d '{__schema { queryType { name, fields { name, description} }}}' http://localhost:3000/graphql
而我们实际的 GraphQL 查询请求内容为:
{
  __schema {
    queryType {
      name,
      fields {
        name,
        description
      }
    }
  }
}
基本上每个 GraphQL 根域都会自动加上一个 __schema 域,这个域有一个子域叫 queryTyp。我们可以通过查询这些域来了解 GraphQL 服务器支持那些查询。我们可以修改 schema.js 来为 count 域加上 description:
let schema = new GraphQLSchema({
  query: new GraphQLObjectType({
    name: 'RootQueryType',
    fields: {
      count: {
        type: GraphQLInt,        //Add description
        description: 'The count!',
        resolve: function() {
          return count;
        }
      }
    }
  })
});
验证一下:
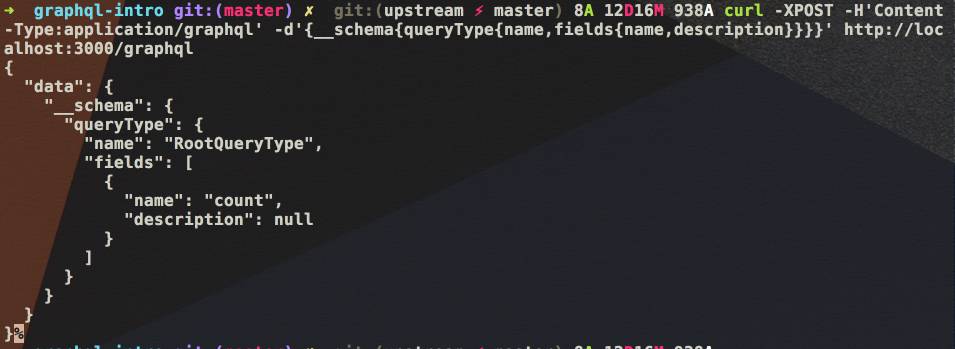
curl -XPOST -H 'Content-Type:application/graphql' -d '{__schema { queryType { name, fields { name, description} }}}' http://localhost:3000/graphql
变异(mutation,即修改数据)
GraphQL中将对数据的修改操作称为 mutation。在 GraphQL Schema 中按照如下形式来定义一个 mutation:
let schema = new GraphQLSchema({
  query: ...
  mutation: //TODO
});
mutation 查询和普通查询请求(query)的重要区别在于 mutation 操作是序列化执行的。例如 GraphQL 规范中给出的示例,服务器一定会序列化处理下面的 mutation 请求:
{
 first: changeTheNumber(newNumber: 1) {
    theNumber
  },  second: changeTheNumber(newNumber: 3) {
    theNumber
  },  third: changeTheNumber(newNumber: 2) {
    theNumber
  }
}
请求结束时 theNumber 的值会是 2。下面为我们的服务器添加一个 mutation 查询,修改 schema.js 为如下所示:
//schema.js

import {
  GraphQLObjectType,
  GraphQLSchema,
  GraphQLInt
}

from 'graphql';
let count = 0;
let schema = new GraphQLSchema({
  query: new GraphQLObjectType({
    name: 'RootQueryType',
    fields: {
      count: {
        type: GraphQLInt,        //Add description
        description: 'The count!',
        resolve: function() {
          return count;
        }
      }
    }
  }),  //Note:this is the newly added mutation query
  mutation: new GraphQLObjectType({
    name: 'RootMutationType',
    fields: {
      updateCount: {
        type: GraphQLInt,
        description: 'Update the count',
        resolve: function() {
          count += 1;          return count;
        }
      }
    }
  })
});

export default schema;
验证:
curl -XPOST -H 'Content-Type:application/graphql' -d 'mutation RootMutationType { updateCount }' http://localhost:3000/graphql搭建好 GraphQL 服务器后,我们来模拟下业务场景的实际需求,对于电商平台来说,最常用的就是商品信息,假设目前的商品数据模型可以用下面的 GraphQLObject 来表示:
var ItemType =  new GraphQLObjectType({
  name: "item",
  description: "item",
  fields: {
    id: {
      type: GraphQLString,
      description: "item id"
    },
    title: {
      type: GraphQLString,
      description: "item title"
    },
    price: {
      type: GraphQLString,
      description: "item price",
      resolve: function(root, param, context) {                   return (root.price/100).toFixed(2);
      }
    },
    pic: {
      type: GraphQLString,
      description: "item pic url"
    }
  }
});
查询商品的 schema 如下所示:
var ItemSchema = new GraphQLSchema({
  query: {
    name: "ItemQuery",
    description: "query item",
    fields: {
      item: {
        type: ItemType,
        description: "item",
        args: {
          id: {
            type: GraphQLInt,
            required: true    //itemId required for query
          }
        },
        resolve: function(root, obj, ctx) {
          return yield ItemService(obj['id']);
        }
      }
    }
  }
});
通过如下 query 可以查询 id 为 12345 的商品信息:
query ItemQuery(id: 12345){  id
  title
  price
  pic
}
商品详情页展示时需要加上优惠价格信息,我们可以修改 ItemType,为它加上一个 promotion 字段:
var ItemType =  new GraphQLObjectType({
  name: "item",
  description: "item",
  fields: {
    id: {
 type: GraphQLString,
      description: "item id"
    },
    title: {
 type: GraphQLString,
      description: "item title"
    },
    price: {
 type: GraphQLString,
      description: "item price",
      resolve: function(root, param, context) {                   return (root.price/100).toFixed(2);
      }
    },
    pic: {
 type: GraphQLString,
      description: "item pic url"
    },
    promotion: {
      type: GraphQLInt,
      description: "promotion price"
    }
  }
});
商品详情页的查询为:
query ItemQuery(id: 12345){
 id
  title
  price
  pic
  promotion
}
ItemSchema 无需修改,只要在 ItemService 的返回结果中加上 promotion 就可以了。这样接口的修改对于原有业务是透明的,而新的业务也能基于已有的代码快速开发和迭代。
再假设有一个新的页面,只需要用到宝贝的图片信息,业务方可以使用下面的查询:
query ItemQuery(id: 12345){
 id
  pic
}
服务器代码不用做任何修改。
4.总结
(除非另有声明,本文章内容采用 CC BY-NC-ND 4.0 授权。)
以上是关于Node.js 服务端实践之 GraphQL 初探的主要内容,如果未能解决你的问题,请参考以下文章
Node.js 蚕食计划—— MongoDB + GraphQL + Vue 初体验
干货 | 2018 JavaScript 趋势;node.js 生产最佳实践;开放数据如何是社会受益;UI设计中的视觉平衡