Istio 1.0 部署
Posted 云原生实验室
tags:
篇首语:本文由小常识网(cha138.com)小编为大家整理,主要介绍了Istio 1.0 部署相关的知识,希望对你有一定的参考价值。
北京时间 2018 年 8 月 1 日(建军节)凌晨 0 点,Istio 宣布推出 1.0 正式版本,并表示已可用于生产环境。这距离最初的 0.1 版本发布已过去一年多的时间。这个项目的组件相对比较复杂,原有的一些选项是靠 ConfigMap 以及 istioctl 分别调整的,现在通过重新设计的 Helm Chart,安装选项用 values.yml 或者 helm 命令行的方式来进行集中管理了。
在安装 Istio 之前要确保 Kubernetes 集群(仅支持 v1.9 及以后版本)已部署并配置好本地的 kubectl 客户端。
1. 下载 Istio
$ wget https://github.com/istio/istio/releases/download/1.0.0/istio-1.0.0-linux.tar.gz
$ tar zxf istio-1.0.0-linux.tar.gz
$ cp istio-1.0.0/bin/istioctl /usr/local/bin/
2. 使用 Helm 部署 Istio 服务
克隆 Istio 仓库:
$ git clone https://github.com/istio/istio.git
$ cd istio
安装包内的 Helm 目录中包含了 Istio 的 Chart,官方提供了两种方法:
用 Helm 生成
istio.yaml,然后自行安装。用
Tiller直接安装。
很明显,两种方法并没有什么本质区别,这里我们采用第一种方法来部署。
$ helm template install/kubernetes/helm/istio --name istio --namespace istio-system --set sidecarInjectorWebhook.enabled=true --set ingress.service.type=NodePort --set gateways.istio-ingressgateway.type=NodePort --set gateways.istio-egressgateway.type=NodePort --set tracing.enabled=true --set servicegraph.enabled=true --set prometheus.enabled=true --set tracing.jaeger.enabled=true --set grafana.enabled=true > istio.yaml

$ kubectl create namespace istio-system
$ kubectl create -f istio.yaml
这里说的是使用 install/kubernetes/helm/istio 目录中的 Chart 进行渲染,生成的内容保存到 ./istio.yaml 文件之中。将 sidecarInjectorWebhook.enabled 设置为 False,从而使自动注入属性生效。
部署完成后,可以检查 isotio-system namespace 中的服务是否正常运行:
过去的 istio-ca 现已更名 istio-citadel。
istio-cleanup-secrets 是一个 job,用于清理过去的 Istio 遗留下来的 CA 部署(包括 sa、deploy 以及 svc 三个对象)。
egressgateway、ingress 以及 ingressgateway,可以看出边缘部分的变动很大,以后会另行发文。
3. Prometheus、Grafana、Servicegraph 和 Jaeger
等所有 Pod 启动后,可以通过 NodePort、Ingress 或者 kubectl proxy 来访问这些服务。比如可以通过 Ingress 来访问服务。
首先为 Prometheus、Grafana、Servicegraph 和 Jaeger 服务创建 Ingress:
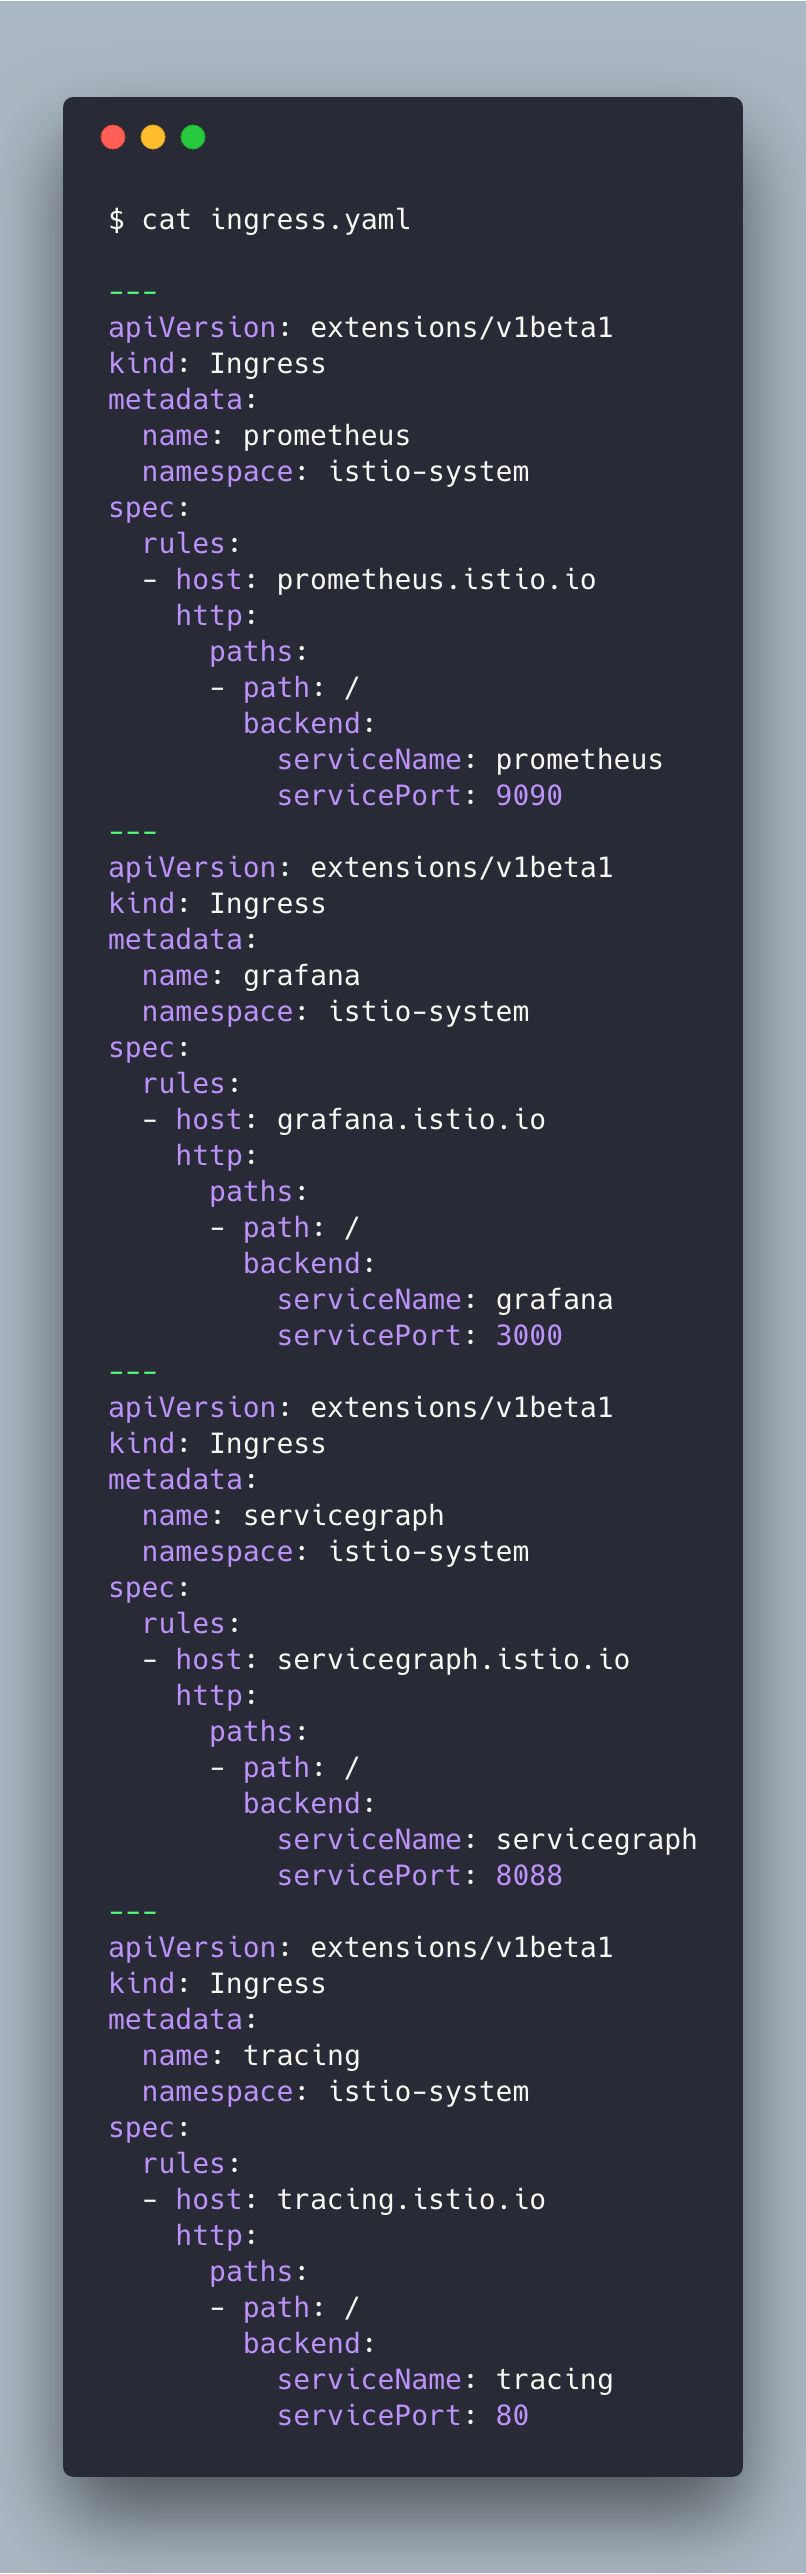
$ kubectl create -f ingress.yaml
然后在你的本地电脑上添加四条 hosts:
$Ingree_host prometheus.istio.io
$Ingree_host grafana.istio.io
$Ingree_host servicegraph.istio.io
$Ingree_host tracing.istio.io
将 $Ingree_host 替换为 Ingress Controller 运行节点的 IP。
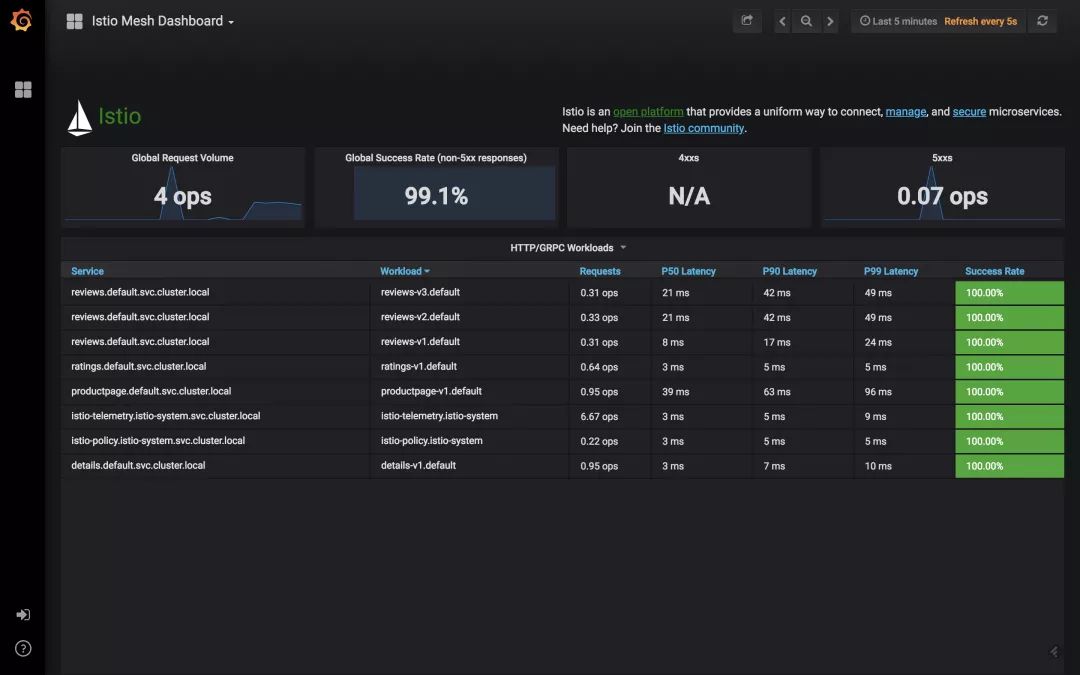
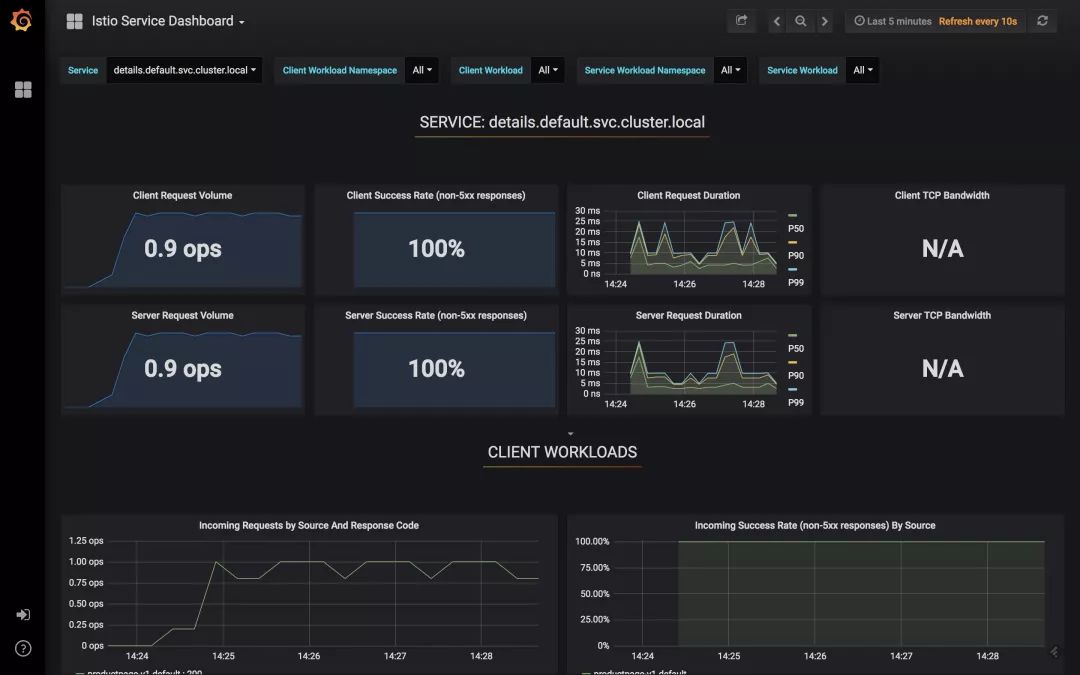
通过 http://grafana.istio.io 访问 Grafana 服务:
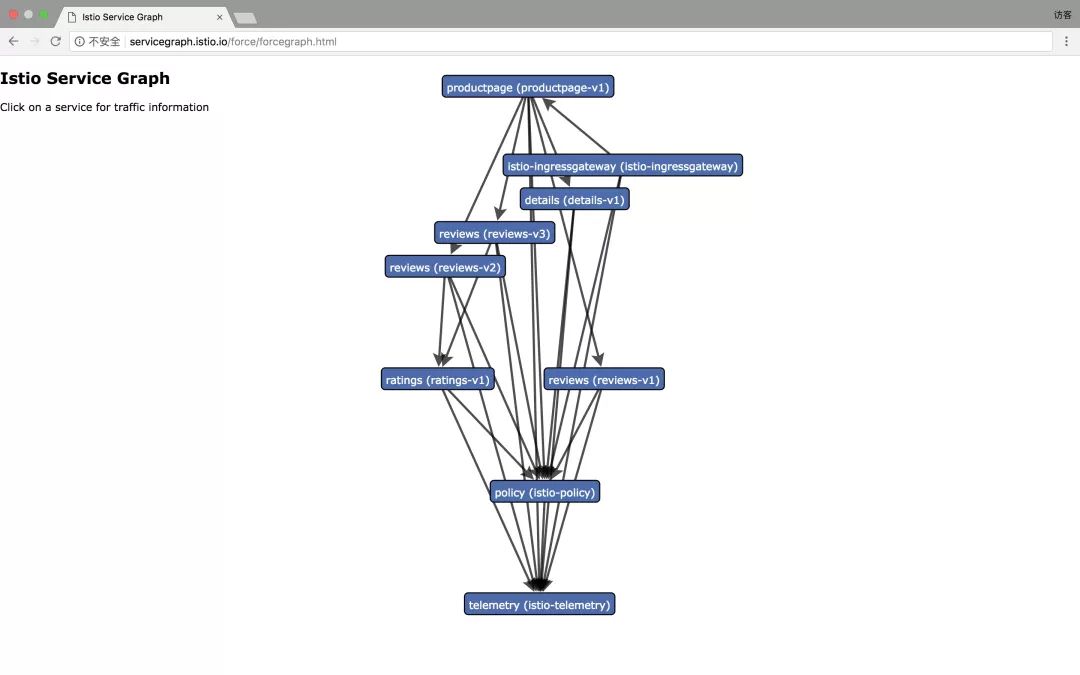
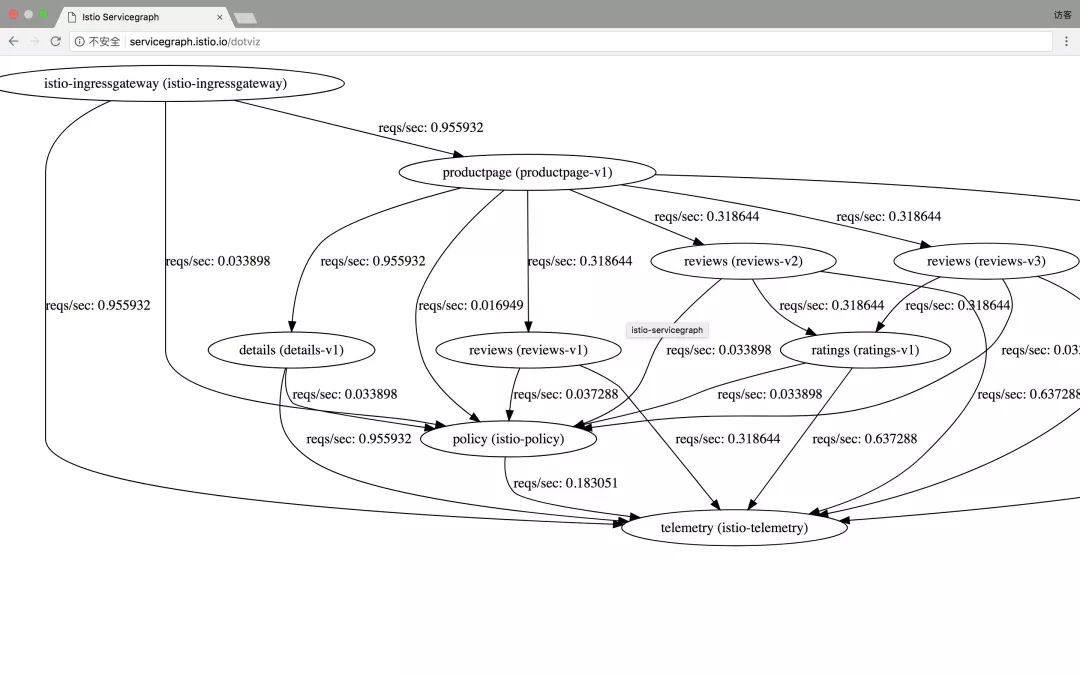
通过 http://servicegraph.istio.io 访问 ServiceGraph 服务,展示服务之间调用关系图。
http://servicegraph.istio.io/force/forcegraph.html : As explored above, this is an interactive D3.js visualization.
http://servicegraph.istio.io/dotviz : is a static Graphviz visualization.
http://servicegraph.istio.io/dotgraph : provides a DOT serialization.
http://servicegraph.istio.io/d3graph : provides a JSON serialization for D3 visualization.
http://servicegraph.istio.io/graph : provides a generic JSON serialization.
通过 http://tracing.istio.io/ 访问 Jaeger 跟踪页面:
通过 http://prometheus.istio.io/ 访问 Prometheus 页面:
如果你已经部署了 Prometheus-operator,可以不必部署 Grafana,直接将 addons/grafana/dashboards 目录下的 Dashboard 模板复制出来放到 Prometheus-operator 的 Grafana 上,然后添加 istio-system 命名空间中的 Prometheus 数据源就可以监控 Istio 了。
4. Mesh Expansion
Istio 还支持管理非 Kubernetes 管理的应用。此时,需要在应用所在的 VM 或者物理中部署 Istio,具体步骤请参考 Mesh Expansion
部署好后,就可以向 Istio 注册应用,如:
# istioctl register servicename machine-ip portname:port
$ istioctl -n onprem register mysql 1.2.3.4 3306
$ istioctl -n onprem register svc1 1.2.3.4 http:7000
5. 参考
Istio 0.8 的 Helm Chart 解析
以上是关于Istio 1.0 部署的主要内容,如果未能解决你的问题,请参考以下文章